Epson Perfection V500 Office User Manual
Hide thumbs
Also See for Perfection V500 Office:
- Service manual (69 pages) ,
- Product information manual (12 pages) ,
- Important safety instructions (4 pages)
Table of Contents
Advertisement
User's Guide
This User's Guide is the on-screen guide to your Perfection V500 Office scanner. Click a
topic below to get started.
Overview of Your Scanner Features
These features help you create the best possible scans, no matter what
shape your original is in.
Guide to the Scanner Parts
Check this section to identify the parts of your scanner, read its light
status, and use its buttons.
Placing Originals on the Scanner
Follow the steps here to place your original documents, photos, film
strips, or slides on the scanner.
Scanning Documents or Photos
Follow the step-by-step instructions here to scan documents or photos
using any of the available scanning methods.
Scanning Film or Slides
Follow the step-by-step instructions here to scan film strips or slides
using any of the available scanning methods.
Scanning Special Projects
Follow the instructions here for specific scanning projects you may need
to create.
Advertisement
Table of Contents

Related Manuals for Epson Perfection V500 Office


Summary of Contents for Epson Perfection V500 Office
- Page 1 User’s Guide This User’s Guide is the on-screen guide to your Perfection V500 Office scanner. Click a topic below to get started. Overview of Your Scanner Features These features help you create the best possible scans, no matter what shape your original is in.
- Page 2 Using the Optional Automatic Document Feeder Follow the steps here to install the optional Automatic Document Feeder and use it to scan multi-page documents. Maintenance Follow the guidelines here to maintain and transport your scanner. Solving Problems If you have a problem using your scanner or its software, check here for solutions.
-
Page 3: Overview Of Your Scanner Features
Home > Overview of Your Scanner Features Overview of Your Scanner Features These features help you create the best possible scans, no matter what shape your original is in. Color Restoration Dust Removal Digital ICE Technology and Digital ICE Lite Technology Backlight Correction Available Scanning Methods... -
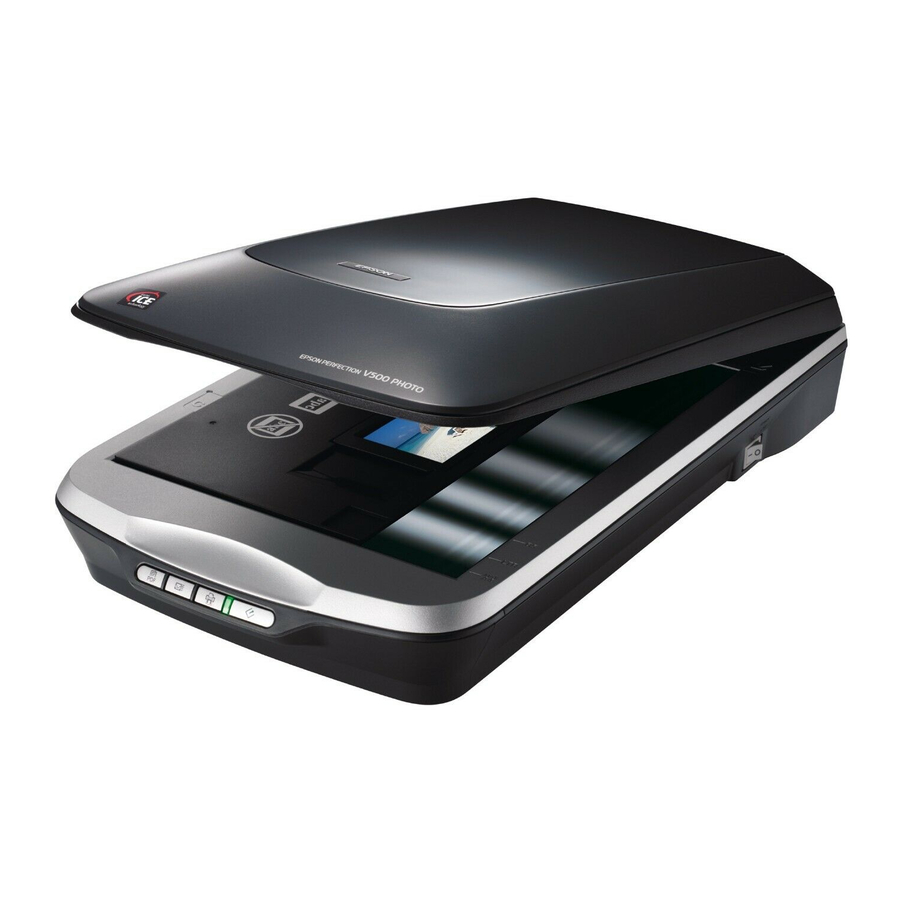
Page 4: Guide To The Scanner Parts
Home > Guide to the Scanner Parts Guide to the Scanner Parts Check these sections to identify the parts of your scanner, read its light status, and use its buttons. Scanner Parts Light and Buttons... -
Page 5: Placing Originals On The Scanner
Home > Placing Originals on the Scanner Placing Originals on the Scanner Follow the steps here to place your original documents, photos, film strips, or slides on the scanner. Placing Documents or Photos Placing Film or Slides... -
Page 6: Scanning Documents Or Photos
Follow the step-by-step instructions here to scan documents or photos using any of the available scanning methods. Starting a Scan With the Scanner Buttons Starting a Scan With Epson Scan Starting a Scan With Another Scanning Program Selecting Epson Scan Settings... - Page 7 Follow the step-by-step instructions here to scan film strips or slides using any of the available scanning methods. Starting a Scan With the Scanner Buttons Starting a Scan With Epson Scan Starting a Scan With Another Scanning Program Selecting Epson Scan Settings...
-
Page 8: Scanning Special Projects
Home > Scanning Special Projects Scanning Special Projects Follow these instructions for specific scanning projects you may need to create. Restoring Color Removing Dust Marks Removing Dust and Scratch Marks from Film and Slides Using Digital ICE Technology Fixing Backlit Photos Using the Scanner as a Copier Scanning Directly to a PDF File Scanning Directly to an E-mail... -
Page 9: Using The Optional Automatic Document Feeder
Home > Using the Optional Automatic Document Feeder Using the Optional Automatic Document Feeder Follow the steps here to install the optional Automatic Document Feeder and use it to scan multi-page documents. Unpacking the Automatic Document Feeder Installing the Automatic Document Feeder Loading Documents in the Automatic Document Feeder Scanning Using the Automatic Document Feeder Cleaning and Replacing the Paper Path Guide... -
Page 10: Maintenance
Home > Maintenance Maintenance Follow the guidelines here to maintain and transport your scanner. Cleaning the Scanner Replacing the Scanner Light Source Transporting the Scanner... -
Page 11: Troubleshooting
If you have a problem using your scanner or its software, check here for solutions. Reading the Status Light Scanner Problems Scanning Software Problems Scan Quality Problems Film or Slide Scanning Problems Optional Automatic Document Feeder Problems Uninstalling Your Scanning Software Where To Get Help Epson Technical Support... -
Page 12: Technical Specifications
Home > Technical Specifications Technical Specifications Check here for technical details about your scanner and its accessories. System Requirements Scanner Specifications Optional Automatic Document Feeder Specifications... -
Page 13: Important Safety Instructions
Home > Safety Important Safety Instructions Restrictions on Copying Read all these instructions, and follow all warnings and instructions marked on the scanner. In this document, warnings, cautions, and notes indicate the following: Warnings must be followed carefully to avoid bodily injury. Cautions must be observed to avoid damage to your equipment. - Page 14 The AC adapter cord should be placed to avoid abrasions, cuts, fraying, crimping, and kinking. Do not place objects on top of the adapter cord and do not allow the AC adapter or the cord to be stepped on or run over. Be particularly careful to keep the AC adapter cord straight at the end and the point where it enters the AC adapter.
- Page 15 Copying these items may also be prohibited by law. A note concerning responsible use of copyrighted materials Epson encourages each user to be responsible and respectful of the copyright laws when using any Epson product. While some countries' laws permit limited copying or reuse of copyrighted material in certain circumstances, those circumstances may not be as broad as some people assume.
-
Page 16: Copyright And Trademarks
Corporation. All rights reserved. ® Intel is a registered trademark of Intel Corporation. ® PowerPC is a registered trademark of International Business Machines Corporation. Epson Scan Software is based in part on the work of the Independent JPEG Group. libtiff... - Page 17 OUT OF OR IN CONNECTION WITH THE USE OR PERFORMANCE OF THIS SOFTWARE. Digital ICE is a trademark of Kodak. General Notice: Other product names used herein are for identification purposes only and may be trademarks of their respective companies. © 2009 Epson America, Inc. All rights reserved. CPD-27555...
-
Page 18: Operating System Versions
Home > Operating System Versions Operating System Versions In this manual, the following abbreviations are used. Windows refers to Windows Vista, XP, XP x64, and 2000. Windows Vista refers to Windows Vista Ultimate Edition, Windows Vista Home Premium Edition, Windows Vista Home Basic Edition, Windows Vista Enterprise Edition and Windows Vista Business Edition. -
Page 19: Color Restoration
Home > Overview of Your Scanner Features Color Restoration Using the Color Restoration feature in your scanning software, you can transform an old, faded, or badly exposed photo into one with true-to-life color and sharpness. Original image Color Restoration applied For instructions on using this feature, see Restoring Color. -
Page 20: Dust Removal
Home > Overview of Your Scanner Features Dust Removal Using the Dust Removal feature in your scanning software, you can virtually “clean” the dust marks from your originals as you scan them. Original image Dust Removal applied Note: Before scanning your originals, carefully remove any dust that you can see on them. - Page 21 Overview of Your Scanner Features Digital ICE Technology and Digital ICE Lite Technology Your scanner and its Epson Scan software are equipped with the Digital ICE Technology and Digital ICE Lite Technology features that remove dust or scratch marks from color film or slides.
-
Page 22: Backlight Correction
Home > Overview of Your Scanner Features Backlight Correction Using the Backlight Correction feature in your scanning software, you can remove shadows from photos that have too much background light. Original image Backlight Correction applied For instructions on using this feature, see Fixing Backlit Photos... -
Page 23: Available Scanning Methods
Available Scanning Methods Using the Scanner Buttons Using Epson Scan Your scanner gives you a variety of ways to scan images. You can select the method that works best for the project you are scanning and the way you like to work. -
Page 24: Using Epson Scan
Professional Mode gives you total control of your scanning settings and lets you check their effects with a preview image. You can use Epson Scan as a “standalone” program to scan your image to a file on your computer. Documents or photos: See Starting a Scan With Epson Scan. -
Page 25: Scanner Parts
Home > Guide to the Scanner Parts Scanner Parts a. scanner cover Scan to PDF button Scan to E-mail button Copy button Start button f. power switch... - Page 26 a. document mat b. transparency unit transportation lock c. document table d. carriage a. DC inlet b. OPTION port...
- Page 27 c. scanner transportation lock d. USB interface connector e. cover cable...
-
Page 28: Light And Buttons
Home > Guide to the Scanner Parts Light and Buttons Light Buttons The scanner has four buttons for scanning operations. The status light indicates whether the scanner is operating normally. Scan to PDF button Scan to E-mail button Copy button Start button e. - Page 29 Reading the Status Light Flashing more information. (None) The scanner is off. Buttons Before using the scanner buttons, make sure you have installed Epson Scan and the Epson Event Manager. Button Function Epson Scan starts. Start The Copy Utility starts.
-
Page 30: Placing Documents Or Photos
Home > Placing Originals on the Scanner Placing Documents or Photos Placing Large or Thick Documents Before scanning a document, remember to respect the rights of copyright owners. Do not scan published text or images without first checking their copyright status. Caution: Do not place heavy objects on the document table glass and do not press the glass with too much force. - Page 31 a. document mat Place your document or photo face-down on the document table. Make sure the upper left corner of the document or photo is against the rear right corner of the scanner, next to the arrow mark.
- Page 32 An area 0.12 inch (3 mm) from the horizontal and the vertical sides of the scanner glass cannot be scanned. If you place a document in the corner of the document table, move it down and in slightly to avoid cropping. a., b.
-
Page 33: Placing Large Or Thick Documents
Note: Always keep the document table clean. Do not leave photos on the document table for an extended period of time as they may stick to the glass. To scan your document or photo, see Starting a Scan With the Scanner Buttons. - Page 34 Open the scanner cover. Pull the scanner cover straight up and off the scanner.
- Page 35 Turn on the scanner using its power switch. Note: When scanning without the scanner cover, gently press down on your document to flatten it. When you are finished scanning, replace the scanner cover in the reverse order that you removed it. Note: Before connecting or disconnecting the cover cable, turn off the scanner using its power switch.
-
Page 36: Placing Film Or Slides
Home > Placing Originals on the Scanner Placing Film or Slides Removing the Document Mat Placing Slides in the Holder Placing Film in the Holder Replacing the Document Mat Removing the Document Mat To scan film strips or slides, you need to remove the document mat from the scanner cover. This uncovers the transparency unit window so your scanner can use it to scan your film or slides. - Page 37 Use a soft microfiber cloth to wipe the transparency unit window and the document table before placing your film or slides.
-
Page 38: Placing Slides In The Holder
a. transparency unit window To place film for scanning, see Placing Film in the Holder. To place slides for scanning, see Placing Slides in the Holder. Placing Slides in the Holder You can scan up to four 35mm slides at a time using the slide portion of the film holder. Note: Make sure the white stickers on the back of the film holder and the areas around them are not scratched, dusty, or covered in any way. - Page 39 Place the film holder on the document table so that it is aligned as shown. Make sure the tab labelled “C” on the film holder fits into the area labelled “C” on the scanner. Place up to four slides in the film holder with the shiny base side facing down. Your images should appear backwards on the side that faces up.
-
Page 40: Placing Film In The Holder
Make sure you removed the document mat. See Removing the Document Mat. Close the scanner cover. To scan your slides, see Starting a Scan With the Scanner Buttons. When you are finished scanning slides, be sure to replace the document mat before scanning documents or photos. - Page 41 Slide one or two film strips all the way into the film holder with the shiny base side facing down. Your images and any wording on the film strips should appear backwards on the side that faces up. You can scan up to 6 standard 35mm images per film strip. Note: Hold the edge of the film gently when touching the film;...
- Page 42 Make sure the film strip is placed as shown. Place the film holder on the document table so that it is aligned as shown. Make sure the tab labelled “A” on the film holder fits into the area labelled “A” on the scanner.
- Page 43 Make sure you removed the document mat. See Removing the Document Mat. Close the scanner cover. To scan your film, see Starting a Scan With the Scanner Buttons. When you are finished scanning film, be sure to replace the document mat before scanning documents or photos.
- Page 44 Note: Hold the edge of the film gently when touching the film; otherwise you may damage the film. Do not cover any of the small holes in the film holder or the slot on the side of the film holder; otherwise, the scanner may have trouble recognizing which film holder you are using.
- Page 45 Place the film holder on the document table so that it is aligned as shown. Make sure the tab labelled “B” on the film holder fits into the area labelled “B” on the scanner. Make sure you removed the document mat. See Removing the Document Mat.
-
Page 46: Replacing The Document Mat
Close the scanner cover. Note: You cannot use Full Auto Mode to scan medium format film. To scan your film, see Starting a Scan With the Scanner Buttons. When you are finished scanning film, be sure to replace the document mat before scanning documents or photos. -
Page 48: Start Button
Epson Scan. From Epson Scan, you can select a scan mode and then scan and save your image to a file on your computer. If the Mode box in the upper right corner of the window is set to... -
Page 49: Copy Button
Photos. To scan an image and open your e-mail program so you can attach it to an e-mail message, you can press the Scan to E-mail button. Epson Scan automatically starts scanning. See Scanning Directly to an E-mail for instructions. -
Page 50: Starting A Scan With Epson Scan
Scanning Documents or Photos Starting a Scan With Epson Scan If you want to scan an image and save it directly to a file, you can start Epson Scan as a “standalone” program. Place your original document or photo on the scanner. See Placing Documents or Photos. - Page 51 Office Mode If the Mode box in the upper right corner of the window is set to Office Mode, click the Help button in the Epson Scan window for instructions. Note: If you want to change the scan mode, see Changing the Scan Mode.
-
Page 52: Starting A Scan With Another Scanning Program
Starting a Scan With Another Scanning Program You can use any TWAIN-compliant scanning program, such as Adobe Photoshop Elements, to scan with your scanner. You open the program, select Epson Scan as your scanning program, and scan. When you are finished, the scanned image opens in your scanning program so you can modify, print, and save it. - Page 53 Do not choose a WIA option for your scanner from the Import or Acquire list; you will not be able to use all the features of your scanner. Epson Scan starts automatically. For instructions on using it, see Selecting Epson Scan...
-
Page 54: Selecting Epson Scan Settings
Finishing the Scan Overview of the Epson Scan Modes Epson Scan lets you control all aspects of scanning and includes three modes. Full Auto Mode lets you scan quickly and easily, without selecting any settings or previewing your image. This is the default mode in Epson Scan. -
Page 55: Selecting File Save Settings
Do one of the following to open the File Save Settings window. Full Auto Mode In the standby window, click the Customize button, then click the File Save Settings button. (If you started Epson Scan from a program like Adobe Photoshop Elements, this button doesn’t appear.) Home or Professional Mode Click the File Save Settings button to the right of the Scan button. - Page 56 Specify a file name prefix with an alphanumeric character string. A 3-digit number is automatically added to the file name, but you can change the Start Number if you like. If you are scanning multiple images at once, each image will receive a different 3-digit number.
- Page 57 (*.TIF) You can also edit the scanned images before saving them. See Epson Scan Help for details. To open Multi-TIFF files, you need a program that supports it. PDF (*.PDF) A document format that can be read on both Windows and Macintosh systems (platform independent).
-
Page 58: Using Full Auto Mode
Preview, then click Scan. The scanned image is automatically saved in the file and location you chose. Using Full Auto Mode When you start Epson Scan for the first time, it runs in Full Auto Mode and displays the Epson Scan standby window. - Page 59 If you want to select a custom resolution, restore faded colors, or remove dust marks, click the Customize button. You see the Customize window.
- Page 60 Click the Scan button. Epson Scan starts scanning in Full Auto Mode. Epson Scan previews your image, detects whether it is a document or photo, and selects the scan settings automatically. After a moment, you see a small preview of your image in...
- Page 61 If you need to cancel scanning, click the Cancel button when it appears. Depending on how you started Epson Scan, the program saves the file to the location you specified or opens the scanned image in your scanning program. See Finishing the Scan details.
-
Page 62: Changing The Scan Mode
Incorrectly. Changing the Scan Mode To change the scan mode, click the arrow in the Mode box in the upper right corner of the Epson Scan window. Then select the mode you want to use from the list that appears. - Page 63 When you start Epson Scan in Home or Professional Mode, you see the main Epson Scan window. Home Mode Professional Mode...
-
Page 65: Professional Mode
Destination settings. These tell Epson Scan how you plan to use your scanned image. Follow these steps to select the basic settings for a document or photo in Epson Scan. Do one of the following to select your document type. -
Page 66: Selecting The Scan Resolution
You will enlarge the images as you scan them (increase the Target Size setting). If you will enlarge the images in Epson Scan so you can use them at a larger size, you can accept the Resolution setting selected by Epson Scan based on your Destination... - Page 67 Once you have selected your basic settings and resolution in Home or Professional Mode, you can preview your image and select or adjust the area of the image(s) you want to scan. Epson Scan displays the preview image(s) in a separate Preview window on your screen.
- Page 68 Follow these steps to preview your image(s) in Home or Professional Mode. Click the Preview button toward the bottom of the Epson Scan window. If you want to change the preview type, click the Thumbnail checkbox under the Preview button, if it is available.
-
Page 69: Thumbnail Preview
Thumbnail preview... - Page 70 If you are viewing the normal preview, you can do the following to adjust the image(s). To select your scan area, click the auto locate icon to place a marquee that marks the edges of your image area. You can move the marquee to change the scan area.
- Page 71 To zoom in on an image, click inside the scan area and click the Zoom button. Epson Scan prescans again and displays a larger preview on the Zoom tab. (Your other images are still previewed at the original size on the Preview tab.)
- Page 72 You can move the marquee, adjust its size, and create multiple marquees on one image (normal preview only) to scan different image areas in separate scan files. Follow these steps. To draw a marquee, move your cursor over a preview image. The pointer becomes a set of cross-hairs.
- Page 73 To resize the marquee, position your cursor over the edge or corner of the marquee. The pointer becomes a straight or angled double-arrow. Click and drag the edge or corner to the desired size. Note: To restrict movement of the marquee to vertical or horizontal only, hold down the Shift key as you move the marquee.
-
Page 74: Adjusting The Color And Other Image Settings
Adjusting the Color and Other Image Settings Once you have previewed your images and adjusted the scan area, you can modify the image quality, if necessary. Epson Scan offers a variety of settings for improving color, sharpness, contrast, and other aspects affecting image quality. - Page 75 Color Restoration Home and Professional: Restores the colors in faded photos automatically. Dust Removal Home and Professional: Removes dust marks from your originals automatically. The results of Dust Removal do not appear in the preview, only in your scanned image. In Professional Mode, the level of Dust Removal is adjustable.
- Page 76 Unsharp Mask Home: Automatically applied. Professional: Turned on by default. Unsharp Mask makes the edges of image areas clearer for an overall sharper image. The level of sharpness is adjustable. Turn off to leave softer edges. Descreening Home and Professional: Improves results when scanning magazine or newspaper images that include screening in their original print processes.
-
Page 77: Selecting The Scan Size
See Epson Scan Help for details. Certain settings may not be available, or may be automatically selected, depending on the type of image you are previewing and other settings you have selected. - Page 78 Professional Mode...
- Page 79 If you are going to scan your image to a particular size, you should select the Target Size setting after previewing it, but before adjusting your scan area (indicated by the marquee). This sets the scan area to the correct proportions so your image will not be cropped unexpectedly. For instructions on previewing your image(s), see Previewing and Adjusting the Scan Area.
- Page 80 If you need to create a scan size that is not in the Target Size list, you can create a custom size. Click the arrow in the list and select Customize. You see the Target Size window. Type a name for your custom size, enter the size, click the Save button, then click OK. Your new size appears in the Target Size list.
-
Page 81: Finishing The Scan
To size your image by a certain percentage, adjust the Scale value. To change the way your image is cropped, turn Trimming on or off. (See Epson Scan Help for details.) To unlock the proportions of your scan size, click the lock icon. - Page 82 If you started your scan from a scanning program such as Adobe Photoshop Elements, your scanned image(s) open in the program window. If Epson Scan does not automatically close after scanning, click Close to close the Epson Scan window and view your image(s) in the program.
- Page 83 Epson Scan. From Epson Scan, you can select a scan mode and then scan and save your image to a file on your computer. If the Mode box in the upper right corner of the window is set to...
- Page 84 To scan an image and open your e-mail program so you can attach it to an e-mail message, you can press the Scan to E-mail button. Epson Scan automatically starts scanning. See Scanning Directly to an E-mail for instructions.
- Page 85 Scanning Film or Slides Starting a Scan With Epson Scan If you want to scan film or slides and save them directly to files, you can start Epson Scan as a “standalone” program. Place your film or slides on the scanner. See Placing Film or Slides for instructions.
- Page 86 Home or Professional Mode If the Mode box in the upper right corner of the window is set to Home or Professional Mode, see Selecting Basic Settings for instructions. Note: In Full Auto Mode, you can scan only 35mm color negative film strips or color positive slides.
- Page 87 Starting a Scan With Another Scanning Program You can use any TWAIN-compliant scanning program, such as Adobe Photoshop Elements, to scan with your scanner. You open the program, select Epson Scan as your scanning program, and scan. When you are finished, the scanned image opens in your scanning program so you can modify, print, and save it.
- Page 88 Do not choose a WIA option for your scanner from the Import or Acquire list; you will not be able to use all the features of your scanner. Epson Scan starts automatically. For instructions on using it, see Selecting Epson Scan...
- Page 89 Finishing the Scan Overview of the Epson Scan Modes Epson Scan lets you control all aspects of scanning and includes three modes. Full Auto Mode lets you scan quickly and easily, without selecting any settings or previewing your image. This is the default mode in Epson Scan.
- Page 90 Do one of the following to open the File Save Settings window. Full Auto Mode In the Standby window, click the Customize button, then click the File Save Settings button. (If you started Epson Scan from a program like Adobe Photoshop Elements, this button doesn’t appear.) Home or Professional Mode Click the File Save Settings button to the right of the Scan button.
- Page 91 Specify a file name prefix with an alphanumeric character string. A 3-digit number is automatically added to the file name, but you can change the Start Number if you like. If you are scanning multiple images at once, each image will receive a different 3-digit number.
- Page 92 (*.TIF) You can also edit the scanned images before saving them. See Epson Scan Help for details. To open Multi-TIFF files, you need a program that supports it. PDF (*.PDF) A document format that can be read on both Windows and Macintosh systems (platform independent).
- Page 93 Preview, then click Scan. The scanned image is automatically saved in the file and location you chose. Using Full Auto Mode When you start Epson Scan for the first time, it runs in Full Auto Mode and displays the Epson Scan standby window.
- Page 94 Note: In Full Auto Mode, you can scan only 35mm color negative film strips or color positive slides. To scan other types of film, use Home or Professional Mode. If you want to select a custom resolution, restore faded colors, or remove dust marks, click the Customize button.
- Page 95 Epson Scan previews each image in your film strip or each slide, detects whether it is color positive or color negative, and selects the scan settings automatically. After a moment, you see a small preview of each image in the Epson Scan window. (It takes a few minutes to scan a full film strip.)
- Page 96 If you need to cancel scanning, click the Cancel button when it appears. Depending on how you started Epson Scan, the program saves the files to the location you specified or opens the scanned image in your scanning program. See Finishing the Scan details.
- Page 97 Incorrectly. Changing the Scan Mode To change the scan mode, click the arrow in the Mode box in the upper right corner of the Epson Scan window. Then select the mode you want to use from the list that appears.
- Page 98 Professional Mode...
- Page 99 Before you scan your film or slides, you need to select these basic settings.
- Page 100 Original settings. These tell Epson Scan the type of film or slides you are scanning. Destination settings. These tell Epson Scan how you plan to use your scanned images. Follow these steps to select the basic settings for film or slides in Epson Scan.
- Page 101 You will enlarge the images as you scan them (increase the Target Size setting). If you will enlarge the images in Epson Scan so you can use them at a larger size, you can accept the Resolution setting selected by Epson Scan based on your Destination setting (Home Mode only).
-
Page 102: Previewing And Adjusting The Scan Area
Once you have selected your basic settings and resolution in Home or Professional Mode, you can preview your images and select or adjust the area of the images you want to scan. Epson Scan displays the preview images in a separate Preview window on your screen. - Page 103 Epson Scan prescans your images and displays them in one of the following Preview windows. Normal preview...
- Page 104 Thumbnail preview If you are viewing the normal preview, you can do the following to adjust the image(s). To select your scan area, draw a marquee that marks the edges of the scan area on each image. You can move and resize the marquees to change the scan areas as necessary.
- Page 105 To zoom in on an image, click inside the scan area and click the Zoom button. Epson Scan prescans again and displays a larger preview on the Zoom tab. (Your other images are still previewed at the original size on the Preview tab.)
- Page 106 Follow these steps. Note for Home Mode users: When you use the Thumbnail preview with film or slides, Epson Scan automatically creates marquees around your image(s) for you. If you need to adjust a marquee,...
- Page 107 To draw a marquee, move your cursor over a preview image. The pointer becomes a set of cross-hairs. Position the pointer in the area where you want to place the corner of your marquee and click. Hold down the mouse button and drag the cross-hairs over the image to the opposite corner of the desired scan area.
- Page 108 Note: To restrict movement of the marquee to vertical or horizontal only, hold down the Shift key as you move the marquee. To restrict sizing of the marquee to the current proportions, hold down the Shift key as you resize the marquee.
- Page 109 Once you have previewed your images and adjusted the scan area, you can modify the image quality, if necessary. Epson Scan offers a variety of settings for improving color, sharpness, contrast, and other aspects affecting image quality. Before you make adjustments, be sure to click the image or marquee for the area you want to adjust.
- Page 110 Digital ICE Home and Professional: Technology and Removes dust or scratch marks from color film or slide images. Digital ICE Lite Digital ICE Technology is a hardware-based dust removal Technology method that is more accurate than the Dust Removal feature, but it is slower and requires more system resources.
- Page 111 See Epson Scan help for details. Certain settings may not be available, or may be automatically selected, depending on the type of image you are previewing and other settings you have selected.
- Page 112 Selecting the Scan Size You can scan your images at their original size, or you can reduce or enlarge their size as you scan them. You do this using the Target Size setting in Home or Professional Mode. Home Mode Professional Mode...
- Page 113 Target Size setting. Note for Home Mode users: When you use the Thumbnail preview with film or slides, Epson Scan automatically selects a target size of 4 × 6 in. for you. If you need to select a different target size, complete all of the steps in this section.
- Page 114 If you need to create a scan size that is not in the Target Size list, you can create a custom size. Click the arrow in the list and select Customize. You see the Target Size window.
- Page 115 (Mac OS X) next to Target Size to display these tools. To size your image by a certain percentage, adjust the Scale value. To change the way your image is cropped, turn Trimming on or off. (See Epson Scan Help for details.) To unlock the proportions of your scan size, click the lock icon.
- Page 116 (Not available if you are scanning at the Original Target Size.) Note: For more information about using the Target Size tools, click Help in the Epson Scan window. Now you are ready to scan your images. Click the Scan button, and see Finishing the Scan for instructions.
-
Page 117: Restoring Color
Restoring Color Using the Color Palette Function (Professional Mode Only) Using the Color Restoration feature in Epson Scan, you can transform old, faded, or badly exposed photos into ones with true-to-life color and sharpness. You can restore printed photos, film, or slides automatically as you scan them. - Page 118 When the Epson Scan window appears, do one of the following, depending on the currently selected scan mode. Home or Professional Mode: Go to step 4. Full Auto Mode: Click the Customize button, then click the Specify document type for Full Auto Mode checkbox and select the type of original you are scanning, if necessary.
- Page 119 For details on using Full Auto Mode when scanning photos, see Using Full Auto Mode. For details on using Full Auto Mode when scanning film or slides, see Using Full Auto Mode. In Full Auto Mode, you can only scan 35mm color negative film strips or color positive slides.
- Page 120 Professional Mode: Scroll down to the Adjustments area and click the Color Restoration checkbox.
-
Page 122: Using The Color Palette Function (Professional Mode Only)
Film or slides: Selecting the Scan Size Click the Scan button to scan and restore the color in your image(s). What happens next depends on how you started Epson Scan. See one of these sections for details. Documents or photos:... - Page 123 Click the Color Extractor button. Your cursor changes to an eye dropper. In the Preview window, click on the color in your image that needs adjustment. The color you selected is moved to the center cell in the Color Palette window with variations in hue in the surrounding cells.
- Page 124 To load a previously saved color, select the color and click the Apply to Palette button. When you are finished adjusting the color, click the Close button to return to the Epson Scan window. For further details on using the Color Palette feature, click the Help button.
- Page 125 Select the cell that contains the hue you would like to use to adjust the color in your image. This color now becomes the color of the center cell. Note: You can also use the cells to the right of the adjustment area to change the brightness, if necessary.
- Page 126 To load a previously saved color, select the color and click the Apply to Palette button. When you are finished adjusting the color, click the Close button to return to the Epson Scan window. For further details on using the Color Palette feature, click the Help button.
-
Page 127: Removing Dust Marks
Home > Scanning Special Projects Removing Dust Marks Using the Dust Removal feature in Epson Scan, you can virtually “clean” the dust marks from your originals as you scan them. Original image Dust Removal applied Note: Before scanning your originals, carefully remove any dust that you can see on them. - Page 128 Starting a Scan With Epson Scan Starting a Scan With Another Scanning Program When the Epson Scan window appears, do one of the following, depending on the currently selected scan mode. Home Mode and Professional Mode: Go to step 4.
- Page 129 Note: For details on using Full Auto Mode when scanning documents or photos, Using Full Auto Mode. For details on using Full Auto Mode when scanning film or slides, see Using Full Auto Mode. In Full Auto Mode, you can only scan 35mm color negative film strips or color positive slides.
- Page 130 Click the Preview button to preview your image(s), then select your scan area. See one of these sections for instructions. Documents or photos: Previewing and Adjusting the Scan Area Film or slides: Previewing and Adjusting the Scan Area Do one of the following to select the Dust Removal option. Home Mode: Click the Dust Removal checkbox.
-
Page 131: Professional Mode
Professional Mode:... - Page 132 Film or slides: Selecting the Scan Size Click the Scan button to scan and remove dust marks in your image(s). What happens next depends on how you started Epson Scan. See one of these sections for details. Documents or photos:...
- Page 133 Digital ICE Technology Digital ICE Technology Specifications Your scanner and its Epson Scan software are equipped with the Digital ICE Technology and Digital ICE Lite Technology features that remove dust or scratch marks from color film or slides. Original image...
- Page 134 Before using Digital ICE Technology, make sure your system meets the requirements in Digital ICE Technology Specifications. Follow these steps to remove dust or scratch marks from film or slides using Epson Scan’s Home or Professional Mode: Place your original film strip or slide(s) on the scanner. See Placing Film or Slides.
- Page 135 Professional Mode:...
- Page 136 Note:...
-
Page 137: Digital Ice Technology Specifications
Selecting the Scan Size for instructions. Click the Scan button to scan and remove dust and scratch marks in your image(s). What happens next depends on how you started Epson Scan. See Finishing the Scan details. Digital ICE Technology Specifications To use Digital ICE Technology, your system memory and hard disk space must meet the requirements in the table below. - Page 138 Epson Scan. Make sure your system resources meet these increased requirements. Note: It may take much longer to scan and for your software to respond to clicking the Cancel button if you have insufficient system resources.
-
Page 139: Fixing Backlit Photos
> Scanning Special Projects Fixing Backlit Photos Using the Backlight Correction feature in Epson Scan, you can remove shadows from photos that have too much background light. You can fix printed photos, film, or slides automatically as you scan them. - Page 140 Starting a Scan With Epson Scan Starting a Scan With Another Scanning Program When the Epson Scan window appears, set the scan mode to Home Mode or Professional Mode. Then select the basic settings for the type of original(s) you are scanning and select the destination setting for the way you will use your image(s).
- Page 141 Professional Mode: Scroll down to the Adjustments area and click the Backlight Correction checkbox. If you want to increase or decrease the level of the backlight correction effect, click the + (Windows) or (Mac OS X) button next to the option and select a setting in the Level list.
- Page 143 Film or slides: Selecting the Scan Size Click the Scan button to scan and correct backlighting in your image(s). What happens next depends on how you started Epson Scan. See one of these sections for details. Documents or photos: Finishing the Scan...
-
Page 144: Using The Scanner As A Copier
Windows: Select or Start > All Programs or Programs > Epson Software > Copy Utility. Mac OS X: Open the Applications > Epson Software > Copy Utility folders and double-click the Copy Utility icon. You see the Copy Utility window. - Page 145 Select your scanner from the Scanner list at the top of the window, if necessary. Select your printer from the Printer list, if necessary. Click the Source Type box, select the type of document you are copying, and click OK. See the table below for guidance.
- Page 146 OK. Note: If you are printing on certain Epson printers, you see the printer settings window. See your printer documentation for instructions on selecting settings. If you want to enlarge or reduce your image as you copy it, click the Copy Size box, select the enlargement/reduction, and click OK.
- Page 147 If you want to preview your scan before printing it or select additional copy settings, click the Preview/Custom button at the bottom of the window. Click Help in the Copy Utility for instructions on using the Custom Copy features.
- Page 148 Scanning Directly to a PDF File Starting a Scan With the Scan to PDF Button Starting a Scan With Epson Scan (Full Auto Mode) Starting a Scan With Epson Scan (Home/Office/Professional Mode) Starting a Scan With the Scan to PDF Button You can scan multiple document pages or photos and save them as one PDF file on your computer using the scanner’s...
- Page 149 Click the Settings button. You see the Scan to PDF Settings window.
- Page 150 Click the Color, Grayscale, or Black&White button to match the colors in the original. Click the arrow to open the Size list and select the size of your original. If you need to select a size that is not in the Size list, you can create a custom size. Click the arrow in the Size list and select Customize.
- Page 151 Type a name for your custom size, enter the size, click the Save button, then click OK. Your new size appears in the Size list. Click the arrow next to the Resolution list and select the number of dots per inch at which you want to scan.
- Page 152 Descreening Removes the rippled pattern that can appear in subtly shaded image areas, such as skin tones. Also improves results when scanning magazine or newspaper images that include screening in their original print process. Text Enhancement Improves the definition of text and line art. Enhances text recognition when scanning text documents.
- Page 153 If you need to change any of the current PDF settings, click the Options button. You see the Epson PDF Plug-in Settings window.
- Page 154 Click OK again, click Close, then click Scan or press the Start button on the scanner. Epson Scan scans your page. If you are scanning multiple pages, replace the first page on the document table with the second page and click Scan or press the Start button again.
- Page 155 Start Epson Scan. See one of these sections for instructions. Documents or photos: Starting a Scan With Epson Scan Film or slides: Starting a Scan With Epson Scan When the Epson Scan window appears, set the scan mode to Full Auto Mode. Then click the Customize button.
- Page 156 Note: To change the scan mode, see Changing the Scan Mode for documents and photos Changing the Scan Mode for film and slides. The Customize window appears.
- Page 157 Click the File Save Settings button. The File Save Settings window appears.
- Page 158 Select PDF as the Type setting. The current PDF settings are displayed below it. If you need to change any of the current PDF settings, click the Options button. You see the Epson PDF Plug-in Settings window.
- Page 159 Click the Scan button. Epson Scan starts scanning in Full Auto Mode. Depending on how you started Epson Scan, the program saves the file to the location you specified or opens the scanned image in your scanning program. See one of these sections...
- Page 160 Film or slides: Starting a Scan With Epson Scan When the Epson Scan window appears, set the scan mode to Home Mode, Office Mode, or Professional Mode. Then select the basic settings for the type of original(s) you are scanning and select the destination setting for the way you will use your image(s).
- Page 161 Previewing and Adjusting the Scan Area Office Mode: Click the Help button in the Epson Scan window for instructions. When you are finished selecting settings and previewing, click the Scan button. The File Save Settings window appears. Select PDF as the Type setting. The current PDF...
- Page 162 If you need to change any of the current PDF settings, click the Options button. You see the Epson PDF Plug-in Settings window.
- Page 163 PDF options, click the Help button). When you are finished selecting settings, click OK. You return to the File Save Settings window. When you are finished selecting file settings, click OK. Epson Scan scans your page and displays this window.
- Page 164 If you are only scanning one document page, or you don’t need to edit your pages, click Save File and go to step 12. If you are scanning multiple pages, click Add Page, replace the first page on the document table with the second page, and click Scan. Repeat this step for each page in your document.
- Page 165 When you have finished editing your document pages, click OK. Your document is saved as a PDF file in the Pictures or My Pictures folder and you return to the Epson Scan window. Click Close to exit Epson Scan.
-
Page 166: Scanning Directly To An E-Mail
Film or slides: Placing Film or Slides Press the Scan to E-mail button on the scanner. Epson Scan starts in Full Auto Mode and automatically scans your image as a JPEG file. Note: If you want to restore color in or remove dust from your images before scanning, click the Pause button. - Page 167 Select the e-mail program you use in the Select E-mail Application list. If you want to resize your image, choose an option under Select Photo Size. Note: The box at the bottom of the window displays information about the image file(s) you are attaching to the e-mail message.
-
Page 168: Converting Scanned Documents Into Editable Text
Home > Scanning Special Projects Converting Scanned Documents Into Editable Text You can scan a document and convert the text into data that you can edit with a word processing program. This process is called OCR (Optical Character Recognition). To scan and use OCR, you need to use an OCR program, such as the ABBYY FineReader program. - Page 169 Click the Scan&Read icon at the top of the window. Epson Scan starts in the last mode you used. Note for Mac OS X users: If you do not see a Scan&Read icon, choose Select Scanner from the Scan&Read menu, select EPSON Perfection V500, and click OK. Then select Scan&Read from the Scan&Read menu to start Epson Scan.
- Page 170 If you are using Home or Professional Mode, see Adjusting the Color and Other Image Settings for instructions. If you are using Office Mode, click the Help button in the Epson Scan window for instructions. Follow the instructions in ABBYY FineReader Help to edit and save your document.
- Page 171 Home > Scanning Special Projects Scanning and Printing Color Accurate Images Scanning and Saving Your Image Printing Your Image You can optimize the color accuracy of your images using a photo-editing application, such as Adobe Photoshop Elements. Note: Not all versions of Photoshop Elements are fully compatible with Windows Vista. If you are using Windows Vista, you may need to upgrade to the latest version of Photoshop Elements.
- Page 172 Select File > Import > EPSON Perfection V500. When the Epson Scan window appears, set the scan mode to Home Mode or Professional Mode. See one of these sections for instructions. Documents or photos: Changing the Scan Mode Film or slides:...
- Page 173 Select Display preview using monitor compensation, then click OK to return to the Epson Scan window. Click Scan to scan your image. If Epson Scan does not automatically close after scanning, click the Close button to close the Epson Scan window. Your image appears in Adobe Photoshop Elements.
- Page 174 Check the settings in your printer software and make any changes necessary for your print job, then click Print to print your image. For details on selecting printer settings, see your printer’s documentation.
- Page 175 Home > Scanning Special Projects Assigning Another Windows Program to a Scanner Button Assigning a Program With Windows Vista Assigning a Program With Windows XP Assigning a Program With Windows 2000 You can assign the scanner buttons to any Windows program that supports scanner events, such as Photoshop Elements.
- Page 176 In the Select an event list, choose the button to which you want to assign a program. In the Start this program list, choose the program you want to assign. Only compatible programs appear in the list. Note: If you want to be given a choice of programs whenever you press the selected button, click the Prompt for which program to run button instead.
- Page 177 Assigning a Program With Windows XP Click Start > Control Panel > Printers and Other Hardware > Scanners and Cameras, or click Start > Control Panel and then double-click the Scanners and Cameras icon. Right-click your scanner’s icon and select Properties.
- Page 178 In the Select an event list, choose the button to which you want to assign a program. In the Start this program list, choose the program you want to assign. Only compatible programs appear in the list. Note: If you want to be given a choice of programs whenever you press the selected button, click the Prompt for which program to run button instead.
- Page 179 Click Apply, then click OK. Note: You must restart your computer before using the newly assigned scanner buttons.
-
Page 180: Unpacking The Automatic Document Feeder
This is particularly useful for scanning documents for OCR (Optical Character Recognition) and for quickly creating an image database. Make sure you have all the items illustrated below. If any items are missing or damaged, contact Epson. See Epson Technical Support for details. - Page 181 ADF Document Mat You can place this mat over a document if you need to scan it from the document table when the ADF is installed. See Placing Documents on the Document Table With the Automatic Document Feeder Installed.
-
Page 182: Installing The Automatic Document Feeder
Whenever you want to use the ADF, you need to remove the scanner cover and replace it with the ADF. Exit Epson Scan and turn off your scanner using its power switch. Disconnect the cover cable. Open the scanner cover. - Page 183 Pull the scanner cover straight up and off the scanner.
- Page 184 Remove the tape and other packing materials from the ADF. Insert the hinge posts on the ADF into the holes in the top of the scanner, at the back edge. Then close the ADF.
- Page 185 Connect the ADF cable to the scanner’s OPTION port. Slide the paper support into its slot on the edge of the sheet feeder on the ADF.
- Page 186 To load documents into the ADF, see Loading Documents in the Automatic Document Feeder. Note: If you need to scan documents or photos from the document table glass while the ADF is installed, follow the instructions in Placing Documents on the Document Table With the Automatic Document Feeder Installed.
-
Page 187: Loading Documents In The Automatic Document Feeder
Home > Using the Optional Automatic Document Feeder Loading Documents in the Automatic Document Feeder Document Specifications Placing Documents on the Document Table With the Automatic Document Feeder Installed You can load up to 30 sheets of paper in the ADF (based on a stack thickness of 0.2 inch [6 mm] or less). -
Page 188: Document Specifications
Slide the edge guide on the input tray of the ADF all the way to the right. Place your stack of paper in the input tray with the printed side facing up and the top edge facing into the feeder. Slide the paper into the feeder until it meets resistance. Then slide the edge guide over to the edge of the paper. - Page 189 Load only documents that meet the following specifications in the ADF: Size Width 3.94 to 8.5 inches (100 to 215.9 mm) Length 5 to 14 inches (127 to 355.6 mm) Thickness 0.07 to 0.16 mm Weight 60 to 105 g/m Paper type High-quality bond paper Printing type...
- Page 190 Place your document or photo on the document table, face-down on the glass. Make sure the top of the document or photo is against the rear right corner of the document table. Place the ADF document mat on top of the document or photos on the document table. Close the ADF.
- Page 191 Selecting Basic Settings. If you are using Office Mode to scan your documents on the document table while the ADF is installed, make sure Office Mode is selected and then click the Help button in the Epson Scan window for instructions.
-
Page 192: Scanning Using The Automatic Document Feeder
Starting a Scan With the Scanner Buttons Starting a Scan With Epson Scan Starting a Scan With Another Scanning Program Click the arrow in the Mode box at the top right of the Epson Scan window. Then select Office Mode. You see the Office Mode window:... - Page 193 Select whether the Image Type of your document pages is Color, Grayscale, or Black&White. Select Auto Detect, ADF, or Document Table as the Document Source setting. Note:...
- Page 194 200 dpi Click the Preview button toward the bottom of the Epson Scan window. The ADF loads your first document page, then Epson Scan prescans it and displays it in the Preview window. The ADF then ejects your first page.
- Page 195 Settings for details. If you started your scan from a scanning program such as ABBYY FineReader, your scanned pages open in the program window. Click Close to close the Epson Scan window and view your scanned pages in the program.
- Page 196 Home > Using the Optional Automatic Document Feeder Cleaning and Replacing the Paper Path Guide After you have used the ADF for a long time, a line of dots may begin to appear on the scanned images. If this happens, follow the steps below to clean the paper path guide. If the problem persists, you may need to replace the paper path guide with the spare one that came with your ADF.
- Page 197 Lift up the edges of the clips holding the paper path guide in place and push the clips all the way out of the notches to release them. Remove the paper path guide in the direction shown below. Using a soft, dry cloth, wipe the clear portion of the paper path guide to clean off any dust or dirt.
- Page 198 Install the ADF on the scanner (see Installing the Automatic Document Feeder). Then try scanning with the ADF again, as described in Scanning Using the Automatic Document Feeder. If you still see a line of dots in your images, follow these steps again to remove the paper path guide and replace it with the spare one that came with your ADF.
-
Page 199: Cleaning The Scanner
Home > Maintenance Cleaning the Scanner To keep your scanner operating at its best, clean it periodically using the following procedure. Turn off the scanner using its power switch. Unplug the AC adapter cord from the scanner. Clean the outer case with a cloth dampened with mild detergent and water. If the glass surface of the document table gets dirty, clean it with a soft, dry microfiber cloth. - Page 200 a. transparency unit window Make sure that no dust builds up on the surface of the document table or the transparency unit window. Dust can cause spots in your scanned images. Caution: Do not press the glass surface of the document table with any force. Be careful not to scratch or damage the glass surface of the document table, and do not use a hard or abrasive brush to clean it.
- Page 201 The luminosity of the scanner light source declines over time. If the light source breaks or becomes too dim to operate normally, the scanner stops working and the status light rapidly flashes orange. When this happens, the light source assembly must be replaced. For details, contact Epson. See Epson Technical Support for details.
-
Page 202: Transporting The Scanner
Home > Maintenance Transporting the Scanner Before transporting the scanner for a long distance or storing it for an extended period of time, you need to lock the scanner’s carriage and transparency unit to prevent damage. Plug in the scanner, connect it to your computer, turn on the scanner using its power switch, and wait until the carriage moves to the home position (near the cover hinge). - Page 203 If the cover cable is attached, disconnect it. Disconnect the USB cable. On the back of the scanner, slide the transportation lock to the locked position to secure the scanner carriage.
- Page 204 Attach the protective materials, then repack the scanner in its original box or a similar box that fits the scanner snugly.
-
Page 205: Reading The Status Light
After trying these solutions, turn off the scanner using its power switch, then turn it back on. If the status light is still flashing: The scanner may be malfunctioning. The scanner light source may need to be replaced. The connected optional equipment may be malfunctioning. Contact Epson. See Epson Technical Support for details. -
Page 206: Scanner Problems
The scanner may not work properly when your computer is in standby mode (Windows) or sleep mode (Mac OS X). Restart Epson Scan and try scanning again. The scanner may not work properly if you upgrade your operating system but do not reinstall Epson Scan. - Page 207 First check your connection to the scanner and computer: Make sure your scanner’s AC adapter is securely connected to the scanner and a working electrical outlet. Make sure the interface cable is securely connected to the scanner and your computer, and that the cable is not damaged or crimped.
- Page 208 If a USB Universal Host Controller and USB Root Hub are listed, Windows supports USB. Try scanning again. If your scanner still is not recognized, contact Epson for assistance. Epson Technical Support for details. Pressing a Scanner Button Does Not Start the Correct Program Make sure Epson Scan and Epson Event Manager are installed correctly.
-
Page 209: You Cannot Scan Multiple Images At One Time
Also, make sure the desired button is selected in the Select an event list box, and Start this program is selected. If you are using Epson Event Manager with the button, you must select Epson Event Manager in the Start this program list. -
Page 210: Scanning Software Problems
The scanner may not work properly when your computer is in standby mode (Windows) or sleep mode (Mac OS X). Restart Epson Scan and try scanning again. The scanner may not work properly if you upgrade your operating system but do not reinstall Epson Scan. -
Page 211: The Scanner Software Does Not Work Properly
Epson Scan. Reinstall Epson Scan by following the instructions in your Start Here sheet. The scanner may not work properly if Epson Scan is open and your computer goes into standby mode (Windows) or sleep mode (Mac OS X). Restart Epson Scan and try scanning again. -
Page 212: You Cannot Scan In Full Auto Mode
You Cannot Scan in Full Auto Mode Epson Scan may not be able to detect certain types of images, or may crop or group the images unexpectedly. This may happen if you scan the following items: Images with a dark background... -
Page 213: You Cannot Scan Using The Thumbnail Preview
You Cannot Scan Using the Thumbnail Preview Epson Scan may not be able to detect certain types of images, or may crop or group the images unexpectedly. This may happen if you scan the following items: Images with a dark background... -
Page 214: Images Are Rotated Incorrectly
Images Are Rotated Incorrectly Try one or more of the following solutions. For documents or photos: Make sure the documents or photos are placed on the scanner’s document table correctly. See Placing Documents or Photos for instructions. Try disabling or enabling the Auto Photo Orientation setting. To access this setting, click Customize if you’re scanning in Full Auto Mode or Configuration if you’re scanning in Home or Professional Mode. - Page 215 The Auto Photo Orientation feature will not work when you scan newspaper or magazine pages, documents, illustrations, or line art. The feature will also not work when you scan images that are 2 inches (5.1 cm) or smaller on any side. The Auto Photo Orientation feature may not work correctly for all image types.
-
Page 216: Scan Quality Problems
Home > Solving Problems Scan Quality Problems The Edges of Your Document Are Not Scanned You See Only a Few Dots in Your Scanned Image A Line of Dots Always Appears in Your Scanned Images Straight Lines in Your Image Come Out Crooked Your Image Is Distorted or Blurred Colors Are Patchy or Distorted at the Edges of Your Image Your Scanned Image Is Too Dark... -
Page 217: A Line Of Dots Always Appears In Your Scanned Images
Make sure you do not move the document or photo, or your scanner while scanning. Make sure the scanner is placed on a flat, stable surface. Make sure Unsharp Mask is selected in Epson Scan’s Professional Mode window. See... -
Page 218: Colors Are Patchy Or Distorted At The Edges Of Your Image
Color and Other Image Settings for film and slides. You can also click Configuration in the Epson Scan window, click the Color tab, then click the Recommended Value button to return the Auto Exposure setting to the default value. See Epson Scan Help for details. -
Page 219: An Image On The Back Of Your Original Appears In Your Scanned Image
Color and Other Image Settings for film and slides. You can also click Configuration in the Epson Scan window, click the Color tab, then click the Recommended Value button to return the Auto Exposure setting to the default value. See Epson Scan Help for details. -
Page 220: Characters Are Not Recognized Well When Converted Into Editable Text (Ocr)
Check your OCR software manual to see if there are any settings you can adjust in your OCR software. Scanned Colors Differ From the Original Colors Change the Image Type setting in Epson Scan’s Home or Professional Mode. See Selecting Basic Settings for documents and photos or... -
Page 221: You Have Trouble Adjusting The Scan Area In The Thumbnail Preview
Home or Professional Mode. The File Save Settings window appears. Select JPEG or TIFF as the Type setting, then click Options. (If you started Epson Scan from a program like Adobe Photoshop Elements, this button does not appear.) Check the color matching and color management capabilities of your computer, display adapter, and software. - Page 222 Home > Solving Problems Film or Slide Scanning Problems You Cannot Scan Film or Slides Negative Film Preview Images Look Strange Striped Rings Appear in Your Scanned Image A Line Appears in the Previewed Image You Cannot Scan Film or Slides Make sure the document mat is removed from the scanner cover.
- Page 223 The document table or transparency unit window may be dusty or scratched. Clean the document table and transparency unit window as described in Cleaning the Scanner. If you still have the problem, contact Epson. See Epson Technical Support for details.
-
Page 224: Optional Automatic Document Feeder Problems
Installing the Automatic Document Feeder for instructions. Make sure you have selected either Office or Professional Mode in Epson Scan. See Scanning Using the Automatic Document Feeder for instructions. Make sure Auto Detect, ADF, or Document Table is selected as the Document Source in Epson Scan. - Page 225 Slowly pull the jammed paper out of the feeder from the top or the bottom. Do not pull the paper too hard or it may tear, making it more difficult to remove. Then let go of the release lever. If more paper is jammed in the ADF, open the access cover at the back of the feeder and carefully pull out the paper.
-
Page 226: Uninstalling Your Scanning Software
You may need to uninstall and then reinstall your scanner software to solve certain problems or if you upgrade your operating system. Uninstalling Epson Scan Follow the instructions in the section for your operating system to uninstall Epson Scan. Uninstalling Epson Scan for Windows... - Page 227 Quit all running applications. Insert the scanner software CD-ROM into your Macintosh. Open the Epson CD-ROM desktop icon, if necessary. Double-click the Common folder, then double-click the EPSON Scan folder. Note: You may have to scroll down to see these folders.
- Page 228 If the Authenticate dialog box appears, enter your password or phrase and click OK. Select Uninstall from the pull-down menu at the top and click Uninstall. Follow the on-screen instructions to uninstall Epson Scan. Uninstalling Other Epson Software Follow the instructions in the section for your operating system.
- Page 229 If a confirmation window appears, click OK. Repeat steps 3 through 5 for each of the following programs. Epson Event Manager EPSON Perfection V500 Office Scanner Driver Update Epson Scan PDF EXtensions In some cases, a message may appear to prompt you to restart the computer.
- Page 230 XP) or as a user who belongs to the Administrators group (Windows 2000). Select or Start > All Programs or Programs > EPSON > Perfection V500 User’s Guide > Uninstall Perfection V500 User’s Guide. Uninstalling the Online User’s Guide for Mac OS X Drag the following folder and icon into the Trash.
-
Page 231: Epson Technical Support
FAQs and troubleshooting advice, or e-mail Epson with your questions. Speak to a Support Representative Before you call Epson for support, please have the following information ready: Product name (Epson Perfection V500 Office) Product serial number (located on the back of the scanner) - Page 232 Purchase Supplies and Accessories You can purchase genuine Epson accessories from an Epson authorized reseller. To find the nearest reseller, call 800-GO-EPSON (800-463-7766). Or you can purchase online at http://www.epsonstore.com (U.S. sales) or http://www.epson.ca (Canadian sales). Other Software Technical Support...
-
Page 233: Windows System Requirements
Home > Technical Specifications System Requirements Windows System Requirements Macintosh System Requirements Make sure your system meets the requirements in these sections before using it with your scanner. Windows System Requirements System Microsoft Windows Vista, XP, XP Professional x64 Edition, or 2000 Professional (Operating systems upgraded from Windows Millennium Edition, 98, or 95 are not supported by the software.) - Page 234 See your system documentation for details.) Note: Epson Scan does not support the UNIX File System (UFS) for Mac OS X. You must install Epson Scan on a disk or in a partition that does not use UFS.
-
Page 235: Scanner Specifications
Home > Technical Specifications Scanner Specifications General Mechanical Electrical Environmental Interfaces Standards and Approvals Note: Specifications are subject to change without notice. General Scanner type Flatbed color Photoelectric Color CCD line sensor device Effective pixels 54,400 × 74,880 pixels at 6400 dpi * Scanning area may be restricted if resolution setting is large. - Page 236 Interface One USB 2.0 Hi-speed port Light source White LED, IR LED * Optical Resolution is the maximum scan resolution of the CCD elements, using the definition of ISO 14473. ISO 14473 defines optical resolution as the fundamental sampling rate of the scan sensor. Mechanical Dimensions Width: 18.7 inches (475.0 mm)
- Page 237 AC adapter model A411B A411E Rated input voltage AC 100 to 120 V AC 220 to 240 V Rated input current 1.0 A 0.5 A Rated input frequency 50 to 60 Hz Rated output voltage DC 24.0 V Rated output current 1.3 A Note: The AC adapter model varies in certain locations.
-
Page 238: Standards And Approvals
Standards and Approvals Scanner U.S. model: FCC Part 15 Subpart B Class B CAN/CSA-CEI/IEC CISPR 22 Class B AC Adapter U.S. model: Safety UL60950-1 CAN/CSA-C22.2 No. 60950-1 FCC Part 15 Subpart B Class B CAN/CSA-CEI/IEC CISPR22 Class B... -
Page 239: Optional Automatic Document Feeder Specifications
Home > Technical Specifications Optional Automatic Document Feeder Specifications General Electrical Environmental Mechanical General Product code B12B813391 Paper input Face-up loading Paper output Face-down ejection Paper capacity Maximum 0.2 inch (6 mm) stack height Paper types Bond paper, fine-quality paper, check paper, and recycled paper Electrical Rated voltage... - Page 240 Temperature Operating 50 to 90 ÚF (10 to 32 ÚC) Storage -4 to 140 ÚF (-20 to 60 ÚC) Humidity Operating 20 to 80%, without condensation Storage 10 to 85%, without condensation Mechanical Dimensions Width: 319 mm (12.6 inches) Depth: 539 mm (21.2 inches) Height: 137 mm (5.4 inches) Weight Approx.