GE CLIMATISEUR AEE23 Owner's Manual
General electric air conditioner - in-room air conditioner user manual
Hide thumbs
Also See for CLIMATISEUR AEE23:
- Owner's manual and installation instructions (56 pages) ,
- Owner's manual (60 pages) ,
- Owner's manual (56 pages)
Table of Contents
Advertisement
Available languages
Available languages
Quick Links
. . . . . . . . . . .2, 3
Operating Instructions
Additional Controls . . . . . . . . . . . . .7
Control Knob Models . . . . . . . . . . .6
Normal Operating Sounds . . . . . . .7
Touch Pad Models . . . . . . . . . . . .4, 5
Air Filter . . . . . . . . . . . . . . . . . . . . . .8
Grille and Case . . . . . . . . . . . . . . . . .8
Outdoor Coils . . . . . . . . . . . . . . . . . .8
Installation-Optional . . . . . . . . . .15
Window Installation . . . . . . . . . .9-14
. . . . . . . . . .16
Consumer Support
Consumer Support . . . . .Back Cover
Customers in Canada only . . . .17, 18
Warranty for Customers
in Canada . . . . . . . . . . . . . . . . . . . .20
in the U.S.A. . . . . . . . . . . . . . . . . . .19
*E
®
labeled product
As an E
S
®
partner, GE has
NERGY
TAR
determined that this product meets
the E
S
®
guidelines for
NERGY
TAR
energy efficiency.
Write the model and serial numbers here:
Model # __________________________
Serial # __________________________
Find these numbers on a label on the
side of the air conditioner.
In Canada, contact us at:
www.GEAppliances.ca
ge.com
Installation Instructions
instructions d'installation
La section française commence à la page 21
Acondicionador
La sección en español empieza en la página 41
Owner's Manual and
AEE23
AEH18*
AEH25*
AEM18*
AEM25*
AEQ24
AEW18*
AEW25*
Climatiseur
Manuel d'utilisation et
de aire
Manual del propietario
y instrucciones de
instalación
49-7610 12-08 JR
Advertisement
Chapters
Table of Contents

Related Manuals for GE CLIMATISEUR AEE23


Summary of Contents for GE CLIMATISEUR AEE23
-
Page 1: Table Of Contents
U.S.A....19 ® labeled product NERGY As an E ® partner, GE has NERGY determined that this product meets the E ® guidelines for NERGY energy efficiency. -
Page 2: Safety Instructions
IMPORTANT SAFETY INFORMATION. READ ALL INSTRUCTIONS BEFORE USING. WARNING! For your safety, the information in this manual must be followed to minimize the risk of fire, electric shock or personal injury. SAFETY PRECAUTIONS ■ Use this appliance only for its intended purpose as described in this Owner’s Manual. -
Page 3: Save These Instructions
WARNING! EXTENSION CORDS CAUTION: DO NOT use an extension cord with any of the 230/208 volt models. READ AND FOLLOW THIS SAFETY INFORMATION CAREFULLY. SAVE THESE INSTRUCTIONS ge.com... -
Page 4: Touch Pad Models
About the controls on the air conditioner—models with touch pads. Lights next to the touch pads on the air conditioner control panel indicate the selected settings. Light indicates the unit The display always shows the room is in the temperature or temperature except when setting the delay time Set mode. - Page 5 ■ Make sure nothing is between the air conditioner and the remote control that could block the signal. ■ Make sure batteries are fresh and installed correctly as indicated on the remote control. ge.com...
-
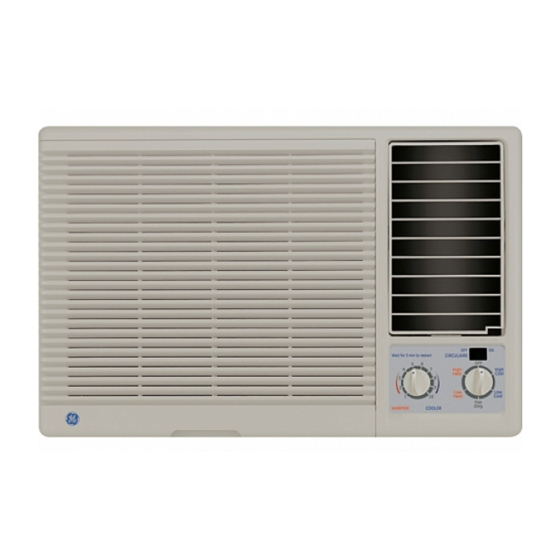
Page 6: Control Knob Models
About the controls on the air conditioner—models with control knobs. Features and appearance will vary. Controls MODE CONTROL (on some models) The air conditioner controls are located behind the control panel door. Press to open and close the door. Mode Control High Cool, Med Cool and Low Cool provide cooling with different fan speeds. -
Page 7: Additional Controls
■ Water will collect in the base pan during high humidity or on rainy days. The water may overflow and drip from the outdoor side of the unit. ■ The fan may run even when the compressor does not. ge.com... -
Page 8: Care And Cleaning Of The Air Conditioner
Care and cleaning of the air conditioner. Grille and Case Turn the air conditioner off and remove the plug from the wall outlet before cleaning. Outdoor Coils The coils on the outdoor side of the air conditioner should be checked regularly. If they are clogged with dirt or soot, they may be professionally cleaned. -
Page 9: Air Conditioner
Installation Instructions Questions? Call 800.GE.CARES (800.432.2737) or visit our Website at: ge.com In Canada, call 1.800.561.3344 or visit www.GEAppliances.ca BEFORE YOU BEGIN Read these instructions completely and carefully. IMPORTANT • — Save these instructions for local inspector’s use. IMPORTANT •... -
Page 10: Window Installation Instructions
Window Installation Instructions PARTS INCLUDED (Appearance may vary) Left accordion panel Window locking bracket (2) Type A (6) Type B (4) Foam top window gasket mounting rail V-support (2) Bolt (2) and nuts (2) Top mounting rail Type C (7) Type D (6) Window sash seal... -
Page 11: Window Requirements
Window Installation Instructions WINDOW REQUIREMENTS • These instructions are for a standard double-hung window. You will need to modify them for other types of windows. • The air conditioner can be installed without the accordion panels if needed to fit in a narrow window. See the window opening dimensions. - Page 12 Window Installation Instructions PREPARE THE WINDOW Cut the window sash seal to the proper length. Peel off the backing and attach the seal to the underside of the window sash. PREPARE THE CASE Install the top mounting rail with 4 type B screws from the inside of the case.
- Page 13 Window Installation Instructions INSTALL THE CASE IN THE WINDOW (cont.) Use a wood block (obtained locally) between the leveling bolts and the wall if the wall is weak or if the weight of the air conditioner falls between the studs in the wall. Adjust the leveling bolts and nuts against the outside wall so that the case has a slight tilt to the outside.
- Page 14 Window Installation Instructions INSTALL THE AIR CONDITIONER IN THE CASE Make sure the ground wire is off to the side and slide the air conditioner into the case. Do not push on the controls or the finned coils. Make sure the air conditioner is firmly seated.
-
Page 15: Installation Instructions
Through-the-Wall Installation Instructions—Optional The case may be installed through-the-wall in both existing and new construction. Read completely, then follow step-by-step. NOTE: Except for the V-support assemblies (included), obtain all materials locally for mounting the air conditioner through-the-wall. IMPORTANT Through-the-wall installation is not appropriate if any of the side or top louvers in the case will be obstructed by the wall. -
Page 16: Troubleshooting Tips
Troubleshooting Tips. Problem Possible Causes Air conditioner The air conditioner does not start is unplugged. The fuse is blown/circuit breaker is tripped. Power failure. The current interrupter device is tripped. Air conditioner does not Airflow is restricted. cool as it should The temp control may not be set correctly. -
Page 17: Ownership Registration For
Please place in envelope and mail to: Veuillez mettre dans une enveloppe et envoyez à : OWNERSHIP REGISTRATION P.O. BOX 1780 MISSISSAUGA, ONTARIO L4Y 4G1 (FOR CANADIAN CONSUMERS ONLY) -
Page 19: Warranty For Customers In The U.s.a
This warranty is extended to the original purchaser and any succeeding owner for products purchased for home use within the USA. If the product is located in an area where service by a GE Authorized Servicer is not available, you may be responsible for a trip charge or you may be required to bring the product to an Authorized GE Service location for service. -
Page 20: In Canada
GE Air Conditioner—One-Year Limited Warranty. All warranty service provided by our Factory Service Centers, or an authorized Customer Care 1.800.561.3344. Please have serial number and model number available when calling for service. For The Period Of: Mabe Will Replace: One Year Any part of the air conditioner which fails due to a defect in materials or workmanship. -
Page 21: Nergy Star
AEW18* AEW25* * Produits homologués E NERGY En tant que partenaire d’ENERGY STAR GE a déterminé que ce produit était conforme aux exigences d’efficacité énergétique d’ENERGY STAR ® Inscrivez ici les numéros de modèle et de série : Numéro de modèle : ____________________ Numéro de Série : ______________________... -
Page 22: Consignes De Sécurité
IMPORTANTES CONSIGNES DE SÉCURITÉ. VEUILLEZ LIRE TOUTES LES CONSIGNES AVANT UTILISATION. AVERTISSEMENT ! Pour votre sécurité, les informations contenues dans ce manuel doivent être suivies afin de minimiser les risques d’incendie, de chocs électriques ou de blessures corporelles. CONSIGNES DE SÉCURITÉ ■... - Page 23 AVERTISSEMENT ! UTILISATION DE RALLONGES MISE EN GARDE : N’UTILISEZ PAS de rallonge avec un modèle à 230/208 Volts. LISEZ ET SUIVEZ SOIGNEUSEMENT CES CONSIGNES DE SÉCURITÉ. CONSERVEZ CES INSTRUCTIONS www.electromenagersge.ca...
-
Page 24: Modèles Dotés Touches À Effleurement
A propos des commandes du climatiseur— modèles dotés de touches à effleurement. Les témoins lumineux à côté des touches à effleurement sur le tableau de commandes du climatiseur indiquent les réglages sélectionnés. L’écran affiche toujours la température de la pièce sauf lorsque vous programmez la température ou la minuterie. - Page 25 Ne faites pas fonctionner votre appareil lorsque les températures extérieures sont en dessous de 0 °C (32 °F). Ce climatiseur froid seul n’est pas conçu pour fonctionner avec des températures extérieures en dessous de 0 °C (32 °F). Il ne doit pas être utilisé Mode Cool (refroidissement) Utilisez le mode Cool (refroidissement) avec la vitesse du ventilateur sur Low (faible), Med (moyenne),...
-
Page 26: Modèles Dotés De Boutons De Commande
A propos des commandes du climatiseur— modèles dotés de boutons de commande. Les fonctions et l’aspect peuvent varier. Commandes COMMANDES DU MODE (sur certaines modèles) Les commandes de climatiseur sont situées derrière la porte du tableau de commandes. Appuyez pour ouvrir et fermer la porte. Commandes du mode Les réglages High Cool (Fort refroidissement), Med Cool (Refroidissement Moyen) et Low Cool (Refroidissement faible) -
Page 27: Commandes Supplémentaires
Commandes supplémentaires. Commande d’évent La commande d’évent se trouve au-dessus du panneau de commande. Lorsque cette commande est réglée sur CLOSE (fermé), seul l’air à l’intérieur de la pièce est climatisé et mis en circulation. Lorsqu’elle est réglée sur OPEN (ouvert), de l’air extérieur est admis dans la pièce. -
Page 28: Entretien Et Nettoyage
Entretien et nettoyage du climatiseur. Grille et Boîtier Eteignez et débranchez le climatiseur avant tout nettoyage. Serpentins Extérieurs Les serpentins situés du côté extérieur du climatiseur doivent être régulièrement vérifiés. S’ils sont obstrués par des poussières ou de la suie, il est possible de les faire nettoyer par des professionnels. -
Page 29: Instructions De Montage
Instructions de montage Questions? Composez le 1.800.561.3344 ou visitez notre site web à : www.electromenagersge.ca AVANT DE COMMENCER Lisez ces instructions entièrement et attentivement. IMPORTANT • — Conservez ces instructions pour l’inspecteur électrique local. IMPORTANT • — Respectez tous les codes et règlements en vigueur. - Page 30 Instructions de montage dans une fenêtre PIÈCES INCLUES (L’aspect peut varier) Panneau en accordéon gauche Rail de montage supérieur Ferrure de verrouillage de la fenêtre (2) Type A (6) Type B (4) Joint d’étanchéité supérieur en mousse de la fenêtre Support en V (2) Boulons (2) et écrous (2) Type C (7)
- Page 31 Instructions de montage dans une fenêtre INSTRUCTION RELATIVE À LA FENÊTRE • Ces instructions sont valables pour une fenêtre standard à guillotine à deux châssis mobiles. Vous devrez modifier les instructions pour les autres types de fenêtres. • Le climatiseur peut être installé sans les panneaux en accordéons si la fenêtre est étroite.
- Page 32 Instructions de montage dans une fenêtre PRÉPARATION DE LA FENÊTRE Découpez le joint de la fenêtre à guillotine à la largeur de la fenêtre et collez le côté adhésif sur le bas du cadre. Joint d’étanchéité de la fenêtre à guillotine INTÉRIEUR PRÉPARATION DU LOGEMENT Installez le rail de montage supérieur avec...
- Page 33 Instructions de montage dans une fenêtre INSTALLATION DU LOGEMENT DANS LA FENÊTRE (suite) Utilisez une pièce de bois (obtenue localement) entre les boulons de mise de niveau et le mur si le mur n’est pas solide ou si le poids du climatiseur se trouve entre deux clous dans le mur.
- Page 34 Instructions de montage dans une fenêtre INSTALLATION DU CLIMATISEUR DANS SON LOGEMENT Assurez-vous que le fil de mise à la terre est placé sur le côté et faites glisser le climatiseur dans son logement. N’appuyez pas sur les commandes ni sur les serpentins à ailettes.
- Page 35 Instructions de montage pour une installation à travers un mur—En option Le logement peut être installé à travers un mur dans une habitation existante ou neuve. Veuillez lire entièrement ces instructions, puis les suivre étape par étape. REMARQUE : Excepté pour les supports en V (fournis), veuillez obtenir tous les matériaux localement pour l’installation du climatiseur à...
-
Page 36: Conseils De Dépannage
Avant d’appeler le service . . . Problème Causes possibles Le climatiseur ne se Le climatiseur met pas en marche est débranché. Le fusible a sauté/ le disjoncteur est ouvert. Il y a une panne de courant. Le mécanisme d’interruption de courant est déclanché. -
Page 37: De Propriété
Please place in envelope and mail to: Veuillez mettre dans une enveloppe et envoyez à : OWNERSHIP REGISTRATION P.O. BOX 1780 MISSISSAUGA, ONTARIO L4Y 4G1 (FOR CANADIAN CONSUMERS ONLY) -
Page 39: Garantie
Climatiseur GE—Garantie Limitée D’un An. Les services sous garantie sont dispensés par nos centres de réparation ou par nos réparateurs Customer Care Pour obtenir le service, appelez le 1.800.561.3344. Veuillez fournir le numéro de série et le numéro de modèle lorsque vous appelez pour obtenir le service. -
Page 40: Service À La Clientèle Service À La Clientèle
Moncton, N.B. E1C 9M3 Prolongation de garantie Achetez un contrat d’entretien GE avant que votre garantie n’expire et bénéficiez d’un rabais substantiel. Ainsi le service après-vente GE sera toujours là après expiration de la garantie. Visitez notre site Web ou appelez-nous au 1.888.261.2133. - Page 41 AEM25* AEQ24 AEW18* AEW25* * Producto etiquetado *E NERGY Como socio de E ® NERGY GE ha confirmado que este producto cumple las directrices de E ® relativas al NERGY rendimiento energético. Escriba los números de modelo y serie aquí:...
-
Page 42: Instrucciones De Seguridad
INFORMACIÓN IMPORTANTE DE SEGURIDAD. LEA TODAS LAS INSTRUCCIONES ANTES DE USAR. ¡ADVERTENCIA! Por su seguridad, se debe seguir la información en este manual para minimizar el riesgo de incendios, descargas eléctricas o lesiones personales. PRECAUCIONES DE SEGURIDAD ■ Use este electrodoméstico solamente para el propósito determinado según se describe en el Manual del propietario. - Page 43 ¡ADVERTENCIA! USO DE CABLES DE EXTENSIÓN— PRECAUCIÓN: NO USE un cable de extensión con ninguno de los modelos de 230/208 voltios. LEA Y SIGA ESTAS INSTRUCCIONES DE SEGURIDAD CUIDADOSAMENTE. GUARDE ESTAS INSTRUCCIONES Modelos de 115 voltios solamente ge.com...
-
Page 44: Instrucciones De Operación
Acerca de los controles en el acondicionador de aire—Modelos con teclas táctiles. Las luces al lado de las teclas de toque en el panel de control del acondicionador de aire indicarán los ajustes seleccionados. La pantalla muestra siempre la La luz indica que la unidad está en el modo de temperatura ambiente, excepto al Ajuste de temperatura o de Tiempo de retardo. - Page 45 Cerciórese de que no haya nada entre el acondicionador de aire y el control remoto que pueda bloquear la señal. ■ Cerciórese de que las baterías sean frescas y se instalen correctamente según se indica en el control remoto. ge.com...
-
Page 46: Modelos Con Botones De Control
Acerca de los controles en el acondicionador de aire—modelos con botones de control. Las funciones y el aspecto pueden variar. Controles CONTROL DE MODO (en algunos modelos) Cool Los controles del acondicionador de aire están ubicados detrás de la puerta del panel de control. -
Page 47: Controles Adicionales
El agua se acumula en la bandeja durante días lluviosos o con mucha humedad. El agua podría derramarse y gotear desde el lado externo de la unidad. ■ El ventilador podría funcionar aun si el compresor no lo hace. ge.com... -
Page 48: Bobinas Para Exteriores
Cuidado y limpieza del acondicionador de aire. Rejilla y caja Apague el acondicionador de aire y retire el enchufe del tomacorriente de la pared antes de limpiar. Bobinas para exteriores Se deben inspeccionar con frecuencia las bobinas en el lado exterior del acondicionador de aire. Si las mismas están obstruidas con suciedad u hollín, podrían limpiarse profesionalmente. -
Page 49: Instrucciones De Instalación
Instrucciones de instalación ¿Preguntas? Llame 800.GE.CARES (800.432.2737) o visite nuestra página en la red en: ge.com ANTES DE INICIAR Lea estas instrucciones completa y cuidadosamente. IMPORTANTE • — Guarde estas instrucciones para uso del inspector local. IMPORTANTE • — Observe todos los códigos y órdenes de ley. - Page 50 Instrucciones de instalación en una ventana HERRAMIENTAS QUE NECESITARÁ Un destornillador de estrella PARTES INCLUIDAS (Apariencia puede variar) Panel de acordeón izquierdo Banda de sellado del riel de montaje superior Soporte para bloqueo de ventana (2) Tipo A (6) Tipo B (4) Llave ajustable Un destornillador con hoja plana...
- Page 51 Instrucciones de instalación en una ventana REQUISITOS PARA LA VENTANA • Estas instrucciones son para una ventana estándar de dos pliegues. Usted necesitará modificar el proceso para otros tipos de ventanas. • El acondicionador de aire puede instalarse sin los paneles de acordeón para ajustarse a una ventana más estrecha.
- Page 52 Instrucciones de instalación en una ventana PREPARE LA VENTANA Corte el sello del marco de la ventana a lo ancho de ésta y pegue la cinta adhesiva en la parte inferior del marco. PREPARE LA CARCASA Instale el riel de montaje superior con 4 tornillos tipo B desde la parte interior de la carcasa.
- Page 53 Instrucciones de instalación en una ventana INSTALE LA CARCASA EN LA VENTANA (cont.) Utilice un bloque de madera (obtenido en forma local) entre los pernos de nivelación y la pared si ésta es débil o si el peso del acondicionador de aire cae entre las columnas de la pared.
- Page 54 Instrucciones de instalación en una ventana INSTALE EL ACONDICIONADOR EN LA CARCASA Asegúrese de que el cable a tierra esté hacia un lado y deslice el acondicionador de aire dentro de la carcasa. No haga presión sobre los controles o las serpentinas de aletas.
- Page 55 Instrucciones de Instalación a Través de la Pared—Opcional La carcasa puede instalarse a través de la pared en construcciones existentes y nuevas. Lea por completo y luego siga todos los pasos. NOTA: Con excepción de los montajes de soportes en V (incluidos), obtenga todos los materiales en forma local para montar el acondicionador de aire a través de la pared.
- Page 56 Notas.
-
Page 57: Solucionar Problemas
Solucionar problemas. Problema Causas posibles El acondicionador de aire El acondicionador de aire no enciende está desconectado. El fusible se disparó / el cortacircuitos se disparó. Interrupción en el suministro eléctrico. El dispositivo de interrupción de corriente se ha activado. El acondicionador de aire El flujo de aire está... -
Page 58: Garantía
Estados Unidos. Si el producto está situado en un área que no dispone de servicio por parte de un proveedor de servicio autorizado de GE, podría tener que hacerse cargo de los costes de envío o bien podría solicitársele que lleve el producto a una centro de servicio de GE autorizado para realizar la reparación. -
Page 59: Servicio Al Consumidor
Solicite una reparación El servicio de expertos GE está a tan sólo un paso de su puerta. ¡Entre en línea y solicite su reparación cuando le venga bien 24 horas al día cualquier día del año! O llame al 800.GE.CARES (800.432.2737) durante horas normales de oficina. - Page 60 Customers in Canada should consult the yellow pages for the nearest Mabe service center, or call 1.800.561.3344. Contact Us If you are not satisfied with the service you receive from GE, contact us on our Website with all the details including your phone number, or write to: General Manager, Customer Relations In Canada: www.GEAppliances.ca, or write to: Director, Consumer Relations, Mabe Canada Inc.