Edimax AR-7167WnA User Manual
Manual
Hide thumbs
Also See for AR-7167WnA:
- User manual (98 pages) ,
- Quick install manual (16 pages) ,
- Datasheet (2 pages)
Table of Contents
Advertisement
Advertisement
Table of Contents

Related Manuals for Edimax AR-7167WnA


Summary of Contents for Edimax AR-7167WnA
- Page 1 AR-7167WnA AR-7167WnB User Manual 04-2012 / v1.3...
- Page 2 The GNU GPL and GNU LGPL software codes used in Edimax products are distributed without any warranty and are subject to the copyrights of their respective authors. The firmware files for this product can be found under the “Download” page at the Edimax website (www.edimax.com).
-
Page 3: Table Of Contents
Contents INTRODUCTION ..........................1 1.1............................. 2 EATURES 1.2......................2 INIMUM EQUIREMENTS 1.3........................3 ACKAGE ONTENTS 1.4......................3 ARDWARE LACEMENT 1.4.1. Rear Panel .......................... 3 1.4.2. Front LEDs ......................... 4 HARDWARE INSTALLATION ....................5 IP ADDRESS SETTING ........................6 WEB MANAGEMENT CONFIGURATION ................ - Page 4 4.3.3. Statistics ..........................48 4.4............................49 OOLS 4.4.1. Administrator ........................49 4.4.2. Time Zone ......................... 50 4.4.3. Firmware .......................... 51 4.4.4. System Restart ........................52 4.4.5. Diagnostics ........................52 FEDERAL COMMUNICATION COMMISSION INTERFERENCE STATEMENT ....... 53 Note: The setup images used in this manual are for reference only. The contents of these images may vary according to firmware version.
-
Page 5: Introduction
1. Introduction The AR-7167WnA/B provides four 10/100 base-T Ethernet ports for user. The device provides high-speed ADSL2+ broadband connection to the Internet or Intranet for high- end users, such as net bars and office users. It provides high performance access to the Internet, downstream up to 24 Mbps and upstream up to 1 Mbps. -
Page 6: Features
1.1. Features ADSL2/2+ Compliance Support downstream rates of up to 24Mbps and upstream rates of up to 1Mbps Compliant to ITU-T G.992.1 (G.dmt), G.992.2 (G.lite), G.992.3 (ADSL2), G.992.4 (splitterless ADSL2), G.992.5 (ADSL2+) for Annex A, B. (Annex A and B are supported in different H/W platform) ... -
Page 7: Package Contents
1.3. Package Contents ADSL2/2+ Router (Annex A or B) Power Adapter (12V DC) RJ-45 Ethernet Cable RJ-11 Telephone Line Quick Installation Guide CD (EZmax Setup Wizard, User Manual and Multi-Language QIG) Holding Base ... -
Page 8: Front Leds
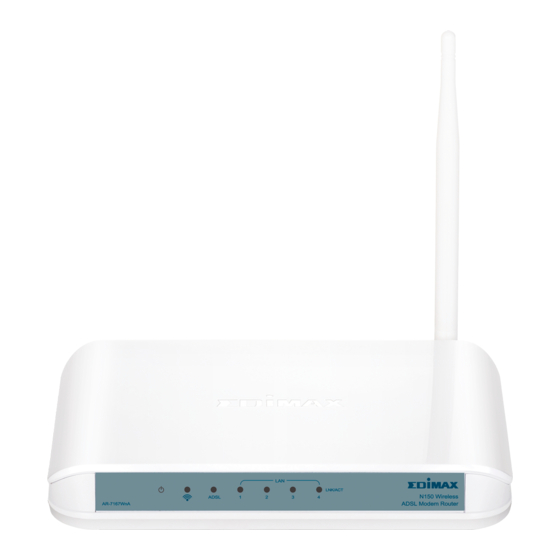
1.4.2. Front LEDs On the router’s front panel there are LED lights that inform you of the router’s current status. Below is an explanation of each LED and its description. Light Status Description PWR (Green) Router is switched on and correctly powered. WLAN (Yellow) Wireless LAN WPS is on. -
Page 9: Hardware Installation
2. Hardware Installation Step 1. Connect the ADSL Line Connect the router to your ADSL cable through the supplied RJ-11 telephone line. Step 2. Connect the router to your LAN network Connect the router to your PC, hub or switch by attached the Ethernet cable to the LAN port of the router. -
Page 10: Ip Address Setting
3. IP Address Setting Using the router to get into the Internet, the PCs in the network must have Ethernet adapter installed and be connected to the router either directly or through a hub or switch. The TCP/IP protocol of each PC has to been installed and the IP Address of each PC has to be set in the same subnet as the router. - Page 11 5. Click OK to confirm the setting. Your PC will now obtain an IP address automatically from your router’s DHCP server. Note: Please make sure that the router’s DHCP server is the only DHCP server available on your LAN. Windows Vista 1.
- Page 12 5. Click OK to confirm the setting. Your PC will now obtain an IP address automatically from your router’s DHCP server. Note: Please make sure that the router’s DHCP server is the only DHCP server available on your LAN. Windows XP 1.
- Page 13 5. Click OK to confirm the setting. Your PC will now obtain an IP address automatically from your router’s DHCP server. Note: Please make sure that the router’s DHCP server is the only DHCP server available on your LAN.
-
Page 14: Web Management Configuration
4. Web Management Configuration Once you have configured your PCs to obtain an IP address automatically, the router’s DHCP server will automatically give your LAN clients an IP address. By default the router’s DHCP server is enabled so that you can obtain an IP address automatically. To see if you have obtained an IP address, see Appendix A. Once your PC has obtained an IP address from your router, enter the default IP address 192.168.2.1 (router’s IP address) into your PC’s web browser and press <enter>... -
Page 15: Quick Start
4.1. Quick Start The Quick Start section is designed to get you using the router as quickly as possible. Before configuring the router, please check with your ISP (Internet Service Provider) what kind of the service is provided such as PPPoE, PPPoA or RFC1483/2684. Gather the information as illustrated in the following table and keep it for reference. - Page 16 Please follow the steps in the setup wizard to complete the configuration of the Internet connection. Step 1: Set your new password Please enter the new password and confirm the password again. Step 2: Choose your tome zone Please select the tome zone where you are located.
- Page 17 Step 3: Set your Internet connection Please check with your ISP the connection type of the ADSL line. Step 4: Input the data supplied by your ISP To know more about the explanation of each setting, please refer to Section 4.2. Step 5: Re-start your ADSL router Click “Next”...
-
Page 18: General Setup
4.2. General Setup Please start your web browser and log onto the web management interface of the router, then click ‘General Setup’ button on the left menu, or click ‘General Setup’ link at the upper-right corner of web management interface. 4.2.1. - Page 19 ATM VC Parameter Description Virtual Circuit VPI (Virtual Path Identifier) and VCI (Virtual Channel Identifier define a virtual circuit. Status Each PCV can be toggled Activated or Deactivated. VPI is a virtual path determines the way an ATM cell should be routed.
- Page 20 Divide the DSL line rate (bps) by 424 (the size of an ATM cell) to find the PCR (Peak Cell Rate). This is the maximum rate at which the sender can send cells. SCR (Sustain Cell Rate) is the average rate, as measured over a long interval, in the order of the connection lifetime.
- Page 21 Parameter Description Encapsulation Please check with your ISP the method of multiplexing. In Bridge Mode, please select “1483 Bridge IP LLC” or “1483 Bridge IP VC-Mux”. Bridge Interface This router has built-in ADSL modem and is able to connect to ISP directly.
- Page 22 Static IP Address Parameter Description Encapsulation Please check with your ISP the method of multiplexing. In Static IP Mode, please select “1483 Bridge IP LLC” or “1483 Bridge IP VC-Mux” or “1483 Routed IP LLC(IPoA)” or “1483 Routed IP VC-Mux”. Bridge Interface This router has built-in ADSL modem and is able to connect to ISP directly.
- Page 23 IP Subnet Mask Enter the Subnet Mask assigned by your ISP. Gateway Enter the Gateway assigned by your ISP. NAT (Network Address Translation), an Internet standard that enables a local-area network (LAN) to use one set of IP addresses for internal traffic and a second set of addresses for external traffic.
- Page 24 Parameter Description User Name Enter the username exactly as your ISP assigned. Password Enter the password that your ISP has assigned to you. Encapsulation Please check with your ISP the method of multiplexing. In PPPoE/PPPoA mode, please select “PPPoE LLC”, “PPPoE VC-Mux”, “PPPoA LLC”, or “PPPoA VC-Mux”.
- Page 25 in the network. Please specify the MSS range from 100 to 1452 bytes or 0 byte as the default value. Default Route When “Default Router” is enabled, all the packets for destinations not known by the router's routing table are sent to the default route. By default, it is enabled.
-
Page 26: Lan
Bridge Mode Parameter Description Encapsulation Please check with your ISP the method of multiplexing. In Bridge Mode, please select “1483 Bridge IP Only LLC” or “1483 Bridge IP Only VC-Mux”. When you are done making changes, click on SAVE to save your changes. 4.2.1.2. - Page 27 LAN Settings Parameter Description IP Address Enter the IP Address of the ADSL router for the local user to access the router’s web page. By default, the IP Address is 192.168.2.1. IP Subnet Mask Enter the Subnet Mask of the ADSL router. By default, the Subnet Mask is 255.255.255.0.
- Page 28 DHCP Select whether DHCP is Disabled, Enabled or Relay. Start IP If the DHCP Server is enabled, please set the “Starting IP Address” which will be the first IP Address assigned to the LAN client. By default, the “Starting IP Address” is 192.168.2.100. IP Pool Count You can select a particular IP address range for your DHCP server to issue IP addresses to your LAN Clients.
-
Page 29: Wireless
4.2.1.3. Wireless Wireless Settings Parameter Description Access Point Activated or deactivated the wireless function of the router. When it is activated, the router will be an access point for other wireless clients to connect wirelessly. Channel It is the radio channel used by the wireless LAN. All devices in the same wireless LAN should use the same channel. - Page 30 this value too low, it will result in bad performance. Enter a value from 256 to 2346. DTIM Determines the interval the Access Point will send its broadcast traffic. The range is from 1 to 255 and the default value is 3 beacons. Wireless Mode 802.11b –...
- Page 31 11n Settings Parameter Description Channel Bandwidth Set channel width of wireless radio. Do not modify default value if you don’t know what it is, default setting is ‘20/40 MHz’. Extension Channel Select the extension channel to above or below the control channel while 40MHz channel bandwidth is selected.
- Page 32 Broadcast SSID Select “Yes” to make the SSID to be visible so wireless clients can scan the router within the network. Select “No” if you want to hide the SSID of the router. Wireless clients have to set the same SSID of the router in order to access the network.
- Page 33 WPS mode. Authentication Type It’s very important to set wireless security settings properly. If you don’t, hackers and malicious users can reach your network and valuable data without your consent and this will cause serious security problem. This router supports WEP, WPA-PSK and WPA2-PSK authentication type.
- Page 34 Wireless MAC Address Filter Parameter Description Active This router can prevent the wireless clients from accessing the wireless network by checking the MAC Address of the clients. If you enable this function, please set the MAC Address of the wireless clients that you want to filter.
-
Page 35: Advanced Setup
4.2.2. Advanced Setup 4.2.2.1. Firewall Parameter Description Firewall When you enable the firewall function, it will protect you from following attacks of WAN side: SYN flooding attack Ping of Death Teardrop Land attack If you enable SPI, all traffics initiated from WAN site will be blocked including DMZ, Virtual Server, etc. - Page 36 Routing Table List You can see the current routing table of the router here. If you want to add another routing rule, please click “ADD ROUTE”. Parameter Description Dest IP Show the IP Address of the destination LAN. Mask Show the Subnet Mask of the destination LAN.
-
Page 37: Nat
Parameter Description Destination IP Address Enter the IP Address of the destination LAN. IP Subnet Mask Enter the Subnet Mask address of the destination LAN. Gateway IP Address This is the gateway IP Address where packets are sent. Enter the gateway IP Address and select the channel (PVC) you want to configure. -
Page 38: Dmz
Parameter Description Virtual Circuit Please select the channel (PVC) you want to configure. NAT Status The activated or deactivated status for the NAT function will be shown here. Number of IPs Select “Single” if you only have a public IP Address. 4.2.2.3.2. -
Page 39: Adsl
Parameter Description Virtual Server for Show the Virtual Server setting is for single or multiple IP Addresses. Start Port Number Enter the start port number. End Port Number Enter the end port number. Local IP Address It is recommended to enter a static IP Address for the server here. -
Page 40: Qos
ADSL Parameter Description ADSL Mode The default setting is “Auto Sync-Up”. This mode will automatically detect the ADSL mode including ADSL2+, ADSL2, G.DMT, T1.413 and G.lite. If you are not sure how to select the ADSL mode, please contact with your ISP. - Page 41 Rule Parameter Description Rule Index Select 16 different rules, each rule’s detail can be set and saved Active Select Rule is activated or deactivated. There are 16 different rules, each rule can be activated or deactivated. Select 11 different applications: There are IGMP, SIP, H.323, Application MGCP, SNMP, DNS, DHCP, RIP, RSTP, RTCP, RTP.
- Page 42 IPP/DS Field Select IP QoS format. IP Precedence Range Select the IP precedence range. Type of Service Select 5 different type of service. DSCP Range Set the DSCP value that you want to filter Set the remarked new 802.1p priority value on the packet that 802.1p fulfill every detail setting condition of each rule Action...
-
Page 43: Access Management
4.2.3. Access Management 4.2.3.1. UPnP When the UPnP function is enabled, the router can be detected by UPnP compliant system such as Windows XP. The router will be displayed in the Neighborhood of Windows XP, so you can directly double click the router or right click the router and select “Invoke” to configure the router through web browser. -
Page 44: Acl
Dynamic DNS Parameter Description Dynamic DNS Activated or deactivated the DDNS function. Service Provider This router supports DynDNS service provider. My Host Name Enter the domain name assigned to your router by the service provider. E-mail Address Enter the E-mail address assigned by DDNS service provider. Username Enter your username. -
Page 45: Filter
Activate or deactivate the Access Control function. When you have activated the function, please do make sure that you have designated the available applications/services or you will be denied to access all the services. Access Control Editing Parameter Description ACL Rule Index This is the item number to record the setting rule. -
Page 46: Ip/Mac Filter
4.2.3.4.1. IP/MAC Filter Rule Type Parameter Description Rule Type Selection Select the rule type of type of filter. - Page 47 IP / MAC Filter Rule Editing Parameter Description IP/MAC Filter Rule Index This is the item number to record the setting rule. Active Select “Yes” to enable the current rule, select “No” to cancel the current rule. Interface Select which channel (PVC) to configure. Direction Select the access to the Internet (Outgoing) or from the Internet (Incoming), or Both.
-
Page 48: Application Filter
4.2.3.4.2. Application Filter Application Filter Editing Parameter Description Application Filter Activate or deactivate the application filter. ICQ/MSN/YMSG/Real If “Allow” is selected, the packets for these applications will be Audio/Video able to pass through the router. If you want to restrict these applications, please select “Deny”. - Page 49 URL Filter Editing Parameter Description Active Activate or deactivate the URL filter. URL Index This is the item number to record the setting. Individual active Select “Yes” to enable the individual active, select “No” to cancel the individual active. URL(host) A URL can be thought of as the "address"...
-
Page 50: Status
4.3. Status The status screens give you information about various aspects of your ADSL router’s settings. 4.3.1. Device Info In this page, you can know the device information including firmware, MAC Address, LAN and WAN settings and also the ADSL line status. -
Page 51: System Log
4.3.2. System Log Display system logs accumulated up to the present time. You can also save the logs for future reviewing. -
Page 52: Statistics
4.3.3. Statistics Show the statistics of transmit and receive packets on the LAN port, ADSL line or WLAN port. -
Page 53: Tools
4.4. Tools 4.4.1. Administrator Parameter Description Username The username of the router is “admin” by default. New Password Enter up to 30-digit of the new password. Confirm Password Enter the new password again to confirm the setting. When you are done making changes, click on SAVE to save your changes, DELETE to delete the rule with the parameters you set or CANCEL to exit without saving. -
Page 54: Time Zone
4.4.2. Time Zone The Time Zone allows your router to set its time; this will affect function such as System Log. Parameter Description Current Date/Time Show the current date/time of the router. Synchronize time with NTP Server Automatically – Set the time by following with a NTP Server. -
Page 55: Firmware
4.4.3. Firmware If you have new firmware for some features update, please upgrade firmware of the router here. Parameter Description New Firmware Location Type in the location of the new firmware or click “Browse” to find it. Romfile Backup To save the current settings as a backup file, please click “ROMFILE SAVE”. -
Page 56: System Restart
4.4.4. System Restart In this page, you can restart your router or restore to factory defaults. If you wish to restart the router using the factory default settings, select “Factory Default Settings” to reset to factory defaults. You can also click the “Reset” button in the rear panel of the router over 5 seconds to reset default settings. 4.4.5. -
Page 57: Federal Communication Commission Interference Statement
Federal Communication Commission Interference Statement This equipment has been tested and found to comply with the limits for a Class B digital device, pursuant to Part 15 of FCC Rules. These limits are designed to provide reasonable protection against harmful interference in a residential installation.