Table of Contents
Advertisement
Quick Links
Advertisement
Table of Contents
Troubleshooting

Related Manuals for Gateway E-6500


Summary of Contents for Gateway E-6500
- Page 1 Gateway E-6500 User Guide...
-
Page 2: Table Of Contents
Gateway contact information ........ - Page 3 ..........48 www.gateway.com...
- Page 4 ......... . 81 ......95 www.gateway.com...
- Page 5 www.gateway.com...
-
Page 6: Getting Help
Chapter 1 Getting Help • Using the Gateway Web site • Using Help and Support • Using Your Computer guide • Using online help • Contacting Gateway... - Page 7 Chapter 1: Getting Help Thank you for purchasing our computer! You have made an excellent decision choosing Gateway. We are sure that you will be pleased with the outstanding quality, reliability, and performance of your new computer. Each and every Gateway computer uses the latest technology and passes through the most stringent quality control tests to ensure that you are provided with the best product possible.
-
Page 8: Help And Support
Your computer includes Help and Support, an easily accessible collection of help information, troubleshooters, and automated support. Use Help and Support to answer questions about Windows and to help you quickly discover and use the many features of your Gateway computer. To start Help and Support: ■... -
Page 9: Searching For A Topic
Internet, sending a fax, and changing power-saving settings as well as other topics. To access the Using Your Computer guide: ■ Click Start All Programs box. Search box. You must be connected to the Search Search Results , then click Gateway Documentation www.gateway.com Search button. list. -
Page 10: Online Help
You can search for information by viewing the help contents, checking the index, searching for a topic or keyword, or browsing through the online help. Gateway contact information For Technical Support, see the Gateway Business Service Plans guide that came with your system. menu or by clicking a Help www.gateway.com... -
Page 11: Identifying Your Computer
Chapter 1: Getting Help Identifying your computer You can find your computer’s serial number on a label on the side of the computer case. www.gateway.com... -
Page 12: Checking Out Your Gateway Computer
Chapter 2 Checking Out Your Gateway Computer • Identifying features • Locating your computer model and serial number • Locating the Microsoft Certificate of Authenticity • Locating the specifications for your computer • Purchasing accessories... -
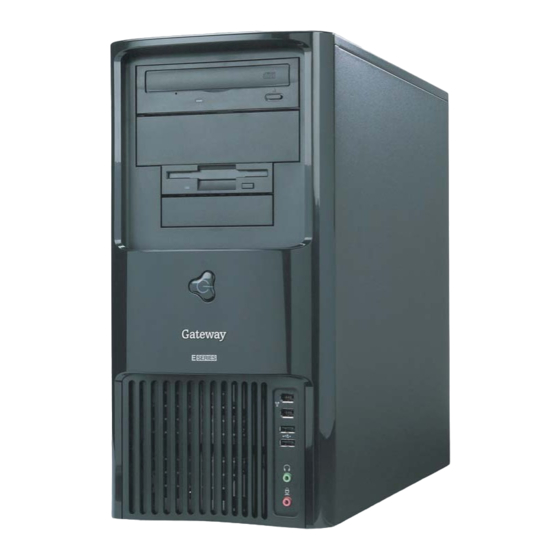
Page 13: Front
Chapter 2: Checking Out Your Gateway Computer Front Your computer includes the following components. DVD/CD drive DVD/CD drive (optional) Power button/ Power indicator Component Icon DVD/CD drive Description Use this drive to listen to audio CDs, install games and programs, watch DVDs, and store large files onto recordable discs (depending on drive type). - Page 14 “Using the diskette drive” on page Plug powered, analog front speakers, an external amplifier, or headphones into this jack. This jack is color-coded orange. Plug a microphone into this jack. This jack is color-coded red or pink. www.gateway.com Front ® ®...
-
Page 15: Back
Chapter 2: Checking Out Your Gateway Computer Back Your computer includes the following components: Power connector Cover release lever Case cover thumbscrew Rear speaker jack (optional) Ethernet (network) jack IEEE 1394 port Parallel port S-Video out jack (optional) Telephone jack... - Page 16 (line in) jack. Plug an external audio input source (such as a stereo) into this jack so you can record sound on your computer. For information on configuring this jack, see “Configuring the audio jacks” on page www.gateway.com Back ® ®...
- Page 17 Chapter 2: Checking Out Your Gateway Computer Component Icon Headphone/analog speakers jack (green) -OR- Front speakers jack Microphone jack (red or pink) Back speaker jack (black) (optional) Center/subwoofer jack (orange) (optional) S/PDIF audio jack (black jack in the orange field)
- Page 18 Component Icon Modem jack (optional) Description Plug a modem cable into this jack. www.gateway.com Back...
-
Page 19: Locating Your Serial Number
Important Label information varies by model, features ordered, and location. The label on the side of your computer case includes your computer serial number. Gateway Technical Support will need this information if you call for assistance. Microsoft Certificate of Authenticity The Microsoft Certificate of Authenticity label found on the back or side of your computer includes the product key code for your operating system. -
Page 20: Finding Your Specifications
Finding your specifications Finding your specifications For more information about your computer, such as memory size, memory type, and hard drive size, visit Gateway’s Support page at support.gateway.com. The Support page also has links to additional Gateway documentation and detailed specifications. www.gateway.com... -
Page 21: Accessories
Chapter 2: Checking Out Your Gateway Computer Accessories To order accessories, visit the Accessory Store at accessories.gateway.com. Memory Large programs, such as multimedia games or graphics programs, use a lot of memory. If your programs are running more slowly than you think they should, try adding more memory. - Page 22 A UPS uses a battery to keep your computer running temporarily during a power failure so you can save your work and shut down your computer correctly. A UPS may also provide protection from power surges. www.gateway.com...
- Page 23 Chapter 2: Checking Out Your Gateway Computer www.gateway.com...
-
Page 24: Getting Started
Chapter 3 Getting Started • Using your computer safely • Protecting your computer from power source problems • Turning your computer on and off • Adjusting the volume • Configuring audio jacks • Connecting the modem and network • Installing peripheral devices... -
Page 25: Working Safely
Avoid focusing your eyes on your computer screen for long periods of time. Look away from your computer occasionally, and try to focus on distant objects. Top of screen is not higher than eye level Feet are flat on the floor www.gateway.com Screen is perpendicular to your line of sight... -
Page 26: Setting Up Your Computer Desk And Chair
Do not slouch forward or lean far back. Sit with your back straight so your knees, ■ hips, and elbows form right angles when you work. Take breaks to stand and stretch your legs. ■ ■ Avoid twisting your torso or neck. www.gateway.com Working safely... -
Page 27: Avoiding Discomfort And Injury From Repetitive Strain
United States. In other areas of the world, such as Europe, the utility power is supplied at 230 volts at 50 Hz. If your computer is operating in an environment such as this, the voltage switch should be moved to 230. www.gateway.com... - Page 28 Working safely To set the voltage selection switch: Use a tool such as an opened paper clip to slide the voltage selection switch to ■ the correct voltage position. Voltage selection switch www.gateway.com...
-
Page 29: Starting Your Computer
For more information about changing the power button mode, see Tips & Tricks “Changing Power-Saving Settings” in Using Your Computer which has been included on your hard drive. To access this guide, click Start, All Programs, then click Gateway Documentation. www.gateway.com... -
Page 30: Turning Off Your Computer
If for some reason you cannot use the Turn Off Computer option in Important Windows to turn off your computer, press and hold the power button for about five seconds, then release it. . The Turn Off Computer dialog box opens. Turn Off Computer www.gateway.com Turning off your computer... -
Page 31: Restarting (Rebooting) Your Computer
As a part of the regular startup process, a program to check the disk status runs automatically. When the checks are finished, Windows starts. . The Task Manager window opens. tab, then click the program that is not responding. www.gateway.com... -
Page 32: Using The Keyboard
Directional keys Move the cursor up, down, right, or left. Numeric keypad Type numbers when the numeric keypad ( Function keys Navigation keys Application , or (Explorer utility). www.gateway.com Using the keyboard Indicators Directional Numeric keys keypad keys are CROLL... -
Page 33: Multifunction Keyboard
Move the cursor up, down, right, or left. Numeric keypad Type numbers when the numeric keypad ( Function keys Navigation keys Application , or CROLL (Search utility), www.gateway.com Indicators Directional Numeric keys keypad keys are activated. (Run utility), and ) is turned on. - Page 34 Move to the next CD track or DVD chapter. Decrease the volume. Increase the volume. Turn off all sound. Opens the My Documents folder. Open online help. Open your e-mail program. Open online search. Open your Web browser. www.gateway.com Using the keyboard Internet...
-
Page 35: Adjusting The Volume
For instructions on how to adjust the volume in Windows, see Tips & Tricks “Adjusting the Volume” in Using Your Computer which has been included on your hard drive. To access this guide, click Start, All Programs, then click Gateway Documentation. “Special-function buttons” on page www.gateway.com... -
Page 36: Configuring The Audio Jacks
. The Control Panel window opens. If your Control Control Panel Sounds, Speech, and Audio Devices , then click under Speaker Settings. The Advanced Advanced on the taskbar. The Realtek dialog box opens. www.gateway.com Configuring the audio jacks 10. To use the . Click/Double-click... -
Page 37: Connecting The Modem
Insert one end of the modem cable into the modem jack computer. Insert the other end of the modem cable into a telephone wall jack. The modem will not work with digital or PBX telephone lines. Start your computer, then start your communications program. www.gateway.com on the back of your... -
Page 38: Connecting To A Cable Or Dsl Modem Or To An Ethernet Network
Insert the other end of the network cable into a cable modem, DSL modem, or Ethernet jack. Connecting to a cable or DSL modem or to an Ethernet network “Networking Your Computer” on page www.gateway.com on the back of your... -
Page 39: Installing A Printer, Scanner, Or Other Peripheral Device
For more information about installing peripheral devices, click Start, Help and Support then click Help and Support. Type the keyword installing devices in the Search box “Checking Out Your Gateway Computer” on , then click the arrow. www.gateway.com ®... -
Page 40: Using Drives And Ports
Chapter 4 Using Drives and Ports • Using the diskette drive • Using the Zip drive • Using CD or DVD drives... -
Page 41: Using The Diskette Drive
(for example, the A: drive), then double-click the file name. To remove the diskette, make sure that the drive activity light is off, then press the diskette eject button. Drive Diskette slot Eject button , then click Start www.gateway.com . Double-click the My Computer... -
Page 42: Using The Zip Drive
(for example, the B: drive), then double-click the file name. To remove the Zip disk, press the eject button. Zip disk slot Eject button , then click Start My Computer www.gateway.com Using the Zip drive . Double-click the... -
Page 43: Using The Cd Or Dvd Drive
You can use your computer to enjoy a wide variety of multimedia features. Identifying drive types Your Gateway computer may contain one of the following drive types. Look on the front of the drive for one or more of the following logos: If your drive has this logo... -
Page 44: Inserting A Cd Or Dvd
Press the eject button to close the tray. Activity indicator Manual eject hole (location varies) (location varies) www.gateway.com Using the CD or DVD drive Eject button... -
Page 45: Playing A Cd
For more information about playing DVDs, see “Playing DVDs” in Tips & Tricks Using Your Computer which has been included on your hard drive. To access this guide, click Start, All Programs, then click Gateway Documentation. Creating CDs and DVDs... -
Page 46: Maintaining Your Computer
Chapter 5 Maintaining Your Computer • Caring for your computer • Updating Windows • Protecting your computer from viruses • Cleaning your computer • Restoring your system • Opening the computer case • Adding memory and replacing the battery... -
Page 47: Caring For Your Computer
Avoid dusty or dirty work environments. Dust and dirt can clog the internal ■ mechanisms. Do not block the ventilation fan. ■ ■ When storing your computer for an extended period of time, unplug AC power. www.gateway.com... -
Page 48: Updating Windows
Scan for Available Updates For more information about Windows Update, click Start, then click Help and Support Help and Support. Type the keyword Windows Update in the HelpSpot Search box , then click Windows Update , then click the arrow. www.gateway.com Updating Windows... -
Page 49: Protecting Your Computer From Viruses
Tips & Tricks “Modifying Security Settings” in Using Your Computer which has been included on your hard drive. To access this guide, click Start, All Programs, then click Gateway Documentation. For more information about protecting your computer against viruses, Help and Support click Start, then click Help and Support. - Page 50 To scan for viruses: Click Start All Programs Norton Internet Security opens. Click Norton AntiVirus Protecting your computer from viruses , then click Norton Internet Security www.gateway.com Norton Internet Security...
- Page 51 Norton Internet Security after the free subscription period, you must extend your subscription. Make sure that you are connected to the Internet. Click Start All Programs Norton Internet Security opens. Click . The LiveUpdate wizard opens. LiveUpdate , then click Norton Internet Security www.gateway.com Norton Internet Security...
- Page 52 Follow the on-screen instructions to update your Norton Internet Security program with the latest virus protection files. When the program has finished, click Protecting your computer from viruses Finish www.gateway.com...
-
Page 53: Cleaning Your Computer
Cleaning the monitor A flat panel display or LCD screen is made of specially coated glass Caution and can be scratched or damaged by abrasive or ammonia-based glass cleaners. www.gateway.com... -
Page 54: Cleaning The Mouse
Turn the mouse upside down. Rotate the retaining ring on the bottom of the mouse counter-clockwise, then remove the retaining ring and mouse ball. Remove any dust, lint, or dirt from the mouse ball with a soft cloth. www.gateway.com Cleaning your computer... -
Page 55: Cleaning Cds Or Dvds
Clean the mouse rollers with a cotton swab dipped in isopropyl alcohol. Replace the mouse ball and lock the retaining ring into place. Cleaning CDs or DVDs Wipe from the center to the edge, not around in a circle, using a product made especially for the purpose. Mouse rollers www.gateway.com... -
Page 56: Restoring Your System
To reinstall your program or driver: Click Start All Programs Follow the on-screen instructions. , then click Accessories System Tools , then click System Recovery www.gateway.com Restoring your system System Restore , then click the arrow. Application & Driver Recovery... -
Page 57: Restoring Your Computer To The Original Configuration
If Windows does not start or if the two previous procedures do not correct the problem, you may need to restore your computer to the original configuration. To restore your computer to the original configuration: Turn on your computer, then press F11. Follow the on-screen instructions. www.gateway.com... -
Page 58: Preventing Static Electricity Discharge
Always hold expansion cards by their edges or their metal mounting brackets. ■ Avoid touching the edge connectors and components on the cards. Never slide expansion cards or components over any surface. Preventing static electricity discharge www.gateway.com... -
Page 59: Opening The Case
Press the power button to drain any residual power from your computer. Remove the thumbscrew from the side panel cover. For the location of the thumbscrew, see “Back” on page Lift the cover release lever. “Preventing static electricity discharge” on page www.gateway.com... - Page 60 Opening the case Swing the side panel away from the computer, then lift the panel away from the computer. www.gateway.com...
-
Page 61: Removing The Front Bezel
Chapter 5: Maintaining Your Computer Removing the front bezel To remove the front bezel: Position the computer where you can grasp the front bottom edge of the bezel, ■ then pull the bezel out and away from the case. www.gateway.com... -
Page 62: Closing The Case
Align the panel tabs into the bottom case notches, then swing the side panel toward the top of the computer to secure it into place. Replace the side panel thumbscrew. Reconnect the cables and power cord. www.gateway.com Closing the case... -
Page 63: Replacing The Front Bezel
Chapter 5: Maintaining Your Computer Replacing the front bezel To replace the front bezel: Align the latch pins with the computer latch holes. Press the bezel firmly into place. www.gateway.com... -
Page 64: Installing Memory
For more stability, place your computer on its side. To avoid scratching the case, place it on a towel or other non-abrasive surface. Find the memory module banks on your system board. “Removing the side panel” www.gateway.com Installing memory... - Page 65 System Properties dialog box in the General tab. , then click Performance and Maintenance . The amount of memory in your computer is shown at the System www.gateway.com “Replacing the side panel” on (if in Category view).
-
Page 66: Replacing The System Battery
Locate the old battery on the system board and note its orientation. You will need to install the new battery the same way. Replacing the system battery “Removing the side panel” Battery release tab www.gateway.com... - Page 67 Reconnect all external cables and the power cord. Turn on your computer. Open the BIOS Setup utility. In the BIOS Setup utility, restore any settings that you wrote down in Save all your settings and exit the BIOS Setup utility. “Replacing the side panel” on www.gateway.com Step...
-
Page 68: Troubleshooting
Chapter 6 Troubleshooting • Troubleshooting typical hardware and software problems... -
Page 69: Safety Guidelines
To avoid bodily injury, do not attempt to troubleshoot your computer Warning problem if: ■ ■ ■ ■ Instead, unplug your computer and contact a qualified computer technician. Power cords or plugs are damaged Liquid has been spilled into your computer Your computer was dropped The case was damaged www.gateway.com... -
Page 70: First Steps
If an error message appears on the screen, write down the exact message. The ■ message may help Gateway Customer Care in diagnosing and fixing the problem. If you added or removed peripheral devices, review the installation procedures you ■... -
Page 71: Troubleshooting
Clean the disc. For more information, see ■ Make sure that the drive is configured correctly by following the instructions in ■ the drive documentation. ■ Reinstall the device driver. “Sound” on page “Identifying drive types” on page “Cleaning CDs or DVDs” on page www.gateway.com... - Page 72 The regional code for the disc is on the disc, disc documentation, or disc packaging. If the DVD movie does not play, the disc’s regional code and your DVD drive’s regional code may not match. “Cleaning CDs or DVDs” on page “Cleaning CDs or DVDs” on page www.gateway.com Troubleshooting “Identifying...
-
Page 73: Computer
The diskette may be full. Delete unnecessary files on the diskette and try again. ■ Make sure that the diskette you are using is IBM-compatible. ■ ■ Try a different diskette. Occasionally diskettes are flawed and cannot be read by the diskette drive. , then click Start All Programs www.gateway.com Gateway... -
Page 74: Dvd Drives
Type the keyword System Restore in the Search box Start All Programs key, the file cannot be restored. HIFT icon. Recycle Bin , then click the arrow. www.gateway.com Troubleshooting , then click Gateway NTER . The file is restored to Restore... -
Page 75: Hard Drive
If your computer has been subjected to static electricity or physical shock, you may need to reinstall the operating system. You see a “Non-system disk” or “disk error” error message ■ Eject the diskette from the diskette drive, then press E Gateway Documentation Recycle Bin , then click the arrow. Start All Programs to restart your computer. -
Page 76: Internet
The complexity of graphics and multimedia on Web pages ■ ■ Having multiple Web browsers open, performing multiple downloads, and having multiple programs open on your computer , then click the arrow. www.gateway.com Troubleshooting “Back” on page 10 to make “Back” on page 10... -
Page 77: Keyboard
If the keyboard does not work after it dries, you may need to replace it. Memory You see a “Memory error” message ■ Use a third-party diagnostic program to help determine if a memory module is failing. www.gateway.com... -
Page 78: Modem (Dial-Up)
, then click the arrow. “Back” on page 10 to make sure that the connections . The Control Panel window opens. If your Control Panel Printers and Other Hardware icon, then click the Phone and Modem Options www.gateway.com Troubleshooting Dialing Rules Edit... - Page 79 48K. Your ISP may not support 48K uploads. Your fax communications program only sends and receives faxes at 14,400 bps when you have a 56K modem Current fax technology only supports a maximum send and receive rate of 14,400 bps. “Internet” on page www.gateway.com...
- Page 80 Phone and Modem Options . The Modem Properties dialog box opens. Properties tab, then click . If information about the modem Query Modem , then click the arrow. www.gateway.com Troubleshooting to make sure that the icon, then click the Modems tab.
-
Page 81: Monitor
For more information, see “Adjusting the color depth” in Using Your Tips & Tricks Computer which has been included on your hard drive. To access this guide, click Start, All Programs, then click Gateway Documentation. For more information about changing the screen resolution, click Help and Support Start, then click Help and Support. -
Page 82: Mouse
For more information, see “Adjusting the screen and desktop settings” Tips & Tricks in Using Your Computer which has been included on your hard drive. To access this guide, click Start, All Programs, then click Gateway Documentation. ■ Move the monitor away from sources of electrical interference, such as televisions, unshielded speakers, microwaves, fluorescent lights, and metal beams or shelves. -
Page 83: Networks
To test the outlet, plug a working device, such as a lamp, into the outlet and turn it on. ■ Make sure that the power cord is free from cuts or damage. Replace any damaged cables. “Cleaning the mouse” on page , then click the arrow. is turned off, then retype the password. www.gateway.com... -
Page 84: Printer
Printers and Other Hardware icon. The Printers and Faxes window opens. Printers and Faxes . The Control Panel window opens. If your Control Panel Printers and Other Hardware icon. The Printers and Faxes window opens. Printers and Faxes www.gateway.com Troubleshooting... -
Page 85: Sound
If you are using external speakers, see the speaker setup poster to check your speaker ■ connections. ■ Make sure that the universal jacks are configured correctly. For more information, “Configuring the audio jacks” on page , click Use Printer Offline , then click the arrow. www.gateway.com to clear the check mark. “Adjusting... -
Page 86: Networking Your Computer
Chapter 7 Networking Your Computer • Introducing networking • Creating an Ethernet network • Testing your network • Troubleshooting your Ethernet network... -
Page 87: Introduction To Networking
Using a router The most common way to set up an Ethernet network is Dynamic Host Control Protocol (DHCP) using a router. A DHCP network configuration uses a router to automatically assign IP addresses to each computer or network device. www.gateway.com... - Page 88 Equipment you need for a router-based Ethernet network For an Ethernet network you need: Two or more computers with Ethernet jacks ■ One router ■ One broadband Internet connection (optional) ■ ■ Ethernet cables connecting all of the network equipment www.gateway.com Introduction to Networking...
-
Page 89: Creating An Ethernet Network
Ethernet cards and drivers on the computers that do not have Ethernet already installed. To order wired or wireless Ethernet PCI or PC cards, visit the Accessories Store at accessories.gateway.com. Use the documentation that comes with your Ethernet cards for instructions on installing the card and any required drivers. -
Page 90: Making Sure Your Broadband Connection Works
. The Control Panel window opens. If your Control Control Panel Performance and Maintenance . The System Properties dialog box opens. System Computer name Workgroup www.gateway.com Creating an Ethernet network . The Performance and box. This name identifies the box. Use a workgroup name of up... -
Page 91: Configuring The Tcp/Ip Protocol
Start Panel is in Category View, click Internet Connections window opens. Click/Double-click . The Control Panel window opens. If your Control Control Panel Network and Internet Connections . The Network Connections window opens. Network Connections www.gateway.com . The Network and... - Page 92 Click The Internet Protocol (TCP/IP) Properties dialog box opens. Properties. Creating an Ethernet network , then click . The Local Area Connection Properties Create a new connection check box in the www.gateway.com and follow This connection uses the...
-
Page 93: Setting Up An Ethernet Network
This type of cable is equipped with RJ-45 connectors (like a large telephone jack connector, but with eight pins) on each end. www.gateway.com... - Page 94 In addition to a router, you need a straight-through cable for each computer you want to connect to the network. Creating an Ethernet network Cable/DSL modem Router WAN port www.gateway.com...
-
Page 95: Configuring Your Router
E http://192.168.1.1 When prompted for a username and password, leave the username box empty and type in the password box, then click admin Enter the following values in the appropriate fields: . The Setup page opens. www.gateway.com ® NTER... - Page 96 Creating an Ethernet network - Check with your ISP to see if entries are required . If your ISP requires a fixed IP , then type the values provided by your ISP. Apply “Testing your network” on page www.gateway.com Apply...
-
Page 97: Testing Your Network
Temporarily turn off any firewall software on your desktop computer ■ Turn off all of the devices, then power them back on ■ Refer to your router’s or access point’s troubleshooting information ■ ■ Contact your Internet service provider www.gateway.com “Using Your Computer... -
Page 98: Troubleshooting Your Ethernet Network
Ethernet (1000 Mbps or 10/100/1000 Mbps). A mixture of Ethernet, Fast Ethernet, and Gigabit Ethernet components will result in your network running at the slowest component speed. Troubleshooting Your Ethernet network 54. For more information about your Ethernet card, www.gateway.com... - Page 99 Chapter 7: Networking Your Computer www.gateway.com...
-
Page 100: A Safety, Regulatory, And Legal Information
Appendix A Safety, Regulatory, and Legal Information • Safety information • Regulatory statements • Notices... -
Page 101: Important Safety Information
Appendix A: Safety, Regulatory, and Legal Information Important safety information Your Gateway system is designed and tested to meet the latest standards for safety of information technology equipment. However, to ensure safe use of this product, it is important that the safety instructions marked on the product and in the documentation are followed. - Page 102 To reduce the risk of fire, use only No. 26 AWG or larger Warning telecommunications line cord. www.gateway.com...
-
Page 103: Regulatory Compliance Statements
(1) this device may not cause harmful interference, and (2) this device must accept any interference received, including interference that may cause undesired operation. Changes or modifications not expressly approved by Gateway could Caution void the FCC compliance and negate your authority to operate the product. - Page 104 Users should make sure, for their own protection, that the electrical ground connections of the power utility, telephone lines, and internal metallic water pipe system, if present, are connected together. This precaution may be particularly important in rural areas. www.gateway.com...
- Page 105 Equivalence Numbers of all the devices does not exceed 5. Laser safety statement All Gateway systems equipped with CD and DVD drives comply with the appropriate safety standards, including IEC 825. The laser devices in these components are classified as “Class 1 Laser Products” under a US Department of Health and Human Services (DHHS) Radiation Performance Standard.
- Page 106 ■ In some cases, your “end of life” product may be “traded in” for credit towards the purchase of new Gateway equipment. Call Gateway to see if this program is available in your area. ■...
- Page 107 In the interest of continued product development, Gateway reserves the right to make improvements in this manual and the products it describes at any time, without notices or obligation.
-
Page 108: Index
CD case computer exterior computer screen keyboard mouse screen closing computer case front bezel unresponsive program computers naming configuring audio jacks router speakers TCP/IP protocol connecting modem PS/2 keyboard PS/2 mouse to Ethernet network to Internet to network www.gateway.com... - Page 109 Help and Support online help Using Your Computer domain name drives diskette identifying drive types recordable CD recordable DVD troubleshooting types DSL modem connecting cleaning controlling play with keyboard drive inserting playing recording troubleshooting DVD drive identifying locating drive www.gateway.com...
- Page 110 Help and Support topics specifications Firewire port front bezel removing replacing function keys Gateway eSupport serial number Gateway contact information Gigabit Ethernet hard drive troubleshooting headphone jack help button online using Help and Support searching starting Hibernate mode i.Link port...
- Page 111 PS/2 port troubleshooting USB port Multifunction keyboard features multimedia adjusting volume playing DVD using DVD drive using Windows Media Player muting sound My Documents button name computer domain router workgroup naming computers workgroup www.gateway.com...
- Page 112 DVDs resetting computer restarting computer restoring system Resume mode router configuring name S/PDIF jack safety avoiding repetitive strain caring for computer general precautions guidelines for troubleshooting posture reducing eye strain setting up computer static electricity www.gateway.com...
- Page 113 Web site connection speed turning off computer turning on computer TV out (S-Video out) jack uninterruptible power supply (UPS) updating device drivers Norton Internet Security Windows USB port www.gateway.com...
- Page 114 WAN IP Address Web browser button Windows Product Key Code restoring Windows key Windows Media Player Windows Security Center using Windows Update wired Ethernet troubleshooting workgroup naming working safely Zip drive identifying locating drive using www.gateway.com...
- Page 115 www.gateway.com...
- Page 116 MAN E-6500 USR GDE R0 6/05...