Table of Contents
Advertisement
Quick Links
Advertisement
Table of Contents

Related Manuals for Planar SA2311W


Summary of Contents for Planar SA2311W
- Page 1 2311W 3D Ready Monitor www.planar3d.com...
-
Page 2: Table Of Contents
Contents Preface ........................1 Warning.....................................1 Safety Precaution................................3 Installation........................4 Introduction ...................................4 Features ...................................4 Unpacking ..................................5 Preparing The Monitor For Wall-Mounting ......................6 Screen Position Adjustment .............................8 Connecting Cables. -
Page 3: Preface
Preface The information contained in this document is subject to change without notice. This document contains proprietary information that is protected by copyright. All rights are reserved. No part of this document may be reproduced, translated to another language or stored in a retrieval system, or transmitted by any means, electronic, mechanical, photocopying, recording, or otherwise, without prior written permission. -
Page 4: Canadian Doc Notice
Canadian DOC Notice This Class B digital apparatus meets all requirements of the Canadian Interference-Causing Equipment Regulations. Cet appareil numérique de la classe B repecte toutes les exigences du Règlement sur le matériel Important Recycle Instruction: Lamp(s) inside this product contain mercury. This product may contain other electronic waste that can be hazardous if not disposed of properly. -
Page 5: Safety Precaution
Safety Precautions Avoid placing the monitor, or any other heavy object, on the power cord to prevent it from fire or electrical shock. Do not expose the monitor to rain, excessive moisture, or dust to avoid fire or shock hazard. Do not cover the slots or openings of the monitor for proper heat dissipation. -
Page 6: Installation
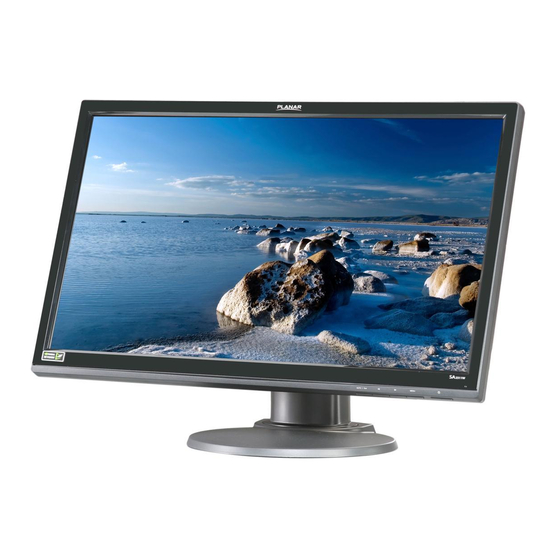
Installation Introduction Congratulations on your purchase of the SA2311W high performance LCD monitor. This 23-inch wide- format monitor is 3D ready with full HD resolution for both professional and entertainment use. Features * 23 “ TFT Color LCD monitor * 16:9 Widescreen... -
Page 7: Unpacking
Unpacking Please check that the following items are present when you unpack the box. We recommend you save the packaging for future use. LCD Monitor 2311W 3D Monitor User Guide AC Power Cord 15-pin D-Sub Cable DVI Cable... -
Page 8: Preparing The Monitor For Wall-Mounting
Preparing The Monitor For Wall-Mounting 1. Lay the LCD monitor on a flat surface with the LCD screen face down. To prevent the monitor from being scratched, put a soft cloth on the table. 2. Use a screw driver to release the four screws from the stand pedestal as below. 3. - Page 9 5. The rear of this LCD display has 4 integrated 4 mm, 0.7 pitches threaded nuts. Use the four holes (A), (B), (C), and (D) to attach the swing arm or other mounting fixture to the back of the monitor with screws (not supplied). Note: The wall-mount uses the 100mm x 100mm spacing standard.
-
Page 10: Screen Position Adjustment
Screen Position Adjustment In order to optimize the best viewing position, you can adjust the monitor as shown in the figures below. Height adjust 80 mm Tilt Swivel... -
Page 11: Connecting Cables
Connecting Cables To connect the monitor to your PC, please follow the steps as given below: HDMI HDMI Steps Connect one of the cables: VGA, DVI or HDMI. Make sure both the monitor and computer are turned off. 1-1.Connect VGA Cable Connect the blue VGA video cable to the computer. -
Page 12: Settings For Stereoscopic 3D Use
Settings for Stereoscopic 3D Use Below are the requirements for stereoscopic 3D viewing: 1. Planar SA2311W 3D Ready Monitor with dual link DVI cable. ® 2. PC with compatible NVIDIA graphics card. See ® http://www.nvidia.com/object/quadro_pro_graphics_boards.html for compatible Quadro cards and drivers used for professional applications. See www.nvidia.com/3dvision... - Page 13 For the Quadro graphics cards, go to the nVidia Control Panel and enable stereo in the “Manage 3D Settings” tab. When connecting the 3D Vision Ready monitor: For boards with the stereo connector, select “On-board DIN connector (with NVIDIA IR Emitter)” and plug in the 3 pin mini-din to 1/8” stereo cable that came with your 3D Vision glasses kit.
-
Page 14: Display Controls
Display Controls Front Panel Controls Icon Description Auto adjust screen display . Press 5 seconds to auto detect the input AUTO / Exit source or manually select the input source. Exit from the present OSD menu. Backward selection of the OSD menu. Decrease the value after sub-menu selected. -
Page 15: Lock Function
OSD Lock Function OSD lock – all 4 buttons are locked except the “POWER” button. When monitor is in normal condition, press the “Menu” and “ ” buttons more than 10 seconds to lock the OSD function. Repeat this step to unlock the OSD. The monitor will show the “OSD Lock”... -
Page 16: Osd Operation
OSD Operation Pressing the MENU button brings up the first level menu. This menu button is also used to enter the sub- OSD menu . Picture Item Content Brightness Adjusts brightness. Contrast Adjusts contrast. H. position Adjusts picture's horizontal position. V. -
Page 17: Other Settings
Other Settings Item Content Language Select different languages of the OSD. Input Select Select the input source for VGA, DVI or HDMI. Reset Resets monitor to original settings. Information Content Shows important information about the monitor. -
Page 18: Technical Information
Technical Information Specifications Model Name Planar SA2311W LCD Display Display Type 23" TN Type LCD Display Area 509.76(H)x286.74(V) mm Input Voltage 100-240Vac VGA: , 30KHz ~ 80kHz , 55Hz~76Hz Frequency DVI: , 30KHz ~ 138kHz , 56Hz~120Hz Operational Features Display Colors 16.7M... -
Page 19: Supported Timing
Supported Timing H-frequency V-frequency Pixel rate Resolution VESA 640 õ 480 31.469 59.941 25.175 640 õ 480 66.66 30.24 VESA 640 õ 480 37.861 72.809 31.5 VESA 640 x480 37.5 31.5 VESA 720 õ 400 31.469 70.087 28.322 VESA 800 õ 600 35.156 56.25 VESA... -
Page 20: Troubleshooting
Screen has one or more lines Vertical if these lines are also in self-test mode. Lines Check for bent or broken pins in the video cable connector. Safety Do not perform any troubleshooting steps. Related Visible signs of smoke or sparks Contact PLANAR immediately. Issues... -
Page 21: Product Registration And Technical Support
Product Registration and Technical Support Register Your Planar Products Today Thank you for choosing Planar. To assure you receive all the benefits of your Planar product and services, register your Planar product today. Visit our website to register your product at http://www.planar.com/support/product_registration.html... - Page 22 020-1052-00 49.7J301.002...