Table of Contents
Advertisement
Quick Links
All about the
Use
of your
Important Safety Instructions ..............................2-5
Features ...............................................................6
Operating Instructions ...................................... 7-13
Care and Cleaning ............................................... 14
Solutions to Common Problems ....................... 15-16
&
Dryer
TA B L E O F C O N T E N T S
Care
Warranty ............................................................ 17
Notes ................................................................. 18
Français ..............................................................19
Español .............................................................. 37
Advertisement
Table of Contents

Related Manuals for Frigidaire FFQE5100PW


Summary of Contents for Frigidaire FFQE5100PW
-
Page 1: Table Of Contents
All about the & Care of your Dryer TA B L E O F C O N T E N T S Important Safety Instructions ......2-5 Warranty ............17 Features ...............6 Notes ..............18 Operating Instructions ........7-13 Français ..............19 Care and Cleaning .......... -
Page 2: Important Safety Instructions
IMPORTANT SAFETY INSTRUCTIONS WARNING For your safety the following information in this manual must be followed to minimize the risk of fi re or explosion or to prevent property damage, personal injury or death. Do not store or use gasoline or other fl ammable vapors and liquids in the vicinity of this or any other appliance. - Page 3 IMPORTANT SAFETY INSTRUCTIONS Product Record WARNING Please read all instructions before using this dryer. Record Your Model and Serial Numbers The model and serial numbers of your dryer are found on the dryer serial plate located inside the door opening. Record and retain these numbers.
-
Page 4: Important Safety Instructions
IMPORTANT SAFETY INSTRUCTIONS 240 v Electric Dryer 240 v Electric Dryer 120 v Gas Dryer 120 v Gas Dryer Grounding type Grounding type wall receptacl ll receptacle 10-30R 10-30R UL-approved service UL-approved service 3-wire 3-wire Do not, Do not, under under an any cir y circumstances,... - Page 5 IMPORTANT SAFETY INSTRUCTIONS PROTECT CHILDREN • ALWAYS disconnect the dryer from the electrical supply • Do not allow children to play on or in the dryer. Close before attempting any service or cleaning. Failure to do so supervision of children is necessary when the dryer is can result in electrical shock or injury.
-
Page 6: Features
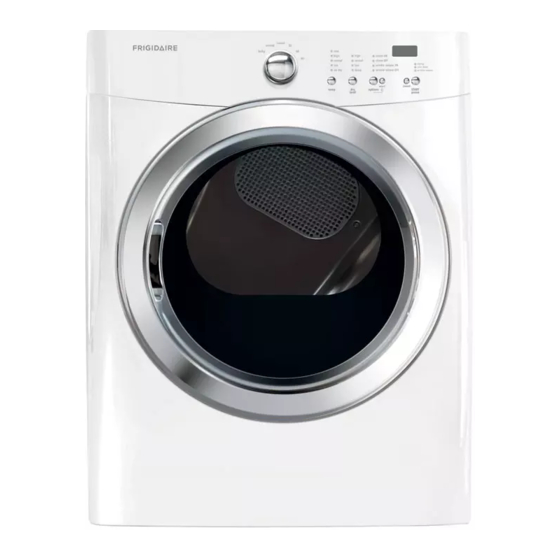
FEATURES Cycle Selector LED Display Control Lock Reversible Door Drum Light Large Surface Moisture Sensor Door Latch Exhaust Channel Outlet Door Strike Adjustable Leveling Legs Heavy Duty Drying Rack* Lint Filter Stacking Kit for Mounting on Matching Washer* *Not all models come with drying rack and stacking kit from the factory. -
Page 7: Operating Instructions
OPERATING INSTRUCTIONS Normal Operating Sounds You may or may not hear the following sounds from your new dryer: A. SUSPENSION ROLLERS The dryer drum is supported by a set of suspension rollers. At times there may be a thumping or rolling sound when the dryer starts. - Page 8 OPERATING INSTRUCTIONS Operating Your Dryer, continued • Adjustments made to a cycle will be remembered Check that the lint fi lter is and recalled each time that cycle is selected in the clean and in place. future. To return to factory CAUTION settings, press these two buttons at the...
-
Page 9: Cycle Selection
OPERATING INSTRUCTIONS This manual covers many models and not all cycles, options, or features listed are available on every model. Consoles shown above for reference only. Your model may differ. Cycle Selection Turn the cycle selector in either direction to the cycle When the load has reached the selected dryness level, it desired. -
Page 10: Cycle Options
OPERATING INSTRUCTIONS Cycle Settings Dryness Level (Auto Dry) For best results To change the preset level, press the dry level button to scroll to the degree of dryness desired. Follow the fabric care label instructions on items To protect your fabrics, not all dryness levels are available to be dried. -
Page 11: Other Features
OPERATING INSTRUCTIONS Other Features Drying Rack (on select models) Use the drying rack for items which should not be tumble rear front support dried. Insert the rack into the dryer drum, resting the legs back support on the moisture sensor bars and the front legs on the air grill. -
Page 12: Operating Instructions
OPERATING INSTRUCTIONS Dryer Settings Chart These Temperatures, Dryness levels and Options are available with the following cycles: temp high normal air dry dry level high normal damp options wrinkle release chime = Available selections. = Cycle defaults. = Non-modifi able presets. -
Page 13: Care And Cleaning
CARE AND CLEANING WARNING WARNING FIRE HAZARD To reduce risk of fi re or serious injury to persons or A clothes dryer produces combustible lint. The property, comply with the basic warnings listed in the dryer must be connected to an outdoors exhaust. Important Safety Instructions and those listed below. -
Page 14: Solutions To Common Problems
SOLUTIONS TO COMMON PROBLEMS Common Drying Problems Many drying problems involve poor cleaning results, poor soil and stain removal, residues of lint and scum, and fabric damage. For satisfactory drying results, follow these suggestions provided by The Soap and Detergent Association. PROBLEM POSSIBLE CAUSES SOLUTIONS... -
Page 15: Solutions To Common Problems
SOLUTIONS TO COMMON PROBLEMS Avoid Service Checklist Before calling for service, review this list. It may save both time and expense. The list includes common occurrences that are not the result of defective workmanship or materials in this dryer. OCCURRENCE POSSIBLE CAUSE SOLUTION Dryer does not start. -
Page 16: Warranty
MAJOR APPLIANCE WARRANTY INFORMATION For the applicable warranty period as set forth below, as measured from your original date of purchase, Electrolux will repair or replace any parts of this appliance that prove to be defective in materials or workmanship when such appliance is installed, used and maintained in accordance with the provided instructions.