LG DLE1310W User Manual
Hide thumbs
Also See for DLE1310W:
- Specifications (2 pages) ,
- Manual (76 pages) ,
- User's manual & installation instructions (68 pages)
Table of Contents
Advertisement
Available languages
Available languages
To contact LG Electronics, 24 hours a day,
7 days a week:
1=800=243=0000
Or visit us on the Web at: us.lge.com
DRYERS
USER'S GUIDE&
INSTA//MIONINSTRUCTIONS
Before beginning
installation,
read these
instructions
carefully. This wll simplify installation
and ensure that the dryer is installed correctly
and
safely. Leave these instructions
near the dryer
after installation
for future reference.
Pour contacter LG Electronics, 24 heures
par jour, 7 jours par semaine
1-800-243-0000
ou visitez notre site Web a I'adresse
us.lge.com
SECADORAS
GUIADE[ USUARIO E
INSTRUCCIONES DE INSTA/ACION
Antes
de comenzar
[a JnstalacJ6n,
lea atentamente
estas instrucciones.
Esto simplificara
[a instalaciOn
y asegurara
que
[a secadora
esta
instalada
en forma
correcta
Y segura.
Conserve
estas
instrucciones
cerca
de
[a secadora
[uego
de
[a
instalaciOn
para
futuras
consultas.
Models/Modelos
Electric/Electrica Cas/Cas
DLE1310W
DLG1320W
P/No.
3828EL3004L
Advertisement
Chapters
Table of Contents

Related Manuals for LG DLE1310W


Summary of Contents for LG DLE1310W
- Page 1 To contact LG Electronics, 24 hours a day, 7 days a week: 1=800=243=0000 Or visit us on the Web at: us.lge.com Pour contacter LG Electronics, 24 heures par jour, 7 jours par semaine DRYERS 1-800-243-0000 ou visitez notre site Web a I'adresse us.lge.com...
-
Page 2: Table Of Contents
Safety Instructions for Connecting Electricity ..7 Congratulations on your purchase PARTS AND FEATURES and welcome to the LG family. Your Key Parts and Components ........INSTALLATION INSTRUCTIONS new LG Dryer combines the most Choose the Proper Location ........Clearances ............. -
Page 3: Important Safetyinstructions
IMPORTANT SAFETYiNSTRUCTiONS READ ALL iNSTRUCTiONS BSFORE WARNING safety, For your the information in this manual must be followed to minimize the risk of fire or explosion, electric shock, or to prevent property damage, personal injury, or loss of life. Your Safety and the safety of others is very important. -
Page 4: What To Do If You Smell Gas
I PORTANTSAFETYiNSTRUcTiONS R_:AD ALL iNSTRUCTiONS BSFORS _WARNING safety, For your the information in this manual must be followed to minimize the risk of fire or explosion, electric shock, or to prevent property damage, personal injury, or loss of life. • installation and service must be •... -
Page 5: Grounding Instructions
I PORTANTSAFETYINSTRUCTIONS READ ALL iNSTRUCTiONS BSFORE WARNING safety, For your the information in this manual must be followed to minimize the risk of fire or explosion, electric shock, or to prevent property damage, personal injury, or loss of life. GROUNDING iNSTRUCTiONS This appliance must be grounded. -
Page 6: Safety Instructions For Installation
I PORTANTSAFETYiNSTRUcTiONS R :AD ALL iNSTRUCTiONS BI=FORI: USS WARNING safety, For your the information in this manual must be followed to minimize the risk of fire or explosion, electric shock, or to prevent property damage, personal injury, or loss of life. SAFETY iNSTRUCTiONS FOR iNSTALLATiON Exhaust/Ducting: •... -
Page 7: Safety Instructions For Connecting Electricity
I PORTANTSAFETYINSTRUCTIONS READ ALL INSTRUCTIONS BEFORE WARNING safety, For your the information in this manual must be followed to minimize the risk of fire or explosion, electric shock, or to prevent property damage, personal injury, or loss of life. SAFETY iNSTRUCTiONS FOR CONNECTING ELECTRiCiTY WARNING: To reduce the risk of fire, electric shock, or injury to persons when using this appliance, follow basic precautions, including the following:... -
Page 8: Parts And Features
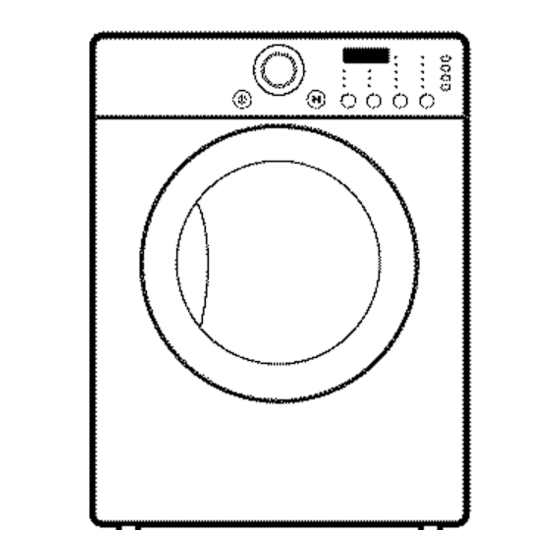
PARTSAND FEATU ES KEY PARTS AND COMPONENTS EASY-TO-USE CONTROL PANEL Rotate the Cycle Selector Knob to select the desired dry cycle. Add cycle options or adjust I.._.._ settings with the touch of a button. O(_OkOOS _ LED DISPLAY The easy-to-read LED display shows cycle options and information and provides status messages during operation. -
Page 9: Installation Instructions
INSTALLATION INSTRUCTIONS iMPORTANT: Read all installation instructions completely before installing and operating your dryer! it is important that you review this entire manual before installing and using your dryer. Detailed instructions concerning electrical connections, gas connections, and exhaust requirements are provided on the following pages. -
Page 10: Installation With Optional Pedestal Base Or Stacking Kit
1"-_1 I -_ 27" _ I_1-1" (2.54 cm) (68.6 cm) (2.54 cm) OPTIONAL ACCESSORIES For these and other LG products, contact your local LG dealer, or visit our Web site at us.lge.com s¢ [ _% Stacking Pedestal (sold separatelW (sold separately) -
Page 11: Leveling The Dryer
INSTALLATION INSTRUCTIONS LEVELING THE DRYER WARN|NG • All four leveling feet must rest solidly on the floor. Gently push on the top corners of the dryer to make sure that the dryer does not • Wear gloves during installation. rock from corner to corner. •... -
Page 12: Changing The Dryer Vent Location
__,,J Remove the rear exhaust duct retaining An adapter kit, part number 383EEL9001B, screw. Pull out the exhaust duct. may be purchased from your LG retailer. This kit contains the necessary duct components to change the dryer vent location. venting... -
Page 13: Venting The Dryer
INSTALLATION INSTRUCTIONS VENTING THE DRYER WARN|NG: to reduce the risk of fire, electric shock, or injury to persons when using this appliance, follow basic precautions, including the following: , Do not crush or collapse ductwork. Failure , Rigid or semirigid metal ducting to follow these instructions can result in fire recommended... -
Page 14: Venting The Dryer
INSTAllATION INST UCTIONS VENTING THE DRYER (cont.) DUCtWOrk 65 ft. (19.8 m) 45 ft. (13.7 m) Recommended 55 ft. (16.8 m) 35 ft. (10.7 m) 47 ft. (13.7 m) 36 ft. (11.0 m) 30 ft. (9.1 m) 25 ft. (7.6 m) /_02om/ /_02om/ 28 ft. -
Page 15: Connecting Gas Dryers
INSTALLATION INSTRUCTIONS cONNEcTiNG GAS DRYERS _I_WAR_I_ =--To reduce the risk of fire, electric shock, or injury to persons when using this appliance, follow basic precautions, including the following: • Gas supply requirements: = Connect the dryer to the type of gas shown As shipped from the factory, this dryer... -
Page 16: Connecting Gas Dryers
INSTALLATION INSTRUCTIONS CONNECTING GAS DRYERS (cont.) WARN|NG: To reduce the risk of fire, electric shock, or injury to persons when using this appliance, follow basic precautions, including the following: • Installation and service must be performed If necessary, the correct nozzle (for the LP nozzle kit order part number 4948EL4002B) by a qualified... -
Page 17: Connecting Electric Dryers
INSTALLATION INSTRUCTIONS cONNEcTiNG ELEcTRic DRYERS _WARN|_I_G -= To help prevent fire, electric shock, serious injury, or death, the wiring and grounding must conform to the latest edition of the National Electrical Code, ANSI/NFPA 70 and all applicable local regulations. Please contact a qualified electrician to check your home's wiring and fuses to ensure that your home has adequate electrical power to operate the dryer. - Page 18 INSTALLATION INSTRUCTIONS CONNECTING ELECTRIC DRYERS (cont.) ,AWARN|NG: . Connect the power cord to the terminal block. Each colored wire should be connected same color screw. Wire color indicated on manual is connected to the same color screw in block. Failure to follow these instructions...
- Page 19 INSTA[[MION INSTRUCTIONS cONNEcTiNG ELEcTRic DRYERS {cont.) WARNING: • Connect the power cord to the terminal block. Each colored wire should be connected same color screw. Wire color indicated on manual is connected to the same color screw in block. Failure to follow these instructions...
- Page 20 INSTALLATION INSTRUCTIONS CONNECTING ELECTRIC DRYERS (cont.) ,AWARN|NG: . Connect the power cord to the terminal block. Each colored wire should be connected same color screw. Wire color indicated on manual is connected to the same color screw in block. Failure to follow these instructions...
-
Page 21: Connecting Electric Dryers
INSTA[LMION INSTRUCTIONS cONNEcTiNG ELEcTRic DRYERS {cont.) WARNING: • Connect the power cord to the terminal block. Each colored wire should be connected same color screw. Wire color indicated on manual is connected to the same color screw in block. Failure to follow these instructions... -
Page 22: Special Requirements For Manufactured Or Mobile Homes
INSTA[[ATION INSTRUCTIONS SPECIAL REQUIREMENTS FOR MANUFACTURED OR MOBILE HOMES Any installation in a manufactured or mobile • The dryer exhaust duct must be affixed securely to the manufactured or mobile home structure, home must comply with the Manufactured Home and the exhaust duct must be made of a Construction and Safety Standards Title 24 CFR, Part 32-80 or Standard CAN/CSAOZ240 MH and... -
Page 23: Howto Use
HOWTO USE Following are instructions for starting and using your new dryer. Please refer to specific sections of this manual for more detailed information. Important Warning: To reduce the risk of fire, electric shock, or injury to persons, read this entire manual, including the important Safety instructions, before operating this dryer. -
Page 24: Control Panel Features
flOW TO USE CONTROL PANEL FEATURES Following are instructions for starting and using your new dryer. Please refer to specific sections of this manual for more detailed information, important Warning: TO reduce the risk of fire, electric shock, or injury to persons, read this entire manual, including the important Safety instructions, before operating this dryer. -
Page 25: Cycle Guide
Adjustable Adjustable Sensor Dry Cycles Manual Dry Cycles Sensor Dry cycles utilize LG's unique dual sensor Use Manual Dry cycles to select a specific system to detect and compare the moisture level amount of drying time and a drying temperature. -
Page 26: Operating The Dryer
OW TO USE OPERATING THE DRYER once you have loaded the dryer: Press the ON/OFF button to turn on the Press the START/PAUSE button to begin the dryer. The lights around the cycle cycle. The display will change, selector knob will illuminate. and the dryer will display the estimated (SENSOR DRY) or set time (MANUAL DRY) remaining... -
Page 27: Cycle Setting Buttons
TO USE CYCLE SETTING BUTTONS SENSOR DRY cycles have preset settings NOTE: To protect your garments, not every that are selected automatically and cannot be dryness level, temperature, or option is available changed. MANUAL DRY cycles have default with every cycle. See the Cycle Guide for details. settings, but you may also customize the settings using the cycle setting buttons. -
Page 28: Cycle Option Buttons
HOWTO USE CYCLE OPTION BUTTONS Your dryer features several additional cycle options to customize cycles to meet your individual needs. Certain option buttons also feature a special function (see the following page for details) that can be activated by pressing and holding that option button for 3 seconds. -
Page 29: User-Maintenanceinstructions
USER-MAINTENANcEINSTRUCTIONS REGULAR CLEANING _WARN|NG -= To reduce the risk of fire, electric shock, or injury to persons when using this appliance, follow basic precautions, including the following: • Unplug the dryer before cleaning to avoid the risk of electric shock. Failure to follow this warning can cause serious injury, fire, electrical shock, or death. -
Page 30: Before Calling For Service
f OU [[S OOTING BEFORE CALLING FOR SERVICE Your dryer is equipped with an automatic error-monitoring system to detect and diagnose problems at an early stage. If your dryer does not function properly or does not function at all, check the following before you call for service. - Page 31 TflOU [ESHOOTING BEFORE cALLiNG FOR SERVICE {cont.) The drying time for a load will vary depending on the Drying time is not • Heat settings, load size, or consistent dampness of clothing is not heat setting, the type of heat used (electric, natural, consistent.
-
Page 32: Specifications/Optional Accessories
IEC 7.0 cu. ft. (22.5 Ibs./10.2 kg) \.._Drying Capacity *Refer to the rating plate on your dryer. OPTIONAL ACCESSORIES For these and other LG products, contact your local LG dealer, or visit our Web site at usJge.com Lr Dit= .. -
Page 33: Pedestal Installation
OPTIONA[ ACCESSORIES PEDESTAL iNSTALLATiON To ensure safe and secure installation, please The pedestal accessory includes: thoroughly follow the instructions below. = Drawer divider (1) = Wrench (1) • Screws (18) 1- • Retainers (4) 1-1- ,WARNING • incorrect installation can cause serious accidents. -
Page 34: Pedestal Installation
OPTIONAl ACCESSO IES PEDESTAL iNSTALLATIONccont.) For dryer For washer/combo Place the dryer on the pedestal. Make sure Make sure the screws on the pedestal align the front and back feet are in the correct with the holes in the retainers, then install 4 positions. -
Page 35: Stacking Kit Installation
OPTIONALACCESSORIES STACKING KIT iNSTALLATiON To ensure safe and secure installation, please This stacking kit includes: observe the following instructions. = Two (2) side rails WARNING = One (1) front rail ,, Four (4) screws = incorrect installation can cause serious accidents. -
Page 36: Stacking Kit Installation
OPTIONAl ACCESSO IES STACKING KiT iNSTALLATiON _cont._ Dryer Washer Insert the front rail between the bottom of fitting the dryer feet into the side brackets as the dryer and the top of the washer. Push the front rail toward the back of the washer until it illustrated. -
Page 37: Warranty
Your LG Dryer will be will repaired or replaced, at LG's option, if it proves to be defective in material or workmanship under normal use, during the warranty period ("Warranty Period") set forth below, effective from the date ("Date of Purchase") of original consumer purchase of the product. - Page 38 Instrucciones importante para la instalaci6n.. 41,42 Instrucciones importante para conectar Felicitaciones por su compra la electricidad ............bienvenido a la familia LG. Su PIEZAS Y CARACTERJSTICAS Piezas y componentes clave ........ nueva Secadora LG combina INSTRUCClONES PARA LA INSTALAClON tecnologia...
- Page 39 INSTBUcclONES IMPOBTANTE DE SEGUBIDAD I.SA TODAS LA INSTRUCCIONSS ANTSS DS USAR ADVERTENCiA Por su seguridad, debe seguir la informaci6n indicada en este manual para minimizar el riesgo de incendio o e×plosi6n, descarga el_ctrica, o para prevenir dahos a la propiedad, lesiones personales, o muerte.
-
Page 40: Qu6 Hacer Si Huele Gas
INSTRUccIONESI PO TANTEDE SEGURIDAD LEA TODAS LA |NSTRUCC|ONES ANTES DE USAR _ADVERTENC|A po, _u_gurid_d, _ d_b_ _ g_,ir i_ infor_oi6n indicada en este manual para rninirnizar el riesgo de incendio o explosi6n, descarga el_ctrica, o para prevenir dahos a la propiedad, lesiones personales, o rnuerte. -
Page 41: Instrucciones De Conexi6N A Tierra
INSTBUccIONES IMPOBTANTE DE SEGUBIDAD LSA TODAS LA |NSTRUCCiONES ANTSS DS USAR ADVERTENCiA i.fo oi6. indicada en este manual para minimizar el riesgo de incendio o e×plosi6n, descarga el_ctrica, o para prevenir dahos a la propiedad, lesiones personales, o muerte. INSTRUCClONES DE CONEXI0N A TIERRA Este electrodomestico deber_, estar conectado... -
Page 42: Instrucclones Importante De Seguridad
INSTRUcclONES I PO TANTEDE SEGURIDAD LEA TODAS LA |NSTRUCC|ONSS ANTSS DS USAR indicada en este manual para rninirnizar el riesgo de incendio o explosi6n, descarga el_ctrica, o para prevenir dahos a la propiedad, lesiones personales, o rnuerte. INSTRUCCIONES IMPORTANTE PARA LA INSTALACION Conducto de escape/Tuberia: •... -
Page 43: Importante Para Conectar
INSTBUcclONES IMPOBTANTE DE SEGUBIDAD LSA TODAS LA |NSTRUCC|ONES ANTSS DS USAR _ADVERTENC|A po,_. _g._id_d. _ d_b_ _g.i_ I_i.fo,_oi6. indicada en este manual para minimizar el riesgo de incendio o e×plosi6n, descarga el_ctrica, o para prevenir dahos a la propiedad, lesiones personales, o muerte. -
Page 44: Piezas Y Componentes Clave
PIEZASY cARAcTE [STICAS PIEZAS Y COMPONENTES CLAVE PANEL DE CONTROL FAClL PARA USAR Gire la perilla selectora de ciclos al ciclo de secado deseado. Afiada los ajustes de ciclo o programe las opciones con el toque de un bot6n. PANTALLA DE LED La pantalla LED de facil lectura muestra las opciones e informaci6n de ciclo e indica mensajes de estado durante el funcionamiento. -
Page 45: Escoja El Lugar Adecuado
INSTRUcclONESPARA[A INSTA[AclON IMPORTANTE: iLea todas las instrucciones de instalacion completamente antes de instalar y hacer funcionar su secadora! Es importante que revise todo este manual antes de instalar y usar su secadora. Se proporcionan instrucciones detalladas pertinentes alas conexiones electricas, de gas, y los requisitos de escape en las siguientes paginas. -
Page 46: O Kit De Apilado Opcionales
1,,_11-,-- 27,, _ I_1,, (2,54 cm) (68,6 cm) (2,54 cm) ACCESORIOS OPCIONALES Para estos y otros productos LG, Ilame a su distribuidor LG local, o visite nuestro sitio Web en us.lge.com. l"_, ....... ' Pedestal Kit de apilado (Adquirido pot separado) -
Page 47: Nivelaci6N De La Secadora
INSTRUcclONESPARA/A INSTA[AclON BilVELACl0N DE LA SECADORA ADVERTENC|A Las 4 patas niveladoras deberan apoyarse firmemente en el piso. Empuje suavemente las esquinas superiores de la secadora para • Use guantes durante la instalaci6n. asegurarse de que su secadora no se mece Si no se cumple con esta advertencia se podran de esquina a esquina. -
Page 48: De Ventilaci6N De La Secadora
INSTRUcclONES PARAI_AINSTAI_AclON COMO CAMBIAR LA UBiCACl0N DEL CONDUCTO DE VENTILACiON DE LA SECADORA , ADVIERTENC|A Tornillo de • Utilice material para ventilaci6n de metal pesado. • No utilice conductos de plastico o aluminio delgado. Use guantes durante la instalaci6n. Si no cumple con estas instrucciones puede resultar... - Page 49 INSTRUcclONES PARA/A INSTA[AclON CONEXION DEL CONDUCTO DE VENTILACION DE LA SECADORA ,ADVERTENC|A: Para reducir el riesgo de incendio, descargas electricas, o heridas al usar su electrodomestico, siga las precauciones basicas, incluyendo Io siguiente: • No aplaste ni doble el sisterna de conducto. •...
- Page 50 INSTRUcciONES PARA[A iNSTA[AciON CONEXI0N DEL CONDUCTO DE VENTiLACi0N DE LA SECADORA ccont.) $istema de conducto 65 pies (19,8 m) 45 pies (13,7 m) Recomendado 55 pies (16,8 m) 35 pies (10,7 m) 47 pies (13,7 m) 30 pies (9,1 m) 36 pies (11,0 m) 25 pies (7,6 m) (10.2...
-
Page 51: Conexi6N De Secadoras A Gas
INSTRUcclONESPARA/A INSTA[AclON CONEXION DE SECADORAS A GAS ADVERTENCiA: Para reducir el riesgo de incendio, descargas electricas o heridas al usar su electrodomestico, siga las precauciones basicas, incluyendo Io siguiente: = Requisitos de suministro de gas: Conecte la secadora al tipo de gas indicado en Como enviado de fabrica, si configura la secadora la placa del hombre. - Page 52 INSTRUcclONES PARALA INSTALAclON CONEXI0N DE SECADORAS A GAS ccont.) ADVERTENC|A: Para reduoir el r iesgo de electricas incendio, descargas o hefidas al usar su electrodomestico, siga las precauciones basicas, incluyendo Io siguiente: = La instalaci6n y ei mantenimiento deben se usar_ (gas natural o petr61eo liquido, LP).
-
Page 53: C6Mo Conectar Las Secadoras El6Ctricas
INSTRUcclONESPARA/A INSTA[AclON C0MO CONECTAR LAS SECADORAS ELECTRlCAS ADVERTENCiA: Para ayudar a evitar incendios, descargas electricas, heridas graves, o muerte, el cableado e instalaci6n a tierra deben cumplir con la L_ltima edici6n del C6digo Electrico Nacional, ANSI/NFPA 70 y todas las regulaciones locales aplicables. Pot favor comuniquese con un electricista calificado para que controle el cableado y los fusibles y asi asegurar que su casa posee energia electrica adecuada para operar la secadora. - Page 54 INSTRUcclONES PARAI_AINSTA[AclON C0MO CONECTAR LASSECADORAS ELECTRICAS(cont.) ADVERTENCiA: Conecte el cable de suministro de corriente ai bioque terminal. Cada cable se debe conectar al tornilio del mismo color. El color del cable que figura en el manual se conecta el torniilo del rnisrno color en el bioque.
- Page 55 INSTRUcCIONESPARA/A INSTA/AclON C0MO CONECTAR LAS SECADORAS ELI CTRlCAS (cont.) ADVERTENC|A: Conecte el cable de suministro de corriente al bloque terminal. Cada cable se debe conectar al tornillo del mismo color. El color del cable que figura en el manual se conecta el tornillo del mismo color en el bloque.
- Page 56 INSTRUcclONES PARA[A INSTA[AclON C0MO CONECTAR LAS SECADORAS ELECTRICAS (cont.) ADVERTENCiA: , Conecte el cable de surninistro de corriente ai bioque terminal. Cada cable se debe conectar al tornilio del mismo color. El color del cable que figura en el manual se conecta el tornillo dei misrno...
- Page 57 INSTRUcclONES PARA[A INSTA[AclON C0MO CONECTAR LAS SECADORAS ELECTRlCAS (cont.) ADVERTENCiA: Conecte el cable de suministro de corriente al bloque terminal. Cada cable se debe conectar al tornillo del mismo color. El color del cable que figura en el manual se conecta el tornillo del mismo color en el bloque.
-
Page 58: Requisitos Especiales Para Viviendas M6Viles O Prefabricadas
INSTRUcclONES PARA[A INSTA[AclON REOUISITOS ESPE¢iALES PARA VIVIENDAS MOVILES 0 PREFABRICADAS Cualquier instalaciOn en una vivienda mOvil o • El conducto de escape de la secadora debe prefabricada debe realizarse de conformidad estar bien fijado a la estructura de la vivienda los Estandares de seguridad y construcciOn de m0vil o prefabricada, y el conducto de escape debe estar fabricado de un material resistente... -
Page 59: Clasificaci6N De Cargas
cOmo usaR A continuaci6n encontrara instrucciones para comenzar a usar su secadora nueva. Para mas informaci6n pot favor consulte las secciones especificas de este manual. Advertencia importante: Para reducir el riesgo de incendios, descargas el_ctricas, o heridas, lea este manual en su totalidad, incluyendo las Instrucciones Importantes... -
Page 60: Caracteristicas Del Panel De Control
0 USAR ¢ARACTER|STiCAS DEL PANEL DE CONTROL A continuaci6n encontrara instrucciones para comenzar a usar su secadora nueva. Para mas informaci6n pot favor consulte las secciones especificas de este manual. Advertencia importante: Para reducir el riesgo de incendios, descargas el_ctricas, o heridas, lea este manual en su totalidad, incluyendo las Instrucciones... -
Page 61: Guia De Ciclos
Los ciclos de secado por sensor utilizan el sistema Use los ciclos de secado manual para exclusivo de sensor doble de LG para detectar y seieccionar una cantidad especifica de tiempo y comparar el nivel de humedad en las prendas yen temperatura de secado. -
Page 62: Funcionamiento De La Secadora
0 USAR FUN¢iONAMIENTO DE LA SECADORA Una vez que ha cargado la secadora: Apriete el bot6n encendido/apagado (ON/ Apriete el bot6n de inicio/pausa (START/ OFF) para encender la secadora. PAUSE) para iniciar el ciclo. La pantalla cambiar& y la secadora Las luces alrededor de la perilla mostrara el secado con sensor selectora de ciclos se iluminaran. -
Page 63: Botones De Ajuste De Ciclos
cOmo usaR BOTONES DE AJUSTE DE ClCLOS Los ciclos de secado por sensor tienen NOTA: Para proteger las prendas, no todos los ajustes preprogramados que se seleccionan niveles de secado, temperatura, u opci6n estan automaticamente y no pueden cambiarse. disponibles en todos los ciclos. Vea la Guia de Los ciclos de secado manual tienen ajustes ciclos para obtener mas detalles. -
Page 64: Botones De Opci6N De Ciclo
0 USA BOTONES DE OPCiON DE CiCLO Su secadora dispone de varias opciones de ciclo adicionales, las cuales personalizan los ciclos para satisfacer sus necesidades individuales. Ciertos botones de opci6n tambien incorporan una funci6n especial (vea la siguiente pagina para obtener mayor informaci6n) que puede activarse apretando y manteniendo apretado ese bot6n de opci6n por 3 segundos. -
Page 65: Instrucclones Del Mantenimento Para El Usario Limpieza Regular
INSTRUCCIONES DELMANTENIMENTO PARA E/USA I0 LilVlPIEZA REGULAR ADVERTENC|A: Para reducir el riesgo de incendio, descargas electricas, o heridas al usar su electrodomestico, siga las precauciones basicas, incluyendo Io siguiente: • Desenchufe la secadora antes de lirnpiar la misma para evitar el riesgo de descargas el_ctricas. -
Page 66: Antes De Ilamar A Mantenimiento
BESOLLIcION DE P 0 [EMAS ANTES DE LLAMAR A MANTENIMIENTO Su secadora esta equipada con un sistema de monitoreo de errores automatico para la detecci6n y el diagn6stico de problemas en una etapa temprana. Si su secadora no funciona adecuadamente o no funciona en Io absoluto revise Io siguiente antes de Ilamar a mantenimiento. - Page 67 BESOLUCION DE PBOBLEMAS ANTES DE LLAMAR A MANTENIMIENTO {cont.) El tiempo de secado para una carga variar& dependiendo Los ajustes de calor, el El tiempo secado rio es tamar]o de la carga, o la del ajuste de calor, tipo de calor utilizado (el6ctrico, constante humedad de las prendas natural, o gas LP), el tama_o de la carga, el tipo de tela,...
-
Page 68: Especif:icaciones/Accesorios
IEC 7,0 pies cObicos (22,5 Ib/10,2 kg) *Consulte la placa de clasificaci6n colocada en su secadora. ACCESORIOS OPCIONALES Para estos y otros productos LG, Ilame a su distribuidor local, o visite nuestro sitio Web en us.lge.com. Pedestal Kit de apilado Si no se dispone de espacio,... -
Page 69: Instalacj6N Del Pedestal
ACCESOfllOS OPCIONALES INSTALACION DEL PEDESTAL Para asegurar la instalaci6n segura, siga El a¢cesorio de pedestal in¢luye: cuidadosamente las siguientes instrucciones. • Divisor de caj6n (1) • Llave (1) ,ADVERTENC|A = TomiNos (18) 1- • Sujetadores (4) 1-1- • La instalaci6n incorrecta puede causar accidentes graves. - Page 70 ACCESo lOS oPCIONA[ES INSTALACi0N DEL PEDESTAL ccont.) Coloque el electrodomestico encima del AsegOrese de que los orifi cios del pedestal. Aseg0rese que los pies frentes y pedestal se alinean con los orifi icios de los traseros se encuentren en las posiciones sujetadores, luego instale 2 tornillos en cada correctas.
- Page 71 ACCESOfllOS OPCIONALES INSTALA¢ION DEI_ KiT DE APILADO Para asegurar la instalaci6n segura, siga las siguientes instrucciones. Este kit de apilado in¢luye: ADVERTENCiA • Dos (2) rieles laterales. • La instalaci6n incorrecta puede causar • Un (1) riel frontal. accidentes graves. •...
-
Page 72: Instalaci6N Del Kit De Apilado
ACCESORIOSOPCIONALES INSTALACION DEL KIT DE APILADO Secadora Lavadora Inserte el riel frontal entre la parte inferior haciendo coincidir las patas en las de la secadora y la parte superior de la abrazaderas laterales como se indica. lavadora. Empuje el riel frontal hacia la parte Evite lesionarse los dedos;... -
Page 73: Garantia
Su secadora LG sera reparada o reemplazada, a discreci6n de LG, si se comprueba que existe un defecto en el material o la mano de obra bajo condiciones de uso normales, durante el periodo de garantia ("Periodo de garantia') establecido mas abajo, vigente desde la fecha ("Fecha de compra') de la compra del cliente original de producto. - Page 74 NOTES...
- Page 75 NOTES...
- Page 76 NOTES...