Table of Contents
Advertisement
Service
This manual is to be used by qualified appliance
technicians only. Maytag does not assume any
responsibility for property damage or personal
injury for improper service procedures done by
an unqualified person.
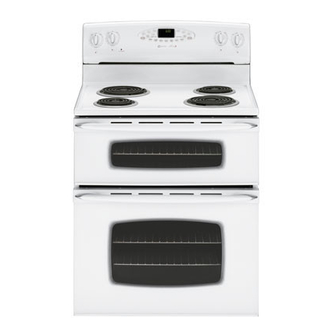
Freestanding
Double Oven
Electric Range
This Base Manual covers general information
Refer to individual Technical Sheet
for information on specific models
This manual includes, but is
not limited to the following:
MER6555AAB/Q/W
MER6751AAB/Q/S/W
MER6755AAB/Q/S/W
MER6775AAB/F/N/Q/S/W
MER6875AAB/F/N/Q/S/W
MER6775ACB/F/N/S/W
MER6875ACB/F/N/S/W
MER6755ACB/S/W
MER6555ACW
16023416
August 2004
©
2004 Maytag Services
Advertisement
Table of Contents
Troubleshooting

Related Manuals for Maytag MER6555AAB


Summary of Contents for Maytag MER6555AAB
- Page 1 Service This manual is to be used by qualified appliance technicians only. Maytag does not assume any This Base Manual covers general information responsibility for property damage or personal Refer to individual Technical Sheet injury for improper service procedures done by an unqualified person.
-
Page 2: Important Information
For further assistance, please contact: Customer Service Support Center CAIR Center Web Site Telephone Number WWW.MAYTAG.COM ..........1-800-688-9900 CAIR Center in Canada ........... 1-800-688-2002 Recognize Safety Symbols, Words, and Labels DANGER DANGER—Immediate hazards which WILL result in severe personal injury or death. -
Page 3: Table Of Contents
Installation Instructions ......... A-2 Quick Test Mode ............. 20 Appendix B Use and Care Model MER6555A** ......B-2 Use and Care Models MER6751AA*, MER6755A** MER6775A** ............B-13 Use and Care Model MER6875A** ...... B-26 Cleaning Procedures ........... B-41 ©2004 Maytag Services 16023416... -
Page 4: Safety Practices For Servicer
Extension Cord Due to possible pinching during installation, extension cords should not be used on products. Extension cords will adversely affect the performance of spark system. 16023416 ©2004 Maytag Services... -
Page 5: Receiving Oven
Unsuitable utensils may break due to sudden temperature change. • Use care when opening oven door. Let hot air or steam escape before removing or replacing food. ©2004 Maytag Services 16023416... -
Page 6: Surface Cooking Units
1. Smother fire with a nonflammable lid/baking soda, or create a possible shock use a Class ABC or BC extinguisher. Not water, salt hazard. or flour. 2. As soon as it is safe to do so, turn the surface controls to “OFF”. 16023416 ©2004 Maytag Services... -
Page 7: General Information
Downdraft Cooktop or Warming Drawer Eyelevel Range Grill Range (20") Feature Content Range (36") 1000-3999 Brands Drop In (24") 4000-6999 Maytag/Amana Wall Oven (27") 7000-9999 Jenn Air Range, Free-Standing (30") Slide-In (30") Range Hood Wall Oven RV Range RV Top ©2004 Maytag Services 16023416... -
Page 8: Specifications
Placement of the Oven servicer: This freestanding range must be placed in the kitchen or • For Maytag product call 1-800-688-9900 or visit the comparable room. All safety guidelines must be followed Web Site at www.maytag.com (see Chapter 2) and free air flow around the range is •... -
Page 9: Range Description
Electronic Oven Control Surface Controls Backguard Data Plate Oven Vent Warming Zone Broiler Single Surface Elements Bake Element Dual Surface Elements Oven Rack (1) Oven Window Broiler Anti-Tip Bracket Leveling Leg Bake Element Oven Racks (2) Door Gasket ©2004 Maytag Services 16023416... -
Page 10: Troubleshooting Procedures
Diagnostic Code Display Mode is accessed via the Quick Test Mode. To view the last 5 error codes, enter the Quick Test Mode by pressing and holding the UPPER CANCEL and UPPER BROIL pads for 3 seconds within 5 minutes of power-up. Diagnostic Code Display Mode may be activated only when applying power to the control. 16023416 ©2004 Maytag Services... - Page 11 Unlock switch not closed LOCK flashes Disables Clean and Lockout functions 9d31 Latch both locked and unlocked LOCK flashes Disables Clean and Lockout functions 9d32 Latch both locked and unlocked LOCK flashes Disables Clean and Lockout functions ©2004 Maytag Services 16023416...
- Page 12 If the control is in a known good lock position and the unlock switch becomes faulted: • The control will not fault. • After the function is canceled and unlock is attempted, the control will attempt to unlock the latch according to the procedures in these notes. 16023416 ©2004 Maytag Services...
-
Page 13: Component Troubleshooting
• Check 120 VAC to ignitor, if no No voltage from control........ No oven operation in bake or broil. voltage, replace control. Loose wire connection or broken wire ..• Verify all connections are clean and tight, replace broken wire. ©2004 Maytag Services 16023416... - Page 14 Normal ............normal the first few times of oven Oven smokes/odor first few usage. times of usage. • Ventilate area well and perform self-clean cycle. • See Testing Procedures for Electronically Controlled ......Failure Codes. diagnostic checks. 16023416 ©2004 Maytag Services...
-
Page 15: Testing Procedures
Ω measure resistance of terminals ..Approximately 18.6 , if not replace. Measure voltage at broil element ..240 VAC, see wiring diagram for terminal identification. If no voltage is present at broil element check wiring. ©2004 Maytag Services 16023416... - Page 16 Check motor windings to ground ..No continuity. Motor speed ........Approx. 900 RPM. Limiter Normally Closed Verify proper operation. Open ..... Approx. 216°F.... Infinite Closed... Approx. 176°F.... Continuity Approximately 1100 Ω at room Temperature sensor Measure resistances ......temperature 75°F. 16023416 ©2004 Maytag Services...
- Page 17 5 & 6 Continuity Upper Broil 14 & 15 Continuity Timer 1 4 & 16 Continuity Toast 7 & 8 Continuity Warm Zone 4 & 6 or 17 Continuity Models MER6555A**, MER6751AA*, MER6755A**, MER6775A** Membrane and Overlay ©2004 Maytag Services 16023416...
-
Page 18: H2 Oven Control Testing
The last 5 diagnostic codes will be stored Display Autoset pads for 3 seconds. in the non-volatile memory. See “Quick Test Mode.” See “Description of Error Codes” for Cycle through the codes using the number pads 1 through 5. explanation. 16023416 ©2004 Maytag Services... -
Page 19: H3 Oven Control Testing
The last 5 diagnostic codes will be stored Display for 3 seconds within 5 minutes of power up. in the non-volatile memory. See “Quick Test Mode.” Cycle through the codes. See “Description of Error Codes” for explanation. ©2004 Maytag Services 16023416... -
Page 20: Quick Test Mode
Volume level 6 bars 1 to 8 bars Temp C/F Degrees F Degrees C Language English French, Spanish Default Press AUTO SET for Factory Settings Display On/Off Clock Clock Display is ON Clock Display is OFF 16023416 ©2004 Maytag Services... - Page 21 Oven can be adjusted from -35° to +35° (-37.2° to + 1.6° C). To avoid over adjusting oven, move temperature -5° (2.7° C) each time. Push OVEN CANCEL button. ©2004 Maytag Services 16023416...
-
Page 22: Disassembly Procedures
(Perform steps 1 – 5.) 5. Reverse procedures to reassemble. 3. Remove screws securing element to assembly. NOTE: Verify connector is pushed through the insulation. 4. Label and disconnect wiring and remove element. 5. Reverse procedures to reassemble. 16023416 ©2004 Maytag Services... -
Page 23: Oven Control/Electronic Clock
Both the upper and lower oven doors are removable. 10. Remove screws securing window pack to liner. (Window pack comes out as an assembly.) NOTE: DO NOT LIFT OVEN DOOR USING HANDLE. Damage to the oven door and personal injury may occur. ©2004 Maytag Services 16023416... - Page 24 Disassembly Procedures To avoid risk of electrical shock, personal injury, or death: WARNING disconnect electrical and gas supply before servicing. Lower Oven Door 16023416 ©2004 Maytag Services...
-
Page 25: Lower Latch Assembly
6. Disconnect and label wiring from door lock switch and 5. Remove screws securing latch assembly and slide motor. assembly from range. 7. Remove screws securing latch assembly and slide 6. Reverse procedure to reassemble. assembly from range. 8. Reverse procedure to reassemble. ©2004 Maytag Services 16023416... -
Page 26: Oven Door Hinge
3. Remove screws securing main back shield and 8. Remove assembly from cavity. remove shield. 9. Reverse procedures to reassemble. 4. Remove screws securing thermostat to range main back. 5. Label and disconnect wiring and remove thermostat. 6. Reverse procedures to reassemble. 16023416 ©2004 Maytag Services... -
Page 27: Infinite Switch
Upper Oven Contact your Maytag dealer for the "HALFRACK" • Equipped with one rack and rack position. Accessory Kit or call 1-800-688-8408. • When pulling the upper oven rack out to remove or check food, grasp the front edge of the rack. -
Page 28: Oven Cavity Components (Electric)
Open or remove the oven door. The following components are accessible: Upper Oven • Racks • Oven Sensor • Broiler Element • Bake Element Lower Oven • Racks • Oven Sensor • Broil Element • Bake Element • Convect Element • Convect Fan 16023416 ©2004 Maytag Services... - Page 29 Appendix A ©2004 Maytag Services 16023416 A–1...
-
Page 30: Installation Instructions
Installation Instructions A–2 16023416 ©2004 Maytag Services... - Page 31 Installation Instructions ©2004 Maytag Services 16023416 A–3...
- Page 32 Installation Instructions A–4 16023416 ©2004 Maytag Services...
- Page 33 Installation Instructions ©2004 Maytag Services 16023416 A–5...
- Page 34 Installation Instructions A–6 16023416 ©2004 Maytag Services...
- Page 35 Installation Instructions ©2004 Maytag Services 16023416 A–7...
- Page 36 Installation Instructions A–8 16023416 ©2004 Maytag Services...
- Page 37 Installation Instructions ©2004 Maytag Services 16023416 A–9...
- Page 38 Installation Instructions A–10 16023416 ©2004 Maytag Services...
- Page 39 Installation Instructions ©2004 Maytag Services 16023416 A–11...
- Page 40 Installation Instructions A–12 16023416 ©2004 Maytag Services...
- Page 41 Installation Instructions ©2004 Maytag Services 16023416 A–13...
- Page 42 Appendix B B–1 16023416 ©2004 Maytag Services...
-
Page 43: Use And Care Model Mer6555A
Use potholders to protect hands. ©2004 Maytag Services 16023416 B–2... - Page 44 The drip bowls under each surface element catch boilovers and the Canning Element (Model CE1). Contact your must always be used. Absence of drip bowls during cooking may Maytag dealer for details or call 1-877-232-6771 USA damage wiring. or 1-800-688-8408 Canada to order.
-
Page 45: Oven Cooking
More+ or Less- pad, the function will Press and hold the Upper Oven CANCEL and be canceled and the display will return to the previous Clock pads for several seconds. The time of display. day will disappear from the display. ©2004 Maytag Services 16023416 B–4... -
Page 46: Fault Codes
4. If the More+ or Less- pad is not pressed within 30 sec- and Cook & Hold pads for three seconds. onds, the control will return to the existing settings. • “Lock” flashes in the display while both oven doors lock. Once complete, “Lock” stops flashing. B–5 16023416 ©2004 Maytag Services... - Page 47 • When the set oven temperature is reached, one long beep will sound. • “Bake” and “Hold” flash. • To recall the set temperature during preheat, press the • “000°” will flash in the display. cont. Bake pad. ©2004 Maytag Services 16023416 B–6...
- Page 48 • Do not use delayed baking for items that require a Delay time can be set from 10 minutes (10:00) to 11 hours, 59 preheated oven, such as cakes, cookies, and breads. minutes (11:59). • Do not use delayed baking if oven is already hot. B–7 16023416 ©2004 Maytag Services...
-
Page 49: Keep Warm
** Brand names are registered trademarks of the respective - use only oven-safe plates, check with the manufacturer. manufacturers. - do not set warm dishes on a cold surface as rapid temperature changes could cause crazing or breakage. ©2004 Maytag Services 16023416 B–8... - Page 50 * When broiling fish, spray broil pan insert with cooking oil. Do not turn fish filets. ** Broiling times are approximate and may vary depending on the thickness of the food. Turn meat halfway through cooking times. B–9 16023416 ©2004 Maytag Services...
-
Page 51: Oven Vent
Use and slide back into the oven. the correct pan size to avoid spillovers and boilovers. Do not place utensils or aluminum foil directly on the oven cont. bottom. ©2004 Maytag Services 16023416 B–10... - Page 52 Use and slide back into the oven. the correct pan size to avoid spillovers and boilovers. Do not place utensils or aluminum foil directly on the oven cont. bottom. B–11 16023416 ©2004 Maytag Services...
- Page 53 RACK 2: lower rack. Contact your Maytag Use for roasting small cuts of meat, casseroles, baking dealer for the “HALFRACK” Acces- loaves of bread, bundt cakes or custard pies, and two-rack sory Kit or call 1-877-232-6771 USA baking.
-
Page 54: Use And Care Models Mer6751Aa*, Mer6755A** Mer6775A
• NEVER store heavy items above the cooktop that could fall to become warm or hot during cooking. Use potholders and damage it. to protect hands. B–13 16023416 ©2004 Maytag Services... -
Page 55: Hot Surface Light
Recommendations on page 7 and “Cooking Made Simple” booklet included with your range. WARMING CENTER SINGLE ELEMENT (SELECT MODELS) SINGLE ELEMENT DUAL ELEMENT (SELECT MODELS) (style varies by model) ©2004 Maytag Services 16023416 B–14... - Page 56 If metal melts on the cooktop, do not use. Call an • Do not slide aluminum pans across a hot surface. The pans authorized Maytag Servicer. may leave marks which need to be removed promptly. (See Cleaning, page 20.) •...
-
Page 57: Cookware Recommendations
1 inch. element. Secure handles. Cookware with loose or broken handles. Heavy handles that tilt the pan. Tight-fitting lids. Loose-fitting lids. Flat bottom woks. Woks with a ring-stand bottom. ©2004 Maytag Services 16023416 B–16... - Page 58 If more than 30 seconds elapse between touching a function pad and the More+ or Less- pad, the function will be canceled and the display will return to the previous display. B–17 16023416 ©2004 Maytag Services...
- Page 59 The current time of day will remain in the display when the 2. Press the More+ or Less- pad to change the setting controls are locked. between °F and °C. 3. Wait four seconds and the new setting will be accepted. ©2004 Maytag Services 16023416 B–18...
-
Page 60: Oven Functions
• When the set oven temperature is reached, one long oven or twice for lower oven. beep will sound. • “Bake” and “Hold” flash. • To recall the set temperature during preheat, press the • “000°” will flash in the display. Bake pad. cont. B–19 16023416 ©2004 Maytag Services... - Page 61 • Do not use delayed baking for items that require a Delay time can be set from 10 minutes (10:00) to 11 hours, 59 preheated oven, such as cakes, cookies, and breads. minutes (11:59). • Do not use delayed baking if oven is already hot. ©2004 Maytag Services 16023416 B–20...
- Page 62 ** Brand names are registered trademarks of the respective - use only oven-safe plates, check with the manufacturer. manufacturers. - do not set warm dishes on a cold surface as rapid temperature changes could cause crazing or breakage. B–21 16023416 ©2004 Maytag Services...
- Page 63 * When broiling fish, spray broil pan insert with cooking oil. Do not turn fish filets. ** Broiling times are approximate and may vary depending on the thickness of the food. Turn meat halfway through cooking times. ©2004 Maytag Services 16023416...
- Page 64 2. After 72 hours, the Sabbath Mode will end. • “SAbbAth” will flash for 5 seconds. • The time of day will return to the display. * Note: “SAbbAth” appears in the display on two lines: SAb . bAth B–23 16023416 ©2004 Maytag Services...
- Page 65 • When baking on two racks, use the RollerGlide rack in the lower rack position, and the flat rack in the upper rack position. Roasting • When roasting large cuts of meat and poultry, use the RollerGlide rack for ease of movement. cont. ©2004 Maytag Services 16023416 B–24...
- Page 66 MULTIPLE RACK COOKING: large roaster is on the lower rack. Two rack: Use rack positions 2 and 4, 1 and 4, or 2 and 5. Contact your Maytag dealer for the “HALFRACK” Accessory Kit or call 1-877-232-6771 USA or 1-800-688-8408 Canada to order.
-
Page 67: Use And Care Model Mer6875A
Use potholders • NEVER store heavy items above the cooktop that could fall and damage it. to protect hands. ©2004 Maytag Services 16023416 B–26... -
Page 68: Cooking Areas
WARMING CENTER ELEMENT SINGLE ELEMENT (WITH FLEX CHOICE DUAL WARM* ELEMENT OPTION) * Flex•Choice Warm: This setting uses a very low heat setting to keep delicate foods or foods in a covered pan warm without cooking. B–27 16023416 ©2004 Maytag Services... - Page 69 If metal melts on the cooktop, do not use. Call an • Do not slide aluminum pans across a hot surface. The pans authorized Maytag Servicer. may leave marks which need to be removed promptly. (See Cleaning, page 21.) •...
- Page 70 1 inch. element. Secure handles. Cookware with loose or broken handles. Heavy handles that tilt the pan. Tight-fitting lids. Loose-fitting lids. Flat bottom woks. Woks with a ring-stand bottom. B–29 16023416 ©2004 Maytag Services...
- Page 71 To recall the time of day when another time function is • A beep will sound when any pad is touched. showing, press the Clock pad. • A double beep will sound if a programming error occurs. ©2004 Maytag Services 16023416 B–30...
- Page 72 3 seconds. A beep will sound and the current setting (°F The touchpad and oven doors can be locked for safety, or °C) will appear in the display. cleaning, or to prevent unwanted use. The touchpads will not function when locked. B–31 16023416 ©2004 Maytag Services...
- Page 73 • If you forget to turn off the oven, it will automatically turn off at the end of 12 hours. If you wish to deactivate the Automatic Shut Off/Sabbath Mode feature, see page 16. • For additional baking and roasting tips, see “Cooking Made Simple” booklet. ©2004 Maytag Services 16023416 B–32...
-
Page 74: Roasting With Convection
75% of the set signal you to check the cooking progress. Cook longer if time. The convection fan will come on immediately after the needed. oven has turned on. cont. B–33 16023416 ©2004 Maytag Services... - Page 75 • 170° appears in the display. • Do not use Delayed Cook & Hold for items that require a preheated oven, such as cakes, cookies, and breads. • Do not use Delayed Cook & Hold if oven is already hot. ©2004 Maytag Services 16023416 B–34...
- Page 76 • Toasting times will be shorter when the oven is hot or when repeated toasting functions are done. • For optimal results when toasting 4-5 pieces of bread or other similar items, follow illustration above. B–35 16023416 ©2004 Maytag Services...
- Page 77 * When broiling fish, spray broil pan insert with cooking oil. Do not turn fish filets. ** Broiling times are approximate and may vary depending on the thickness of the food. Turn meat halfway through cooking times. ©2004 Maytag Services 16023416...
- Page 78 15 minutes more. - use only oven-safe plates, check with the manufacturer. - do not set warm dishes on a cold surface as rapid temperature changes could cause crazing or breakage. B–37 16023416 ©2004 Maytag Services...
-
Page 79: Adjusting The Oven Temperature
• If power fails, the ovens will power up in Sabbath Mode with 72 hours remaining and no cycle active. • If the oven lights are desired while in Sabbath Mode, they must be turned on before the Sabbath Mode is started. ©2004 Maytag Services 16023416 B–38... -
Page 80: Oven Fan
Roasting • When roasting large cuts of meat and poultry, use the RollerGlide rack for ease of movement. B–39 16023416 ©2004 Maytag Services... - Page 81 Contact your Maytag dealer for the “HALFRACK” Accessory Kit or call 1-877-232-6771 USA or MULTIPLE RACK COOKING: 1-800-688-8408 Canada to order.
-
Page 82: Cleaning Procedures
Porcelain enamel 3. Press the appropriate Clean pad. • SET flashes in the display. * Brand names for cleaning products are registered trademarks of the respective manufacturers. B–41 16023416 ©2004 Maytag Services... - Page 83 Smoke may also occur if the oven is heavily soiled or if a broiler pan was left in the oven. Sounds As the oven heats, you may hear sounds of metal parts expanding and contracting. This is normal and will not damage the oven. ©2004 Maytag Services 16023416 B–42...
- Page 84 • Melted Sugar or Plastic – Immediately turn element to LOW and scrape sugar or plastic from hot surface to a cool area. Then turn element OFF and allow to cool. Clean residue with razor blade scraper and Cooktop Cleaning Creme*. B–43 16023416 ©2004 Maytag Services...
- Page 85 This is especially important for white surfaces. * Brand names for cleaning products are registered trademarks of the respective manufacturers. ** To order direct, call 1-877-232-6771 USA and 1-800-688-8408 Canada. ©2004 Maytag Services 16023416 B–44...