Meridian DSP5500 User Manual
Hide thumbs
Also See for DSP5500:
- User manual (73 pages) ,
- User manual (50 pages) ,
- User manual (50 pages)

Related Manuals for Meridian DSP5500


Summary of Contents for Meridian DSP5500
- Page 1 MERIDIAN DSP5500 USER MANUAL © 1992,1993,1995, 1996 Meridian Audio Ltd http://www.meridian-audio.com...
-
Page 2: Table Of Contents
Introduction ..........5 Restoring default settings ....28 About this manual ........5 Storing preferred tone settings ..28 How to customise DSP5500 ....29 DSP5500 description ......6 Customising: general procedure ..29 Master and slave speakers ....6 Type: an overview ......29 Centre, left, right and surround ....6... - Page 3 Maintenance & service ......52 Type 6 Meridian Digital Theatre..57 Guarantee ..........53 Type 7 Second room in Multiroom system......57 Appendix 1 DSP5500 types ....54 Type 8 Additional room in Type 1 setup, Meridian 500 Multiroom system......57 series system using 562 ....54 Appendix 2 Test mode......
-
Page 4: Sales And Service In The Uk
Digital Gramophone & Wireless Ltd Stonehill Huntingdon Cambs. PE18 6ED England Copyright © 1992,1993,1995, 1996 Digital Gramophone & Wireless Ltd Acknowledgements Trademarks etc. Boothroyd|Stuart Meridian and Meridian are registered trademarks of Meridian Audio Ltd. Authors: Bob Stuart, Richard Hollinshead. DSP5500 User Guide... -
Page 5: Introduction
This manual will enable you to get the most from them. The DSP5500 is a sophisticated product. You should therefore read all the supplied documentation before fully installing the DSP5500, particularly if you intend to customise its functions. -
Page 6: Dsp5500 Description
Since the digital audio signal is in two-channel stereo format, the DSP5500 needs to be told if it is a centre, or on the left or right. We refer to the DSP5500 which is on the left when viewed from the listening position as the left speaker. -
Page 7: Control
2 (see page 31) and the MSR must be configured to Option 3 (see MSR User Guide). An MSR not set to Option 3 will give very confusing results in a 200-Series system. In all cases where DSP5500 is used in a system containing 200-Series components the Meridian 209 system handset should not be used. -
Page 8: Unpacking The Dsp5500
NOTE Do not move the DSP5500 around until the feet are fitted. To do so will almost certainly damage the lower corners of the side panels. - Page 9 Note Do not allow the MSR to become wet. If drinks are accidentally spilt on it, remove the battery and let the MSR dry out. If necessary consult your dealer. Note Additional MSRs can be obtained from your dealer if you would prefer to have more than one. DSP5500 User Guide...
-
Page 10: Installing Your Dsp5500
DSP5500, see Customising DSP5500: an overview, on page 28, describes your Customising options in detail. By the time you have set up DSP5500 according to your DSP5500: an needs, you will be aware of how the alternative choices available to you overview, on can differ from the standard configurations. -
Page 11: Connections
If it does, the DSP5500 may not ‘see’ your commands from the MSR. No harm will be done to the DSP5500; it will simply be inconvenient. -
Page 12: Starting Off With Dsp5500
1. Switch on the power to the sources, but for now do not start them playing. 2. Turn on the power switch at the rear of the master DSP5500. A small point on the display should now be illuminated: DSP5500 User Guide... -
Page 13: If There Are No Lights
In Type 1 this will select the physical input D1, and both DSP5500s will display 65 is the volume number, and cd means that the DSP5500 expects the source to be a Meridian CD player which can be controlled by the MSR. -
Page 14: Basic Operation Of Dsp5500
The other input keys on the MSR (e.g. LP, Tape 1, Video and Tape 2) operate in a similar way in Type 1: The LP input of a Meridian 562 is engaged. The D1 input of the DSP5500 is selected. The display shows The Tape 1 input of a Meridian 562 is engaged. -
Page 15: Display
Changing the display The DSP5500 has several display modes. To change the display: 1. Press Display The master DSP5500 will cycle through the five display options, which are: source + volume number (convenient legends which you have chosen are displayed) blank track number for CD;... -
Page 16: Volume
While the CD player is loading a disc (reading the disc’s directory), the DSP5500 will show the directory message: At the end of a CD, the DSP5500 will detect the lead-out track and momentarily display the message 1. With the disc playing, press Display again. You will see a disc time display, counting up as the disc plays. -
Page 17: Mute
Phase Balance Axis Tip This is also the way to review settings you have made. The DSP5500 will cycle through its menus, displaying the current choice in each one as it goes. In Setup mode, an additional menu item appears for boundary, corner or free bass alignment. - Page 18 1. Press the w or the e menu key until the balance display shows. The master display will momentarily show This allows you to ask the DSP5500 what its balance setting is without changing it. Note We call this kind of display a cursor – in this case, the balance cursor.
- Page 19 Using DSP5500 Note This will also reset the bass and tilt controls. DSP5500 User Guide...
-
Page 20: Tilt Control
They are less crude than conventional tone controls. The responses of the tilt control in DSP5500 are shown in Appendix 4 on page To review the tilt setting: 1. -
Page 21: Phase
To recall a bass setting, use the Store key; see page 22 Bass explained The bass control allows you to adjust the broad balance of the DSP5500 to correct for the acoustics of your listening room, or for a poorly balanced recording. -
Page 22: Storing Settings
An unusual feature of DSP5500 is that the tone control settings for tilt and bass can be stored separately for each source. If, for example, you happen to prefer a tilt setting only when listening to the video source, use Setup to programme the DSP5500 for that setting. - Page 23 Using DSP5500 Note When you change sources, you will need to press Store to recall any favourite tone setting you may have stored. Note Clear does not reset the phase and axis settings. DSP5500 User Guide...
-
Page 24: Controlling A Meridian Cd Player
1. Press Stop To make the disc pause 1. Press Pause The Pause indication on the Meridian CD will light up. If the DSP5500 master was displaying track or time information, it will display To start it again (‘unpause’) 1. Press Pause To cause a disc to repeat 1. -
Page 25: Selecting Index Points
1. Press 1 followed by 5 The DSP5500 will show – Again, press Play or wait for a short time. If you select a track that does not exist on the disc, the DSP5500 will show an error message: Err. Selecting index points To select index points you need to enter both the track and index point by number. -
Page 26: Use With 504, 204 Or 604 Fm Tuner
Comms to ‘N.C.’) To select a preset station, e.g. preset 4 1. Press 4 The DSP5500 will show a 'select cursor' display. For 500 mode the display is: For 200 mode the display is: 2. Either press Play or wait for a short time. The tuner will go to preset number 4. -
Page 27: Operation Summary
Operation Operation summary On the remote control FUNCTION Puts the DSP5500 into Standby mode CD, LP etc. Selects a source to listen to Display Cycles the display through: source and volume number blank (display off) preset on tuner; track on CD frequency on tuner;... -
Page 28: Customising Dsp5500: An Overview
Type settings, and you can return to these at any time. Programming is the process of telling the DSP5500 what you want it to do when the MSR is used. It is based round the Type system, which has five different Types;... -
Page 29: How To Customise Dsp5500
When customising, you may need to use Type, Config and Setup, in that order, before reverting to Normal. In other cases, you may only need to use Config or Setup. Neither of these modes resets the DSP5500, so you will not necessarily lose any settings you have previously made. -
Page 30: Setup: An Overview
Customising DSP5500: how to Config: control settings In Config, you can make selections that affect the way in which DSP5500 responds to certain keys. The main choices of this kind are: left or right master or slave Multiroom standby option... -
Page 31: Customising Using Type
Selecting Types 1. Switch off the DSP5500, using the power switch on the back, and wait for 3 seconds 2. While pressing the 1 key (2 for Type 2, 5 for Type 5) on the remote control, switch the power on again. -
Page 32: Customising Using Config
When you are happy with your left/right and master/slave choices for this speaker: 1. Switch off the DSP5500, using the power switch on the back 2. After a second, switch the DSP5500's power on again Note Ensure that you have set the two speakers to opposite settings. One must be left, the other right;... -
Page 33: How To Use Config
Note In Config, the speaker is silenced. How to use Config 1. Switch off the master DSP5500, using the power switch on the back, and wait for 3 seconds 2. While pressing the 0 key on the remote control, switch the power on again. - Page 34 500 tells you that this system operates in Meridian 500-Series mode. All controllable Meridian products must be 500 compatible. Also use this if the DSP5500 is the only controllable preamplifier connected (i.e. the source keys on the MSR will only select between the two inputs of the DSP5500).
-
Page 35: Surround System Options
Choose ‘y’ if you are using a DSP speaker with centre-channel features as a centre. Source menus The source menus are used to change what happens when you press a key on the MSR (i.e. what the DSP5500 then displays, and which input it selects). DSP5500 User Guide... - Page 36 ‘phantoms’ of the same type, e.g. CD = ‘rd’ and Radio = ‘rd’. Source menu 2 options Source menu 2 is used to define which DSP5500 input will be selected for any given source key on the MSR. DSP5500 User Guide...
- Page 37 For 200 mode only, this tells the DSP5500 that the source is a Meridian 232 controlling a CD changer. In 500 or 200 mode this tells the DSP5500 that the source is like a Laserdisc player. Some laserdiscs carry digital subcode (chapter, time etc.) that can be displayed by the speaker.
-
Page 38: Completing Config
How to use Setup Note It is not necessary to make any adjustments to the slave for Setup. 1. Switch off the master DSP5500, using the power switch on the back, and wait for 3 seconds 2. While pressing the Store key on the remote control, switch the power on again. -
Page 39: Boundary Controls
Using the system boundary control for a left-right pair This menu will appear on any master DSP5500 which is in Setup – even if it is a centre channel and even if there is no left or right DSP speaker. -
Page 40: Centre-Channel Options
Sub.2 Note Selecting a subwoofer option gives the same performance as the free space setting. These options are only provided on DSP5500 for compatibility with DSP5000. Do not use them unless one or more of the slave speakers is a DSP5000. -
Page 41: Centre-Channel Options
Connecting DSP5500 Four types of connection must be made to the DSP5500: power (see page 12) digital audio (see page 44) communications (see page 45) - Page 42 D1 The first digital input, using a coaxial cable D2 The second digital input, using a coaxial cable D OUT A digital output which is selected by the DSP5500 to pass on a signal to the other DSP5500. This means that the slave only needs to have one digital input connected.
- Page 43 Phono lead, about 6m long. 2. Connect one DIN plug to the Comms Input socket and the accompanying phono plug to the D1 socket on the slave DSP5500. 3. Connect the other end to the Comms Output socket and the D OUT socket of the master.
-
Page 44: Digital Audio Connections
RF interaction with your system. Unscreened cables for digital connections may cause illegal levels of RF interference. The DSP5500 has two coaxial digital inputs, D1 and D2. The M5- and S5- leads provided, which will be sufficient for the great majority of installations, connect to the D1 input and the D OUT output. -
Page 45: Communications Connections
Communications connections are only made to other Meridian equipment. In general, you can follow the instructions given for the other equipment, and view DSP5500 as a D600 or D6000 for communication purposes. The following sections describe the major points. If you have a Meridian 500-Series only system For example;... - Page 46 3. Connect a second digital audio lead (not provided) between the D2 input of the master DSP5500 and the digital output of the 607 4. Connect the SP5 adapter to the DIN plug at the far end of the M5-lead (from the master) 5.
-
Page 47: Rs232 Connection
(The P-lead supplied with the 200-Series will work, but the CD5 is preferred) 5. Configure the DSP5500 and 500-Series item for 200 mode (see page If you are using no other Meridian equipment 1 Connect the DSP5500's D1 and D2 digital inputs to appropriate digital... -
Page 48: Specification
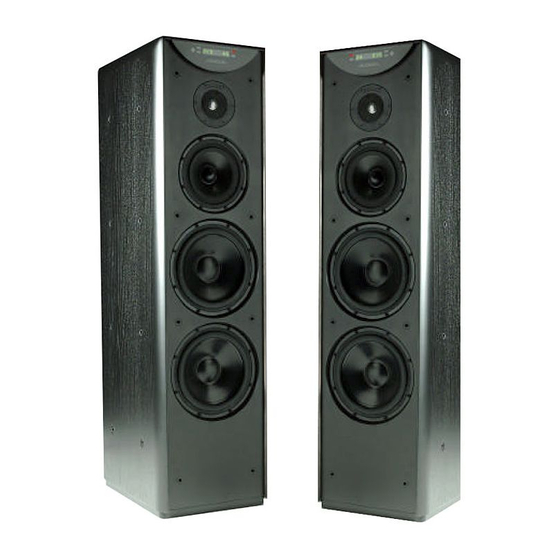
Tweeter Meridian 25mm piston in short horn: aluminium dome with silver voice-coil. Constructed from MDF Cabinet Dimensions 280 x 1360 x 430mm Weight 65 kg each Power 100–125; 200-230; 210–250V AC 50–60Hz 20VA standby; 600VA max DSP5500 User Guide... -
Page 49: Help
3. Check that the correct source has been selected, and that this source is running and producing music 4. Check that all interconnections have been made to the correct sockets 5. Check that the DSP5500 is not in Mute. If it is, you will see this display: Att. -
Page 50: Meridian Cd Does Not Respond
DSP5500 system, the speakers and any 500-Series components must be put into 200-mode (normally Type 2). 3. Make sure that the DSP5500 has been set up so that this source is Comms type ‘1C’ – see page 37. -
Page 51: Dsp5500S Do Not Respond
200-mode (normally Type 2). Radio interference Note DSP5500 is designed to comply with all relevant international standards concerning local-oscillator re-radiation. Note DSP5500 is a digital audio and computing device which has been designed to very high standards of electromagnetic compatibility. DSP5500 User Guide... -
Page 52: Cleaning
Outside the UK, contact the importing agent for the territory. A list of Meridian agents abroad is available from the above address. No responsibility can be accepted for the DSP5500 while it is in transit to the factory or an agent, and customers are therefore advised to insure the unit. -
Page 53: Guarantee
The Meridian DSP5500 is guaranteed against defects in material and workmanship for 12 months from the date of purchase. The guarantee is void if the DSP5500 has been subjected to misuse, accident or negligence, or has been in any way tampered with or modified without the written authorisation of DGW Ltd. -
Page 54: Appendix 1 Dsp5500 Types
All connections from sources are made to 562 which then sends a single digital feed to the DSP5500s. Type 1 sets the DSP5500 as a left master, so you will need to make the other a right slave, or adjust left/right on both speakers. -
Page 55: Type 2 Setup, Meridian Cd As Preamp (Via 607)
DSP5500. It is possible to control one of the previously mentioned CD preamp combinations and a Meridian FM tuner using Type 1. Type 1 sets the DSP5500 as a left master, so you will need to make the other a right slave, or adjust left/right on both speakers. -
Page 56: Type 4 Setup, 601 Preamp Or
The 601 has very comprehensive customisation facilities, and these are covered in its manual. If you are using DSP5500 with a 601, you are advised to study the 601 user guide, bearing in mind that recommendations concerning D6000 apply equally to DSP5500. -
Page 57: Type 5 Setup, Meridian 500 System Not Using 562
The CD is connected directly to D1, all other sources are routed directly or via an A/D converter to D2. Type 5 sets the DSP5500 as a left master, so you will need to make the other a right slave, or adjust left/right on both speakers. -
Page 58: Appendix 3 Calibrate Mode
The calibration display looks like the Test mode display (see Appendix 2): This shows that you are in Calibrate mode and that the volume level is 65. This mode operates like Test, but two menus are enabled. DSP5500 User Guide... - Page 59 2. Press the n or s menu key to move in 0.5dB steps over the range ±1.5dB Getting out of Calibrate Once calibration is compete, switch the DSP5500 off and then on again while pressing Clear. This should bring you back into the normal playing state.
-
Page 60: Appendix 4
Appendix Appendix 4 -2dB -4dB -6dB 10Hz 100Hz 1kHz 10kHz Tilt control responses, showing the steps between +10 and –10 -2dB -4dB 100Hz 1kHz Frequency DSP55000 bass control, showing 1dB steps between +5 and –5 DSP5500 User Guide... -
Page 61: Index
32 DSP, 6 background, 17 using, 32 DSP centre, 35 keys, 17 Connections DSP5000 reviewing settings, 17 communications, 41, 45 description, 6 root in Config, 32 digital, 41, 44 general description, 7 source in Config, 32 DSP5500 User Guide... - Page 62 Programming. see mode, 35 Standby Customising display, 12 Wall correction, 30 explained, 13 Radio interference, 51 Warranty, 53 getting into, 14 rEc message, 22 to get out of, 14 Recall. see Memory Starting the speakers off, 13 DSP5500 User Guide...
-
Page 63: Notes
Notes Notes DSP5500 User Guide... - Page 64 Notes DSP5500 User Guide...