
Related Manuals for Buffalo Wireless-G High Speed ADSL2+ Modem Router


Summary of Contents for Buffalo Wireless-G High Speed ADSL2+ Modem Router
- Page 1 WBMR-G125 Wireless-G High Speed ADSL2+ Modem Router MANUAL www.buffalo-technology.com...
-
Page 2: Table Of Contents
Table of Contents 1 Introduction Product Features Benefits of a Home Network Advantages of a Buffalo Wireless Network Package Contents System Requirements Internet Connection Settings 2 Understanding your Router 3 Connecting your Computers 4 Manually Configuring Client Adapters 5 Accessing the User Interface... -
Page 3: Introduction
Introduction Thank you for purchasing the Buffalo ADSL2+ Wireless- G Modem Router. In minutes you will be able to share your Internet connection and network your computers with your new Router. The following is a list of features that make your Router an ideal solution for your home or small office network. - Page 4 Integrated 802.11g Wireless Access Point 802.11g is an exciting new wireless technology that achieves data rates up to 54Mbps, nearly five times faster than 802.11b. 125 High-Speed Mode High-Speed Mode (HSM)*, a 54g™ performance enhancement, provides the fastest wireless connectivity for 802.11g-capable networks in real-world environments.
-
Page 5: Benefits Of A Home Network
No cabling required – you can spare the expense and hassle of retrofitting Ethernet cabling throughout the home or office Package Contents • Wireless-G High Speed ADSL2+ Modem Router (WBMR-G125) • Utility CD-ROM w/ User Manual • Quick Setup Guide • AC Adapter •... -
Page 6: System Requirements
System Requirements • Activated Broadband ADSL Line • PC with a Client Adapter • Microsoft® Windows 98SE / Me / 2000 / XP / Vista™, Macintosh OS or other Operating System with TCP/IP Protocol Installed • Internet Explorer 5.0 or higher Netscape Navigator 4.7 or higher for Web-based Configuration •... -
Page 7: Understanding Your Router
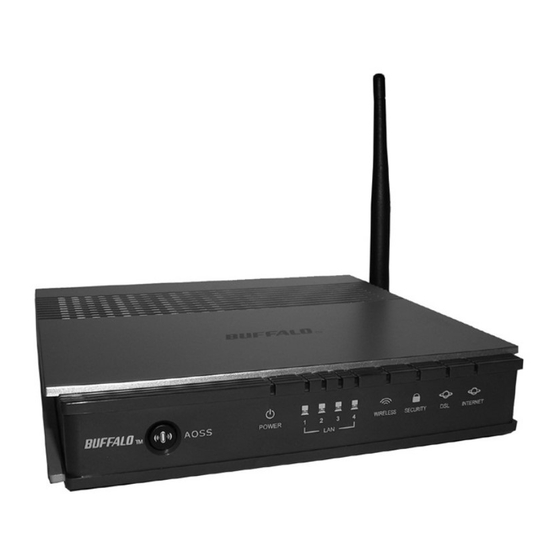
Understanding Your Router Front Panel Name Colour Description POWER Green or Red ON (Green): Power On OFF : Power Off Blinks continuous (Red): Writing in Flash- ROM (e.g. change settings, update firmware) Blinks once (Red): RAM error (e.g. access, recognized storage size) Blinks twice (Red): Flash-ROM error (e.g. access, parameter settings) Blinks three times (Red): Wired device error (Example: wired driver install error) - Page 8 Green ON: LAN Port is ready (LINK) OFF: LAN Port is not ready (no LINK) Blinks: LAN Port is communicating Wireless Green ON: Wireless is valid OFF : Wireless is invalid/cannot communicate Blinks: Communicating wirelessly SECURITY Orange ON: Wireless Security is active OFF: Wireless Security is inactive Blinks twice: Waiting for AOSS/WPS (PBC) to be activated.
- Page 9 Back Panel 6. DSL Line Connect your ADSL line to this port. 7. Ethernet Ports The Ethernet ports are RJ45, 10/100 auto-negotiation. The ports are labeled 1 through 4. These ports correspond to the numbered LEDs on the front of the Router.
-
Page 10: Connecting Your Computers
Positioning your Router Your wireless connection will be stronger the closer your computer is to your Router. Typical indoor operating range for your wireless devices is between 30m and 60m. In the same way, your wireless connection and performance will degrade somewhat as the distance between your Router connected devices increases. - Page 11 Connecting your ADSL Line Connection for the Router to the ADSL line varies by country and region. Typically it involves a microfilter or a microfilter with built-in splitter to allow simultaneous use of ADSL service and telephone service on the same telephone line. Please read the following steps carefully and select the appropriate method.
- Page 12 4. If you have an RJ45 wall jack for your ADSL service, connect an RJ45-to- RJ11 converter to the wall jack. Then connect one end of the telephone cord to the converter and the other end to the gray RJ11 port labeled “DSL line” on the back of your Router.
-
Page 13: Manually Configuring Client Adapters
status. Now you are ready to configure the Router for ADSL connection. In order for your computer to properly communicate with your Router, you will need to change your computer’s “TCP/IP Ethernet” settings to “Obtain an IP address automatically/Using DHCP”. This is normally the default setting in most home computers. - Page 14 4. You will also need to delete the Gateway address from the Gateway tab and DNS Configuration entries in order to properly be configured for connection to the Buffalo router. Restart the computer. When the computer restarts, your network adapter(s) are now configured for use with the Router.
- Page 15 3. Under the “Internet Options” screen, click on “Connections” and select “LAN Settings…”. 4. Make sure there are no check marks next to any of the displayed options: “Automatically detect settings”, “Use automatic configuration script”, and “Use a proxy server”. Click “OK”. Then click “OK” again in the “Internet Options” page.
-
Page 16: Accessing The User Interface
Accessing the User Interface 1. You can access the web-based management user interface of the Router using the Internet browser on a computer connected to the Router. Type “http://192.168.11.1” in your browser’s address bar. Then press the “Enter” key. Note: It is strongly recommended that you use a computer physically connected to the Router with an RJ45 cable for initial setup. -
Page 17: Understanding The Web-Based User Interface
Understanding the Web-Based User Interface Understanding the Web-Based User Interface Quick-Navigation Tabs - You can go directly to any of the Router’s UI pages by clicking directly on these links. The links are divided into logical categories and grouped by tabs to make finding a particular setting easier to find. Help is available to the right of each page. - Page 18 Setting your ISP Connection Type to PPPoE or PPPoA PPPoE (Point-to-Point Protocol over Ethernet) is the standard method of con- necting networked devices. It requires a user name and password to access the network of your ISP for connecting to the Internet. PPPoA (PPP over ATM) is similar to PPPoE, but is mostly implemented in the UK. Select PPPoE or PP- PoA and then set the following options: 1.
- Page 19 1. VPI/VCI - Enter your Virtual Path Identifier (VPI) and Virtual Circuit Identifier (VCI) parameter here. (Assigned by your ISP). Network Setup The Network Setup section sets your broadband modem router to work cor- rectly with machines connected through its LAN (Ethernet) ports. Local IP Address This is the gateway’s IP address on the LAN —...
- Page 20 DDNS If your Modem Router’s Internet IP address is assigned dynamically and you wish to host a Web site or other Internet service, you can sign up with DynDNS.org or TZO.com for Dynamic DNS (DDNS) service. Then select your DDNS provider from this list box, enter the required information, and click Apply.
-
Page 21: Wireless Config
Wireless Config AOSS AOSS™ (AirStation One-Touch Secure System) Connection AOSS is a Buffalo technology that makes it simple to connect wireless clients to an access point securely. You no longer need to worry about choosing the proper security protocols, IP addresses, or SSID’s. The intelligence of AOSS determines the best connection possible and configures itself in seconds. - Page 22 To identify your wireless network, a name called the SSID (Service Set Identi- fier) is used. The default SSID of the Router is “BUFFALO”. You can change this to anything you want to or you can leave it unchanged. If there are other...
- Page 23 Wireless Channel Your Router is configured to operate on the proper channels for the country you reside in. If there are other wireless networks operating in your area, your network should be set to operate on a channel that is different than the other wireless networks.
- Page 24 WEP (Wired Equivalent Privacy) WEP is a common protocol that adds security to all Wi-Fi-compliant wireless products. WEP was designed to give wireless networks the equivalent level of privacy protection as a comparable wired network. 64-Bit WEP 64-bit WEP was first introduced with 64-bit encryption, which includes a key length of 40 bits plus 24 additional bits of system-generated data (64 bits total).
- Page 25 Most of the new wireless equipment in the market today supports both 64-bit and 128-bit WEP encryption, but you might have older equipment that only supports 64-bit WEP. All Buffalo wireless products will support both 64-bit and 128-bit WEP. 1. Select “128-bit WEP” from the drop-down menu.
- Page 26 Connecting your Computer to a Wireless Network that Requires a 64-Bit or 128-Bit WEP Key 1. Double-click the “Signal Indicator” icon to bring up the “Wireless Network” screen. The “Advanced” button will allow you to view and configure more options of your wireless card. 2. Under the “Wireless Network Properties” tab, select a network name from the “Available networks”...
- Page 27 Advanced Multicast Rate This is the transmission speed used when the Modem Router transmits to multiple clients at the same time. Multicasting is common in applications that involve audio and/or video streams. The default setting, Auto, usually gives the best results, but a fixed, high rate may be preferable in some environ- ments.
- Page 28 Privacy Separator Communication between wireless stations must go through the Modem Router. The Privacy Separator function prevents any wireless station from ac- cessing any other. You can enable this function for better security. Mac Filter The MAC Filter is a powerful security feature that allows you to specify which computers are allowed on the network.
-
Page 29: Security
Security Firewall VPN Passthrough Virtual Private Network (VPN) passthrough lets authorised remote clients log onto VPN servers on your LAN and join the LAN as though they were locally connected. Strong encryption is normally used to make the remote link secure. Your broadband gateway is set by default to allow four types of VPN connections: IP Security (IPSec), Point-to-Point Protocol over Ethernet (PPPoE), Point-to-Point Tunneling Protocol (PPTP), and Layer 2 Tunneling Protocol (L2TP). -
Page 30: Gaming Ports
Block WAN Requests An “anonymous Internet request” is an attempt to “ping” your broadband gateway’s WAN interface. Pinging is a way of checking if a system is running at a particular IP address. It can also be used to hunt for certain kinds of vulnerabilities in the system. - Page 31 If you have a client PC that cannot run an Internet application properly from behind the firewall, you can open the client up to unrestricted two-way Inter- net access. This may be necessary if the NAT feature is causing problems with an application such as a game or video conferencing application.
-
Page 32: Admin Config
Admin Config Management Gateway Username & Password This is the user name and password you must type to log onto your broad- band modem router as administrator. The default user name is the word root and there is no password set by default. Remote Management This control determines whether you can log onto and manage the gateway from the Internet. - Page 33 of operational events. Logging is enabled by default, but can be disabled if desired. The gateway keeps logs of several kinds of events. Clicking View Logs displays a window in which these logs can be viewed separately or together. Select the log(s) you want to view from the drop-down list box at the top of the window.
- Page 34 Firmware Update From time to time, Buffalo may release new versions of the Router’s firmware. Firmware updates contain feature improvements and fixes to problems that may have existed. When Buffalo releases new firmware, you can download the firmware from the Buffalo website and update your Router’s firmware to the latest version.
-
Page 35: Diagnostic
Diagnostic Gateway Diagnostic panels show the current status of your modem router, its local network connection, the wireless interface, and the DSL link. The information displayed is read-only, that is, you cannot change any settings through these panels. A diagnostic panel is automatically updated approximately every 15 seconds, so you may notice that the panels flash periodically. - Page 36 The Wireless Diagnostic Panel reflects settings in the Wireless Configuration tab’s Basic and Security panels. this panel also shows the wireless firmware version and MAC address. DSL Connection If a DSL link has been established, technical information about it is shown here.
-
Page 37: Eu - Declaration Of Conformity
EU - Declaration of Conformity This device complies with the essential requirements of the R&TTE Directive 1999/5/EC. The following test methods have been applied in order to prove presumption of compliance with the R&TTE Directive 1999/5/EC: • EN 60950: 2000 Safety of Information Technology Equipment •... - Page 38 Under no circumstances shall Buffalo Technology be liable in any way to the user for damages, including any lost profi ts, lost savings or other incidental or consequential damages arising out of the use of, or inability to use, the Buffalo products.
- Page 39 Monday - Friday (GMT) 9:00 AM - 6:00 PM Monday-Thursday 9:00 AM - 4:30 PM Friday At Buffalo Technology, we constantly update our software and firmware. For the mostrecent software, firmware, driver, and technical whitepaper releases available, please visit the Buffalo Technology website:...