Ricoh AFICIO 1515 MF - B/W Laser - All-in-One General Settings Manual
User instructions
Hide thumbs
Also See for AFICIO 1515 MF - B/W Laser - All-in-One:
- Supplementary manual (15 pages) ,
- Operating instructions manual (1171 pages) ,
- Facsimile reference manual (124 pages)
Table of Contents
Advertisement
General Settings Guide
Getting Started
Combined Function Operations
User Tools (System Settings)
Troubleshooting
Other Functions
Entering Text
Security
Specifications
Read this manual carefully before you use this product and keep it handy for future reference.
For safe and correct use, please be sure to read the Safety Information in the "Copy Refer-
ence" before using the machine.
Operating Instructions
ABU003S.eps
Advertisement
Table of Contents

Related Manuals for Ricoh AFICIO 1515 MF - B/W Laser - All-in-One


Summary of Contents for Ricoh AFICIO 1515 MF - B/W Laser - All-in-One
-
Page 1: Operating Instructions
Operating Instructions General Settings Guide ABU003S.eps Getting Started Combined Function Operations User Tools (System Settings) Troubleshooting Other Functions Entering Text Security Specifications Read this manual carefully before you use this product and keep it handy for future reference. For safe and correct use, please be sure to read the Safety Information in the "Copy Refer- ence"... - Page 2 Type for 3515/DSm415/LD015/Aficio 1515 Type for 3515F/DSm415f/LD015f/Aficio 1515F Type for 3515MF/DSm415pf/LD015spf/Aficio 1515MF Printed in China EN USA B129-6707...
- Page 3 Introduction This manual describes detailed instructions on the operation and notes about the use of this machine. To get maximum versatility from this machine all operators are requested to read this manual carefully and follow the instructions. Please keep this manual in a handy place near the machine. Important Contents of this manual are subject to change without prior notice.
- Page 4 In accordance with IEC 60417, this machine uses the following symbols for the main power switch: a means POWER ON. c means STAND BY. Copyright © 2003...
-
Page 5: Manuals For This Machine
Manuals for This Machine The following manuals describe the operational procedures of this machine. For particular functions, see the relevant parts of the manual. Note Manuals provided are specific to machine type. Adobe Acrobat Reader is necessary to view the manuals as a PDF file. Two CD-ROMs are provided: •... - Page 6 Manuals for DeskTopBinder V2 Lite DeskTopBinder V2 Lite is a utility included on the CD-ROM labeled “Scanner Driver & Document Management Utilities”. • DeskTopBinder V2 Lite Setup Guide (PDF file - CD-ROM2) Describes the installation of, and the operating environment for DeskTop- Binder V2 Lite in detail.
-
Page 7: What You Can Do With This Machine
What You Can Do with This Machine The following introduces the functions of this machine, and the relevant manu- als containing detailed information about them. Note Some functions many not be available depending on your machine type. Copier, Facsimile, Printer, and Paperless Fax Transmission Scanner Functions ABU006S.eps... -
Page 8: Fax Transmission And Reception Through The Internet
Fax Transmission and Using the Scanner in a Reception through the Internet Network Environment ABU007S.eps ABU008S.eps xxx@xxx.com xxx@xxx.com ABU008S ABU007S • You can send scan files to a speci- • You can send fax documents fied destination using e-mail through e-mail by specifying the (Sending scan file by e-mail). -
Page 9: Administrating The Machine (Security Functions)
Administrating the Machine Monitoring the Machine Using (Security Functions) a Computer ABU009S.eps ABU010S.eps ABU009S ABU010S The security functions protect docu- You can monitor machine status and ments from being copied without change settings using a computer. permission or unauthorized access •... -
Page 10: Table Of Contents
TABLE OF CONTENTS Manuals for This Machine ..................i What You Can Do with This Machine..............iii Copier, Facsimile, Printer, and Scanner Functions........... iii Paperless Fax Transmission..................iii Fax Transmission and Reception through the Internet ..........iv Using the Scanner in a Network Environment ............iv Administrating the Machine (Security Functions)............ - Page 11 User Code (MFP) ....................45 Registering a New User Code..................45 Changing a User Code.....................46 Deleting a User Code....................48 Displaying the Counter for Each User Code ............49 Printing the Counter for Each User Code..............49 Clearing the Counter ....................50 Fax Destination ....................52 Registering a Fax Destination ..................52 Changing a Registered Fax Destination ..............54 Deleting a Registered Fax Destination..............55 E-mail Destination....................57...
- Page 12 7. Security Security.........................85 Primary Security Functions ..................85 Extended Security Function ..................85 Operating Environment and Notes..............87 Operating Environment ....................87 For Administrator......................87 For User ........................87 8. Specifications Main Unit.......................89 Auto Document Feeder (ADF) .................92 Other Item ......................93 Paper Tray Unit (Tray 2) ..................93 Copy Paper ......................94 Recommended Paper Sizes and Types..............94 Unusable Paper .......................95...
-
Page 13: Copyrights And Trademarks
Adobe Systems Incorpo- rated. Bluetooth™ is a trademark of the Bluetooth SIG, Inc. (Special Interest Group) and is used by RICOH Company Limited under license. Copyright ©2001 Bluetooth SIG, Inc. The Bluetooth Trademarks are owned by Bluetooth SIG, Inc. USA. -
Page 14: Information About Installed Software
Information about Installed Software expat • The software including controller, etc. (hereinafter “software”) installed on this product uses the expat Version 1.95.2 (hereinafter “expat”) under the con- ditions mentioned below. • The product manufacturer provides warranty and support to the software of the product including the expat, and the product manufacturer makes the ini- tial developer and copyright holder of the expat, free from these obligations. - Page 15 NetBSD 1. Copyright Notice of NetBSD For all users to use this product: This product contains NetBSD operating system: For the most part, the software constituting the NetBSD operating system is not in the public domain; its authors retain their copyright. The following text shows the copyright notice used for many of the NetBSD source code.
- Page 16 2. Authors Name List All product names mentioned herein are trademarks of their respective owners. The following notices are required to satisfy the license terms of the software that we have mentioned in this document: • This product includes software developed by the University of California, Berkeley and its contributors.
- Page 17 Sablotron Sablotron (Version 0.82) Copyright (c) 2000 Ginger Alliance Ltd. All Rights Re- serve a) The application software installed on this product includes the Sablotron soft- ware Version 0.82 (hereinafter, “Sablotron 0.82”), with modifications made by the product manufacturer. The original code of the Sablotron 0.82 is provided by Ginger Alliance Ltd., the initial developer, and the modified code of the Sa- blotron 0.82 has been derived from such original code provided by Ginger Alli- ance Ltd.
- Page 18 SASL CMU libsasl Tim Martin Rob Earhart Rob Siemborski Copyright (c) 2001 Carnegie Mellon University. All rights reserved. Redistribution and use in source and binary forms, with or without modifica- tion, are permitted provided that the following conditions are met: Redistributions of source code must retain the above copyright notice, this list of conditions and the following disclaimer.
- Page 19 Copyright (C) 1990-2, RSA Data Security, Inc. All rights reserved. License to copy and use this software is granted provided that it is identified as the “RSA Data Security, Inc. MD4 Message-Digest Algorithm” in all material mentioning or referencing this software or this function. License is also granted to make and use derivative works provided that such works are identified as “derived from the RSA Data Security, Inc.
-
Page 20: How To Read This Manual
How to Read This Manual Symbols The following set of symbols is used in this manual. R WARNING: This symbol indicates a potentially hazardous situation that might result in death or serious injury when you misuse the machine without following the in- structions under this symbol. -
Page 21: Energy Star Program
ENERGY STAR Program As an ENERGY STAR Partner, we have determined M006.eps that this machine model meets the ENERGY STAR Guidelines for energy efficiency. The ENERGY STAR Guidelines intend to establish an international energy-saving system for developing and introducing energy-efficient office equipment to deal with environmental is- sues, such as global warming. - Page 22 • Duplex Priority To conserve paper, the Duplex function (1-Sided 2-Sided) can be selected preferentially when you turn on the operation switch or the main power switch, press the {Clear Modes} key, or the machine resets itself automatically. To change Duplex Priority mode, see Copy Reference. Specifications Copier only Fax, printer, or scanner in-...
-
Page 23: Getting Started
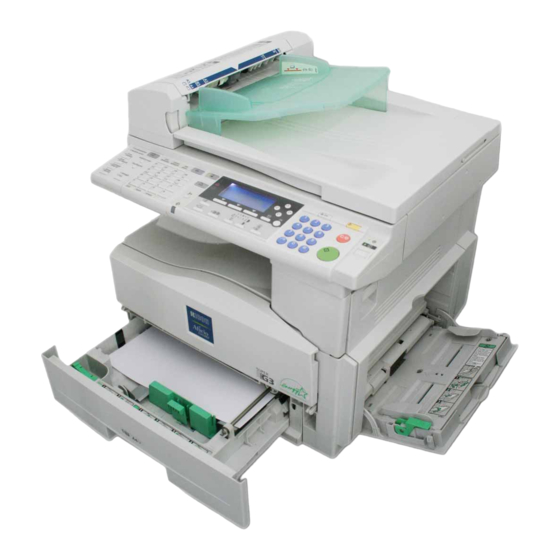
1. Getting Started Guide to Components ABU101S.eps ABU101S Auto Document Feeder Main power switch Feeds in originals automatically. If the machine does not operate after turning on the operation switch, check Exposure glass the main power switch is turned on. If it Place originals face down here. -
Page 24: Operation Switch
Getting Started Operation switch Paper tray (Tray 1) Press to turn the power on (the On indi- Load paper here. cator lights). To turn the power off, press Paper tray unit (Tray 2) again (the On indicator goes off). See p.13 “Other Items”. Control panel Internal tray guide See p.14 “Control Panel”. -
Page 25: Other Items
Other Items Other Items • External ABU121S.eps ABU121S Paper tray unit (Tray 2) Holds 500 sheets. • Internal Fax unit Allows you to use the facsimile function. Printer/Scanner unit Allows you to use the printer and scanner functions. Parallel port IEEE 1284 interface board Allows you to connect an IEEE 1284 cable. -
Page 26: Control Panel
Getting Started Control Panel This illustration shows the control panel of the machine with fax, printer, and scanner installed. ABU102S.eps 1112 13 14 22 23 24 ABU102S Fax function keys Display Displays operation status and messages. Reference Selection keys Facsimile Reference <Basic Features> Correspond to items on the display. - Page 27 Control Panel Main power indicator and On Copier function keys indicator Reference The main power indicator lights when Copy Reference the main power switch is turned on. The On indicator lights when the operation {Lighter} and {Darker} keys switch is on. Press to change the image density setting.
-
Page 28: Display
Getting Started Display The display panel shows machine status, error messages, and function menus. Important A force or impact of more than 30 N (about 3 kgf) will damage the display. The copy display is set as the default screen when the machine is turned on. ***ZEN001.tif*** When you select or specify an item on the display, it is highlighted like Reading the Display and Using Keys... - Page 29 Control Panel Common key operations The following keys are common to all screens: Key list Deletes a selected function or entered values, and then the previous [Cancel] display returns. [Exit] The previous display returns. [Stop] Stops a job in progress. [Yes] Acknowledges a selected function or an entered values.
- Page 30 Getting Started...
-
Page 31: Combined Function Operations
2. Combined Function Operations Changing Modes Note You cannot switch modes in any of the following situations: • When scanning a fax message for transmission • During immediate transmission • When accessing User Tools • During On hook dialing for fax transmission •... -
Page 32: System Reset
Combined Function Operations -System Reset The machine returns automatically to its initial condition when the job is fin- ished, after a certain period of time has elapsed. This function is called “System Reset”. Note You can change the System Reset time. See p.31 “System Auto Reset Timer”. -
Page 33: Multi-Access
Multi-Access Multi-Access You can carry out another job using a different function while the current job is being performed. Performing multiple functions simultaneously like this is called “Multi-accessing”. This allows you to handle jobs efficiently, regardless of how the machine is being used. - Page 34 Combined Function Operations Function you want to se- Copy Facsimile Printer Scanner lect Transmission Recep- Print tion Function in progress Memory Reception b Printing Re- ceived Data Receive Data Printing Using the control panel Scanning b…means that these functions can be used together. $…means that you can interrupt the current job with Function keys to proceed to a subsequent job.
-
Page 35: User Tools (System Settings)
3. User Tools (System Settings) User Tools Menu (System Settings) Reference For details about Interface Settings and File Transfer, see “User Tools Menu (System Settings)”, Network Guide. For details about parallel interface, see “System Settings (Parallel Connec- tion)”, Printer Reference 2. General Features (See p.28 “General Features”.) Default (MFP) Default (Copier only) - Page 36 User Tools (System Settings) Timer Settings (See p.31 “Timer Settings”.) Default (MFP) Default (Copier only) Auto Off Timer 1 min. Energy Saver Timer 1 min. System Auto Reset Timer 60 sec. Copier Auto Reset Timer 60 sec. Facsimile Auto Reset Timer 30 sec.
- Page 37 User Tools Menu (System Settings) Default Default (MFP) (Copier only) Program/Change User Code Program — Change — Delete — Address Book:Print List Destination List — Group Destination List — Quick Dial Label — AOF (Always On)
-
Page 38: Accessing User Tools (System Settings)
User Tools (System Settings) Accessing User Tools (System Settings) This section is for key operators in Select [System Settings] using {U} charge of this machine. or {T}, and then press the {OK} User Tools allow you to change or set key. -
Page 39: Quitting User Tools
Accessing User Tools (System Settings) Quitting User Tools Press the {User Tools/Counter} key. ABU105S.eps ABU105S... -
Page 40: Settings You Can Change With User Tools
User Tools (System Settings) Settings You Can Change with User Tools Reference To access User Tools, see p.26 “Accessing User Tools (System Settings)”. General Features Panel Tone The beeper (key tone) sounds when a key is pressed. Note Default: On Copy Count Display The copy counter can be set to show the number of copies made (count up), or the number of copies yet to be made (count down). -
Page 41: Tray Paper Settings
Settings You Can Change with User Tools Measurement Unit You can switch the measurement between “mm” and “inch”. Note Default: Metric version: mm Inch version: inch Tray Paper Settings Tray Paper Size:Tray 1–2 Select the size of the paper loaded in the paper tray. •... - Page 42 User Tools (System Settings) Paper Type:Tray 1– 2 Set the display so you can see what type of paper is loaded in each paper tray. The print function uses this information to automatically select the paper tray. • The paper types you can set are as follows: •...
-
Page 43: Timer Settings
Settings You Can Change with User Tools Timer Settings Auto Off Timer After a specified period has passed, following job completion, the machine automatically turns off, in order to conserve energy. This function is called “Auto Off”. The machine status after the Auto Off operation is referred to as “Off mode”, or “Sleep mode”. - Page 44 User Tools (System Settings) Copier Auto Reset Timer Specify the time to elapse before copier mode resets. Note If [Off] is selected, the machine does not automatically switch to the user code entry screen. Default: On, 60 sec. The time can be set from 10 to 999 seconds using the number keys. Facsimile Auto Reset Timer (facsimile) Specify the time to elapse before the facsimile mode resets.
-
Page 45: Key Operator Tools
Settings You Can Change with User Tools Key Operator Tools The key operator must set the following items (for settings or more information, contact the key operator): We recommend that the key operator program a key operator code when mak- ing settings. -
Page 46: Display/Print Counter
User Tools (System Settings) Extended Security Specify whether or not to use the security function. Note Default : Off You have to set a 6-digit key operator code to enable Extended Security. See p.33 “Key Operator Code”. Reference For details about security, see p.85 “Security”. Display/Print Counter Allows you to view and print the number of prints. - Page 47 Settings You Can Change with User Tools Select [Display/Print Counter] using {U} or {T}, and then press the {OK} key. ***ZEN005.tif*** Press [Print]. ***ZEN006.tif*** Press the {Start} key. ***ZEN007.tif*** Press the {User Tools/Counter} key. Counter per User Code Allows you to view and print the numbers of prints accessed with user codes, and to set those values to 0.
- Page 48 User Tools (System Settings) Address Book Management You can add, change, or delete user information in the Address Book, and fac- simile/scanner functions destinations. For details about these operations, see p.45 “User Code (MFP)”, p.52 “Fax Destination”, and p.57 “E-mail Destination”. •...
- Page 49 Settings You Can Change with User Tools Program/Change/Delete Group You can register multiple users in a group. This allows you to easily control registered users in each group. For details about operations, see p.62 “Registering Destinations to a Group”. • [Program/Change] This registers new groups, or changes the group name or registration num- ber.
-
Page 50: User Code (For Machines With Copier Function Only)
User Tools (System Settings) User Code (For machines with copier function only) Register user codes to restrict copier Select [Program/Change User Code] functions to certain users, and check using {U} or {T}, and then press on their use of copier functions. the {OK} key. -
Page 51: Changing A User Code
User Code (For machines with copier function only) Enter the new user code using the Changing a User Code number keys, and then press the {OK} or {#} key. Note ***ZEN014.tif*** Even if you change a user code, the counter value will not be cleared. Press the {User Tools/Counter} key. -
Page 52: Displaying The Counter For Each User Code
User Tools (System Settings) Select [Per User Code] or [All User Displaying the Counter for Codes] using {U} or {T}, and then Each User Code press the {OK} key. ***ZEN015.tif*** You can check the counter for each user code. Press the {User Tools/Counter} key. Select [System Settings] using {U} or {T}, and then press the {OK} When selecting [All User Codes], a... -
Page 53: Printing The Counter For Each User Code
User Code (For machines with copier function only) Printing the Counter for Each Clearing the Counter User Code Press the {User Tools/Counter} key. You can print out the counter for each Select [System Settings] using {U} user code. or {T}, and then press the {OK} Press the {User Tools/Counter} key. -
Page 54: Address Book
User Tools (System Settings) Address Book Registering user information, such as To manage registered items fax numbers and e-mail addresses, in • User Code the Address Book allows you to man- Register user codes to restrict age them together. particular functions to certain users, and check their use of Important each function. -
Page 55: Registering Destination Information
Address Book Items to register Registering Destination • User Name Information Reference p.43 “Registering the desti- Registering the destination name nation name” • User Name p.44 “Registering Sender In- Register the destination name. formation” This is the basic information re- ***ZEN020.tif*** quired for managing destina- tions. -
Page 56: Registering Sender Information
User Tools (System Settings) When using the scanner function • E-mail Register e-mail addresses in the Address Book. To send scan files by e-mail, select the desti- nation from the Destination List, so you can specify the e- mail address. Reference p.57 “E-mail Destination”... -
Page 57: User Code (Mfp)
User Code (MFP) User Code (MFP) Register user codes to restrict the fol- Registering a New User Code lowing functions to certain users, and check their use of each function: Press the {User Tools/Counter} key. • Copier ABU105S.eps • Facsimile •... -
Page 58: Changing A User Code
User Tools (System Settings) Select [Program/Change] using {U} Enter the user code using the or {T}, and then press the {OK} number keys, and then press the {OK} key. key. ***ZEN018.tif*** ***ZEN022.tif*** Select the function using {U} or Enter the registration number you {T}, and then check the one you want to program using the num- want to set the user code for using... - Page 59 User Code (MFP) Select [Program/Change] using {U} Press [UserCode]. or {T}, and then press the {OK} ***ZEN038.tif*** key. Press [Search]. ZEN019.tif Enter the new user code using the number keys, and then press the {OK} key. ***ZEN039.tif*** Note You can also enter the registra- tion number of the user (desti- nation) using the number keys or the Quick Dial keys.
-
Page 60: Deleting A User Code
User Tools (System Settings) Select [Display Destination List] us- Deleting a User Code ing {U} or {T}, and then press the {OK} key. Press the {User Tools/Counter} key. ZEN024.tif Select [System Settings] using {U} or {T}, and then press the {OK} key. Select [Key Operator Tools] using {U} or {T}, and then press the {OK} key. -
Page 61: Displaying The Counter For Each User Code
User Code (MFP) Press the {User Tools/Counter} key. Printing the Counter for Each User Code Displaying the Counter for You can print out the counter made Each User Code under each user code using [Print Counter], [Transmission Counter], or You can check the counter made un- [Scanner Counter]. -
Page 62: Clearing The Counter
User Tools (System Settings) E Press the {Start} key. Note The counter list prints out. Repeat this step when you want to print more than one Press the {User Tools/Counter} key. counter. C Press the {OK} key. Clearing the Counter D Press the {Start} key. - Page 63 User Code (MFP) C Select the counter using {U} or Note {T}, and then check the one Repeat this step when you you want to clear using {V}. want to clear more than one ZEN044.tif counter. C Press the {OK} key. A confirmation message ap- pears.
-
Page 64: Fax Destination
User Tools (System Settings) Fax Destination Register fax destinations, so you do Registering a Fax Destination not need to enter them each time, and can send documents scanned in using the fax function. Press the {User Tools/Counter} key. • It is easy to select the fax destina- ABU105S.eps tion if you register a “User (Desti- nation) Name”... - Page 65 Fax Destination Select [Program/Change] using {U} Press [Dest.]. or {T}, and then press the {OK} ZEN021.tif key. ZEN018.tif Select [Fax Settings] using {U} or {T}, and then press the {OK} key. ***ZEN048.tif*** Enter the registration number you want to program using the num- ber keys or the Quick Dial keys, and then press the {OK} key.
-
Page 66: Changing A Registered Fax Destination
User Tools (System Settings) C Select [On] or [Off] using {U} or Changing a Registered Fax {T}, and then press the {OK} key. Destination ***ZEN051.tif*** Press the {User Tools/Counter} key. Select [System Settings] using {U} or {T}, and then press the {OK} key. -
Page 67: Deleting A Registered Fax Destination
Fax Destination Press the {Cancel} key. Select [Display Destination List] us- ing {U} or {T}, and then press the Press the {OK} key. {OK} key. ZEN024.tif The “ ” message ap- Programmed pears, and then the “Address Book” display returns. Press the {User Tools/Counter} key. - Page 68 User Tools (System Settings) Press [Search]. Press [Dest.]. ZEN019.tif ZEN055.tif Note Note You can also enter the registra- If you selected [Delete] in step tion number of the user (desti- press [Yes] to delete all user in- nation) using the number keys formation, and then proceed to or the Quick Dial keys.
-
Page 69: E-Mail Destination
E-mail Destination E-mail Destination Register e-mail destinations, so you Select [System Settings] using {U} do not need to enter e-mail addresses or {T}, and then press the {OK} every time, and can send scan files by key. e-mail, or send fax documents by In- ZEN002.tif ternet Fax. - Page 70 User Tools (System Settings) Enter the registration number you Enter the e-mail address using the want to program using the num- number keys and the Quick Dial keys, and then press the {OK} key. ber keys or the Quick Dial keys, and then press the {OK} key.
-
Page 71: Changing A Registered E-Mail Destination
E-mail Destination Enter the sender's password us- Press [Search]. ZEN019.tif ing the number keys, and then press the {OK} key. ***ZEN060.tif*** Note You can also enter the registra- Note tion number of the user (desti- You can enter up to eight digits. nation) using the number keys or the Quick Dial keys. -
Page 72: Deleting A Registered E-Mail Destination
User Tools (System Settings) Press [Dest.]. Enter the sender's password us- ZEN038.tif ing the number keys, and then press the {OK} key. ZEN060.tif Select [E-mail Settings] using {U} or {T}, and then press the {OK} key. Press the {Cancel} key. ZEN048.tif Press the {OK} key. - Page 73 E-mail Destination Press the {OK} key. Note Select [Program/Change] if you Press [Dest.]. want to delete only the e-mail ZEN038.tif address. Select [Delete] if you want to de- lete all user information. Press [Search]. ZEN019.tif Note If you selected [Delete] in step press [Yes] to delete all user in- formation, and then proceed to step...
-
Page 74: Registering Destinations To A Group
User Tools (System Settings) Registering Destinations to a Group Register destinations to a group to Select [Prgrm./Change/Delete Group] easily control registered fax and e- using {U} or {T}, and then press mail address for each group. the {OK} key. To group destinations, the groups ZEN005.tif must be registered beforehand. -
Page 75: Registering A Destination To A Group
Registering Destinations to a Group Press the {OK} key. Note You can also enter the registra- The “ ” message ap- Programmed tion number of the user (desti- pears, and then the “Group” dis- nation) using the number keys play returns. or the Quick Dial keys. -
Page 76: Removing A Destination From A Group
User Tools (System Settings) Select [Program Group] using {U} Select [Program/Change] using {U} or {T}, and then press the {OK} or {T}, and then press the {OK} key. key. ZEN048.tif Press [Search]. ZEN053.tif Select the group name to which you want to register using {U} or Note {T}, and then check it using {V}. -
Page 77: Displaying The Destinations Registered In Groups
Registering Destinations to a Group Press [Dest.]. Select [Prgrm./Change/Delete Group] using {U} or {T}, and then press ZEN038.tif the {OK} key. Select [Program/Change] using {U} or {T}, and then press the {OK} key. Press [Search]. Select [Program Group] using {U} ZEN082.tif or {T}, and then press the {OK} key. - Page 78 User Tools (System Settings) Reference Searching to select a registered For details about entering group by registration number t e x t , s e e p . 8 3 “ E n t e r i n g Text”. A Select [Search by Registration No.] using {U} or {T}, and then C Press the {OK} key.
-
Page 79: Changing A Group Name
Registering Destinations to a Group B Enter the characters of the des- Changing a Group Name tination you want to change us- ing the number keys and the Quick Dial keys, and then Press the {User Tools/Counter} key. press the {OK} key. ZEN025.tif Select [System Settings] using {U} or {T}, and then press the {OK}... -
Page 80: Deleting A Group
User Tools (System Settings) Searching to select a registered Deleting a Group group by registration number Press the {User Tools/Counter} key. A Select [Search by Registration No.] using {U} or {T}, and then Select [System Settings] using {U} press the {OK} key. or {T}, and then press the {OK} B Enter the registration number key. - Page 81 Registering Destinations to a Group B Enter the characters of the des- Searching to select a registered tination you want to delete us- group by registration number ing the number keys and the Quick Dial keys, and then A Select [Search by Registration No.] press the {OK} key.
-
Page 82: Using The Search Function To Select A Destination
User Tools (System Settings) Using the Search Function to Select a Destination You can use the search function to se- Searching to select a registered lect a registered destination by name, destination by name registered number, user code, fax number or e-mail address. A Select [Search by Name] using {U} or {T}, and then press the Press the {User Tools/Counter} key. - Page 83 Using the Search Function to Select a Destination D Select the user (destination) Searching to select a registered you want to change or delete destination by user code using {U} or {T}, and then press the {OK} key. A Select [Search by User Code] us- ZEN027.tif ing {U} or {T }, and then press the {OK} key.
- Page 84 User Tools (System Settings) Searching to select a registered Searching to select a registered destination by fax number destination by e-mail address A Select [Search by Fax No.] using A Select [Search by E-mail Address] {U} or {T}, and then press the using {U} or {T}, and then {OK} key.
-
Page 85: Troubleshooting
4. Troubleshooting If Your Machine Does Not Operate As You Want The following chart gives explanations of common problems and messages. If other messages appear, follow the instructions displayed. Note For further “Troubleshooting”, refer to the other manuals for this machine. See p.i “Manuals for This Machine”. - Page 86 Troubleshooting Problem Causes Solutions Cannot print in duplex You cannot use paper in For duplex printing, select Tray 1-2 mode. the bypass tray for duplex in copier mode or with the printer printing. driver. [Off] is selected for [Duplex] Select [On] for [Duplex] in Paper in Paper Type: Tray 1-2.
-
Page 87: Clearing Misfeeds
x Clearing Misfeeds x Clearing Misfeeds ZFOH210E.eps R CAUTION: • The fusing section of this machine might be very hot. Caution should be tak- en when removing misfed paper. Important When clearing misfeeds, do not turn off the power switch. If you do, your copy settings are cleared. - Page 88 Troubleshooting ABU040S.eps displayed displayed displayed ABU040S...
-
Page 89: Changing The Paper Size
Changing the Paper Size Changing the Paper Size Preparation When loading A4L size paper Be sure to select the paper size A Place the back fence in the cor- with User Tools. If you do not, mis- feeds might occur. See p.29 “Tray ner pocket on the left. -
Page 90: Changing The Paper Size In The Paper Tray Unit (Tray 2)
Troubleshooting Square the paper and load it in While pressing the release lever, the tray. set the back fence to the new size. ABU049S.eps ABU046S.eps ABU049S ABU046S Important Push the paper tray in until it stops. Be sure to load the paper under the roller. - Page 91 Changing the Paper Size Important When loading 8 " 14"L or Do not stack paper over the lim- " 14"L size paper it mark. A Pull the back fence off from Load paper so that the paper the tray. touches the right side of the tray, or misfeeds might occur.
-
Page 92: Selecting The Paper Size With User Tools
Troubleshooting Select the paper size using the Selecting the Paper Size with scroll keys, and then press the User Tools {OK} key. ***ZEN083.tif*** Press the {User Tools/Counter} key. ABU105S.eps The “ ” message ap- Programmed pears. Press the {User Tools/Counter} key. ABU105S Select [System Settings] using {U} or {T}, and then press the {OK}... -
Page 93: Other Functions
5. Other Functions Other Functions Press the {User Tools/Counter} key. Displaying the Total Counter You can display the total counter val- Changing the Language ue used for all functions. You can change the language used on Press the {User Tools/Counter} key. the display. - Page 94 Other Functions...
-
Page 95: Entering Text
6. Entering Text Entering Text {W} or {V} This section describes how to enter characters. When you enter a charac- Use to move the cursor left or ter, it appears at the cursor position. If right. there is a character already at the cur- Note sor position, the newly entered char- To enter symbols, press the {Sym-... - Page 96 Entering Text Select the desired symbol using Entering letters the scroll keys, and then press the {OK} key. Press the {Shift} key to switch be- ***ZEN078.tif*** tween uppercase and lowercase. ABU041S.eps ***ZEN079.tif*** Note ABU041S To enter another symbol, repeat steps A to B. Press a Quick Dial keys.
-
Page 97: Security
7. Security Security Confidential information is always at risk of being copied without permission or subject to unauthorized access through the network. To protect documents from such intrusion, not only can passwords be set, but also the Extended Security function can be used to strengthen security. For those who require increased document protection, we recommend the Ex- tended Security function. - Page 98 Security Press the {User Tools/Counter} key. ABU105S.eps ABU105S Select [System Settings] using {U} or {T}, and then press the {OK} key. ZEN002.tif Select [Key Operator Tools] using {U} or {T}, and then press the {OK} key. ZEN003.tif Select [Extended Security] using {U} or {T}, and then press the {OK} key. ZEN005.tif Select [On] using {U} or {T}, and then press the {OK} key.
-
Page 99: Operating Environment And Notes
Operating Environment and Notes Operating Environment and Notes Security for this machine is assured on the premises that the machine is used un- der the following conditions: Operating Environment • The condition of the machine is normal. (For example, it is not damaged, modified, or lacking components.) •... - Page 100 Security...
-
Page 101: Specifications
8. Specifications Main Unit Configuration: Desktop Photosensitivity type: OPC drum Original scanning: One-dimensional solid scanning system through CCD Copy process: Dry electrostatic transfer system Development: Dry two-component magnetic brush development system Fusing: Heating roll pressure system Resolution: 600 dpi Exposure glass: Stationary original exposure type Original reference position: Rear left corner... - Page 102 Specifications Copy paper size: • Tray: A4L, B5 JISL, A5K, 8 " 11"L, 5 " "K, 16KL • Bypass: A4L, A5KL, B5 JISL, 8 " 14"L, 8 " 11"L, 5 " 8 "KL, " 10 "L, 8" 13"L, 8 " 13"L, 8 "...
- Page 103 Main Unit Copy paper capacity: • Tray 1: 250 sheets (80 g/m , 20 lb) • Bypass: 100 sheets (80 g/m , 20 lb) Power consumption: Main unit only Complete system Warm up Less than 890 W Less than 890 W Stand-by About 90 Wh About 100 Wh...
-
Page 104: Auto Document Feeder (Adf)
Specifications Auto Document Feeder (ADF) Mode: • ADF mode Original size: • A4L – A5KL • 8 " 14"L – 5 " 8 "KL Original weight: • One-sided originals: 52 – 105 g/m (14 – 28 lb) Number of originals to be set: •... -
Page 105: Other Item
Other Item Other Item Paper Tray Unit (Tray 2) Paper weight: 60 – 90 g/m (16 – 24 lb.) Paper size: A4L, 8 " 14"L, 8 " 13"L, 8 " 11"L, 8 " 13"L, 8 " 14"L Maximum power consumption: 15 W (power is supplied from the main unit) Paper capacity: 500 sheets (80 g/m... -
Page 106: Copy Paper
Specifications Copy Paper Recommended Paper Sizes and Types The following limitations apply to each tray: Metric version Inch version Paper weight Paper capacity Paper tray 1 A4L, B5 JISL, A5K, 8 " 11"L, 60 – 90 g/m 250 sheets 16 – 24 lb "... -
Page 107: Unusable Paper
Copy Paper Important If you use damp or curled paper, a misfeed might occur. In such a case, try turning over the paper stack in the paper tray. If there is no improvement, change to copy paper with less curl. Note When using the bypass tray, we recommend you set the copy paper direction to L. -
Page 108: Paper Storage
Specifications Note Do not use any of the following kinds of paper or a misfeed might occur. • Bent, folded, or creased paper • Torn paper • Slippery paper • Perforated paper • Rough paper • Thin paper that has low stiffness •... -
Page 109: Index
INDEX Accessing User Tools (System Settings) Deleting a group Address Book Deleting a registered e-mail destination Print List Deleting a registered fax destination Deleting a user code Address Book Management for machines with copier function only for MFP AOF (Always On) Display Auto Document Feeder Display Contrast... - Page 110 Key Counter Management Reading the display and using keys Key Operator Code Recommended paper sizes and types Key Operator Tools Registering a fax destination Key Repeat Registering an e-mail destination Registering a new group Registering a new user code for machines with copier function only Language for MFP Lower right cover...
- Page 111 MEMO...
- Page 112 MEMO B129-6707...