D-Link DCS-931L User Manual
User manual
Hide thumbs
Also See for DCS-931L:
- User manual (47 pages) ,
- Quick installation manual (41 pages) ,
- Quick install manual (13 pages)
Table of Contents
Advertisement
Advertisement
Table of Contents

Related Manuals for D-Link DCS-931L


Summary of Contents for D-Link DCS-931L
- Page 1 Version 1.0 | 02/12/2013 User Manual Cloud Camera 1050 DCS-931L...
-
Page 2: Manual Overview
Manual Overview D-Link reserves the right to revise this publication and to make changes in the content hereof without obligation to notify any person or organization of such revisions or changes. Information in this document may become obsolete as our services and websites develop and change. -
Page 3: Table Of Contents
Configuration ..............19 Troubleshooting ..............43 Using the Web Configuration Interface ......19 Technical Specifications ..........46 Live Video ..................20 Setup ....................21 Contacting Technical Support ........48 Wizard ..................21 Internet Connection Setup Wizard ......22 Warranty ................49 Network Setup ..............24 Registration ..............56 D-Link DCS-931L User Manual... -
Page 4: Product Overview
Section 1 - Product Overview Product Overview Package Contents • DCS-931L Cloud Camera 1050 • CAT5 Ethernet Cable • Power Adapter • Manual and Software on CD • Quick Install Guide Note: Using a power supply with a different voltage than the one included with your product will cause damage and void the warranty for this product. -
Page 5: Introduction
Congratulations on your purchase of the DCS-931L Cloud Camera 1050. The DCS-931L is a versatile and unique solution for your small office or home. Unlike a standard webcam, the DCS-931L is a complete system with a built-in CPU and web server that transmits high quality video images for security and surveillance. -
Page 6: Features
Motion and Sound Triggered Notifications and Recordings The DCS-931L can send e-mail notifications with snapshots or video clips whenever motion or sound is detected. You can customize areas of the video to monitor for motion to keep watch over entry ways, and you can set volume limits to detect when a loud sound is picked up by the camera. -
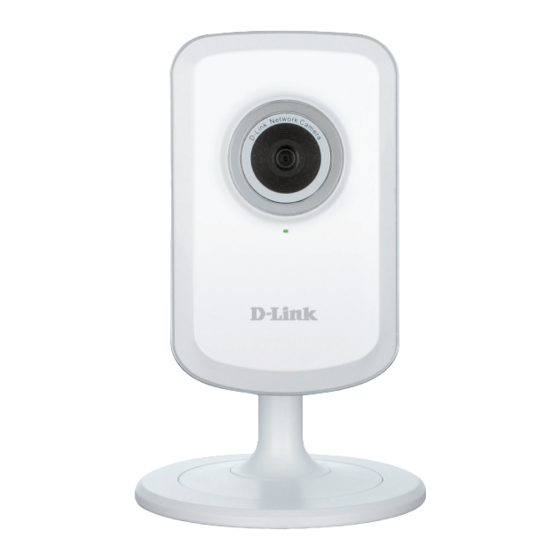
Page 7: Hardware Overview
Section 1 - Product Overview Hardware Overview Front View Camera Lens Microphone D-Link DCS-931L User Manual... -
Page 8: Rear View
Section 1 - Product Overview Rear View Power Connector Ethernet Port Power and Link LED Reset Button WPS LED WPS Button Camera Stand D-Link DCS-931L User Manual... -
Page 9: Installation
Manual Hardware Installation: This section shows you how to manually set up your camera, though in order to use the mydlink features of your camera, you will still need to run the Camera Setup Wizard. Refer to page 15. D-Link DCS-931L User Manual... -
Page 10: Zero Configuration Setup
Connect your camera to your mydlink-enabled Cloud Router and Zero Configuration will automatically configure your DCS-931L and automatically add the camera to your mydlink account. With this quick and easy setup you can remotely access your camera from the www.mydlink.com website to manage and monitor your DCS-931L. - Page 11 Click the notification to continue. A summary and confirmation notification will appear with the automatically configured details. Make a note of the details and click Yes to add the camera to your account. D-Link DCS-931L User Manual...
- Page 12 Your camera is now set up. You can skip to the “mydlink” section on page 18 to learn more about the mydlink features of this camera. For “Configuration” information go to page 19 for advanced configuration of your camera. D-Link DCS-931L User Manual...
-
Page 13: Camera Setup Wizard
Advanced folder to run the wizard. Then, click Set up your Cloud Camera to go through the Setup Wizard, which will guide you through the step-by-step installation process. D-Link DCS-931L User Manual... -
Page 14: Mac Users
Wizard. Once downloaded, open the Setup Wizard firle and launch the application. After about 20-30 seconds, the Setup Wizard will open, which will guide you step-by-step through the installation process from connecting your hardware to configuring your camera and registering it with your mydlink account. D-Link DCS-931L User Manual... -
Page 15: Manual Hardware Installation
You can use WPS to connect your camera to your network wirelessly. For more information, refer to “WPS - Push Button Setup” on page 17. If your router does not support WPS, you will still be able to set up your camera’s wireless settings in the camera’s web interface. D-Link DCS-931L User Manual... -
Page 16: Wireless Installation Considerations
Section 2 - Installation Wireless Installation Considerations The D-Link Wireless Network Camera lets you access your network using a wireless connection from anywhere within the operating range of your wireless network. However, the number, thickness and location of walls, ceilings, or other objects that the wireless signals must pass through, may limit the range. -
Page 17: Wps - Push Button Setup
WPS feature. If you are not sure where the WPS button is on your router, please refer to your router’s User Manual. WPS Button The DCS-931L will automatically create a secure wireless connection to your router. While connecting, the green LED will flash and your camera will reboot. D-Link DCS-931L User Manual... -
Page 18: Mydlink
After registering your DCS-931L camera with a mydlink account in the Camera Setup Wizard, you will be able to remotely access your camera from the www.mydlink.com website. After signing on to your mydlink account, you will see a screen similar to... -
Page 19: Configuration
After completing the Camera Setup Wizard, you are ready to use your camera. The camera’s built-in Web configuration interface is designed to allow you to easily access and configure your DCS-931L. At the end of the wizard, enter the IP address of your camera into a web browser, such as Internet Explorer . -
Page 20: Live Video
Video Compression Format: compression format used when viewing your camera. Zoom: Click on these buttons to zoom in and out of the video. Audio: Click on the ON/OFF button to turn audio playback on and off. D-Link DCS-931L User Manual... -
Page 21: Setup
Manual Internet Connection Setup. Note: To register your camera with mydlink and enable its mydlink-related features, you will need to use the Camera Setup Wizard. Please refer to “Camera Setup Wizard” on page 13 for more details. D-Link DCS-931L User Manual... -
Page 22: Internet Connection Setup Wizard
Section 3 - Configuration Internet Connection Setup Wizard This wizard will guide you through a step-by-step process to configure your new D-Link Camera and connect the camera to the Internet. Click Next to continue. Select what kind of Internet connection your camera should use: •... - Page 23 Configure the correct time to ensure that all events are triggered, captured, and scheduled at the right time. Click Next to continue. This page displays your configured settings. Click Apply to save and activate your changes, or click Back to change your settings. D-Link DCS-931L User Manual...
-
Page 24: Network Setup
For example, if the port is changed to 1010, users must type http://192.168.0.100:1010 instead of only “http://192.168.0.100”. UPnP Settings: Enable this setting to configure your camera as a UPnP device in the network. D-Link DCS-931L User Manual... -
Page 25: Wireless Setup
Click this button to select an available wireless network to connect to. Wireless Select the wireless security mode used by your wireless network. If you Security Mode: select WEP or WPA-PSK/WPA2-PSK, enter the password for your wireless network in the text box that appears. D-Link DCS-931L User Manual... -
Page 26: Extender Setup
Set the maximum number of clients that are allowed to connect to the Clients Allowed extended network. to Connect: Security Mode: If you choose to Create a New Wireless Network Name, you can set your wireless security options here. D-Link DCS-931L User Manual... -
Page 27: Dynamic Dns
Select your DDNS Server from the drop-down menu. Host Name: Enter the host name of the DDNS server. User Name: Enter your username or e-mail used to connect to the DDNS. Password: Enter your password used to connect to the DDNS server. D-Link DCS-931L User Manual... -
Page 28: Image Setup
Note: If the camera is installed upside down, Flip Image and Mirror should both be checked. Brightness Control: Allows you to adjust the brightness level. Contrast Control: Allows you to adjust the contrast level. Saturation Control: Allows you to adjust the saturation level. D-Link DCS-931L User Manual... -
Page 29: Video
Select one of five levels of image quality: Highest, High, Medium, Low, and Lowest. View Mode: Select the default encoding to use when viewing your video on the Live Video page. Light Frequency: Select the frequency used by your lighting and power to help reduce image flicker. D-Link DCS-931L User Manual... -
Page 30: Audio
This section allows you to adjust the audio settings for your camera. Note: Please wait a few seconds for the camera to adjust the audio after making changes. Audio Settings: You may Enable or Disable the camera audio feed. Volume Settings: Select the desired volume percentage level. D-Link DCS-931L User Manual... -
Page 31: Motion Detection
Schedule that you define. Sensitivity: Specify the amount of difference between two sequential images that would indicate motion. Detection Areas: Use your mouse to click on the areas of the video that you would like to monitor for motion. D-Link DCS-931L User Manual... -
Page 32: Sound Detection
Time: Specify whether you want to Always have sound detection enabled, or according to a Schedule that you define. Detection Specify the volume level that a sound must exceed in order to be “detected”. Level: D-Link DCS-931L User Manual... -
Page 33: Mail
Note: You can also use STARTTLS, which will use SMTP server port number 587. Note: If you want to use a Yahoo SMTP server, the SMTP server address will be different between each registered region, and only SMTP port 465 is supported for SSL-TLS. D-Link DCS-931L User Manual... - Page 34 This is the same as e-mailing images, as specified account: above, but will take video clips according to the Video Limit settings you specify. Test E-mail Account: This will send a test e-mail according to the e-mail settings you have specified above. D-Link DCS-931L User Manual...
-
Page 35: Ftp
Set how frequently you want images to be taken and uploaded. You can Frequency: choose to upload by frames per second, or by seconds per frame. Base File Name: Set what you want the base file name to be for your snapshots. D-Link DCS-931L User Manual... - Page 36 Clicking on the Test button will send a test JPEG snapshot to the FTP server specified above to make sure that your settings are correct. This will send a test e-mail according to the e-mail settings you have specified above. D-Link DCS-931L User Manual...
-
Page 37: Time And Date
If Synchronize NTP Server is disabled, you can set the date and time manually. You can also click on the Copy Your Computer’s Time Settings and Time Manually: to automatically set the date and time based on your computer’s settings. D-Link DCS-931L User Manual... -
Page 38: Maintenance
Add. A maximum of 8 user accounts can be created. User List: Displays the account names of authorized users. You can modify or delete an account by clicking on its modify or delete icon. D-Link DCS-931L User Manual... -
Page 39: System
To Factory the factory defaults. Please note that this will erase any changes you Default: have made to the settings of the camera. Click the Reboot the Device button to reboot the camera. Reboot The Device: D-Link DCS-931L User Manual... -
Page 40: Firmware Upgrade
Section 3 - Configuration Firmware Upgrade Your current firmware version and date will be displayed on your screen. You may go to the D-Link Support Page to check for the latest firmware versions available. To upgrade the firmware on your DCS-931L, download the latest firmware from the D-Link Support Page to your local hard drive. -
Page 41: Status
Section 3 - Configuration Status Device Info This section displays all the detailed information about your device and network settings. D-Link DCS-931L User Manual... -
Page 42: Active User
Section 3 - Configuration Active User This page lists all the active users’ information including the User Name, IP address, and the time that camera access began. D-Link DCS-931L User Manual... -
Page 43: Troubleshooting
If you forget your password, you will need to perform a hard reset of your camera. This process will change all your settings back to the factory defaults. To reset your camera, please use an unfolded paperclip to press and hold the RESET button for at least 3 seconds while your camera is plugged in. D-Link DCS-931L User Manual... - Page 44 Reposition the camera into a more shaded area immediately, as prolonged exposure to bright lights will damage the sensor. 7. The camera is producing noisy images. How can I solve the problem? The video images might be noisy if the camera is used in a very low light environment. D-Link DCS-931L User Manual...
- Page 45 You may also need to change the security settings on your browser to allow the ActiveX plug-in to be installed. If you are using Internet Explorer with a version number lower than 6, then you will need to upgrade your Web browser software in order to view the streaming video transmitted by the Network Camera. D-Link DCS-931L User Manual...
-
Page 46: Technical Specifications
• DHCP Client • JPEG for still images • NTP Client (D-Link) VIDEO FEATURES • DNS Client • DDNS Client (Dyndns and D-Link) • Adjustable image size and quality • Time stamp and text overlay • SMTP Client • Flip and Mirror •... - Page 47 • Camera only: 27.2 x 60 x 96 mm WEIGHT • 83 g (without bracket and stand) MAX POWER CONSUMPTION • 3.5 W OPERATION TEMPERATURE • 32 ˚F to 104 ˚F (0 ˚C to 40 ˚C) D-Link DCS-931L User Manual...
-
Page 48: Contacting Technical Support
• Hardware Revision (located on the label on the bottom of the Network Camera (e.g. rev A1)) • Serial Number (s/n number located on the label on the bottom of the Network Camera). You can find software updates and user documentation on the D-Link website as well as frequently asked questions and answers to technical issues. -
Page 49: Warranty
Any repair or replacement will be rendered by D-Link at an Authorized D-Link Service Office. The replacement hardware need not be new or have an identical make, model or part. D-Link may, at its option, replace the defective Hardware or any part thereof with any reconditioned product that D-Link reasonably determines is substantially equivalent (or superior) in all material respects to the defective Hardware. - Page 50 D-Link further warrants that, during the Software Warranty Period, the magnetic media on which D-Link delivers the Software will be free of physical defects. The customer’s sole and exclusive remedy and the entire liability of D-Link and its suppliers under this Limited Warranty will be, at D-Link’s option, to replace the non-conforming Software (or defective media) with software that substantially conforms to D-Link’s...
- Page 51 • The customer must submit with the product as part of the claim a written description of the Hardware defect or Software nonconformance in sufficient detail to allow D-Link to confirm the same, along with proof of purchase of the product (such as a copy of the dated purchase invoice for the product) if the product is not registered.
- Page 52 Purolator Canada or any common carrier selected by D-Link. Return shipping charges shall be prepaid by D-Link if you use an address in Canada, otherwise we will ship the product to you freight collect. Expedited shipping is available upon request and provided shipping charges are prepaid by the customer.
- Page 53 FOR WARRANTY SERVICE) RESULTING FROM THE USE OF THE PRODUCT, RELATING TO WARRANTY SERVICE, OR ARISING OUT OF ANY BREACH OF THIS LIMITED WARRANTY, EVEN IF D-LINK HAS BEEN ADVISED OF THE POSSIBILITY OF SUCH DAMAGES. THE SOLE REMEDY FOR A BREACH OF THE FOREGOING LIMITED WARRANTY IS REPAIR, REPLACEMENT OR REFUND OF THE DEFECTIVE OR NONCONFORMING PRODUCT.
- Page 54 The availability of some specific channels and/or operational frequency bands are country dependent and are firmware programmed at the factory to match the intended destination. The firmware setting is not accessible by the end user. D-Link DCS-931L User Manual...
-
Page 55: Industry Canada Statement
Warranty For detailed warranty information applicable to products purchased outside the United States, please contact the corresponding local D-Link office. Industry Canada Statement: This device complies with RSS-210 of the Industry Canada Rules. Operation is subject to the following two conditions: (1) This device may not cause harmful interference, and (2) this device must accept any interference received, including interference that may cause undesired operation. -
Page 56: Registration
Registration Registration Product registration is entirely voluntary and failure to complete or return this form will not diminish your warranty rights. Version 1.0 February 12, 2013 D-Link DCS-932L User Manual...