Table of Contents
Advertisement
Advertisement
Table of Contents

Related Manuals for FujiFilm 100


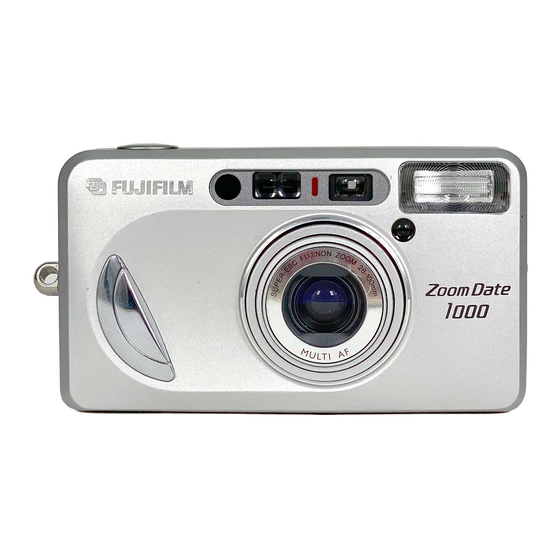
Summary of Contents for FujiFilm 100
- Page 1 OWNER’S MANUAL...
-
Page 2: Table Of Contents
CONTENTS FEATURES ... 2 PART NAMES ... 3 QUICK START GUIDE ... 6 Menus and modes ... 9 Finder ... 11 AF Lamp ... 12 1. PRELIMINARY STEPS ATTACHING THE STRAP ... 14 LOADING THE BATTERY ... 15 TURNING ON YOUR CAMERA ... 16 CHECKING YOUR BATTERY ... -
Page 3: Part Names
PART NAMES 2( p.51) 3( p.30) 4( p.15) 5( p.14) 6( p.15) 1 AF (Autofocus) Window 2 Remote Controller Sensor 3 Shutter Release Button 7( p.48,51) 4 Battery Compartment Cover 5 Strap Lug 6 Battery cover release knob 8( p.39) 7 Self-Timer/Remote Controller Lamp 8 Flash... - Page 4 B( p.12) C( p.11) D( p.25) E( p.25) F( p.37) G( p.24) B AF Lamp (green) C Viewfinder Eye-piece D Film Leader Mark E Film Take-up Spool F Mid-Roll Rewind Button G Film Confirmation Window H Camera Back I Film Pressure Plate J Tripod Socket H( p.24,36)
- Page 5 K( p.12) L( p.11) M( p.24,36) N( p.9) O( p.17) K AF Lamp (green) L Viewfinder Eye-piece P( p.16) M Camera Back Lock N Liquid Crystal Display O Battery Status P Power Button Q Zoom Button Q( p.29) R Film Confirmation Window S MENU/SET Button T Four-direction Button...
-
Page 6: Quick Start Guide
QUICK START GUIDE An easy introduction to automatic photography with your FUJIFILM camera. Press the power button to turn the power on. are displayed on the LCD and the camera is set for automatic mode photography. Adjust the zoom. - Page 7 Compose the picture. Press the shutter button down completely. Excellent pictures can be taken with just the operations described from page 27 on.
- Page 8 How to use the MENU/SET button and four-direction button 1 Selecting the menu and mode 2 Selecting the menu Make the menu you want to change blink/light. 3 Selecting the mode The current mode blinks. 4 Setting the mode The set mode is displayed. The LCD backlight is green (mode set) when the power is turned on and when a mode has been set (goes out after 10 seconds).
-
Page 9: Menus And Modes
Menus and modes FLASH ( p.39) 1 Multi program flash mode 2 Red-eye reduction flash mode 3 Back light compensation flash mode 4 Flash-off mode 5 Night portrait (slow sync) mode SELF-TIMER ( p.46,49) 6 Self-timer/Remote control off mode (normal mode) 7 Self-timer mode (1 shot) 8 Self-timer mode (2 continuous shots) - Page 10 FOCUS ( p.53) A AF (Auto focus) mode B Landscape mode C Macro mode DATE ( p.21) D Year-Month-Day E Month-Day-Year F Day-Month-Year G Day-Hour-Minute H Nothing printed Examples shown are for 18:15 on the 26th November 2001.
-
Page 11: Finder
Finder A : Framing area Compose the image within this area. B : AF (auto-focus) spot Position this spot over the main subject in your picture. C : Close-up Frame When taking close-ups, use these marks as a guide when composing the picture. ( p.31) -
Page 12: Af Lamp
When the shutter button is pressed down halfway, the AF lamp (green) lights or AF Lamp blinks. - Page 13 AF lamp status and meaning When the shutter button is pressed down halfway. Status Photography is possible. (Focus and exposure settings complete.) Rapid blinking Out of focal range. Ensure that the subject is at least 0.65 m (0.65 m/2.1 ft. - ) from the camera. The shutter lock operates in the Slow blinking Out of focus.
-
Page 14: Preliminary Steps Attaching The Strap
1. PRELIMINARY STEPS ATTACHING THE STRAP Slip the thin cord on the carrying strap through the strap lug on the side of the camera leaving a loop. Slide the thick part of the strap through this loop and pull tight. Take up any slack to make sure the strap is securely attached to the camera. Do not use a strap made for cellular phones or similar electronic products. -
Page 15: Loading The Battery
LOADING THE BATTERY Your camera uses one 3V lithium battery, type CR2/DL CR2. To load the battery. 1 Move the battery cover release knob. 2 Open the battery cover. 3 Insert the battery following instruction in the diagram on the inside of the battery cover paying particular attention to the position of the , and . -
Page 16: Turning On Your Camera
TURNING ON YOUR CAMERA Before you can use your camera, you must turn the power on. First press the power supply button which turns on the power. Pressing this button a second time will turn the power off. When you turn your camera on, the lens cover will open and the initial display will appear in the LCD. -
Page 17: Checking Your Battery
CHECKING YOUR BATTERY To determine the condition of the battery in your camera, turn the power on and check the battery capacity indicator on the LCD panel. 1 Lit 2 Lit 3 Blinks : Shutter cannot be released because battery is exhausted. Replace with : Battery capacity is OK. -
Page 18: Setting The Date (Year-Month-Day/Hour-Minute)
SETTING THE DATE (YEAR-MONTH-DAY/HOUR-MINUTE) Setting the date 1 Turn the camera on and press the MENU/SET button. The LCD lights orange and the menu selection mode is entered. 2 Press any of the buttons to the make the DATE menu blink. The year “... - Page 19 5 When the date has been set, press the MENU/SET button. The LCD changes to green and the date which has been set is displayed. To set the time (hour or minute) by the radio, press in the MENU/SET button when the time signal indicates zero.
- Page 20 Changing the date 1 Turn the camera on and press the MENU/SET button. The LCD lights orange and the menu selection mode is entered. 2 Press any of the buttons to make the DATE menu blink. The date section blinks. 3 Hold the MENU/SET button down for 2 seconds or longer.
-
Page 21: Selecting The Date Mode
SELECTING THE DATE MODE The date and time (year-month-day/ hour-minute) will be imprinted at the lower right of the photograph. The date display printed on the front of the picture may not be clearly visible against a dark background. Since the date is printed on the film when the film is wound on, the date may not be printed on the last frame when more than the standard number of frames are taken. - Page 22 1 Turn the camera on and press the MENU/SET button. The LCD lights orange and the menu selection mode is entered. 2 Press any of the buttons to make the DATE menu blink. The date mode selection mode is entered. 3 Press the buttons and select the DATE mode.
-
Page 23: Using Your Camera Loading The Camera
C : Film Speed (sensitivity to light or ISO rating) • If non-DX coded film is used, the camera’s automatic exposure system automatically sets itself to ISO 100. • Always load and remove film from your camera away from direct sunlight. - Page 24 Check the film check window to make sure no film is loaded into the camera. Never open the camera back while film is in your camera. Do not load a film immediately before inserting the battery. When the battery is replaced immediately after loading a new film, the camera may not recog- nize that a film has been loaded.
- Page 25 Insert the roll of film. Be careful not to touch the lens section. A : FILM TIP mark While holding the film cassette in place, gently pull the end of the film leader out as far as the FILM TIP mark in the camera. Hold the film cassette down so that it does not pop out of the film compartment.
- Page 26 Close the camera back. The film advances automatically. The type, number of exposures, and speed of the film that has been loaded may be checked with the film check window. Check that the exposure counter (“ ”) appears in the LCD. If the film is not loaded correctly, the film counter is not displayed in the LCD.
-
Page 27: Using Your Camera
USING YOUR CAMERA When the camera is turned on, the camera is set for automatic mode photography. How to take pictures with the automatic mode is explained here. Automatic mode settings A : Multi program flash mode B : Self-timer/Remote control off mode (normal mode) C : AF (Auto focus) mode For details of how to use the other photography modes, refer to “3.ADVANCED TECHNIQUES”. - Page 28 Turn the camera on and hold it firmly using both hands as shown in the illustration. When taking vertical pictures, hold the camera with the flash unit at the top. Before taking important, once-in-a-lifetime pictures such as weddings or special events, take a few test shots to make sure your camera is functioning correctly.
- Page 29 To use the zoom lens, press the in the finder. Pressing the mark will set the lens at the shorter focal lengths to obtain wide-angle coverage. The focusing range for sharp pictures in the Change the focus mode in the following cases. Long distance photography: mode ( p.55) Macro photography (Focal distance 0.5 - 1.0 m (1.6 - 3.3 ft.)):...
- Page 30 Press down the shutter release halfway. Focusing is complete when the AF lamp (green) lights up. If you are closer than 65 cm (26 in.) to the subject, the AF lamp will start blinking to warn you that the subject cannot be focused. Note that if you are closer than 30 cm (12 in.) to the subject, the AF lamp turns on but the subject cannot be focused.
- Page 31 Close-up photography A : Viewfinder B : Print finishing C : Parallax correction mark When photographing a subject that is closer than about 1.0 m (3.3 ft.) from the camera, the area within the frame shown in the diagram on the left will be in the picture.
- Page 32 There are a few conditions when the camera’s autofocus system may not function accurately. At these times, you should use the “Auto-Focus Lock” settings ( p.33) or the “Landscape Mode” setting ( p.55). Conditions requiring these settings in- clude: A bright light source within the picture such as the sun near your subject, a strong light reflec- tion such as from water or from the windshield of a car;...
-
Page 33: Using The Auto-Focus Lock
USING THE AUTO-FOCUS LOCK In the composition shown at left, the AF frame is off the subject (in this case, the people). In this case the lens will not focus on the subject. Move the camera to position the AF frame over the subject. - Page 34 With the AF frame positioned over the subject, press down the shutter release but- ton halfway to set the auto-focus lock. Check that the AF lamp (green) lights up. While holding the shutter release button halfway down to keep the Auto-Focus lock on, move the camera back to the original position to recompose your picture, then press the shutter release button all the way down.
-
Page 35: Unloading The Film Or Removing Film In Mid-Roll
UNLOADING THE FILM OR REMOVING FILM IN MID-ROLL To Unload the Film When the last frame in the film has been exposed, the film automatically rewinds into the film cassette which can then be removed for processing. When rewinding is complete, the exposure counter will read “ ”. Sometimes more photographs can be taken than the stated number of exposures, but the final frame may not be printed. - Page 36 1 Slide the camera back lock in the direction indicated by the arrow. 2 Open the camera back in the direction indicated by the arrow. Do not apply unnecessary force to the camera back. Remove the film.
- Page 37 Removing film in mid-roll Press the button with the point of a pen or something similar. When rewinding is complete, the exposure counter will read “ ”. Do not press the button with any object that tapers to a sharp point. Check that the motor has stopped and that “...
- Page 38 Do not open the camera back while there is a film in mid-roll in the camera. If the camera back is opened while there is a film in mid-roll in the camera, the film may be exposed to the light. The exposure counter is reset to “...
-
Page 39: Advanced Techniques Selecting The Flash Mode
3. ADVANCED TECHNIQUES SELECTING THE FLASH MODE The following flash modes can be selected. FLASH modes )Multi program flash mode ) Red-eye reduction flash mode ) Back light compensation flash mode ) Flash-off mode ) Night portrait (slow sync) mode Unless the mode is set, the mode is automatically cancelled per shot. - Page 40 1 Turn the camera on and press the MENU/SET button. The LCD lights orange, the flash menu blinks/lights and the flash mode selection mode is entered. 2 Press the buttons and select the FLASH mode. The selected mode blinks. 3 Press the MENU/SET button to complete the setting. The LCD changes to green and the mode which has been set is displayed.
- Page 41 Effective flash range Film speed Wide angle (28 mm) 0.65 – 2.9 m ISO 100 2.1 – 9.5 ft. 0.65 – 5.8 m ISO 400 2.1 – 19.0 ft. 0.65 – 8.1 m ISO 800 2.1 –...
- Page 42 ) Multi program flash mode Used for general photography. The quantity of light emitted by the flash is adjusted automatically according to the brightness of the subject, the distance, and the zoom magnification. For bright remote scenes, the flash does not fire. ) Red-eye reduction flash mode Reduce red-eye.
- Page 43 Dealing with red-eye When you photograph a person in dim light using flash, the pupil of the eye will sometimes appear red. Under low light, the pupils of the eye dilate for better vision. Red-eye is caused by light from the flash entering the dilated pupils and being reflected back to the lens.
- Page 44 ) Back light compensation flash mode Use this mode to avoid deep shadows when photographing against the light such as a person standing in front of a window or under a tree with a very bright background. This produces more natural looking flash photographs.
- Page 45 ) Night portrait (slow sync) mode Used when taking portraits to record the background in a night scene. Your camera will be placed in the slow shutter speed/red-eye reduction mode (The flash fires briefly 10 times (pre-flash), then fires the 11th time for taking a picture.), allowing you to take both the night scene and your subject clearly.
-
Page 46: Selecting The Self-Timer Mode
SELECTING THE SELF-TIMER MODE The following self-timer/remote control modes can be selected. SELF-TIMER modes ) Self-timer/Remote control off mode (normal mode) ) Self-timer mode (1 shot) ) Self-timer mode (2 continuous shots) ) Self-timer mode (3 continuous shots) ) Remote control mode ( p.49) mode is automatically set when the power is turned off. - Page 47 1 Turn the camera on and press the MENU/SET button. The LCD lights orange and the menu selection mode is entered. 2 Press the buttons to make the SELF-TIMER menu blink/light. The self-timer mode selection mode is entered. 3 Press the buttons to select “...
- Page 48 Compose the picture and press the shutter release button. The camera focuses on the subject that the AF frame is positioned over, and then the self-timer starts. You can select the Auto-Focus lock mode also. ( p.33) When pressing the shutter release button, do not stand in front of the camera. This may cause a focusing error or underexposure.
-
Page 49: Selecting The Remote Controller Mode
SELECTING THE REMOTE CONTROLLER MODE A remote controller of the proper type is required. Remove the remote controller from its holder by sliding it in the direction of the arrow. A : Remote controller holder B : Transmitter C : Shutter release button To replace the remote controller in the holder, slide the remote controller in the direction oppo- site to the arrow until it clicks into position. - Page 50 1 Turn the camera on and press the MENU/SET button. The LCD lights orange and the menu selection mode is entered. 2 Press the buttons to make the SELF-TIMER menu blink/light. The self-timer/remote controller mode selection mode is entered. 3 Press the buttons and select the The selected mode blinks.
- Page 51 Aim the AF Frame at your subject and compose your picture. 1 Point the remote controller toward the camera’s remote controller sensor, and then press the remote controller’s shutter release button. 2 After the self-timer/remote controller lamp blinks for about 2 seconds, the shutter is released.
- Page 52 3.5 m (11.5 ft.) 3.5 m (11.5 ft.) (16.4 ft.) The coverage of the remote controller is up to about 5 m (16.4 ft.) when used di- rectly in front of the camera, and up to about 3.5 m (11.5 ft.) when used at a vertical or horizontal angle of 20 .
-
Page 53: Selecting The Focus Mode
The mode is maintained so that a number of pictures can be taken. The mode is canceled when the power is turned off. When the mode is set, the focal distance is fixed at 100 mm. 1 When the mode is selected, the Available flash modes mode is automatically set. - Page 54 1 Turn the camera on and press the MENU/SET button. The LCD lights orange and the menu selection mode is entered. 2 Press any of the buttons to make the FOCUS menu blink. The focus mode selection mode is entered. 3 Press the buttons and select the FOCUS mode.
- Page 55 ) AF (Auto focus) mode Used for normal photography. Compose the picture so that the subject is within the AF frame. ( p.28) ) Landscape mode Used when taking landscape pictures or photographing remote (night) scenes through window glass. The lens is focused for the distant subjects. The flash does not fire in this mode. This mode is automatically cancelled per shot.
- Page 56 The macro mode is used when you want to take large pictures of small subjects such as flowers and insects. A : Parallax correction marks The focal distance is fixed at 100 mm. Compose the picture so that the subject that you want to photograph is within the frame.
-
Page 57: Multi Program Flash
When close-up pictures are taken in a dim place with an ordinary flash, it fires at 100%. As a result, the subject is washed out by overexposure. The multi program flash reduces the light quantity down to 12.5%, preventing overexposure. - Page 58 Portrait photography under very bright light When a person is photographed in bright daylight, his (her) face is likely to be spot- ted with the shadows of hair and nose. Even in such a case, the multi program flash automatically fires to reduce the shadows. It seems unnecessary to use the flash in a bright place.
-
Page 59: Trouble Shooting
TROUBLE SHOOTING During operation Problems The shutter release won’t 1 “ trip. 2 Power switch is not on. 3 Is “ 4 “ ” is lit on the exposure counter. 5 Is the AF lamp blinking in the The numerals on the ex- Did you remove film without rewinding posure counter blink. - Page 60 Printed pictures Problems Picture is not sharp. 1 Was your finger on the AF windows when shooting? 2 Did you aim the subject properly? 3 Is the lens dirty? 4 Is the camera moving? 5 You selected at a close distance. Picture is too dark.
-
Page 61: Common Sense Camera Care
COMMON SENSE CAMERA CARE Although your camera is designed for many years of service, it is a precision instrument and requires thoughtful handling. In particular, avoid exposing it to shock, moisture or physical abuse such as dropping it on the floor. 1 If you use your camera at the beach or in a light rain, pro- tect it from moisture. -
Page 62: Specifications
Programmed electronic shutter release, 1 – 1/500 sec. shutter speeds Exposure Control Automatic Interlocking range (ISO 100), EV (wide angle): 10.4 ( 6) – 17, EV (telephoto): 13.6 ( 7.1) – 17 ( = values for the flash off mode) Film Speed Setting... - Page 63 Liquid Crystal Display Exposure counter, flash mode, self-timer/remote control mode, focus mode, date mode, battery capacity sign, flash charging sign. Power Supply One CR2/DL CR2 lithium battery Others Tripod socket, Remote controller (compatible) Dimensions & Weight 107.0 60.0 36.0 mm/4.2 1.4 in.
-
Page 64: Important Safety Notice
IMPORTANT SAFETY NOTICE This product has been developed to be as safe as possible when used for its designed purposes. Under normal circumstances, this product will provide long, safe service when handled correctly. It is important, however, that this product is handled properly and used only for photographic purposes. - Page 65 WARNING Do not use this camera in locations with a high concentration of inflammable gas or near open gasoline, Benzine, paint thinner or other volatile substances which can give off dangerous vapors. Failure to observe this precaution could result in explosion or fire. Store your camera out of the reach of small children.
- Page 66 26-30, Nishiazabu 2-chome, Minato- ku, Tokyo 106-8620, Japan. <FUJIFILM ABROAD> In North America FUJI PHOTO FILM U.S.A., INC. 555 Taxter Road, Elmsford, N.Y. 10523, U.S.A. FUJI PHOTO FILM CANADA INC. 275 Britannia Road East, Mississauga, Ontario , L4Z 2E7, Canada FUJI PHOTO FILM HAWAII, INC.