FujiFilm FinePix S9000 Owner's Manual
Fujifilm digital camera owner's manual finepix s9000, finepix s9500
Hide thumbs
Also See for FinePix S9000:
- Owner's manual (83 pages) ,
- Brochure & specs (4 pages) ,
- Settings manual (1 page)
Table of Contents
Advertisement
Advertisement
Table of Contents

Related Manuals for FujiFilm FinePix S9000


Summary of Contents for FujiFilm FinePix S9000
- Page 1 OWNER’S MANUAL This manual will show you how to use your FUJIFILM DIGITAL CAMERA FinePix S9000/FinePix S9500 correctly. Please follow the instructions carefully. Getting Ready Using the Camera Advanced Features Settings Software Installation Viewing Images BL00472-200 ( 1 )
-
Page 2: Warning
5. Limited Warranty. SOFTWARE RECORDED ON THE CD-ROM. BY OPENING FUJIFILM warrants to you that Media is free from any defect in material THE PACKAGE, YOU ACCEPT AND AGREE TO BE and workmanship under normal use for ninety (90) days from the date of BOUND BY THIS AGREEMENT. -
Page 3: Table Of Contents
Contents Warning ... 2 Accessories included ... 8 IMPORTANT ... 2 Camera parts and features ... 9 EC Declaration of Conformity ... 3 Example of screen text display ... 10 ■ Photography mode ... 10 Disposal of Electric and Electronic Equipment in Private Households ... - Page 4 Then seek ■ Exif Print (Exif ver. 2.2) medical assistance. Exif Print Format is a newly revised digital camera file format that contains a variety of shooting information for optimal printing. Do not store or use the camera in direct sunlight or in places subject to extreme temperature rises, such as in a closed car in summer.
-
Page 5: Accessories Included
Accessories included h AA-size Alkaline Batteries (LR6) (4) h A/V cable (1) Approx. 1.2 m (3.9 ft.), plug (2.5 mm dia.) to pin-plug ×2 h 16 MB, xD-Picture Card™ (1) h USB cable (mini-B) (1) Anti-static case (1) included h Strap (1) h CD-ROM (1) Software for FinePix CX h Lens cap (1) -
Page 6: Example Of Screen Text Display
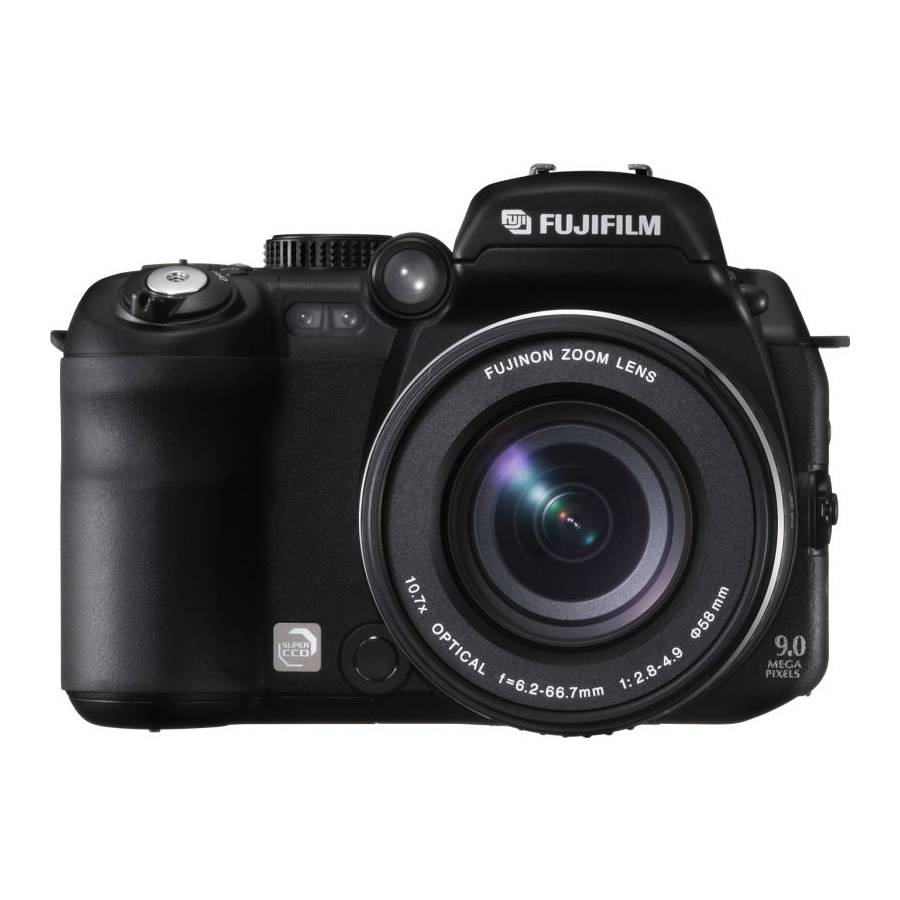
Camera parts and features Flash (P.51) Flash pop-up button (P.23, 51) Focus ring (P.22, 49) Zoom ring (P.22, 29) Lens hood Focus mode selector switch (P.22, 48, 49) (One-touch AF) button (P.22, 49) Example of screen text display ■ Photography mode High-speed shooting Continuous shooting Photometry... -
Page 7: Attaching The Lens Hood
(0°C to +10°C/+32°F to +50°F). The use of AA-size Ni-MH batteries is better for this reason. h Use Fujifilm Battery charger (sold separately) to charge AA-size Ni-MH batteries. h See P.125-126 for other notes on using batteries. -
Page 8: Inserting The Media
“ ” MEDIA (➡P.100). h Data cannot be copied between the two media types on the FinePix S9000 / FinePix S9500. 1 Set the Power switch to “OFF”. 2 Open the slot cover. -
Page 9: Turning On And Off / Setting The Date And Time
TURNING ON AND OFF / SETTING THE DATE AND TIME To turn the camera on, set the Power switch to “ or “ ”. To turn the camera off, set the Power switch to “OFF”. When using the camera for the first time after DATE/TIME NOT SET DATE/TIME NOT SET purchasing, the date and time are cleared. -
Page 10: Selecting The Language
CORRECTING THE DATE AND TIME / CHANGING THE DATE FORMAT Correcting the date and time DATE/TIME DATE/TIME 1 Press “d” or “c” to select Year, Month, Day, 2007 2006 Hour or Minute. 2005 8 4 2 2 1 00 Y Y. M M . D D Y Y. -
Page 11: Basic Operation Guide
Using BASIC OPERATION GUIDE the Camera This section describes the camera’s functions. Power switch ON/OFF and “ Photography mode / Command dial selector switch In Photography mode, turn the Use the Power switch to Command dial to select program select the mode. shift and specify settings such as the shutter speed and aperture. -
Page 12: Taking Pictures ( Auto Mode)
BASIC OPERATION GUIDE Flash pop-up button To use the flash, press the flash pop-up button to Focus ring release the flash. The camera focuses on INFO (information check) button the subject using Manual focus mode. Press this button to view image information. Photography mode: Displays the current Zoom ring settings (white balance, sharpness, etc.) - Page 13 ◆ ◆ Subjects not suitable for autofocus The FinePix S9000 / FinePix S9500 uses a high-precision autofocusing mechanism. However, it may have difficulty focusing on the following: walls or subjects dressed in the same color as h Very shiny subjects such as a mirror or car...
-
Page 14: Indicator Lamp Display
TAKING PICTURES ( AUTO MODE ) PHOTOGRAPHY MODE INDICATOR LAMP DISPLAY Display Status Lit green AF/AE lock in progress, Setting video output Blinking green Camera shake warning or AF warning (ready to shoot) Blinking green and Recording to media (ready to shoot) orange alternately Lit orange Recording to media (not ready) -
Page 15: Using Af/Ae Lock
AF (Autofocus)/AE (Auto-exposure) lock On the FinePix S9000 / FinePix S9500, pressing the shutter button down halfway locks the focus and exposure settings (AF/AE lock). To focus on a subject that is off to one side or to set the exposure before composing the final shot, locks the AF and AE settings. -
Page 16: Shooting Assistant Function
Still images viewable on the FinePix S9000 / FinePix S9500 This camera will display still images recorded on the FinePix S9000 / FinePix S9500 or still images (excluding some uncompressed images) recorded on any FUJIFILM digital camera that supports xD- Picture Cards or CF/Microdrives. - Page 17 VIEWING THE IMAGES ( w PLAYBACK ) PLAYBACK MODE Sorting by date Text displayed In Playback mode, press the “DISP/BACK” button to change the display shown on the screen. Press No text displayed the “DISP/BACK” button until the sorting by date Multi-frame playback screen appears.
- Page 18 VIEWING THE IMAGES ( w PLAYBACK ) PLAYBACK MODE Playback zoom Press “a” or “b” during single-frame playback to zoom the image. A zoom bar appears on the screen. Zoom bar ● Press the “DISP/BACK” button to cancel playback zoom. PANNING PANNING CANCEL...
- Page 19 ◆ The AF sensor The FinePix S9000 / FinePix S9500 uses an external AF sensor (external-light passive phase difference AF) that features faster AF operation than previous models. The external AF sensor does not function when Macro mode, Super macro mode, the digital zoom, AREA or C-AF focusing is used. It may take longer to focus if the external AF sensor is soiled (➡P.132).
-
Page 20: Taking Pictures — Selecting The Camera Settings
PHOTOGRAPHY FUNCTIONS TAKING PICTURES — SELECTING THE CAMERA SETTINGS Specify the camera settings for taking pictures to get the best result. A general guide is given below. Select the Photography mode (➡P.40-44). Specifies all settings other than “Quality”, “Sensitivity” and “FinePix COLOR”... - Page 21 SELECTING PHOTOGRAPHY MODE PHOTOGRAPHY FUNCTIONS B AUTO Set the Mode dial to “ This is the easiest mode to use and can be used for most types of shots. ● See P.39 for information on available flashes. SCENE POSITION Set the Mode dial to “ This mode provides the best Scene position setting for the scene being shot.
- Page 22 M SHUTTER-PRIORITY AUTO PHOTOGRAPHY FUNCTIONS Set the Mode dial to “ This is an automatic mode to set the shutter speed. Use this mode to freeze a moving subject (fast shutter speed) or convey the impression of movement (slow shutter speed). Setting the shutter speed Turn the Command dial to select the shutter speed.
-
Page 23: D Exposure Compensation
> MANUAL PHOTOGRAPHY FUNCTIONS Set the Mode dial to “ Use Manual mode to set any shutter speed and aperture setting. Setting the shutter speed Turn the Command dial to select the shutter speed. h Shutter speed setting 30 sec. to 1/4000 sec. in 1/3 EV increments Bulb (B) ISO 200 ●... -
Page 24: Ae-L Using Ae Lock
PHOTOGRAPHY FUNCTIONS AE-L USING AE LOCK B, √, À, U, ,, /, N, M, < Use this function to take pictures with the exposure locked for a particular subject. Set the Power switch to “ Set the Mode dial to “ “... - Page 25 PHOTOGRAPHY FUNCTIONS CONTINUOUS AF B, √, À, U, ,, /, N, M, <, > Use this button to take pictures of a moving subject. Using Continuous AF mode reduces the time required for focusing. Set the Focus mode selector switch to “C-AF”. Frame the shot so that the subject fills the entire AF N N N frame.
-
Page 26: D Flash Photography
PHOTOGRAPHY FUNCTIONS e MACRO ( CLOSE-UP ) Select Macro mode to take close-up shots. Set the Power switch to “ Set the Mode dial to “ < > “ ” or “ ” mode. The Macro mode setting changes each time you press the “... -
Page 27: Red-Eye Reduction
PHOTOGRAPHY FUNCTIONS d FLASH PHOTOGRAPHY x Auto flash Use this mode for ordinary photography. The flash fires as required by the shooting conditions. ● If pressing the shutter button while the flash is charging, the picture will be taken without the flash. b Red-eye reduction Use this mode to guarantee that the subject’s eyes appear normal when taking pictures of people in low-light... -
Page 28: Continuous Shooting
f CONTINUOUS SHOOTING PHOTOGRAPHY FUNCTIONS Set the Power switch to “ 1 Hold down the “ 2 Turn the Command dial to select the Continuous shooting mode. 3 Release the “ N N N ISO 200 ISO 200 ISO 200 O F F O F F 320 F5.6... -
Page 29: Long-Period Continuous Shooting
f CONTINUOUS SHOOTING PHOTOGRAPHY FUNCTIONS h Long-period continuous shooting Available Photography modes: B, √, À, U, ,, / This mode allows you to take up to 40 continuous N N N shots (max. 1.1 frames/sec.). ● Long-period continuous shooting cannot be used in the “ <... -
Page 30: Photography Information
PHOTOGRAPHY INFORMATION PHOTOGRAPHY FUNCTIONS This function displays the histogram for an image and allows the brightness distribution during shooting to be checked. This function can also be used to check the current photography settings. 1 Set the Power switch to “ 2 Set the Mode dial to Photography mode. -
Page 31: Quality Settings In Photography Mode
p PHOTO MODE PHOTOGRAPHY ˘ QUALITY MODE ( NUMBER OF RECORDED PIXELS ) Quality settings in Photography mode Choose from 7 settings. Using the table below as a guide, select the setting that best suits your aims. Quality mode Sample uses ⁄... -
Page 32: Finepix Color
ü FinePix COLOR p PHOTO MODE PHOTOGRAPHY 1 Set the Power switch to “ 2 Set the Mode dial to Photography mode. 3 Press the “ screen. ● In “ ” Movie mode, do not set the “ setting. The FinePix COLOR setting is retained even when the camera is off or the mode setting is changed. -
Page 33: Äself-Timer Photography
SETTING PHOTOGRAPHY MENU PHOTOGRAPHY MENU Changing the page number 1 Press the “MENU/OK” button to display the menu on the monitor. 2 Press “d” to move to page number. 3 Press “a” or “b” to select the page. PA G E 1 PA G E : O F F : O F F... -
Page 34: High-Speed Shooting
PHOTOGRAPHY MENU PHOTOGRAPHY MENU A WHITE BALANCE ( SELECTING THE LIGHT SOURCE ) Available Photography modes: N, M, <, > Change the white balance setting to suit for the WHITE BALLANCE WHITE BALLANCE surroundings and lighting. In “AUTO” mode, the correct white balance may not AUTO AUTO be achieved for subjects such as close-ups of... -
Page 35: Haf Mode
PHOTOGRAPHY MENU PHOTOGRAPHY MENU H AF MODE Available Photography modes: N, M, <, > AF MODE AF MODE Ï CENTER AUTO AUTO ˝ MULTI Ë AREA The AF mode can only be selected when the focus mode is S-AF (➡P.23). Ï... -
Page 36: Contrast
PHOTOGRAPHY MENU PHOTOGRAPHY MENU ‘ SATURATION Available Photography modes: N, M, <, > Use this setting to adjust the quality of the image, SATURATION SATURATION including making the colors more vivid or toning the colors down. HIGH HIGH HIGH: Obtains deep and vivid color. This setting is effective for taking more vivid shots of EV EV subjects such as scenery (blue sky and... -
Page 37: Ê Using An External Flash
PHOTOGRAPHY MENU PHOTOGRAPHY MENU Ê USING AN EXTERNAL FLASH Available Photography modes: N, M, <, > Select “ON” in this setting when using an external EXTERNAL FLASH EXTERNAL FLASH flash unit. Synchronized shutter speeds up to 1/1000 sec. can be used. E V E V ●... -
Page 38: Playback)
PLAYBACK INFORMATION PLAYBACK FUNCTIONS Use this function to check the photography information. Hold down the “INFO” button to check the information. ● This function cannot be used during multi-frame playback (➡P.31). Quality mode Sensitivity I S O 4 0 0 I S O 4 0 0 Shutter speed / Aperture 1 / 5 0 0... -
Page 39: Úimage Rotate
S9000 / FinePix S9500 and FinePixViewer (included). ◆ ◆ Images that can be rotated You may not be able to rotate images that were shot with a camera other than the FinePix S9000 / FinePix S9500. ”. Ú ” IMAGE ROTATE. -
Page 40: Photo Mode Playback
DPOF stands for Digital Print Order Format and refers to a format that is used for recording printing specifications for images shot using a digital camera on media such as an xD-Picture Card and CF/Microdrive. The recorded specifications include information on which frames are to be printed. -
Page 41: Playback Menu
¸ SPECIFYING DPOF SETTINGS EASILY p PHOTO MODE PLAYBACK Always press the “MENU/OK” button after the settings are completed. Pressing the “DISP/BACK” button cancels those settings. PRINT ORDER (DPOF) PRINT ORDER (DPOF) DPOF :00009 DPOF Total number of prints Setting for that frame SHEETS SHEETS FRAME... -
Page 42: Dpof All Reset
¸ DPOF SET FRAME PLAYBACK MENU 1 Press “d” or “c” to display the frame (file) for specifying DPOF settings. 2 Press “a” or “b” to set a value up to 99 as the number of copies of the frame (file) to be printed. For frames (files) that you do not want printed, set the number of prints to 0 (zero). - Page 43 PLAYBACK MENU Ç PROTECTING IMAGES: FRAME / SET ALL / RESET ALL 1 Set the Power switch to “ 2 Press the “MENU/OK” button to display the menu on the screen. Protection is a setting that prevents frames (files) from being accidentally erased. However, the “FORMAT”...
-
Page 44: Automatic Playback
◊ AUTOMATIC PLAYBACK PLAYBACK MENU 1 Set the Power switch to “ 2 Press the “MENU/OK” button to display the menu on the screen. 1 Press “a” or “b” to select “ 2 Press “c”. PLAYBACK PLAYBACK NORMAL NORMAL NORMAL NORMAL FADE-IN FADE-IN... -
Page 45: Âplaying Back Voice Memos
 RECORDING VOICE MEMOS PLAYBACK MENU The remaining recording time appears during RECORDING RECORDING recording. Blinking red Remaining time ● To end your comment during recording, press the “MENU/OK” RE-REC RE-REC button. 2 8 s After 30 seconds of recording, “FINISH” appears on FINISH FINISH the screen. -
Page 46: Adjusting Volume Of Voice Memos
 PLAYING BACK VOICE MEMOS PLAYBACK MENU Adjusting volume of voice memos Volume can be adjusted while playing back voice memos. Adjust the volume to suit your condition. Press the “MENU/OK” button while playing back voice memo. The voice memo is paused during playback. -
Page 47: Movie Mode
◆ ◆ Images that can be trimmed You may not be able to trim images that were shot with a camera other than the FinePix S9000 / FinePix S9500. Sample uses Printing at up to 10R (25.4 × 30.5 cm) / A4 size Printing at up to 6R (15.2 ×... -
Page 48: Recording Times Per Media
When used media is 4GB or more, a movie up to 60 minutes long (at the “ long (at the “ Visit website for information on available Microdrive / CompactFlash card: http://home.fujifilm.com/products/digital/ ˘ QUALITY SETTINGS IN MOVIE MODE 1 Set the Mode dial to “... -
Page 49: Playing Back Movies
PLAYING BACK MOVIES PLAYBACK MODE 1 Set the Power switch to “ 2 Press “d” or “c” to select the movie file. ● Movies cannot be played back using multi-frame playback. Press the “DISP/BACK” button to select single-frame playback. PLAY PLAY Indicated by the “... -
Page 50: Set-Up
SET-UP Settings ˜ USING THE SET-UP SCREEN Press the “MENU/OK” button to display the menu on the screen. SELF-TIMER SELF-TIMER AUTO AUTO 1 Press “a” or “b” to select “ 2 Press “c”. SET-UP SET-UP AUTO AUTO 1 Press “d” to move to page number. 2 Press “a”... -
Page 51: Á Image Display
SET-UP ■ SET-UP menu options Settings Display Factory default Specifies whether an image checking screen (photography result) appears after taking a picture. áIMAGE CONT/3 SEC/ 1.5 SEC The image appears for a few moments and is then recorded. 1.5 SEC/OFF DISP. -
Page 52: Ã Playback Volume
SET-UP ã PLAYBACK VOLUME Adjust volume while playing back movie and voice memo. 2 3 4 5 6 8 9 1 0 1 0 1 Press “d” or “c” to adjust the volume. The larger the number, the larger the volume is emitted. -
Page 53: Î Auto Power Off
SET-UP î AUTO POWER OFF When this function is enabled and the camera AUTO POWER OFF AUTO POWER OFF remains unused for 2 or 5 minutes, it is turned off. Auto power off function prevents leaving the power 30 fps fps 5 MIN AE-L 1 AE-L... -
Page 54: Installation On A Windows Pc
SET-UP 1 Press “d” or “c” to select +, –, hour and minute. TIME DIFFERENCE TIME DIFFERENCE 2 Press “a” or “b” to correct the setting. 8/24/2005 10:00 AM 8/24/2005 10:00 AM h Available time setting –23:45 to +23:45 (in 15-minute increments) 00 : 00 CANCEL CANCEL... -
Page 55: Installation On A Mac Os X
5.1 INSTALLATION ON A Windows PC Do not connect the camera to your PC until the software installation is completed. Install FinePixViewer as instructed in the Quick start guide. ◆ ◆ Launching the installer manually 1 Double-click the “My Computer” icon. ✽... - Page 56 5.2 INSTALLATION ON A Mac OS X Turn your Macintosh on and start up Mac OS X. Do not launch any other applications. When the bundled CD-ROM is loaded into the CD- ROM drive, the “FinePix” icon appears. Double-click the “FinePix” icon to open the “FinePix” volume window.
-
Page 57: Camera Connection
● Please connect the AC Power Adapter AC-5VX (sold separately) to your camera. ● Use a media that was formatted on FinePix S9000 / FinePix AC-5VX S9500. Set the Power switch to “ CHECKING USB CHECKING USB “CHECKING USB”... - Page 58 ● Please connect the AC Power Adapter AC-5VX (sold separately) to your camera. ● Use a media that was formatted on FinePix S9000 / FinePix S9500. Set the Power switch to “ ”. “CHECKING USB” appears and then the menu is displayed on the screen.
-
Page 59: Connecting To A Pc
6.2 CONNECTING THE CAMERA DIRECTLY TO THE PRINTER — PictBridge FUNCTION 1 Press “d” or “c” to display the frame (file) for which you want to specify PRINT settings. 2 Press “a” or “b” to set a value up to 99 as the number of copies of the frame (file) to be printed. - Page 60 6.3 CONNECTING TO A PC 1 Turn your PC on. Camera 2 Connect the camera to the PC using the USB cable (mini-B). ● USB socket Make sure that the USB cable (mini-B) is connected correctly and pushed in. Set the Power switch to “ Camera operation h When the camera and PC are exchanging data, the indicator lamp blinks orange.
-
Page 61: Disconnecting The Camera
6.3 CONNECTING TO A PC 6.3.2 Disconnecting the camera Windows Once the image has been saved, the window below appears (Save Image Wizard Windows). To disconnect the camera, click the [Remove] button. Macintosh Once the image has been saved, the window below appears. To disconnect the camera, click the [OK] button. -
Page 62: System Expansion Options
Trash” in the “Finder” menu. System Expansion Options eBy using the FinePix S9000 / FinePix S9500 together with other optional FUJIFILM products, your system can be expanded to fill a wide range of uses. ■ Image input / output to the PC... -
Page 63: Ac Power Adapter
Accessories Guide eVisit the FUJIFILM web site for the latest information on camera accessories. http://home.fujifilm.com/products/digital/index.html h xD-Picture Card Use the following xD-Picture Cards: DPC-16 (16 MB)/DPC-32 (32 MB)/DPC-64 (64 MB)/DPC-128 (128 MB)/ DPC-256 (256 MB)/DPC-512 (512 MB)/DPC-M512 (512 MB)/DPC-M1GB (1 GB) - Page 64 However, care must be taken with the input terminal of the FUJIFILM Digital camera. way Ni-MH batteries are used if their original h Turn off the FUJIFILM Digital camera before performance is to be maintained. disconnecting the cord from the FUJIFILM Digital h Ni-MH batteries left unused in storage for long camera’s DC input terminal.
- Page 65 Contact the CompactFlash card manufacturer for information on the CompactFlash functions, operation details and system requirements. Card types approved for use with the FinePix S9000 / FinePix S9500 are listed on the FUJIFILM website. http://home.fujifilm.com/products/digital/ h The CompactFlash card may be hot immediately after being used in the camera and should be handled with care.
- Page 66 You may not be able to print some images photographed on other cameras. Displayed for PictBridge. This message appears when printing is performed from a FUJIFILM printer that supports PictBridge. u PRINTING Refer to the Owner’s Manual for the printer for details.
- Page 67 Briefly remove the batteries or disconnect the works correctly. problem. AC power adapter. Then reload the batteries or reconnect the AC power adapter and try again. If you think the camera is faulty, contact your FUJIFILM dealer. ® ò Cannot print with “...
-
Page 68: Specifications
9.0 million pixels 1/1.6-inch Super CCD HR Number of total pixels: 9.24 million pixels Storage media xD-Picture Card (16/32/64/128/256/512 MB/1 GB) CF card and Microdrive™ (Compatibility is listed on Fujifilm website: http://home.fujifilm.com/products/digital/) File format Still image: DCF-compliant Compressed: Exif ver.2.2 JPEG, DPOF-compatible Uncompressed: CCD-RAW (RAF) ✽... -
Page 69: Explanation Of Terms
Microdrive 1 GB 1313 ✽ These specifications are subject to change without notice. FUJIFILM shall not be held liable for damages resulting from errors in this Owner’s Manual. ✽ The LCD monitor on your digital camera is manufactured using advanced high-precision technology. Even so, small bright points and anomalous colors (particularly around text) may appear on the monitor. -
Page 70: Fujifilm Digital Camera Worldwide Network
Procesos de Color S.A. Technical support & Pablo Bermudez 111 Apartado 3794 - Esq. Arequipa - Lima 11 Repair service TEL +51 14 33 5563 FAX +51 14 33 7177 jalvarado@fujifilm.com.pe Uruguay Fotocamara S.R.L. Technical support & Cuareim 1439, montevideo, Uruguay Repair service TEL +598-2-9002004 FAX +598-2-9008430 fotocam@adinet.com.uy... - Page 71 Fujifilm Slovakia Technical support Pribylinska 2, 831 04 Bratislava, Slovakia TEL 00421 2 44 888 077 FAX 00421 2 44 889 300 fujifilm@fujifilm.sk Repair service FIS Tatracentrum, Hodzovo nam. 4 - Tatracentrum, 811 06 Bratislava, Slovakia TEL 00421 2 54 647 347 fis.tatracentrum@stonline.sk Spain Fujifilm España S.A.
-
Page 72: Safety Notes
Safety Notes h Make sure that you use your FinePix S9000 / FinePix S9500 camera correctly. Read these Safety Notes and your Owner’s Manual carefully before use. If a problem arises, turn the camera h After reading these Safety Notes, store them in a off, remove the batteries, disconnect safe place. - Page 73 26 - 30, Nishiazabu 2 - chome, Minato - ku, Tokyo 106 - 8620, Japan http://home.fujifilm.com/products/digital/ Printed on recycled paper. FPT - 507107 - FP Printed in Japan...