Table of Contents
Advertisement
Adult Assembly Required
KETTLER® International, Inc.
Please do not return this product to
the store. Contact KETTLER® for
parts and service: call toll free
866.804.0440 or send email to
parts@kettlerusa.com.
Please visit our website
www.kettlerusa.com to view a video
demonstration of product assembly
or scan the QR Code above.
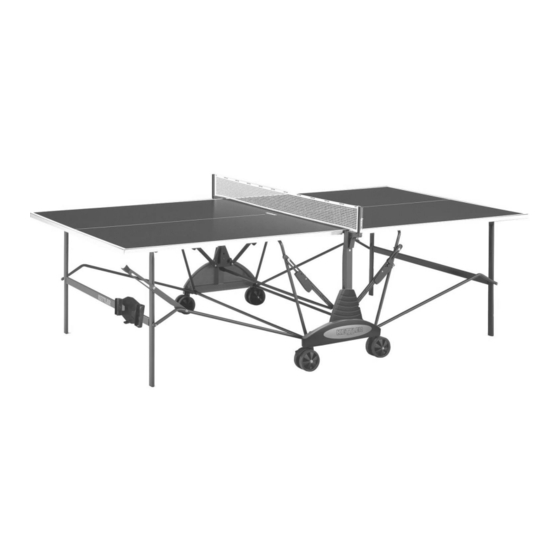
Stockholm GT Table Tennis Table
Model 7162-490/890 & 7122-490/890
1355 London Bridge Road
www.kettlerusa.com
info@kettlerusa.com
Made in Germany
Virginia Beach, VA 23453 USA
Tools needed; not included
Picture Similar
Advertisement
Table of Contents

Related Manuals for Kettler 7162-490

Summary of Contents for Kettler 7162-490
- Page 1 Stockholm GT Table Tennis Table Model 7162-490/890 & 7122-490/890 Adult Assembly Required Made in Germany Picture Similar KETTLER® International, Inc. 1355 London Bridge Road Virginia Beach, VA 23453 USA www.kettlerusa.com info@kettlerusa.com Please do not return this product to the store. Contact KETTLER® for Tools needed;...
- Page 2 In spite ® of this, should you have any cause for complaint, please contact KETTLER Note on Safety ...
- Page 3 Then use section and that all items are undamaged. If there spanner for final tightening. Then check that all are any problems, please contact KETTLER®. Before assembling the equipment, study the screw connections have been tightened firmly.
- Page 4 Package Contents (continued) Number Included - 2 Number Included – 2 of each Number Included - 6 Number Included - 2 Number Included - 2 Number Included - 2 Tool included Not shown at actual size Items below are shown at actual size Number Included - 2 Number Included - 4 Number Included –...
- Page 5 Package Contents (continued) Items below are shown at actual size Number Incl – 8 Number Incl – 6 Number Incl – 4 Number Incl – 10 End view and side view shown m6x3mm dia 25x8 Number Incl – 4 m6x5mm Number Incl –...
- Page 6 Assembly Begin the assembly of your table by carefully removing the plastic wrap and all of the loose contents. Separate the two table tops by removing the four plastic corner protectors and the plastic side strips. Step 1 2 Required 2 Required 2 Required Align footlock with stemtube.
- Page 7 Assembly Step 2 Install stemtubes to wheelbases as shown. Begin by installing locking stemtube to wheelbase (A-H) Repeat for non-locking stemtube 4 Required 8 Required as shown in I. dia 25x8 dia 16x8 4 Required m8x125 4 Required 4 Required 16x8 25x8 16x8...
- Page 8 Assembly Step 3 Install non-locking wheels. Do not over torque; wheels should roll smoothly. Install non-locking wheels on both wheelbase assemblies. 2 Required 8 Required dia 16x8 2 Required m8x110...
- Page 9 Assembly Step 4 Install locking wheels. The grooves of the wheels should face inward. Do not over torque; wheels should roll smoothly. Install locking wheels on both wheelbase assemblies. 2 Required 8 Required dia 16x8 2 Required m8x110...
- Page 10 Assembly Step 5 Assemble net posts as shown. 4 Required 4 Required m6x3mm m6x45...
- Page 11 Assembly Step 6 Install H-pads to alignment strut (A-F). Insert nut into strut (G-J). 4 Required Secure strut to wheelbase (K-U). 4 Required m5 locking Repeat for opposite side. 4 Required 4 Required m5x65 4 Required dia 12x5 locking locking...
- Page 12 Assembly Step 6 (continued) 12x5 12x5 m5x65 m5x65...
- Page 13 Assembly Step 7 Lock wheels. Step 8 Bolt Crossbar to Wheelbases as shown. Upon completing Step 8, assembly should match F. 2 Required dia 25x8 2 Required m8x60...
- Page 14 Assembly Important: Have two people complete Steps 9-13. With assistance, lift one table top onto the wheelbase; the legs will be facing outward. Have one person support the top Step 9 while it is resting on the base while the other person completes assembly. Jbar Assemble crossbar to Jbars and support leg in the order shown.
- Page 15 Assembly Step 10 Install plug into crossbar as shown. End view and side view shown 2 Required m6x5mm...
- Page 16 Assembly Step 11 Raise safety lever up straight. Bolt the safety lever to leg. 2 Required 1 Required 1 Required dia 12x6 m6x58...
- Page 17 Assembly Step 12 2 Required m12x6x3 Bolt the Jbars to leg. End view and side view shown 2 Required m12x6x15 2 Required m6x100...
- Page 18 Assembly Step 13 Bolt locking struts to support leg. Repeat for left side of top as shown in H. 2 Required 2 Required 2 Required dia 12x6 m6x49 Carry out steps 9-13 again for the other side.
- Page 19 Assembly Assembly Step 14 Install handgrips as shown. Open Table Top to Complete Assembly To properly open table into playing position: lock wheels. Push the thumb latch down on the locking strut. Squeeze the strut on the right side and lower table into playing position. Support the table as you lower it; never allow it to drop down.
- Page 20 Assembly Step 15 6 Required Screw sideshroud into place. Repeat installation of the 3.9x13 second shroud on opposite side of wheelbase assembly. 3 screws Net Assembly Slide Jpin through net (A, B). Place Jpin in designated slots (C). Tie string to tension tab (D). Place string in slots over Jpin and net post.
- Page 21 Assembly Assembly Assembly Assembly Remove Film Remove protective plastic film from table surface. Folding Table To properly fold the table, lock wheels, unlock the net post, press the safety lever up and lift top. Once the top is halfway up you can release lever and continue to fold the top. Racquet and Ball Holder Assembly...
- Page 22 United States only. Any shipment outside of the United States will be at the sole cost of the customer. This KETTLER® Limited Warranty is a manufacturer’s warranty and is not changed or modified by additional warranties extended by individual retailers at the point of sale. Manufacturer warrants this product to be free from defects in material at the time of the product’s tender of delivery for a period of 3...
- Page 23 Important: Spare part prices do not include fastening materials; if fastening material (bolts, nuts, washers, etc.) is required, this should be clearly stated on the order by adding the words “with fastening material”. Contact: KETTLER® International Inc., 1355 London Bridge Road, Virginia Beach, VA 23453 USA Online: www.kettlerusa.com E-mail: info@kettlerusa.com...
- Page 24 Spare Parts For 7122-XXX...
- Page 25 Spare Parts Spare Part Number Spare Part Number Number for 7122-XXX for 7162-XXX Number Description Required Indoor Outdoor Top (-490) 94130000 94130003 Top (-890) 94130117 94130058 94111114 94111122 Footcap 10100062 10100062 Clamp (indoor only) 10128024 Clamp (outdoor only) 10128024 Support Leg 94110732 94110742 Wheelbase...
- Page 26 KETTLER ® without the prior written permission of KETTLER International Inc., ® 1355 London Bridge Road, Virginia Beach, VA 23453 USA www.kettlerusa.com •...