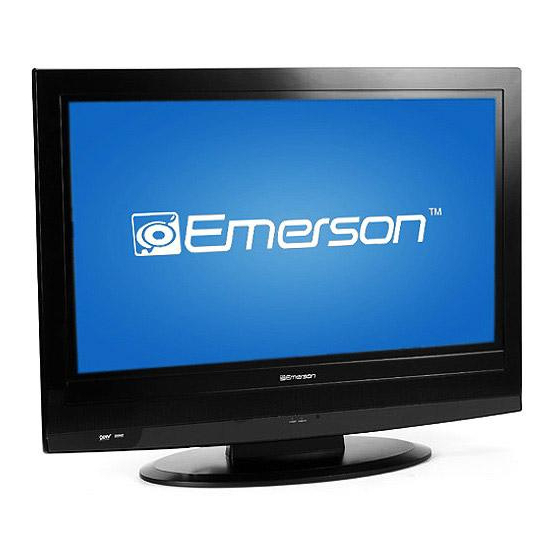
Emerson LC320EM8 Owner's Manual
32 inch digital / analog lcd tv
Hide thumbs
Also See for LC320EM8:
- Owner's manual (72 pages) ,
- Service manual (69 pages) ,
- Service manual (66 pages)
Table of Contents
Advertisement
Available languages
Available languages
EMERSON AND THE G-CLEF LOGO ARE REGISTERED TRADEMARKS
OF EMERSON RADIO CORP., PARSIPPANY, NEW JERSEY, U.S.A.
HIGH-DEFINITION TELEVISION
IF YOU NEED ADDITIONAL ASSISTANCE WITH SET-UP OR OPERATING AFTER
READING OWNER'S MANUAL, PLEASE CALL TOLL FREE 1-800-256-2487, OR
VISIT OUR WEB SITE AT http://www.EmersonAudioVideo.com
32 inch Digital / Analog
TM
TO RECEIVE DIGITAL/ANALOG SIGNAL,
YOU MUST CONNECT ANTENNA.
Owner's Manual
LC320EM8
© 2007 Funai Electric Co., Ltd.
LCD TV
INPUT
POWER
SLEEP
SELECT
1
2
3
4
5
6
AUDIO
7
8
9
STILL
-
0
SCREEN
SETUP
MODE
ENTER
BACK
INFO
CH RETURN
VOL.
CH
MUTE
Advertisement
Chapters
Table of Contents

Related Manuals for Emerson LC320EM8


Summary of Contents for Emerson LC320EM8
- Page 1 32 inch Digital / Analog LCD TV EMERSON AND THE G-CLEF LOGO ARE REGISTERED TRADEMARKS OF EMERSON RADIO CORP., PARSIPPANY, NEW JERSEY, U.S.A. Owner’s Manual LC320EM8 INPUT POWER SLEEP SELECT AUDIO STILL SCREEN SETUP MODE ENTER BACK INFO CH RETURN VOL.
-
Page 2: Important Safeguards
WARNING: TO REDUCE THE RISK OF FIRE OR ELECTRIC SHOCK, DO NOT EXPOSE THIS APPLI- ANCE TO RAIN OR MOISTURE. CAUTION THIS SYMBOL INDICATES THAT DANGER- OUS VOLTAGE CONSTITUTING A RISK OF RISK OF ELECTRIC SHOCK ELECTRIC SHOCK IS PRESENT WITHIN DO NOT OPEN THIS UNIT. -
Page 3: Precautions
16. OVERLOADING - Do not overload wall outlets and extension cords as instructions, as improper adjustment of other controls may result in this can result in a risk of fire or electric shock. damage and will often require extensive work by a qualified techni- cian to restore the TV to its normal operation. -
Page 4: Supplied Accessories
SUPPLIED ACCESSORIES • Owner’s Manual • Remote control unit • Batteries (1EMN22175) (NF006UD) (“AA” x 2) • If you need to replace these accessories, please refer to the PART NO. with the illustrations and call our toll free cus- tomer support line found on the cover of this manual. •... -
Page 5: Table Of Contents
ONTENTS IMPORTANT SAFEGUARDS ............2 PRECAUTIONS . -
Page 6: Functions
UNCTIONS REMOTE CONTROL, TOP AND REAR PANEL FUNCTION SLEEP button INPUT SELECT button (p23) (p20) Press to activate the sleep timer. Press to access connected external devices like a DVD recorder or VCR. INPUT POWER SLEEP SELECT POWER button (p12) AUDIO button (p19) Press to turn the TV on and off. -
Page 7: Installing The Batteries
ANT. IN jack AUDIO OUT jacks Coaxial cable connection for Audio cable connection for external your antenna or cable box. audio equipment. Use AUDIO IN jacks of external equipment. DIGITAL AUDIO OUT AUDIO jacks (for DVI connection) (COAXIAL) jack Audio cable connection for external Digital audio coaxial cable audio/video devices with DVI jack. -
Page 8: Preparation For Use
REPARATION FOR USE CONNECTION This section describes how to connect your TV to an antenna, cable box, etc. MAKE SURE YOU HAVE AN ANTENNA. As DTV is only available over the air, you need an antenna to receive a digital signal. NOTE: •... -
Page 9: Connecting Other Devices
CONNECTING OTHER DEVICES [HDMI] 1) High Definition Multimedia Interface (HDMI) uses the latest technology to ensure the signal maintains the highest degree of integrity from source to TV. Both video and audio travel through a single cable. HDMI cable (not included) To HDMI IN jack HDMI OUT ANT. -
Page 10: Component Cable Connection
[COMPONENT CABLE CONNECTION] Offers better picture quality for video devices connected to your TV. Use a component video cable (not included) to connect your TV to external video devices equipped with component video jacks. If you connect to your TV’s COMPONENT1 input jack, connect audio cables to the AUDIO L/R jacks of COM- PONENT1. -
Page 11: Video Connection
[VIDEO CONNECTION] Offers standard picture quality for video devices connected to your TV. When the audio jack of the video device is monaural, connect the audio cable to the audio L input jack. To VIDEO1 Video cable (not included) input jack To video output jack VIDEO... -
Page 12: Initial Settings
NITIAL SETTINGS INITIAL SETUP When you first turn on your TV, the following screen is displayed. Use [ K / L ] to select the This section will guide you through your TV’s initial on-screen menu language from the choices on set up which includes selecting a language for your the right side of the screen. -
Page 13: Channel Settings
HANNEL SETTINGS AUTOSCAN For TV channels, using [ K / L ], select “Air”. With AUTOSCAN, your TV automatically scans and For CATV channels, select “Cable”. memorizes your area’s viewable channels. Activate Autoscan Autoscan AUTOSCAN when you turn on your TV for the first Back time, change broadcast sources (e.g. -
Page 14: Channel List
CHANNEL LIST Select the channel you want to remove. This function lets you remove undesired channels • Using [ K / L ], select the channel. from the Channel Registration List. Channel List Channel List STILL Highlight channels for Ch Up/Down key selection. SCREEN SETUP SETUP... -
Page 15: Manual Register
MANUAL REGISTER Select the channel you want to add. • Using [the Number buttons], select your This function lets you manually add channels not memorized due to poor broadcast strength during desired channel. AUTOSCAN. INPUT Manual Register Manual Register POWER SLEEP SELECT Register... -
Page 16: Antenna Confirmation
ANTENNA CONFIRMATION • If the channel is set to external input, you can- not confirm the antenna situation. Displays signal strength for each channel. Video1 INPUT POWER SLEEP SELECT Antenna Antenna Back Indicator is available for antenna signal only. AUDIO STILL Ch Change SCREEN... -
Page 17: Language Selection
LANGUAGE SELECTION You can choose English, Spanish, or French as your on screen language. STILL SCREEN SETUP SETUP MODE ENTER ENTER INFO BACK CH RETURN VOL. MUTE Display the setup screen. • Press [SETUP]. The following setup screen appears. Select “LANGUAGE” and press [ENTER] to con- firm. -
Page 18: Watching Tv
ATCHING TV NTSC ATSC CHANNEL SELECTION 18:00 CH4-1 No signal No signal Select channels by pressing [CH K/L] found on 18:30 remote control or on the TV’s control panel, or by CH4-1 CH4-2 CH4-3 pressing [the Number buttons] found on the remote 19:00 control. -
Page 19: Still Mode
STILL MODE When the broadcasting has all audio... SAP / STEREO / STEREO You can freeze the image shown on the screen. SAP / MONO When the broadcasting has stereo audio and AUDIO monaural audio... STILL STILL MONO / STEREO MONO / STEREO SCREEN... -
Page 20: Accessing External Devices
ACCESSING EXTERNAL DEVICES • When you press [INFO], the current external input mode, the type of resolutions for video Use your remote control to access DVD recorders, signal, TV aspect ratio, CC and TV rating will home audio systems and other external devices be displayed at the top-right of the screen. -
Page 21: Changing The Screen Display Mode
CHANGING THE SCREEN DISPLAY MODE Press [SCREEN MODE], to switch the TV Each of 4 display modes can be selected in either aspect ratio. 4:3 or 16:9 aspect ratios. Press [SCREEN MODE] repeatedly until the nor- AUDIO mal screen displays. STILL NOTE: SCREEN... -
Page 22: Screen Information
SCREEN INFORMATION In the digital mode, the detailed information for the You can display the currently selected channel or current channel such as the Program guide is dis- other information such as the audio mode on the played. screen. AUDIO Display the detailed information for the channel. -
Page 23: Sleep Timer
PTIONAL SETTINGS SLEEP TIMER SETUP SCREEN The Sleep Timer can be set to automatically turn This section describes the overview of the setup off your television after an incremental period of screen displayed when you press [SETUP]. time. For more details, see the reference page for each item. -
Page 24: Picture Adjustment
Contrast PICTURE ADJUSTMENT Using [s / B], adjust to increase or decrease contrast. You can select from four default picture color set- s : To decrease contrast tings. You can also adjust brightness, contrast, B : To increase contrast color, tint, sharpness and color temperature as well Contrast as energy saving settings. -
Page 25: Closed Caption
[Caption Mode] CLOSED CAPTION CC1 and Text1: are the primary caption and text services. You can view closed captioning (cc) for TV pro- The captioning or text is displayed in the same grams, movies, news, and prerecorded tapes. language as the program’s dialogue Closed captions refer to text of dialogue or descrip- tions displayed on-screen for the hearing impaired. -
Page 26: Dtv Closed Caption
DTV CLOSED CAPTION CLOSED CAPTION STYLE Display the setup screen. Apart from closed captions, DTV has its own closed • Press [SETUP]. captions called DTV CC. Use this menu to change The following setup screen appears. the settings for DTV CC. Display the setup screen. - Page 27 [Font Opacity] Font opacity of the displayed caption can be Set each item. switched as below. • When “User Setting” is set to “On”, you can set the following items. CC Style CC Style Closed Caption User Setting • CC style set by “User Setting” will be displayed. Font Style Font Size •...
-
Page 28: V-Chip
V-CHIP Enter the password. • Use [the Number buttons] and enter the You can block certain programming inappropriate for 4-digit number. children. This block can be released by entering a password. V-Chip V-Chip INPUT POWER SLEEP SELECT Enter password. BACK PIN Code Back AUDIO... - Page 29 Set “MPAA Rating”. Set “TV Rating”. • Using [ K / L ], select the rating. • Using [ K / L ], select the rating. • Press [ENTER] and set to “View” or “Block”. • Press [ENTER] and set to “View” or “Block” for V-Chip V-Chip the rating without sub categories.
- Page 30 C New Password Display the “New Password” screen. • Using [ K / L ], select “New Password”. V-Chip V-Chip MPAA Rating TV Rating New Password • Press [ENTER]. Change the password. • Use [the Number buttons] on the remote con- trol and enter the NEW 4-digit password.
-
Page 31: Hdmi Audio
HDMI AUDIO Set the method of sound input for HDMI jack. STILL SCREEN SETUP SETUP MODE ENTER ENTER INFO BACK Display the setup screen. • Press [SETUP]. The following setup screen appears. Select “DETAIL” and press [ENTER] to confirm. • Using [ K / L ], select “HDMI Audio” and press [ENTER] to confirm. -
Page 32: Miscellaneous
ISCELLANEOUS TROUBLESHOOTING GUIDE Before calling for service, please refer to the following information. Symptom Remedy No power • Be sure the power cord is connected to outlet. • If a power failure occurs, unplug the power cord for 30 minutes to allow the unit to reset itself. - Page 33 Symptom Remedy Picture rolls vertically • When the outside antenna is used, check the wire condition and connection. • Electrical interference from nearby appliances may affect picture quality. • View other TV channels. The problem might be limited to the broadcasting station.
-
Page 34: Glossary
GLOSSARY ATSC HDMI (High-Definition Password Multimedia Interface) Acronym that stands for Advanced A stored 4-digit number that Television Systems Committee and allows access to parental control Interface that supports all uncom- the name of the digital broadcasting features. pressed, digital audio/video formats standards. -
Page 35: Specifications
PECIFICATIONS GENERAL SPECIFICATIONS ELECTRICAL SPECIFICATION Television System: ATSC Sound Output: 5W, 8 ohm x 2 NTSC-M TV Standard OTHER SPECIFICATIONS Closed Caption Remote Control: Digital encoded System: §15.119/FCC (Analog CC) infrared light system §15.122/FCC (Digital CC) Operating Channel Coverage (ATSC/NTSC) Temperature: 5°C to 40°C VHF:... -
Page 36: Limited Warranty
LIMITED WARRANTY FUNAI CORP. will repair this product, free of charge in the USA in the event of defect in materials or workmanship as follows: DURATION: PARTS: FUNAI CORP. will provide parts to replace defective parts without charge for one (1) year from the date of original retail purchase. - Page 37 Televisión con pantalla LCD digital/analógica de 32 pulgadas EMERSON Y EL LOGOTIPO G-CLEF SON MARCAS REGISTRADAS DE EMERSON RADIO CORP., PARSIPPANY, NEW JERSEY, EE.UU. Manual del Usuario LC320EM8 INPUT POWER SLEEP SELECT AUDIO STILL SCREEN SETUP MODE ENTER BACK INFO CH RETURN VOL.
-
Page 38: Importante Para Su Seguridad
ADVERTENCIA: PARA REDUCIR EL RIESGO DE INCENDIO O CHOQUE ELÉCTRICO, NO EXPONGA ESTE EQUIPO A LA LLUVIA O HUMEDAD. ESTE SÍMBOLO INDICA QUE DENTRO DE CAUTION ESTA UNIDAD SE ENCUENTRA PRESENTE RISK OF ELECTRIC SHOCK VOLTAJE PELIGROSO QUE CONSTITUYE UN RIESGO DE CHOQUE ELÉCTRICO. - Page 39 17. INTRODUCCIÓN DE OBJETOS Y LÍQUIDOS - Nunca inserte objetos de ningún cuencia requerirá trabajo intensivo con un técnico calificado para restaurar la tipo en esta unidad a través de las aberturas, ya que podrían tocar puntos de operación normal de la unidad. voltaje peligrosos o hacer corto circuito con otros componentes que podrían resul- e.
-
Page 40: Accesorios Suministrados
ACCESORIOS SUMINISTRADOS • Manual del usuario • Unidad de control remoto • Pilas (1EMN22175) (NF006UD) (“AA” x 2) • Si necesita cambiar estos accesorios, consulte el Núm. de PIEZA encima de la figura y llame a nuestra línea de asisten- cia mencionado en la página delantera. - Page 41 Í NDICE IMPORTANTE PARA SU SEGURIDAD ............2 PRECAUCIONES .
-
Page 42: Funciones
UNCIONES FUNCIONES DEL MANDO A DISTANCIA Y DEL PANEL SUPERIOR Y TRASERO Botón SLEEP (pág.23) Botón INPUT SELECT (pág.20) Presiónelo para acceder a aparatos externos Presione para activar el temporizador conectados, tales como un grabador de DVD de apagado automático. INPUT o una VCR. -
Page 43: Instalación De Las Pilas
Toma ANT. IN Tomas AUDIO OUT Conexión de cable coaxial a su Conexión de cable de audio a disposi- antena o su caja de cable. tivos de audio externos. Utilice las tomas AUDIO IN del aparato externo. Toma DIGITAL AUDIO OUT (COAXIAL) Toma HDMI IN ANT. -
Page 44: Preparación Para El Uso
REPARACIÓN PARA EL USO CONEXIÓN Esta sección describe cómo conectar el televisor a una antena, caja de cable, etc. ASEGÚRESE DE TENER UNA ANTENA. Como el DTV sólo existe en ondas aéreas, necesita una antena para recibir señal digital. NOTA: •... -
Page 45: Conexión De Otros Dispositivos
CONEXIÓN DE OTROS DISPOSITIVOS [HDMI] 1) El sistema HDMI (Interfaz Multimedia de Alta Definición) incorpora la tecnología más avanzada para ase- gurar que la señal mantiene el mayor grado de intensidad posible desde la fuente al televisor. Tanto el vídeo como el audio viajan a través de un único cable. -
Page 46: Conexión De Cable De Componentes
[CONEXIÓN DE CABLE DE COMPONENTES] Ofrece una mejor calidad de imagen para dispositivos de vídeo conectados a su TV. Utilice un cable conector de vídeo componente (no incluido) para conectar su TV a dispositivos externos de vídeo equipados con tomas de vídeo componentes. Si conecta las tomas de salida componente a la toma de entrada COMPONENT1, conecte un cable de audio a las tomas AUDIO L/R (izquierda/derecha) de COMPONENT1. -
Page 47: Conexión De Vdeo
[CONEXIÓN DE VÍDEO] Ofrece una calidad de imagen estándar para dispositivos de vídeo conectados al televisor. Cuando la toma de audio del dispositivo de vídeo es monoaural, conecte el cable de audio a la toma de entrada de audio L. Cable de vídeo Al conector... -
Page 48: Preajustes Inicial
REAJUSTES INICIAL PREPARACIÓN INICIAL Al encender el televisor por primera vez, apare- cerá la siguiente pantalla. Utilice [ K / L ] para Esta sección le guiará en la instalación inicial de su seleccionar el idioma del menú en pantalla entre televisor, que entre otras cosas requiere selec- las opciones que aparecen en el margen dere- cionar el idioma para el menú... -
Page 49: Ajuste De Los Canales
JUSTE DE LOS CANALES PREA. AUTO CA. Para canales de TV, mediante [ K / L ], seleccione "Aire". Para canales CATV, seleccione "Cable". Con la función AUTOSCAN, el televisor escanea y memoriza automáticamente los canales visualiz- Autoscan Autoscan ables en su zona. Active la función AUTOSCAN al Atrás Autoscan volverá... -
Page 50: Lista De Canales
LISTA DE CANALES Seleccione el canal que desea añadir. • Con [ K / L ], seleccione el canal. Esta función le permite eliminar canales no desea- dos de la lista de registro de canales. Lista Canales Lista Canales Subraye canales para selección Ch Up/Down. -
Page 51: Registro Manual
REGISTRO MANUAL Seleccione el canal que desea añadir. • Mediante [los botones de número], selec- Esta función le permite añadir manualmente canales no memorizados durante la operación de cione el canal deseado. AUTOSCAN debido a la poca fuerza de la señal de transmisión. -
Page 52: Confirmación De Antena
• Si el canal es puesto a la entrada externa, CONFIRMACIÓN DE ANTENA usted no puede confirmar la situación de antena. Visualiza la intensidad de señal de cada canal. Video1 INPUT POWER SLEEP SELECT Antena Antena Atrás Indicador disponible sólo para señal antena. -
Page 53: Selección De Idioma
SELECCIÓN DE IDIOMA Puede elegir su idioma de pantalla entre los sigu- ientes: Inglés, Español o Francés. STILL SCREEN SETUP SETUP MODE ENTER ENTER INFO BACK CH RETURN VOL. MUTE Visualización de la pantalla de instalación. • Presione [SETUP]. Se mostrará la siguiente pantalla de instalación. Seleccione "IDIOMA"... -
Page 54: Para Mirar Tv
ARA MIRAR TV Sobre la emisión de subcanales: SELECCIÓN DE CANAL Puede haber diferentes programas emitidos en subcanales a través de un único canal proce- Seleccione los canales presionando [CH K/L] en el dente de ATSC. Puede ver cada programa de mando a distancia o en el panel de mando del televi- subcanal emitido seleccionando uno de los sor, o bien presionando [los botones de número]... -
Page 55: Modo De Imagen Fija
Cuando la emisión contiene audio estéreo y audio MODO DE IMAGEN FIJA monoaural... Puede congelar la imagen mostrada en la pantalla. MONO / ESTÉREO MONO / ESTÉREO Cuando la emisión contiene SAP y audio monoaural... SAP / MONO / MONO AUDIO Cuando la emisión contiene solamente audio monoaural... -
Page 56: Acceso A Dispositivos Externos
ACCESO A DISPOSITIVOS EXTERNOS • Para utilizar las tomas COMPONENT2 del TV, seleccione "Component2". Utilice el mando a distancia para acceder a grabadores de DVD, sistemas de sonido en casa y • Para utilizar la toma HDMI IN del TV, selec- otros dispositivos externos que estén conectados al cione "HDMI". -
Page 57: Cambio Del Modo De Visualización De Pantalla
CAMBIO DEL MODO DE VISUALIZACIÓN DE PANTALLA Cada vez que presione [SCREEN MODE], la Cada uno de los 4 tipos de modo de visualización relación de aspecto del televisor cambiará de se puede seleccionar en el modo de pantalla, con forma alterna. -
Page 58: Información De Pantalla
INFORMACIÓN DE PANTALLA En el modo digital, se mostrará la información Se puede mostrar en pantalla el canal seleccionado detallada para el canal vigente actualmente selec- en ese momento y otra información, tal como el cionado, como la guía de programación. modo de audio. -
Page 59: Temporizador De Apagado Automático
JUSTES OPCIONALES TEMPORIZADOR DE APAGADO AUTOMÁTICO PANTALLA DE INSTALACIÓN La función Temporizador de Apagado Automático Esta sección describe el resumen de la pantalla de apagará automáticamente la corriente de la unidad instalación que se muestra al presionar [SETUP]. a una hora determinada. Para más detalles, vea la página de referencia de cada elemento. -
Page 60: Ajuste De La Imagen
Contraste AJUSTE DE LA IMAGEN Mediante [s / B], ajuste para aumentar o reducir el contraste. Puede seleccionar entre cuatro configuraciones de s : Para disminuir el contraste color de imagen predeterminadas. También puede B : Para aumentar el contraste ajustar los ajustes de brillo, contraste, color, matiz, Contraste 60 nitidez y temperatura de color así... -
Page 61: Subtítulos
[MODO DE TÍTULO] SUBTÍTULOS S.C.1 y Texto1 son los servicios primarios de subtítulos y texto. Puede ver subtítulos (cc) en programas de tele- Los subtítulos o el texto se muestran en el visión, películas, noticias, y cintas pregrabadas. Los mismo idioma que el diálogo del programa subtítulos son el texto de diálogo o descripción que (hasta 4 líneas de escritura sobre pantalla, sin aparece en pantalla para los usuarios con dis-... -
Page 62: Subtítulos De Dtv
SUBTÍTULOS DE DTV ESTILO DE SUBTÍTULO CERRADO Visualización de la pantalla de instalación. Aparte de los subtítulos cerrados, DTV tiene sus pro- • Presione [SETUP]. pios subtítulos cerrados, denominados S.C. DTV. Utili ce Se visualizará la siguiente pantalla de instalación. este menú... - Page 63 [Opaco Fuente] Se puede cambiar la opacidad del texto del título Ajuste cada elemento. mostrado de la siguiente forma. • Cuando "Config. Usuarid" esté ajustado en Estilo S.C. Estilo S.C. Subtítulo Cerrado "On", puede ajustar los elementos siguientes. Config. Usuarid Estilo Fuente Tamaño Fuente •...
-
Page 64: V-Chip
V-CHIP Introduzca la contraseña. • Con [los botones de número] introduzca el Puede bloquear determinados programas inapropi- ados para niños. Este bloqueo puede cancelarse número de 4 dígitos. mediante una contraseña. V-Chip V-Chip INPUT POWER SLEEP SELECT Introduzca contraseña. BACK Código Id. - Page 65 Ajuste de "Clase de MPAA". Ajuste de "Clase de TV". • Con [ K / L ], seleccione la clase. • Con [ K / L ], seleccione la clase. • Presione [ENTER] y ajuste "Mirar" o "Bloq.". • Presione [ENTER] y ajuste "Mirar" o "Bloq." para la clase sin subcategorías.
- Page 66 C Contraseña Nueva Visualización de la pantalla "Contraseña Nueva". • Con [ K / L ], seleccione "Contraseña Nueva". V-Chip V-Chip Clase de MPAA Clase de TV Contraseña Nueva • Presione [ENTER]. Cambie la contraseña. • Use [los botones de número] del mando a distancia e introduzca la NUEVA contraseña de 4 dígitos.
-
Page 67: Audio Hdmi
AUDIO HDMI Ajuste el método de entrada de sonido para la toma HDMI. SCREEN SETUP SETUP MODE ENTER ENTER INFO BACK Active la pantalla de instalación. • Presione [SETUP]. Se muestra la siguiente pantalla de instalación. Seleccione "DETALLE" y presione [ENTER] para confirmar su selección. -
Page 68: Varios
ARIOS GUÍA DE LOCALIZACIÓN DE PROBLEMAS Antes de llamar al servicio técnico, compruebe una vez más el siguiente cuadro. Síntoma Solución No hay corriente • Asegúrese de que el cable de alimentación está enchufado. • Si se produce un fallo de corriente, desenchufe el cable de alimentación durante 30 minutos para permitir que la unidad se reinicie por sí... - Page 69 Síntoma Solución La imagen se desplaza vertical- • Si está usando una antena exterior, compruebe el estado del cable así como el mente de la conexión. • La interferencia eléctrica de aparatos cercanos puede afectar a la calidad de la imagen.
-
Page 70: Glosario
GLOSARIO ATSC LPCM (Modulación por codifi- cación de pulsos lineales) (Un segundo un programa de audio) Acrónimo de Advanced Television Systems Commitee y nombre del LPCM es un formato que puede tener Canal de audio secundario que se estándar de radiodifusión digital. hasta ocho canales de audio. -
Page 71: Especificaciones
SPECIFICACIONES ESPECIFICACIONES GENERALES ESPECIFICACIONES ELÉCTRICA Sistema de televisión: ATSC Salida de sonido: 5W, 8 ohmios x 2 NTSC-M TV estándar OTRAS ESPECIFICACIONES Sistema de Subtítulos narrativos: §15.119/FCC (CC analógica) Mando a distancia: Sistema de infrarrojos con §15.122/FCC (CC digital) codificación digital Gama de canales (ATSC/NTSC) Temperatura de VHF:... -
Page 72: Garantia Limitada
GARANTIA LIMITADA FUNAI CORP. reparará este producto libre de cargos en los EE.UU. de América, en caso de defectos en los materiales u obra de mano, de la siguiente manera: DURACION: Partes: FUNAI CORP. proveerá las partes necesarias para reemplazar las piezas defectuosas sin ningún cargo durante un (1) año a partir de la fecha de la compra original al minorista.