
Related Manuals for Blaupunkt Toronto 420 BT


Summary of Contents for Blaupunkt Toronto 420 BT
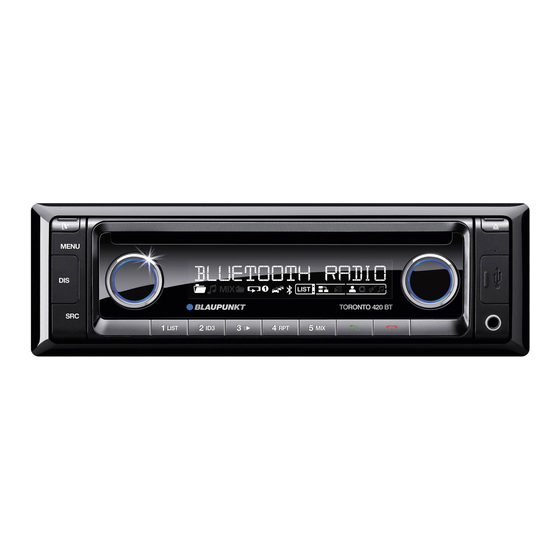
- Page 1 Car Radio Bluetooth Toronto 420 BT 1 011 202 420 / 1 011 202 421 San Francisco 320 1 011 202 320 / 1 011 202 321 www.blaupunkt.com Operating and installation instructions...
-
Page 2: Controls
USB port button Unlock the detachable control panel Front AUX-IN socket MENU button < button (only Toronto 420 BT) Short press: Call up/close menu Ending/rejecting a phone call Long press: Start scan function button (Toronto 420 BT only) On/Off button... -
Page 3: Table Of Contents
Placing the device in operation ....... 5 Telephone functions..........17 Attaching/detaching the control panel .... 5 Bluetooth® streaming mode........20 Display language (only Toronto 420 BT) ... 6 Phone book functions ...........20 Setting the reception area ........6 Additional functions in Switching on/off ............6 the Bluetooth®... -
Page 4: Safety Notes
Safety notes Safety notes Road safety Observe the following notes about road safety: The car sound system was manufactured accord- ing to the state of the art and established safety • Use your device in such a way that you can guidelines. -
Page 5: Declaration Of Conformity
Declaration of conformity Optional equipment (not part of the scope of delivery) The Blaupunkt AudioVision GmbH & Co. KG de- clares that the car sound system San Francisco Use only accessories approved by Blaupunkt. 320 complies with the basic requirements and... -
Page 6: Display Language (Only Toronto 420 Bt)
On/Off button Display language (only Toronto 420 BT) Volume For the Toronto 420 BT, you can defi ne whether the Adjusting the volume language for messages on the display is English or German. The setting is performed in the user menu You can adjust the volume in steps from 0 (off ) to (see the chapter "User settings", section "Mak-... -
Page 7: Display Brightness
Placing the device in operation | Traffi c information | Radio mode Display brightness for traffi c announcements (see the chapter "User settings", section "Making settings in You can manually switch the display brightness the "VOLUME" menu", menu item "TRAFFIC between daytime mode and night-time mode or VOL"). -
Page 8: Changing To Radio Mode Or Selecting A Memory Bank
Radio mode Changing to radio mode or selecting Tuning into stations manually u Press the rotary button once to activate a memory bank manual station tuning. The following memory banks are available in the The display briefl y shows "SEARCH MANUAL". diff erent reception areas: u Turn the rotary control ... -
Page 9: Storing Stations Automatically (Travelstore)
Radio mode Scanning all stored stations of the waveband u Press the rotary control for approx. 2 sec- In the reception areas "EUROPE" and "USA", an FM onds to start the scanning. station can transmit its current programme type, During the scan, the display alternately dis- e.g. -
Page 10: Confi Guring The Display
Notes: Notes: • To ensure proper functioning, use only CDs • Blaupunkt cannot guarantee the fl awless with the Compact-Disc logo. function of all iPod and iPhone models. • Blaupunkt cannot guarantee the fl awless • If an iPhone and iPod are connected at the... -
Page 11: Changing To Cd/Mp3/Wma/Ipod Mode
CD/MP3/WMA/iPod mode Changing to CD/MP3/WMA/iPod Note: You must not hinder or assist the drive as it mode automatically draws in the CD. u Press the SRC button repeatedly until the u Insert the CD with its printed side up into the desired audio source is displayed: CD tray until you feel a slight resistance. -
Page 12: Inserting/Removing The Memory Card
CD/MP3/WMA/iPod mode If the USB data carrier is initially selected as Selecting tracks audio source, the data are read fi rst. u Turn rotary control one notch counter- Notes: clockwise or clockwise to change to the pre- vious/next track. • If the connected USB data carrier cannot be seen, "USB ERROR"... -
Page 13: Playing Tracks In Random Order
CD/MP3/WMA/iPod mode Playing tracks in random order Confi guring the display u Press the 5 MIX button u Press the DIS button > to change among once or several times the playback modes: to toggle between these displays: Opera- Display Meaning Opera- Display / icon... -
Page 14: Browse Mode
CD/MP3/WMA/iPod mode Browse mode Browse mode in iPod mode In iPod mode, you can select and play the tracks In Browse mode, you can directly search for and via the categories "ARTISTS", "ALBUMS", "GENRES" select a certain track on the MP3/WMA data carrier or "PLAYLISTS". -
Page 15: Searching By Track Names (Not In Ipod Mode)
The playback starts. You are exiting the (Toronto 420 BT only) browse mode. You can connect the Toronto 420 BT via Bluetooth® with other Bluetooth®-ready devices, such as cell Searching by track names phones or MP3 players. This allows you to use the... -
Page 16: Pairing And Connecting A Cell Phone
Bluetooth® Calling the Bluetooth® menu Pairing and connecting a cell phone u Briefl y press the MENU button to open Note: the user menu. If a connection with a cell phone currently ex- u Turn the rotary control until the "BLUE- ists, this connection is automatically discon- TOOTH"... -
Page 17: Telephone Functions
Bluetooth® u In the Bluetooth® menu, select the "PAIRING" Notes: menu item. • If no connection can be established, the u Press the rotary control display briefl y shows "CONNECT FAILED". to open the menu. • After switch-on, the car sound system The "MOBILE PHONE"... - Page 18 Bluetooth® u Turn the rotary control Making a call to select a diff er- u In the Bluetooth® menu, select the "DIAL NEW ent entry. u Press the rotary control NUMBER" menu item. or the but- u Press the rotary control to call the number.
- Page 19 Bluetooth® Storing a phone number in the car sound Speed dial for any phone number or for the system number dialed last or a stored number You can store phone numbers in the car sound With speed dial, you can make a call without fi rst system and make calls using the speed dial (see having to select the corresponding function in the the following section).
-
Page 20: Bluetooth® Streaming Mode
Bluetooth® Speed dial for phone book entries Bluetooth® streaming mode Note: Starting the Bluetooth® streaming mode This function is only available u Press the SRC button repeatedly until • if the phone book of the connected cell "BT-STREAM" appears on the display. phone was transferred to the car sound The playback starts. -
Page 21: Additional Functions In The Bluetooth® Menu
Bluetooth® Each entry consists of a name and a number, each • If you insert a CD during an ongoing trans- up to 20 characters on digits. fer, the playback does not start until the transfer is completed. Note: Do not switch off the car sound system while Deleting the phone book of the cell phone transferring the phone book. - Page 22 Bluetooth® Managing paired devices To unpair the displayed device, u press the < button for approx. 2 sec- In the Bluetooth® menu, you can manage the onds. paired Bluetooth® devices (cell phones and streaming devices such as MP3 player). The display briefl y shows "DELETED" and you In the device lists for cell phones and streaming are returned to the Bluetooth®...
-
Page 23: External Audio Sources
(Sub-Out) For this reason, we recommend using angled • Setting the 3-band equaliser jack plugs, e.g. the Blaupunkt accessories cable • Adjusting the time delay for switching in an (7 607 001 535). external amplifi er As soon as an external audio source, such as a Calling and exiting the "AUDIO"... -
Page 24: Making Settings In The "Audio" Menu
Sound settings Making settings in the "AUDIO" menu LOUDNESS Increase of bass at low volume. Settings: ON, OFF. BASS u Press the rotary control to change the Bass level. Settings: –7 to +7. setting. u Press the rotary control to change the u Turn the rotary control to change be- setting. -
Page 25: Setting The 3-Band Equaliser
Sound settings AMP DELAY EQUALIZER Setting the delay with which a connect amplifi er Switching the equalizer on or off . Settings: ON, is switched in. Settings: 0.5/1.0/1.5/2.0/2.5 seconds OFF. and OFF (no delay) . u Press the rotary control to change the u Press the rotary control to change the... -
Page 26: User Settings
(settings: 80/100/200 Hz) • CLOCK – GAIN (settings: –7 to +7) • VARIOUS – Q-FACTOR • BLUETOOTH (Toronto 420 BT only, see the (settings: 1.0/1.25/1.5/2.0) chapter "Bluetooth®") u Press the rotary control to change the u Turn the rotary control ... -
Page 27: Making Settings In The "Tuner" Menu
User settings Making settings in the "TUNER" Notes: • In the factory default, all AM memory menu banks are deactivated. TRAFFICINFO (traffi c information) • If a memory bank is deactivated, the sta- (only for reception area EUROPE) tions stored in this memory bank are re- Only possible in FM radio mode: Switching prior- tained. -
Page 28: Making Settings In The "Display" Menu
User settings TUNER AREA (reception area) Switching the PTY function on or off . Settings: ON, Select the reception area for the radio reception. OFF. Settings: EUROPE, USA, SOUTH AMERICA, THAI- LAND. u Press the rotary control to change the u Press the rotary control setting. -
Page 29: Making Settings In The "Volume" Menu
Press the rotary control to confi rm the setting. setting. HANDSFREE VOL (for Toronto 420 BT only and with connected Making settings in the "VOLUME" cell phone) menu Adjusting the level for handsfree volume. Settings: –5 to +5. -
Page 30: Making Settings In The "Clock" Menu
User settings Making settings in the "CLOCK" menu Making settings in the "VARIOUS" menu PERM CLOCK Switch the permanent display of the time on or off . DEMO MODE Settings: ON, OFF. Switching the demo mode on or off . Settings: u Press the rotary control ON, OFF. -
Page 31: Factory Settings
User settings | Factory settings AUX EDIT The car sound system switches off and is reset to the factory settings. If a CD has been Entry of an individual 15-digit name for the AUX inserted in the CD drive, the car sound system source. -
Page 32: Useful Information
20 – 20,000 Hz can be called up from www.blaupunkt.com. Pre-amp out Service 4 channels: In some countries, Blaupunkt off ers a repair and Input sensitivity pick-up service. Front AUX-IN: 300 mV / 10 kΩ Information about the availability of this service in your country can be found at www.blaupunkt.com. -
Page 33: Installation Instructions
Do not connect the vehicle’s plug connec- tors to the radio! You can obtain the adapter cable required 1 011 202 321 / 1 011 202 421: for your vehicle type from any BLAUPUNKT dealer. • Depending on the model, your vehicle may diff er from the description provided here. - Page 34 Installation instructions Available as an optional accessory 1 2 V 7 607 621 … Installation kits 7 608 … … 0° - 30° +/– 10° +/– 10°...
- Page 35 Installation instructions Removal Antenna Antenna connection Preamp Out (4x) Rear USB Microphone In (Bluetooth®, Toronto 420 BT only) 1-20 1 2 V...
- Page 36 Installation instructions 7 10 13 16 19 9 12 15 18 Aut. antenna / Amplifi er +12V 8 11 14 17 20 Remote Control +12V 10 Ampere max. 150 mA Sub Out GND Speaker out RR+ Radio Mute Speaker out RR– Sub Out Speaker out RF+ Permanent +12V...
- Page 37 Installation instructions Relais +12V Sub Out GND Sub Out 1 3 5 Kl. 15 +12V Radio Mute 4 Ohm 4 Ohm 4 Ohm 4 Ohm +12V Subject to changes!
- Page 38 This product is protected by certain intellectual property rights of Microsoft. Use or distribution of such technology outside of this product is prohibited without a license from Microsoft. © 2012 All rights reserved by Blaupunkt. This material may be reproduced, copied or distributed for personal use only.
- Page 39 Please keep the fi lled-in radio pass in a safe place!
- Page 40 Passport Name: ........................1 011 202 _ _ _ Type: ........................Serial no.: BP ....................... Blaupunkt AudioVision GmbH & Co. KG Robert-Bosch-Straße 200 D-31139 Hildesheim http://www.blaupunkt.com 01/12...