Table of Contents
Advertisement
Quick Links
Download this manual
See also:
Operator's Manual
Goal: You will install a VariTrac CCP , zone controllers, and communicating sensor/bypass
damper control in this workshop. You will also install 24Vac power, the Comm4 communications
link and zone sensor wiring. Sections of this workshop include the following:
Install VariTrac UCMs and digital zone sensor
Install VariTrac Central Control Panel
Startup VariTrac and setup system from operator display
Reference: VariTrac Central Control Panel Installation Manual (VAV-SVN03A-EN)
VariTrac Central Control Panel Operators Guide (VAV-SVP01A-EN)
Job Description:
A VariTrac III and Tracker 10 will be installed at B&R Specialty Metals. The VariTrac CCP is
applied to the office area HVAC system. This HVAC system consists of Voyager CV unit
supplying 3 separately controlled zones. VariTrac is applied as a changeover bypass system and
uses a bypass damper assembly to monitor and control supply air static pressure and
temperature. VariTrac devices required for this job include the following:
VariTrac CCP
VariTrac UCMs (3)
Zone sensors (3)
Communicating Bypass Damper assembly
Tracker is used to control the warehouse area and brazing workshop. Tracker controls scheduling
of the warehouse rooftop unit, exhaust fans for the restroom and brazing workshop, outdoor
lighting, and occupancy for the Varitrac system.
03- VariTrac Installation Workshop.doc
Workshop 3
VariTrac Installation
VariTrac Installation
3-1
Advertisement
Table of Contents

Related Manuals for Trane VariTrac


Summary of Contents for Trane VariTrac
- Page 1 VariTrac Central Control Panel Operators Guide (VAV-SVP01A-EN) Job Description: A VariTrac III and Tracker 10 will be installed at B&R Specialty Metals. The VariTrac CCP is applied to the office area HVAC system. This HVAC system consists of Voyager CV unit supplying 3 separately controlled zones.
- Page 2 VariTrac Installation The drawing shows the VariTrac system you will install in this workshop. you will complete the power wiring and communications link. Then startup the system. Install VariTrac UCMs and digital zone sensor Reference: VariTrac Installation Manual (VAV-SVN03A-EN), Pages 23 through 27 1.
- Page 3 Question: Will the comm link function even though the electrician swapped polarity at one of the Comm4 devices? ______. Why or why not? ________________________. 4. Install a zone sensor to VariTrac damper UCM, address #1. Use wire provided for both the sensor/adjustable setpoint.
- Page 4 Question: Can both 24Vac power and sensor wiring share the same conduit? ____. Why or why not? _____________________________________________________ Install Communicating Bypass Damper Assembly Reference: VariTrac Installation Manual (VAV-SVN03A-EN), Pages 21 through 22 The communicating sensor/bypass assembly is normally located between the Note: supply fan and the bypass damper in the least turbulent location possible.
- Page 5 ______________. Install VariTrac Central Control Panel Reference: VariTrac Installation Manual (VAV-SVN03A-EN), page 17 10. Remove the Display and Main modules from the termination module to gain access to the termination board wiring.
- Page 6 11. Connect 24Vac transformer leads to AC power terminations (TB1-1,TB-2) on the VariTrac termination board. Note: A dedicated 24 Vac, 30VA Class 2 transformer is required to power the VariTrac Central Control Panel. The ground wire (TB2-3) is connected to the circuit breaker panel.
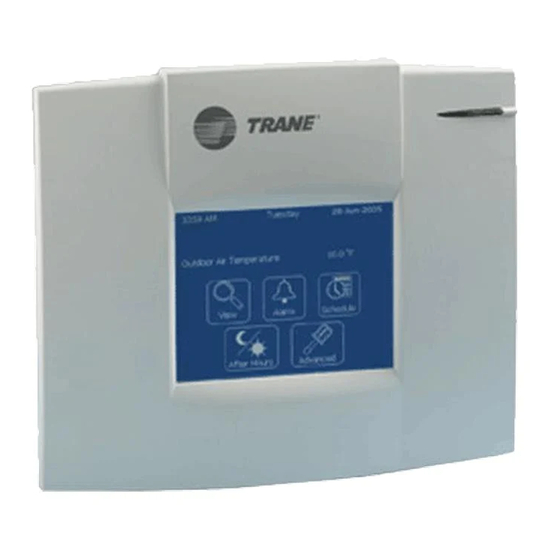
- Page 7 VariTrac Installation 13. Verify that 24 Vac power, and Comm4 link are correctly terminated at the VariTrac termination board. 14. Install Main logic board onto the VariTrac termination board module. 15. Install the VariTrac operator display module onto the main module.
- Page 8 Reference: VariTrac Installation Manual (VAV-SVN03A-EN), page 43 to 51 16. Apply 24Vac power to VariTrac and UCMs. Question: What is the minimum configuration of VariTrac devices required for the CCP startup sequence to begin? ____________________________________________. 17. View the VariTrac operator display. The ‘System Initialization in Progress’ screen displays.
- Page 9 Hint: Press the ‘Advanced’ button to access the following options. π Set current date and time π Change System Name: from “VariTrac CCP” to “Front Office Area” π Select HVAC Unit Type: as ‘Voyager Commercial CV’ π Change Discharge Heating Setpoint: to ‘100.0’...
- Page 10 VariTrac Installation You have completed this workshop! 3-10 03- VariTrac Installation Workshop.doc...