Table of Contents

Related Manuals for Sierra Wireless Overdrive Pro 3G


Summary of Contents for Sierra Wireless Overdrive Pro 3G
- Page 1 User Guide Overdrive Pro™ 3G/4G Mobile Hotspot by Sierra Wireless ©2012 Sierra Wireless, the Sierra Wireless logo, and the red wave design are trademarks of Sierra Wireless. Other marks are the property of their respective owners. 4/16/12...
- Page 2 Document 2131389 Revision 3...
-
Page 3: Table Of Contents
Table of Contents Section 1: Getting Started ..........1 1A. - Page 4 Sharing Your Connection ..........37 Ending Your Network Connection .
- Page 5 Low Battery Alert ........... . 70 Critical Battery Level Alert .
- Page 6 Welcome to Your Device Window - Select an Option ....112 Section 6: Resources ..........113 6A.
- Page 7 7B. Safety Information ...........135 Important Notice .
-
Page 9: Section 1: Getting Started
Section 1 Getting Started... -
Page 10: About This Guide
Your device allows you to easily connect to the Internet and to share your 3G or 4G connection. This user guide is designed to provide you with all the information you need to install and use your Overdrive Pro™ 3G/4G Mobile Hotspot by Sierra Wireless. Note: The printed basic guide that comes with the device should be sufficient for most installations. -
Page 11: System Requirements
Section 1B System Requirements To use your Overdrive Pro 3G/4G Mobile Hotspot, the following are required: ● One or more computers that support Wi-Fi (802.11b/g/n) ● Web browser (required if you’ll be using the browser interface to view status and to configure settings). -
Page 13: Section 2: Your Device
Section 2 Your Device... -
Page 14: Device Basics
Section 2A Device Basics Components of Your Device (page 8) 3G and 4G Networks (page 8) Package Contents (page 9) Care and Maintenance (page 9) Connectors and Buttons (page 9) Battery (page 10) Connecting Through USB (page 11) Charging the Device (page 12) Power Button (page 13) LCD (page 16) Mute Switch (page 17) - Page 15 Your device provides a simple way to use your 3G or 4G Internet connection with any Wi-Fi- enabled device, and to share your Internet connection with friends and family. Your Device...
-
Page 16: Components Of Your Device
Components of Your Device Your device consists of these main components: ● Wi-Fi access point The Wi-Fi access point connects your computers and other Wi-Fi-enabled devices to your device. ● 3G modem The 3G modem connects your device to the Internet via the 3G (CDMA 1X/EVDO) network (more widely available, compared with 4G). -
Page 17: Package Contents
Package Contents Your package includes: ● Overdrive Pro 3G/4G Mobile Hotspot by Sierra Wireless ● Battery compartment cover ● Rechargeable battery ● AC charger with micro-USB port ● Micro-USB cable ● basic guide Care and Maintenance As with any electronic device, you should handle this device with care to ensure reliable operation. -
Page 18: Battery
Battery The battery compartment is on the back of the device. The battery is replaceable. If you need a new battery, visit the Sierra Wireless online store at https://www.sierrawireless.com/eStore. Installing the Battery Using slight thumb pressure, slide the battery compartment cover upward to remove it. -
Page 19: Connecting Through Usb
Replace the battery compartment cover. Connecting Through USB Note: If you’ll be using USB for data transfer (and not just for charging the device), you must install the device driver. (See “Making a Tethered Connection” on page 27.) Use the micro-USB cable (included) to connect the device to your computer when: ●... -
Page 20: Charging The Device
To connect the device to your computer: Insert the larger end of the micro-USB cable into your computer. Insert the other end of the cable into the micro-USB port on the side of your device. Note: If you’re having problems, see “Cannot Connect Through USB” on page 128. Charging the Device You need to recharge your device’s battery periodically. -
Page 21: Power Button
Charging Through Your Computer Notes: If you’ll be using USB for data transfer (and not just for charging the device), you must install the device driver. (See “Making a Tethered Connection” on page 27.) If you’re using Mac OS X 10.4.x, after you connect the device you may see a warning message that your computer is running on UPS backup battery and that you should perform a computer shutdown. - Page 22 If the LCD is blank, press and hold the power button until the device powers on. Turning Your Device Off Press and hold the power button until the device turns off. Using the Power Button to Determine the Device State The power button on the device also indicates the device’s status, as shown in the following table.
- Page 23 Controlling the Device Using the Power Button Type of press Result ● Removes device from standby (low power) mode. ● Wakes up (turns on) the LCD if the LCD was enabled but dormant. (The LCD turns dark, after a configurable time of inactivity.) Quick press ●...
-
Page 24: Lcd
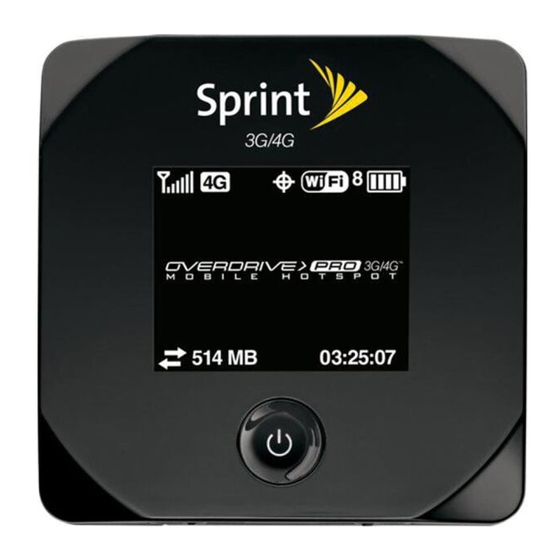
If the LCD is not lit, see “Turning Your Device On” on page 13. Interpreting the LCD The LCD shows icons and text that reflect the status of the device and your connection. Signal strength 3G or 4G status Alerts Number of Wi-Fi users Battery status Device name. -
Page 25: Mute Switch
LCD Information Screens The LCD of the Overdrive Pro 3G/4G Mobile Hotspot can display, on separate screens, summary information for the following: ● Connection information (the Wi-Fi network name [SSID] and password [if the Wi-Fi Password Reminder feature is enabled]) ●... - Page 26 Your Device...
-
Page 27: Section 3: Getting Your Device Ready
Section 3 Getting Your Device Ready... -
Page 28: Setting Up Your Device
Section 3A Setting Up Your Device Device Setup (page 20) Account Setup (Activation Wizard) (page 21) Changing the Password and Settings (page 22) Device Setup Install the battery, as described in “Installing the Battery” on page 10. Connect the device to the AC charger, as described in “Using the AC Charger with Your Device’s micro-USB Port”... -
Page 29: Account Setup (Activation Wizard)
On your computer, connect to the Wi-Fi network listed on the device LCD. If you don’t know how to do this, see “How Do I Connect to Wi-Fi?” on page 115. After you’ve connected to the Wi-Fi network, the device LCD displays “Open any web page to continue setup.” Open your Web browser. -
Page 30: Changing The Password And Settings
Set up my Overdrive Pro , during the device setup), a window with several Wi-Fi security options opens. Note: All the devices used with the Overdrive Pro 3G/4G Mobile Hotspot must support the selected security type. The options displayed depend on the setting (in ;... - Page 31 Wi-Fi security options opens. Note: All the devices used with the Overdrive Pro 3G/4G Mobile Hotspot must support the selected security type. You can also view the expanded list of Wi-Fi security options in the...
- Page 32 Wi-Fi devices. ● WPA/WPA2 Personal (recommended setting) — Wi-Fi devices that use either WPA or WPA2 can connect to the Overdrive Pro 3G/4G Mobile Hotspot. This setting is supported by most Wi-Fi devices. Your Device is Now Restarting The “Your device is now restarting” window opens if you’ve clicked...
-
Page 33: Section 4: Using Your Device
Section 4 Using Your Device... -
Page 34: Connecting Through Usb
Section 4A Connecting Through USB ● TRU-Install (page 26) ● Requirements for a USB Tethered Connection (page 26) ● Making a Tethered Connection (page 27) TRU-Install TRU-Install is a feature that installs the necessary drivers the first time you connect your device to your Windows or Mac computer through the micro-USB cable. -
Page 35: Making A Tethered Connection
If you’re running Windows Vista and the AutoPlay window opens, click Run setup.exe In the TRU-Install window, click Install the Sierra Wireless USB driver. (Follow the onscreen instructions.) To install the device driver on Mac: Make sure the device is turned on. - Page 36 Connecting the Device to Your Computer Insert the larger end of the micro-USB cable into your computer. Insert the other end of the cable into the micro-USB port on the side of your device. Using Your Device...
-
Page 37: Browser Interface Home Page
Section 4B Browser Interface Home Page Displaying the Home Page of the Device (page 31) Logging On as an Administrator (page 31) Virtual Device (page 32) Mini Window (page 32) Turning Your Device Off (page 33) The home page is the entry page of the browser interface that lets you: ●... - Page 38 When you click an icon or the text next to it, a window opens to the right (see the screenshot on page 40). The window contains additional status information and, if you’re logged in, commonly- used configurable settings. (See “Icons and Text” on page 39.) Use this area to enter the administrator password and log in.
-
Page 39: Displaying The Home Page Of The Device
Displaying the Home Page of the Device Note: You can display the home page only when your device is turned on and you have established a connection to it (through Wi-Fi or through the micro-USB cable). To display the home page, type one of the following in the address bar of your Web browser: ●... -
Page 40: Virtual Device
Virtual Device The right half of the home page contains an image of your device. This is a “virtual device” — it reflects most of the icons and text displayed on the real device. Mini Window If you click the virtual device in the home page, the Mini Window opens — an image of the device in a separate Web browser window Similar to the virtual device, the Mini Window reflects most of the icons and text displayed on the real device. -
Page 41: Turning Your Device Off
To save space on your monitor, you can close the home page and move the Mini Window to the side of your monitor. Then you can use the window to keep an eye on the status of your device and connection. (To reopen the home page, click the Home link.) If you’re logged in, the window has a... -
Page 42: Alerts
Section 4C Alerts 3G Activation Required (page 34) GPS Privacy Agreement (page 35) SD Card Error (page 35) Software Update Available (page 36) The alerts icon indicates whether there are any alerts (messages that require your attention). The icon is on the left side of the home page. Click the icon to display the Alert window. -
Page 43: Gps Privacy Agreement
If you selected No, I need to create an account and get an Account Number and MSID a. A new window will open displaying the Broadband2Go Activation portal. b. Select I want to activate my Broadband2Go device c. Follow the prompts to create your Broadband2Go account (this will include entering your personal and payment information). -
Page 44: Software Update Available
If it works in the other device, the card slot on your device may have a problem. If the card doesn’t work in the other computer, try one of the following: Use a different microSD card. — or — Reformat your card. (Follow the instructions that came with the microSD Card.) Note: The formatting procedure erases all the data on the microSD card, after which the files CANNOT be retrieved. -
Page 45: Your Network Connection
For other users to share your network connection: Provide the Wi-Fi network name and password to them. On their computer, users must connect to the Wi-Fi network of the Overdrive Pro 3G/4G Mobile Hotspot. (See “How Do I Connect to Wi-Fi?” on page 115.) -
Page 46: Ending Your Network Connection
Ending Your Network Connection Make sure you’re logged in to the home page. Click on the Virtual Device or in the Mini Window. (See “Virtual Device” on page 32 Disconnect and “Mini Window” on page 32.) Note: The Wi-Fi connection is still available, so users can, for example, share files by using a microSD card. Using Your Device... -
Page 47: Icons And Text
Section 4E Icons and Text Signal Information (page 40) Mobile Broadband Information and Settings (page 41) Alert Information (page 42) GPS Information and Settings (page 42) Wi-Fi Users Information and Settings (page 43) Battery Information and Settings (page 44) Internet Connection Information (page 45) microSD Card Information and Settings (page 46) Sounds Information and Settings (page 47) The left part of the home page has a vertical row of icons and text, starting with the signal strength... -
Page 48: Signal Information
If you click an icon or the text, a window opens with additional information, as shown in the following screenshot. If you’re logged in, the window may also display configurable settings. Advanced Settings Note: A more complete set of configurable settings is available in the window. -
Page 49: Mobile Broadband Information And Settings
CINR stands for Carrier to Interference-plus-Noise Ratio and is a measurement of signal effectiveness. The first table also shows the type(s) of 3G service you have: 1X, 1xEV-DO, or both. (To determine whether you have EV-DO Rev. 0 or Rev. A service, use the text near the 3G icon; see “Mobile Broadband Information and Settings”... -
Page 50: Alert Information
If you don’t have 4G coverage, you can save power by selecting 3G Only To automatically connect to the network upon loss of connection or when the device powers on, select Connect Automatically Alert Information The alerts icon indicates whether there are any alerts (situations that require your attention). Note: To view alert information, you must be logged in. -
Page 51: Wi-Fi Users Information And Settings
Configuring the Settings When you’re logged in, the following settings are available. View privacy agreement (link displayed if you haven’t yet accepted the GPS privacy agreement). You cannot enable and use GPS until you accept this agreement. Click the link to view and then accept the agreement. -
Page 52: Battery Information And Settings
● You don’t recognize a listed computer. ● You have lots of data to transfer (you want to be the sole user of the bandwidth). ● You’re approaching the data limit on your account. — You can limit the number of Wi-Fi users (maximum of five) that can connect to the Max Wi-Fi users device. -
Page 53: Internet Connection Information
Long Range — This setting allows you to use your wireless devices farther from your Overdrive Pro 3G/4G Mobile Hotspot but increases the possibility of interference with or from nearby wireless networks. Standby (Low Power) Mode When the device is in standby (low power) mode, the 3G/4G modem radios, the Wi-Fi radio, and the LCD are off, and the power button is flashing (approximately every 8 seconds). -
Page 54: Microsd Card Information And Settings
— This is the address of the node on the computer network that the network Default Gateway software uses when an IP address does not match any other routes in the routing table (that is, when an IP packet’s destination address is outside of the local subnet). —... -
Page 55: Sounds Information And Settings
Sounds Information and Settings The sounds icon ( ) shows whether the device speaker is on. The device speaker is on. The device speaker is off. Click the sounds icon to display the Sounds window. The window displays: ● Status of the device speaker (on or off). ●... -
Page 56: Home Page Buttons
Section 4F Home Page Buttons Top Row of the Home Page Buttons (page 48) Bottom Row of the Home Page Buttons (page 50) Top Row of the Home Page Buttons The top horizontal part of the home page has the following buttons: ●... - Page 57 Advanced Settings From the Advanced Settings window you can configure all the settings of the device and the browser interface. The Advanced Settings window has the following tabs, each with several panels: ● Device tab. (See “Device Tab” on page 72.) ●...
-
Page 58: Bottom Row Of The Home Page Buttons
Bottom Row of the Home Page Buttons These buttons are displayed below the Virtual Device. Note: The buttons appear only when you’re logged in. Connect/Disconnect Button This button connects or disconnects your device from the 3G or 4G network. Power Off Button This button turns the device off. -
Page 59: Using The Microsd Card
Section 4G Using the microSD Card Before Using the microSD Card Slot (page 51) Inserting a microSD Card (page 52) Removing a microSD Card (page 53) Accessing the microSD Card (page 53) Before Using the microSD Card Slot Enable the slot. (See “Enabling the microSD Card Slot” below.) Set up access to the slot. -
Page 60: Inserting A Microsd Card
If you’ve selected Administrator + Guest hange the Set Guest Username Set Guest Password fields (up to 20 characters Optionally, c each with spaces allowed). Give the guest username and password to people whom you want to allow access to the card. microSD Shared Folder Name You can optionally change the name of the folder that the microSD card shows up as (in the file browser program);... -
Page 61: Removing A Microsd Card
Removing a microSD Card Make sure you and other users have completed any file transfers. In the microSD Card Information and Settings window (page 46), click Safe-Eject SD Card and wait until a message is displayed, stating it is safe to remove the card. Gently open the tab labeled “microSD”... - Page 62 From the Windows menu, click , and then type one of the following: Start \\virginmobile.hotspot\ \\<Hostname>\ Double-click the shared folder. In Finder, select Go > Connect to Server Type one of the following: smb://virginmobile.hotspot/ smb://<Router IP Address>/ (For example, smb://192. 1 68.0. 1 /) smb://<Hostname>...
-
Page 63: Location Services
Section 4H Location Services Requirements for GPS Service (page 55) Enabling GPS (page 55) Displaying Your Location Information (page 55) Viewing Your Current Location in a Web Browser (page 56) Performing a Location Search (page 56) Requirements for GPS Service To access GPS services: ●... -
Page 64: Viewing Your Current Location In A Web Browser
In the GPS Information and Settings window, set , and click GPS Mode One-time Get fix now (The top part of the window shows your location information.) Advanced Settings > WAN > GPS Get fix Tip: You can also display location information from —... -
Page 65: Updates
Section 4I Updates Automatically Checking for Updates (page 57) Manually Checking for Updates (page 58) Upgrading Firmware From a File (page 59) Note: If a software update is available, the device LCD displays a message, and an alert is available from the home page. -
Page 66: Manually Checking For Updates
Manually Checking for Updates Note: During installation of the update: • DO NOT turn off or unplug the device. • Your Wi-Fi and Internet connections won’t be available. When the installation is complete, you will need to reconnect to Wi-Fi. (See “How Do I Connect to Wi-Fi?”... -
Page 67: Upgrading Firmware From A File
Upgrading Firmware From a File Use this option when you have an updated firmware file that you’ve, for example, downloaded from the Virgin Mobile or Sierra Wireless website. Note: During installation of the update: • DO NOT turn off or unplug the device.... -
Page 68: Viewing Device Information
Section 4J Viewing Device Information To view information about your device: Log in to the home page. Click Advanced Settings Click Device > About WAN mode WAN mode Advanced Note: 4G information is not available if is “3G only.” ( is in Settings >... - Page 69 ● Firmware Version — This is the firmware version of the 3G component of the device. ● Total Bytes — This is the amount of data transferred over the 4G network during the lifetime of the device. ● Firmware Version —...
-
Page 70: Reset Button
Section 4K Reset Button Restarting the Device (page 63) The reset button is inside the hole located near the battery compartment as shown below. For information on using this button, see “Restarting the Device” (page 63) and “Resetting the Software to Default Settings (Through the Reset Button)” (page 106). Using Your Device... -
Page 71: Restarting The Device
Restarting the Device Tip: Alternatively, you may be able to restart the device by pressing and holding the power button on the device for three to four seconds. If the device or the home page seems to stop responding, you can reset (restart) the device. To restart the device: Using slight thumb pressure, slide the battery compartment cover upward to remove it. - Page 72 Replace the battery compartment cover. Using Your Device...
-
Page 73: Section 5: Settings
Section 5 Settings... -
Page 74: Power Settings
Section 5A Power Settings Battery and USB Power Settings (page 66) AC Power Settings (page 66) Battery and USB Power Settings You can specify the settings for battery power and USB power: ● Short Range — This setting improves battery life, at the cost of a shorter Wi-Fi range. ●... -
Page 75: Configuring The Lcd
Section 5B Configuring the LCD Turning the LCD On or Off (page 67) Setting the LCD Timeout (page 67) Setting the LCD Brightness (page 67) Turning the LCD On or Off Log in to the home page. Click Advanced Settings > Device > Display Set the field to . -
Page 76: Enabling And Disabling The Power Button Led
Section 5C Enabling and Disabling the Power Button LED The power button LED on the device acts as a status indicator. (For more information, see “Using the Power Button to Determine the Device State” on page 14.) To enable or disable the power button LED: Log in to the home page. -
Page 77: Sounds
Section 5D Sounds Enabling and Disabling Sounds for Specific Events (page 69) Low Battery Alert (page 70) Critical Battery Level Alert (page 70) You can enable or disable sounds of the device through: ● The mute switch on the device (disables all sounds). (See “Mute Switch” on page 17.) ●... -
Page 78: Low Battery Alert
Low Battery Alert You can set an alert to sound when the battery level is low. Setting the Alert From the Home Page Make sure you’re logged in to the home page. Click the Sounds icon ( In the Sounds window, select Low battery Setting the Alert From the Advanced Settings Window Log in to the home page. -
Page 79: Login Settings
Section 5E Login Settings Changing the Administrator Password (page 71) Automatic Login (“Remember Me”) (page 71) Changing the Administrator Password Note: If you forget the Admin Login password, you’ll need to reset the device to its default settings and go through the device setup. -
Page 80: Advanced Settings
Section 5F Advanced Settings Accessing the Advanced Settings Window (page 72) Device Tab (page 72) WAN Tab (page 76) Wi-Fi Tab (page 79) Router Tab (page 82) From the Advanced Settings window you can configure all the settings of the device and the browser interface. - Page 81 ● Import Router Settings — You can import configuration settings. (See “Importing Settings” on page 108.) ● Export Router Settings — You can export configuration settings. (See “Exporting Settings” on page 108.) ● Update Firmware from File — You can upgrade the device firmware from a file. (See “Upgrading Firmware From a File”...
- Page 82 ● SD-Card Slot — Before you can use the microSD Card slot, you must enable it. (See “Enabling the microSD Card Slot” on page 51.) ● microSD Shared Folder Name — This is the name of the folder that the microSD card shows up as (in the file browser program).
- Page 83 About Panel To view information about your device: Log in to the home page. Click Advanced Settings Click Device > About Note: 4G information is not available if WAN mode is “3G only.” ( WAN mode is in Advanced Settings > WAN > Setup The following information is displayed: ●...
-
Page 84: Wan Tab
● Firmware Version — This is the firmware version of the 4G component of the device. ● MAC Address — This is the MAC address of the 4G module. Each wireless device has a unique MAC address (assigned by its manufacturer). ●... - Page 85 From this window, you can view or adjust these settings, or perform the following actions: ● Active Network — This is the network that is currently being used for your data connection: 3G, 4G, or none. ● Network Operator — This field shows the carrier that your device was activated with. ●...
- Page 86 From this window, you can view this 4G information: ● Connection Status — This field reflects whether you are connected to 4G. ● Service Type — This field reflects the 4G service type: 4G, 4G Off, or no service. ● Coverage Type —...
-
Page 87: Wi-Fi Tab
● Get fix now — This button starts a one-time fix (not displayed if or a GPS Mode Continuous GPS session is already in progress). If you change the value from Continuous One-time , you must click Save before your changes take effect and the fix becomes possible. ●... - Page 88 (up to 2346). ● Wi-Fi Power Save Mode — If this field is set to “On,” the Wi-Fi component of the Overdrive Pro 3G/4G Mobile Hotspot enters power save mode, when possible. If your computer tends to lose the Wi-Fi connection and stops responding, set this field to “Off.”...
- Page 89 Security Panel Log in to the home page. Click Advanced Settings Click Wi-Fi > Security From this window, you can set the: ● Security — This specifies the security used by Wi-Fi. (See “Wi-Fi Security” on page 85.) ● Wi-Fi Password —...
-
Page 90: Router Tab
● Display a list of computers that are currently connected through Wi-Fi ( List of connected devices (See “Displaying a List of Currently Connected Computers” on page 88.) Router Tab See “Configuring the Router Tab” on page 96. Settings... -
Page 91: Configuring The Wi-Fi Network
The SSID identifies your Wi-Fi network and is visible to other Wi-Fi-enabled devices. It appears on your device’s LCD screen; if more than one Overdrive Pro 3G/4G Mobile Hotspot is available, you can use this name to tell the devices apart. - Page 92 In the field, enter the new name. SSID If the SSID field is not available, is enabled. You must either edit Link SSID and Hostname Hostname (and the SSID will get the same value), or disable Link SSID and Hostname and edit the SSID.
-
Page 93: Wi-Fi Security
Wi-Fi Security By default, Wi-Fi security is enabled for your device and the Wi-Fi network. Note: All the devices used with the Overdrive Pro 3G/4G Mobile Hotspot must support the selected security type. To change the security used by Wi-Fi: Log in to the home page. - Page 94 (recommended setting) — Wi-Fi devices that use either WPA or WPA2 can WPA/WPA2 Personal connect to the Overdrive Pro 3G/4G Mobile Hotspot. Supported by most Wi-Fi devices. Click Save The option you select determines the Wi-Fi security used and also the maximum length of the Wi-Fi password.
- Page 95 Press the power button on the device two times quickly (within a half-second interval). The information is displayed for approximately 20 seconds. To clear the information before that, briefly press the power button on the device. Enabling the Wi-Fi Password Reminder Log in to the home page.
-
Page 96: Host Name (Device Name)
Specifying Computers That Are Not Allowed to Access the Network Log in to the home page. Click Advanced Settings > Wi-Fi > MAC Filter In the list, click MAC Filter Mode Block all in list Determine and block an undesired user of your network. Click the List of connected devices link. -
Page 97: Setting The Maximum Number Of Wi-Fi Users
To change the host name: Log in to the home page. Click Advanced Settings Click Wi-Fi > Network Router > LAN In the field, enter a name for your device. Hostname The name must be 1–15 ASCII characters. Valid characters are: 0-9. -
Page 98: Disabling Wi-Fi When Connected Through Usb
Disabling Wi-Fi When Connected Through USB You can optionally turn off the device’s Wi-Fi when connected via the micro-USB cable. In this case: ● Only a computer that is connected to the device through the micro-USB cable can use the device. ●... -
Page 99: Configuring 3G And 4G
Section 5H Configuring 3G and 4G Viewing 3G Activation Information (page 91) 3G Panel (page 91) Resetting the 3G and 4G Configurations to Default Settings (page 92) Viewing 3G Activation Information Log in to the home page. Click Advanced Settings Click Device >... -
Page 100: Resetting The 3G And 4G Configurations To Default Settings
● MSID (Mobile Station ID) — Also known as IMSI (International Mobile Station Identity), the MSID is an identifier of a device on the 3G network. ● NAI (Network Access Identifier) — This is your User ID for accessing the 3G network. ●... -
Page 101: Gps Settings
Section 5I GPS Settings Setting the GPS Mode (page 93) Setting the GPS Fix Rate (page 94) Using Metric Units (page 94) Changing Your Mapping Service (page 94) Performance Setting (GPS) (page 94) Accuracy (page 95) Basic GPS settings can be changed in the GPS Information and Settings window. (See “GPS Information and Settings”... -
Page 102: Setting The Gps Fix Rate
Setting the GPS Fix Rate The GPS fix rate determines how often GPS fixes are obtained. This option is available only if the fix mode ( ) is set to GPS Mode Continuous Log in to the home page. Click Advanced Settings >... -
Page 103: Accuracy
Accuracy The accuracy setting determines how accurate the location information is. Log in to the home page. Click Advanced Settings > WAN > GPS In the section, select one of the following: Accuracy — The device automatically determines the most appropriate setting to use. Automatic —... -
Page 104: Configuring The Router Tab
. Users will be able to connect only through Wi-Fi and only Disable after they provide the correct Wi-Fi password (if Wi-Fi security is enabled). This setting does not affect the ability to charge the Overdrive Pro 3G/4G Mobile Hotspot through the micro-USB cable. ● Port Forwarding —... -
Page 105: Lan Panel
● Port Triggering — You can set the device to monitor outgoing data on specific port numbers (trigger ports). (See “Port Trigger Panel” on page 103.) ● DMZ — You can select one computer to receive all unsolicited incoming connections. (See “DMZ Panel”... - Page 106 From this window, you can view or adjust these settings, or perform the following actions: ● Router IP Address — This is the routing hardware’s IP address on the LAN. ● Subnet Mask — This is the routing hardware’s internal LAN subnet mask. ●...
- Page 107 is set to Disable, the routing hardware rejects DNS requests targeting the internal DNS Relay DNS proxy. DNS Relay field is configurable and displayed only if DNS Mode is Manual. If DNS Mode Auto, DNS Relay is enabled by default. ●...
- Page 108 Enter a number between 2 and 10080. ● Max DHCP Clients — This is the number of DHCP addresses that can be assigned and active at one time. It’s recommended you set this to a number greater than the number of Wi-Fi users. ●...
-
Page 109: Port Forward Panel
DNS Mode setting specifies how the DNS servers (that the DHCP clients are to communicate DNS Mode with) are obtained. Log in to the home page. Click Advanced Settings Click Router > LAN DNS Mode to one of the following: —... - Page 110 Enabling Port Forwarding Before you can use or configure Port Forwarding, you must enable it. Log in to the home page. Click Advanced Settings > Router > Basic Next to , select Port Forwarding Enable Click Save Enabling Port Forwarding for an Application Make sure you’ve enabled port forwarding.
-
Page 111: Port Trigger Panel
Port Trigger Panel Some applications require multiple ports open for communication, many of which may be initiated by a computer on the WAN. Examples of this include video conferencing, VoIP (Internet telephony), and Internet gaming. With port triggering, the device monitors outgoing data on specific port numbers (trigger ports). The device keeps track of the IP address of the computer that sends data on these trigger ports, so that when incoming data on the forward ports arrives, the device sends the incoming data to the same computer. -
Page 112: Dmz Panel
Click Click Save Removing Ports From the Port Triggering List Make sure you’ve enabled port triggering. (See “Enabling Port Triggering” on page 103.) Click Advanced Settings > Router > Port Trigger To keep the entry in the list (in case you want to re-enable this entry later on), clear the Enable check box. -
Page 113: Resetting The Software To Default Settings
Configuring DMZ Make sure you’ve enabled DMZ. (See “Enabling DMZ” on page 104.) Click Advanced Settings > Router > DMZ Specify the computer that you want exposed to the Internet: in the Destination IP Address field, enter the IP address of the computer. (If you don’t know how to find the IP address, see “Finding the IP Address”... - Page 114 Resetting the Software to Default Settings (Through the Reset Button) Using slight thumb pressure, slide the battery compartment cover upward to remove it. Locate the small hole near the battery compartment. The reset button is inside this hole. Insert a thin object (for example, the end of a paper clip) into the hole, and press down for five or more seconds Settings...
- Page 115 Replace the battery compartment cover. Check the device LCD. If it displays “Reset to factory defaults? Press to accept,” press the power button on the device. Follow the instructions on the device LCD. Resetting the Software to Default Settings (Through the Browser Interface) WARNING: If you reset the software to default settings:...
-
Page 116: Exporting And Importing Settings
Section 5K Exporting and Importing Settings Exporting Settings (page 108) Importing Settings (page 108) Exporting Settings Settings include configuration information for the device, network, and browser interface. You can, for example, save the current configuration, then make some changes and test them. You can then use the button to restore (load) the saved configuration. -
Page 117: Logs
Section 5L Logs Available Logs (page 109) Connection History (page 109) System Events (page 110) Setting the Method Used for Time Acquisition (page 111) Available Logs The following types of logs are available: ● Connects and disconnects. (See the following section.) ●... -
Page 118: System Events
System Events You can enable or disable, as a group, the logging of the following events: ● Software update available ● Primary WAN failover ● Primary WAN switchback ● Unexpected data connection loss ● Changes to miscellaneous settings The following system events are always logged: ●... -
Page 119: Setting The Method Used For Time Acquisition
Setting the Method Used for Time Acquisition Time information is stored in the connection history log and system events log. To set the method used for obtaining the time: Log in to the home page. Click Advanced Settings > Device > Log Select the or the check box. -
Page 120: Setup Pages
Section 5M Setup Pages Welcome to Your Device Window - Select an Option (page 112) Welcome to Your Device Window - Select an Option The Welcome to Your Overdrive Pro window opens: ● Automatically, as part of the initial setup of your newly purchased device. ●... -
Page 121: Section 6: Resources
Section 6 Resources... -
Page 122: More Information
Section 6A More Information Visiting the Virgin Mobile Website (page 114) Contacting Customer Service (page 114) Visiting the Virgin Mobile Website ● Go to http://www.virginmobileusa.com to get information on Virgin Mobile services, options, and more. You can also: ● Review coverage maps. ●... -
Page 123: Frequently Asked Questions
Section 6B Frequently Asked Questions How Can I Tell I’m Connected to 3G or 4G? (page 115) How Do I Connect to Wi-Fi? (page 115) What Do I Do if I Forget the Wi-Fi Password? (page 116) What Do I Do if I Forget the Administrator Password? (page 116) What Do I Do if the Home Page Displays “Charging paused”? (page 117) If the Connection is “Always On,”... -
Page 124: What Do I Do If I Forget The Wi-Fi Password
Other operating systems Please see the user documentation for your operating system or computer. Select the Wi-Fi network provided by the Overdrive Pro 3G/4G Mobile Hotspot and connect to it. (If prompted for a network key/security key/password, enter the Wi-Fi password.) What Do I Do if I Forget the Wi-Fi Password? ●... -
Page 125: What Do I Do If The Home Page Displays "Charging Paused
What Do I Do if the Home Page Displays “Charging paused”? If the text after the battery icon (on the home page) includes “Charging paused” (as shown in the screenshot below), try the following: ● Connect your device through the micro-USB cable. ●... -
Page 126: How Do I Access My Corporate Network Through A Vpn
Determine the COM port number that your Sierra Wireless device (that is, your Overdrive Pro 3G/ 4G Mobile Hotspot) is using. In the following example for Windows, the Device Manager shows that COM 18 is used. In your case, the COM port number might be different. -
Page 127: Tips
Section 6C Tips Extending Battery Life (page 119) Device Location (page 120) Improving Signal Strength (page 120) Improving Wi-Fi Performance (page 120) Security Tips (page 121) Finding the MAC Address (page 122) Finding the IP Address (page 122) Extending Battery Life ●... -
Page 128: Device Location
Device Location ● Avoid moisture or extreme temperatures. ● For improved reception, place the device near a closed window. ● Place your device within easy reach of a reliable power supply and the computer to which it will be connected. Improving Signal Strength ●... -
Page 129: Security Tips
Double-click Network adapters Double-click the Wi-Fi client network adapter of your computer — for example, “Intel(R) WiFi Link 5100 AGN” in the screenshot below. If the Wi-Fi client network adapter is by Intel, click Advanced and, in the Property list, click and move the slider all the way to the right (to ). -
Page 130: Finding The Mac Address
Finding the MAC Address You’ll need to know the MAC address of a device when: ● Assigning an IP address based on a MAC address (when using DHCP). (See “DHCP Static IP Assignment List” on page 100.) ● Allowing or denying computers access to the network. (See “Allowing or Denying Computers Access to the Network”... - Page 131 ● Static DHCP features The steps to finding the IP address of a device vary, depending on your operating system. Windows Open a command prompt window. Click Start Type , and click command At the command prompt, type ipconfig and press Enter Write down the IP Address for the entry that relates to the wireless network connection.
-
Page 132: Troubleshooting Tips
Connection” on page 26 and “Making a Tethered Connection” on page 27.) ● Go to www.virginmobileusa.com/help-support to access troubleshooting and other resources. ● The knowledge base at the Sierra Wireless website ( www.sierrawireless.com/support/ customer_help.aspx ) may also be useful. Resources... -
Page 133: Lcd Is Dark
LCD Is Dark The following table describes situations that can cause the LCD to be dark (that is, not displaying any text or icons), and recommends actions. Device state LCD state Your action Advanced LCD Backlight Settings > Device > Display > Turn on the LCD: set to “On.”... - Page 134 If the “Activation failed” message is still displayed, contact Customer Service and have the following available: Your billing information. ESN of the device (displayed on the packaging, inside the battery compartment, and at Advanced Settings > Device > About Connecting to 3G/4G Check the signal strength.
-
Page 135: Cannot Connect To Wi-Fi
Retry the update. If the “Update failed” message is still displayed, contact your service provider. Cannot Connect to Wi-Fi If your computer cannot connect to the Wi-Fi network of the Overdrive Pro 3G/4G Mobile Hotspot, make sure that: ● The maximum number of Wi-Fi users has not been reached. (To determine the number of connected Wi-Fi users and set the maximum, see “Wi-Fi Users Information and Settings”... -
Page 136: Cannot Connect Through Usb
Cannot Connect Through USB If your computer cannot connect to the Overdrive Pro 3G/4G Mobile Hotspot through the micro-USB cable: Make sure that you've installed the device driver, as described in “Making a Tethered Connection” on page 27. Connect to the Overdrive Pro 3G/4G Mobile Hotspot through Wi-Fi. -
Page 137: Cannot Connect To The 3G Or 4G Network
● If DHCP is enabled on the device, make sure DHCP is enabled on your computer. (See “DHCP” on page 99.) ● Check your Web browser settings. Open the Control Panel in Windows. Double-click Internet Options From the Security tab, restore the default settings. From the Connections tab, select... -
Page 138: Gps Fix Not Available
For best results, minimize the number of obstructions between your device and the GPS satellites. GPS Fix Not Available Make sure you have a clear view of the sky; if you’re in a forested area, or in or near tall buildings, move to another location. -
Page 139: Section 7: Technical Specifications, Safety Information, And Regulatory Information
Section 7 Technical Specifications, Safety Information, and Regulatory Information... -
Page 140: Technical Specifications
Section 7A Technical Specifications LED Operation (page 132) Radio Frequency and Electrical Specifications (page 132) Software Specifications (page 133) Environmental Specifications (page 134) Mechanical Specifications (page 134) LED Operation See “Using the Power Button to Determine the Device State” on page 14. Radio Frequency and Electrical Specifications Approvals Size: 1800 mAh... -
Page 141: Software Specifications
Software Specifications IS-2000 Release 0 CDMA (3G) specification IS-707A Data service IEEE 802.16e-2005 WiMAX (4G) specification IEEE 802.11b IEEE 802.11g Wi-Fi specification IEEE 802.11n WEP Open & Shared WEP-64 WEP-128 Wi-Fi security and encryption protocols WPA-Personal TKIP & AES (Pre-Shared Key or WPA-PSK) WPA2-Personal TKIP &... -
Page 142: Environmental Specifications
Environmental Specifications -4 to +131°F Operating temperature -13 to +140°F Storage temperature 90%, non-condensing Humidity 10–1000 Hz, 6G, 60 min/axis, 3 hrs total (non-operating) Vibration 1 m (approx. 39") on concrete Drop Mechanical Specifications 2.7" x 2.7" x 0.69" Dimensions (W x L x H) Supported Power button Not supported... -
Page 143: Safety Information
Sierra Wireless accepts no responsibility for damages of any kind resulting from delays or errors in data transmitted or received using the device, or for failure of the device to transmit or receive such data. - Page 144 Do not expose to water or other liquids, fire, explosion, or other hazards. ● Use the battery only in the Overdrive Pro 3G/4G Mobile Hotspot. ● If using with a charger, use only the AC charger supplied with the device.
-
Page 145: Regulatory Notices
FCC RF exposure limits in a portable configuration. At least 1.0 cm of separation distance between the Overdrive Pro 3G/4G Mobile Hotspot by Sierra Wireless and the user’s body must be maintained at all times. This device must not be used with any other antenna or transmitter that has not been approved to operate in conjunction with this device. - Page 146 This device complies with Parts 15 and 27 of the FCC Rules. Operation is subject to the following two conditions: (1) This device may not cause harmful interference, and (2) this device must accept any interference received, including interference that may cause undesired operation. Technical Specifications, Safety Information, and Regulatory Information...
-
Page 147: Legal
This product may contain technology developed by or for Sierra Wireless Inc. This product includes technology licensed from QUALCOMM®. This product is manufactured or sold by Sierra Wireless Inc. or its affiliates under one or more patents licensed from InterDigital Group. - Page 148 software (and charge for this service if you wish), that you receive source code or can get it if you want it, that you can change the software or use pieces of it in new free programs; and that you know you can do these things.
- Page 149 2. You may modify your copy or copies of the Program or any portion of it, thus forming a work based on the Program, and copy and distribute such modifications or work under the terms of Section 1 above, provided that you also meet all of these conditions: a) You must cause the modified files to carry prominent notices stating that you changed the files and the date of any change.
- Page 150 If distribution of executable or object code is made by offering access to copy from a designated place, then offering equivalent access to copy the source code from the same place counts as distribution of the source code, even though third parties are not compelled to copy the source along with the object code.
- Page 151 9. The Free Software Foundation may publish revised and/or new versions of the General Public License from time to time. Such new versions will be similar in spirit to the present version, but may differ in detail to address new problems or concerns. Each version is given a distinguishing version number.
- Page 152 This program is free software; you can redistribute it and/or modify it under the terms of the GNU General Public License as published by the Free Software Foundation; either version 2 of the License, or (at your option) any later version. This program is distributed in the hope that it will be useful, but WITHOUT ANY WARRANTY;...
- Page 153 Kevin Gibbs John Estabrook National Laboratory for Applied Network Research National Center for Supercomputing Applications University of Illinois at Urbana-Champaign http://www.ncsa.uiuc.edu Permission is hereby granted, free of charge, to any person obtaining a copy of this software (Iperf) and associated documentation files (the “Software”), to deal in the Software without restriction, including without limitation the rights to use, copy, modify, merge, publish, distribute, sublicense, and/or sell copies of the Software, and to permit persons to whom the Software is furnished to do so, subject to the following conditions:...
- Page 154 THIS SOFTWARE IS PROVIDED BY THE COPYRIGHT HOLDERS AND CONTRIBUTORS “AS IS” AND ANY EXPRESS OR IMPLIED WARRANTIES, INCLUDING, BUT NOT LIMITED TO, THE IMPLIED WARRANTIES OF MERCHANTABILITY AND FITNESS FOR A PARTICULAR PURPOSE ARE DISCLAIMED. IN NO EVENT SHALL THE COPYRIGHT OWNER OR CONTRIBUTORS BE LIABLE FOR ANY DIRECT, INDIRECT, INCIDENTAL, SPECIAL, EXEMPLARY, OR CONSEQUENTIAL DAMAGES (INCLUDING, BUT NOT LIMITED TO, PROCUREMENT OF SUBSTITUTE GOODS OR SERVICES;...
- Page 155 This product includes cryptographic software written by Eric Young (eay@cryptsoft.com). This product includes software written by Tim Hudson (tjh@cryptsoft.com). Original SSLeay License Copyright (C) 1995-1998 Eric Young (eay@cryptsoft.com) All rights reserved. This package is an SSL implementation written by Eric Young (eay@cryptsoft.com). The implementation was written so as to conform with Netscapes SSL.
- Page 156 OTHERWISE) ARISING IN ANY WAY OUT OF THE USE OF THIS SOFTWARE, EVEN IF ADVISED OF THE POSSIBILITY OF SUCH DAMAGE. The licence and distribution terms for any publicly available version or derivative of this code cannot be changed. I.e. this code cannot simply be copied and put under another distribution licence [including the GNU Public Licence.] PPPD License Copyright (c) 1984-2000 Carnegie Mellon University.
- Page 157 The name(s) of the authors of this software must not be used to endorse or promote products derived from this software without prior written permission. Redistributions of any form whatsoever must retain the following acknowledgment: “This product includes software developed by Paul Mackerras <paulus@samba.org>”.
- Page 158 THE AUTHORS OF THIS SOFTWARE DISCLAIM ALL WARRANTIES WITH REGARD TO THIS SOFTWARE, INCLUDING ALL IMPLIED WARRANTIES OF MERCHANTABILITY AND FITNESS, IN NO EVENT SHALL THE AUTHORS BE LIABLE FOR ANY SPECIAL, INDIRECT OR CONSEQUENTIAL DAMAGES OR ANY DAMAGES WHATSOEVER RESULTING FROM LOSS OF USE, DATA OR PROFITS, WHETHER IN AN ACTION OF CONTRACT, NEGLIGENCE OR OTHER TORTIOUS ACTION, ARISING OUT OF OR IN CONNECTION WITH THE USE OR PERFORMANCE OF THIS SOFTWARE.
-
Page 159: Trademarks
Jean-loup Gailly Mark Adler Trademarks Sierra Wireless, the Sierra Wireless logo, TRU-Locate, and the red wave design are trademarks of Sierra Wireless. Windows® is a registered trademark of Microsoft Corporation. Mac and Mac OS are trademarks of Apple Inc., registered in the U.S. and other countries. -
Page 160: Copyright
Copyright ©2012 Sierra Wireless. All rights reserved. No reproduction in whole or in part without prior written approval. Limitation of Liability The information in this manual is subject to change without notice and does not represent a commitment on the part of Sierra Wireless. SIERRA WIRELESS AND ITS AFFILIATES SPECIFICALLY... -
Page 161: Index
Index Service type ..... . . 78 Status ......40 4G Only (WAN Mode) . - Page 162 Administrator + Guest (microSD card Base Station ID (BSID) ....78 access) .......51 Base station preamble ID .
- Page 163 Cannot connect to the 3G/4G network . . 129 Connecting to 3G/4G message ..126 Connection Cannot connect to Wi-Fi ....127 Cannot display the home page .
- Page 164 Data Sent ......45 Static IP Assignment List ... 100 Data statistics for the current connection DHCP IP Address Range .
- Page 165 Enter standby mode (playing a Full charge, time required ....132 sound) ......47, 69, 74 Environmental specifications .
- Page 166 FAQ (Frequently Asked Questions) . . . 115 Playing a sound upon connection ..47 Tips ......119 Playing a sound upon disconnection .
- Page 167 Legal information ..... 139 Message about UPS backup battery . . 27 Maintenance of your device ....9 Liability, limitation of .
- Page 168 MTU Mode ......98 Operating temperature ....134 Mute switch, location .
- Page 169 Location ......9 Remember me (keeps you logged in as administrator) ......71 Pressing, results of .
- Page 170 Safari browser ......3 Sierra Wireless knowledge base ..124 Safari can’t open the page .
- Page 171 Standby current ..... . 132 TKIP/AES ......24, 85 Total Bytes (3G) .
- Page 172 Connecting the device to your Sierra Wireless ....152 computer through USB ....27 Virgin Mobile .
- Page 173 Windows XP, improving Wi-Fi performance ......120 Wireless speakers ....120 WMM (Wi-Fi Multimedia) support .