Table of Contents
Advertisement
Quick Links
Advertisement
Table of Contents

Related Manuals for Supermicro Supero AOC-SIMLP-B


Summary of Contents for Supermicro Supero AOC-SIMLP-B
- Page 1 UPER ® AOC-SIMLP-B AOC-SIMLP-B+ AOC-SIMLP-3 AOC-SIMLP-3+ USER'S GUIDE Rev. 1.1...
- Page 2 Clara County in the State of California, USA. The State of California, County of Santa Clara shall be the exclusive venue for the resolution of any such disputes. Supermicro's total liability for all claims will not exceed the price paid for the hardware product.
-
Page 3: Table Of Contents
1.3 Product Features ..................1-6 1.4 Checklist ....................1-6 1.5 An important Note to the User ..............1-6 1.6 Contacting Supermicro ................1-7 Chapter 2: Technical Specifications and Software Installation ... 2-1 2.1 AOC-SIMLP-B/SIMLP-B+/SIMLP-3/SIMLP-3+ Card Layout and Jumper ..Locations ......................2-1 2.2 Block Diagram .................... -
Page 4: Chapter I: Introduction
Introduction This manual is written for system integrators, PC technicians and knowledgeable PC users who intend to integrate Supermicro's unique IPMI 2.0 Management functionality with the capability of KVM-over-LAN into their systems. It provides detailed information for the application and use of the AOC-SIMLP-B/ SIMLP-B+/SIMLP-3/SIMLP-3+ that supports remote access for system monitoring, diagnosis and management. -
Page 5: Product Features
Chapter 1: Introduction • Voltage monitoring • Power status monitoring, chassis intrusion monitoring • Remote power control to power-on, power-off or reboot a system • Remote access to text-based, graphic-based system information, including BIOS configurations and OS operation information (KVM) •... -
Page 6: Checklist
AOC-SIMLP-B(+)/AOC-SIMLP-3(+) User's Guide 1.4 CheckList If your shipping package came with missing or damaged parts, please contact Supermicro's Tech. Support. Please refer to the following checklist when contacting us. i. AOC-SIMLP-B/SIMLP-B+/SIMLP-3/SIMLP-3+: ii. Brackets: One full-size bracket, one low-profile bracket and two screws, iii. -
Page 7: Contacting Supermicro
Chapter 1: Introduction 1.6 Contacting Supermicro Headquarters Address: SuperMicro Computer, Inc. 980 Rock Ave. San Jose, CA 95131 U.S.A. Tel: +1 (408) 503-8000 Fax: +1 (408) 503-8008 Email: marketing@supermicro.com (General Informaion) support@supermicro.com (Technical Support) Web Site: www.supermicro.com Europe Address: SuperMicro Computer B.V. - Page 8 AOC-SIMLP-B(+)/AOC-SIMLP-3(+) User's Guide Notes...
-
Page 9: Chapter 2: Technical Specifications And Software Installation
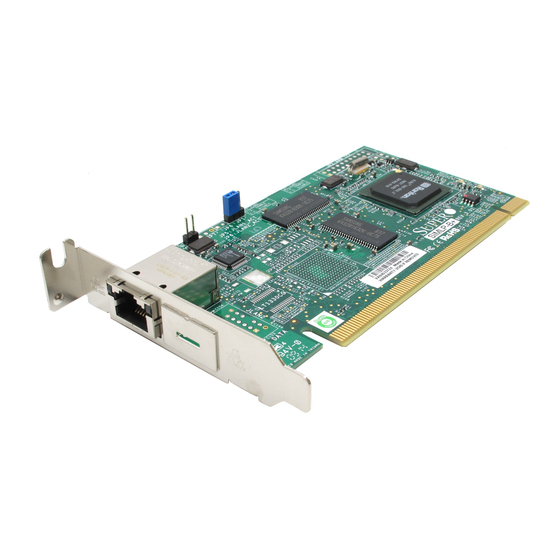
Chapter 2: Technical Specifications and Installation Chapter 2 Technical Specifications and Software Installation 2.1 AOC-SIMLP-B/SIMLP-B+/SIMLP-3/SIMLP-3+ Card Layout and Jumper Locations AOC-SIMLP-B/SIMLP-B+/SIMLP-3/SIMLP-3+ Card Layout and Jumper Locations Front View Front Components 1. LAN Port 1 (JLAN1) for IPMI/Keyboard/Video/Mouse over IP 2. LAN Port 2 (JLAN2) for 3rd Data via Intel's 82541PI Controller 3. - Page 10 AOC-SIMLP-B(+)/AOC-SIMLP-3(+) User's Guide Rear View Rear Side Components 1. Flash DRAM (64Mb/133MHz) 2. VRAM (64Mb/166MHz)
-
Page 11: Block Diagram
Chapter 2: Technical Specifications and Installation 2.2 Block Diagram PH2X10/-10 UART PCI-E ETHERNET UART Interface IPMI & KVM USB Interface Supermicro KIRA100 Featured GPIO LPC Interface PRSNT# FML Interface DVO Video Interface RMII SMDATA SMCLK SMALT# (IPMI may go to MBLAN) -
Page 12: Safety Guidelines
AOC-SIMLP-B(+)/AOC-SIMLP-3(+) User's Guide 2.3 Safety Guidelines To avoid personal injury and property damage, please carefully follow all the safety steps listed below when accessing your system or handling the components: ESD Safety Guidelines Electric Static Discharge (ESD) can damage electronic com ponents. To prevent dam- age to your system. -
Page 13: Chapter 3: Software Application And Usage
LAN. The necessary utilities for the access and configuration of the add-on card are included on the Supermicro bootable CDs that came with your card. This section provides information on the configuration and the access of the IPMI card on the network. - Page 14 AOC-SIMLP-B(+)/AOC-SIMLP-3(+) User's Guide To Log In Once you are connected to the remote server, the following Log In screen displays. 1. Type in your Username in the "Username" box. 2. Type in your Password in the "Password" box and click on "Login." (*Note: The default username is ADMIN.
-
Page 15: Home Page
Chapter 3: Software Application and Usage 3.1 Home Page Home Remote Console Screen Logout Console 3.1.1 Buttons from the Home Page Home: Click this icon to return to the Home Page. Console: Click this icon to go to the Remote Console Screen. Remote Console Screen: Displayed in the window is Remote Console Screen. - Page 16 AOC-SIMLP-B(+)/AOC-SIMLP-3(+) User's Guide 3.1.2 Function Keys from the Home Page Click on these function keys to use the functions as specified below. 1. Remote Control: Click on this icon for remote access and management of Video Console Redirection. 2. Virtual Media: Click on this icon to use virtual remote media devices.
-
Page 17: Functions Listed On The Home Page
Chapter 3: Software Application and Usage 3.2 Functions Listed on the Home Page 3.2.1. Remote Control Click on the icon of Remote Control to activate its submenus-KVM Console and Remote Power as listed below. a. KVM Console Click on this item to configure keyboard, mouse or video settings for the remote host. - Page 18 AOC-SIMLP-B(+)/AOC-SIMLP-3(+) User's Guide b. Remote Power Click on this item to configure the power settings for Remote Console as shown below. Remote Power Screen Explanation of Functions Power On: Click on this icon to power on the remote host. Power Down: Click on this icon to power down the remote host.
-
Page 19: Virtual Media
The floppy image uploaded shall be in the binary format with a maximum size of 1.44MB. It will be loaded to the Supermicro SIMLP card and will be emulated to the host as a USB device. Virtual Drive: Select a drive in the remote host as a destination drive for you to upload your image data. - Page 20 AOC-SIMLP-B(+)/AOC-SIMLP-3(+) User's Guide b. CD-ROM Image CD-ROM Image Screen Explanation of Functions CD-ROM image: Click on this function key to share data stored in your local CD-ROM drive with other users in the remote host through the Windows Share application via USB.
- Page 21 Chapter 3: Software Application and Usage c. Drive Redirection Drive Redirection Screen Explanation of Functions Drive Redirection: Click on this function key to make local drives accessible for other users via console redirection. This function allows you to share your local drives (Floppy, CD-ROM and HDDs) with users in the remote systems.
- Page 22 AOC-SIMLP-B(+)/AOC-SIMLP-3(+) User's Guide d. Virtual Media Options Virtual Media Options Screen Explanation of Functions Options: Click on this function key to activate the Virtual Media sub-menu. Virtual Media Options: Use this option to disable or en- able USB MASS storage in the remote host. Check this box to disable the function of Virtual Media Options to prevent data stored in a local drive from being accessed, or uploaded by the user in the remote host.
-
Page 23: System Health
Chapter 3: Software Application and Usage 3.2.3. System Health Click on the System Health icon on the Home Page to activate its submenus: Chassis Control, Monitor Sensor, System Event Log and Alert settings as listed below. System Health Screen a. Chassis Control Chassis Control Screen Chassis Control Chassis Control: Click on this function key to access Health Monitoring informa-... - Page 24 AOC-SIMLP-B(+)/AOC-SIMLP-3(+) User's Guide Power Control The following Power Control items are included: Refresh: Click on this icon to refresh the screen of the remote host. Power On: Click on this icon to power on the system for the remote host. Power Down: Click on this icon to power down the system for the remote host.
- Page 25 Chapter 3: Software Application and Usage b. Monitor Sensors Monitor Sensors Screen Monitoring Sensor: Click on this function key to display the following Health Moni- toring Information shown in the following table: 3-13...
- Page 26 AOC-SIMLP-B(+)/AOC-SIMLP-3(+) User's Guide Health Monitoring Sensor Information on the Remote Host Temperature Monitoring CPU1 Temperature Temp A: CPU1 Core1 Temperature, Temp B: CPU1 (Temp A, Temp B) Core2 Temperature, CPU2 Temperature Temp A: CPU2 Core1 Temperature, Temp B: CPU2 (Temp A, Temp B) Core2 Temperature, System Temperature Voltage Monitoring...
- Page 27 Chapter 3: Software Application and Usage c. System Event Log System Event Log Screen System Event Log: Click on this function key to display the System Health Event Log for the remote host system. 3-15...
- Page 28 AOC-SIMLP-B(+)/AOC-SIMLP-3(+) User's Guide d. Alert Settings Alert Settings Screen Alert Settings: Click on this function key to activate the alert settings submenu for the remote host system. The items monitored include: 1. Filter List, 2. Policy List and 3. LAN Destination List 3-16...
-
Page 29: User Management
Chapter 3: Software Application and Usage 3.2.4. User Management Click on the User Management icon on the Home Page to activate its submenus: Change Password, Users & Group and Permissions as listed below. User Management Screen a. Change Password User Management: Click on this icon to activate the User Management submenu. Once this submenu displays, you can access the New Password fields. - Page 30 AOC-SIMLP-B(+)/AOC-SIMLP-3(+) User's Guide b. Users & Groups-User Management and Group Management Users & Groups: Click on this icon to activate the Users & Groups submenu. User Management: This window displays the user's information. Existing users: Select an existing user for information updates. Once a user is selected, click on the "Lookup"...
- Page 31 Chapter 3: Software Application and Usage IPMI Privilege Level: Click on the arrow key on the right to activate the Privilege Selection menu. The IPMI Privilege Level contains five categories: No Access, User, Operator, Administrator and OEM. Create: Click on this button to enter a new user's or group information in the User/ Group Management fields.
- Page 32 AOC-SIMLP-B(+)/AOC-SIMLP-3(+) User's Guide c. Permissions Permissions: Click on this icon to activate the User/Group Permissions submenu. Show Permissions for User/Group: click on the arrow on the right to activate the user/group permissions selection menu. Update: Click this icon to update permissions information. Effective Permissions: This field indicates the actual permissions a user/group has.
-
Page 33: Kvm Settings
Chapter 3: Software Application and Usage 3.2.5. KVM Settings Click on the KVM Settings icon on the Home Page to activate its submenus: User Console and Keyboard/Mouse as listed below. a. User Console KVM Settings: User Console 3-21... - Page 34 AOC-SIMLP-B(+)/AOC-SIMLP-3(+) User's Guide a. User Console 1. User Console: Click on this icon to activate the User Console submenu. 2. User Selection: This field allows you to decide which group the user belongs to. Click on the arrow on the right to activate the selection menu and highlight the name of the group to select it.
- Page 35 Chapter 3: Software Application and Usage 14. Miscellaneous Remote Console Settings: This window allows you to specify the following Remote Console Settings. 15. Start in Monitor Mode: Check this box to enable the Start in Monitor Mode which will allow data to be displayed in the remote monitor as soon as Remote Console is activated.
- Page 36 AOC-SIMLP-B(+)/AOC-SIMLP-3(+) User's Guide b. Keyboard/Mouse KVM Settings: Keyboard/Mouse 1. Keyboard/Mouse: Click on this function key to configure the following Key- board/Mouse Settings. 2. Key Release Timeout: Check this box to enable the function of "Key Release Timeout," which will set the time limit for a key to be pressed by the user. 3.
-
Page 37: Device Settings
Chapter 3: Software Application and Usage 3.2.6. Device Settings Click on the Device Settings icon on the Home Page to activate its submenus: Network, Dynamic DNS, Security, Certificate, Date/Time, Event Log and SNMP Settings as listed below. a. Network Device Settings: Network a. - Page 38 AOC-SIMLP-B(+)/AOC-SIMLP-3(+) User's Guide 3. Network Basic Settings: This window allows you to configure basic settings for your network. 4. IP Auto Configuration: Click on the box to activate the selection menu and select a desired item from the list. The options are None, DHCP, and BOODP. 5.
- Page 39 Chapter 3: Software Application and Usage b. Dynamic DNS Device Settings: Dynamic DNS b. Dynamic DNS 1. Dynamic DNS: Click on this function key to activate its submenu and configure the following Dynamic DNS (-Domain Name Server) settings as listed below. 2.
- Page 40 AOC-SIMLP-B(+)/AOC-SIMLP-3(+) User's Guide 9. Check Interval: Enter the interval for the IPMI to report to the Dynamic DNS again. 10. Delete Saved External IP Address: Click on the Delete Icon to delete the IP Address for an external system that has been previous entered and saved. 3-28...
- Page 41 Chapter 3: Software Application and Usage c. Security Device Settings: Security c. Security 1. Security: Click on this function key to activate its submenu and configure the following Security settings as listed below. 2. Encryption Settings: This window allows you to configure encryption settings. 3.
- Page 42 AOC-SIMLP-B(+)/AOC-SIMLP-3(+) User's Guide 6. Enable IP Access Control: Check this box to enable the function of IP Access Control. This function is used to limit user access to the network by identifying them by their IP addresses. (*This function is available to the LAN interface only.) 7.
- Page 43 Chapter 3: Software Application and Usage d. Certificate Device Settings: Certificate d. Certificate 1. Certificate: Click on this function key to activate its submenu and configure the following Certificate settings as listed below. 2. Certificate Signing Request (CSR): This window allows you to define the Certificate Signing Request (CSR) form.
- Page 44 AOC-SIMLP-B(+)/AOC-SIMLP-3(+) User's Guide 3. Common Name: Enter the (fully qualified domain) network name of the IPMI. 4. Organization Unit: Enter the name of the department within an organization that the IPMI belongs to. 5. Organization: Enter the name of the organization that the IPMI belongs to. 6.
- Page 45 Chapter 3: Software Application and Usage e. Date/Time Device Settings: Date/Time e. Date/Time 1. Date/Time: Click on this function key to activate its submenu. This feature allows you to set the internal realtime clock for your SIMLP card. 2. UTC Offset: This window allows you to offset the UTC Timer. 3.
- Page 46 AOC-SIMLP-B(+)/AOC-SIMLP-3(+) User's Guide f. Event Log Device Settings: Event Log 3-34...
- Page 47 16. Community: Enter the name of the community if the receiver requires a com- munity string. 17. Click here to view the Supermicro Daughter Card SNMP MIB: Click this link to see the SMLP card SNMP MIB. 18. Event Log Assignments: This window allows you to specify the types and the destination for the event logging.
- Page 48 AOC-SIMLP-B(+)/AOC-SIMLP-3(+) User's Guide g. SNMP Settings Device Settings: SNMP Settings g. SNMP Settings 1. SNMP Settings: Click on this function key to activate its submenu. This feature allows you to configure Simple Network Management Protocol settings. 2. Enable SNMP Agent: Check the box to enable the SNMP Agent and allow it to interface with your SIMLP card.
- Page 49 Chapter 3: Software Application and Usage 5. System Location: Enter the physical location of the SNMP host server. This location will be used in response to the SNMP request as "sysLocation0." 6. System Contact: Enter the name of the contact person for the SNMP host server.
-
Page 50: Maintenance
AOC-SIMLP-B(+)/AOC-SIMLP-3(+) User's Guide 3.2.7 Maintenance Click on the Maintenance icon on the Home Page to activate its submenus: Device Information, Event Log, Update Firmware and Unit Reset Settings as listed below. a. Device Information Maintenance: Device Information 1. Device Information: Click on this function key to activate its submenu. This feature displays the information of the SIMLP card and its firmware. - Page 51 Chapter 3: Software Application and Usage b. Event Log Maintenance: Event Log 1. Event Log: Click on the function key on the left to activate the Event Log sub- menu. Once the submenu is displayed, the Event Log List will display. The Event Log List contains the information of events that are recorded by the SIMLP in the order of Date/Time, Types, and the descriptions of the events including the IP address(es), person(s) and activities involved .
- Page 52 AOC-SIMLP-B(+)/AOC-SIMLP-3(+) User's Guide c. Update Firmware Maintenance: Update Firmware 1. Update Firmware: Click on this function key to enable "Update Firmware." 2/3. Firmware File: Enter the name of the firmware you want to update or click on the "Browser" icon to select the firmware file. 4.
- Page 53 Chapter 3: Software Application and Usage d. Unit Reset Maintenance: Unit Reset 1. Unit Reset: This feature allows you to reset the following components: 2. Reset Keyboard/Mouse: Click the "Reset" icon to reset Keyboard/mouse. 3. Reset USB: Click the "Reset" icon to reset the USB module. 4.
-
Page 54: Remote Console Main Page
AOC-SIMLP-B(+)/AOC-SIMLP-3(+) User's Guide 3.3 Remote Console Main Page Log Out Click to Open Home Console Remote Console Preview Screen Refresh Reset Power On Power Down After you have entered the correct IP address for your remote console and typed in correct user name and password, you should be connected to the remote console. -
Page 55: Remote Console Options
Chapter 3: Software Application and Usage 3.3.1 Remote Console Options After the remote console screen appears, click on the button "Option" on the very upper right corner to display the Options Menu as shown below. Options Options Menu No KB/Mouse: a. - Page 56 AOC-SIMLP-B(+)/AOC-SIMLP-3(+) User's Guide 6. Chat Window: This item allows the user to communicate with other users logged in the same remote host by clicking on the Chat Window button. The screen below shows a Chat Window displayed in a scaled down remote console screen. Remote Console Window Title Bar (Scaled-down to 50%)
- Page 57 Chapter 3: Software Application and Usage 7. Video Settings: This item allows the user to set the monitor display settings by clicking on the Video Settings button (marked "1" below.) After you've clicked the Video Settings button, the submenu displays as shown below. Video Settings Button Video Settings...
- Page 58 AOC-SIMLP-B(+)/AOC-SIMLP-3(+) User's Guide 8. Soft Keyboard: This item allows the user to use the soft keys that have been pre-installed in the "Soft Keyboard" of the particular language selected. After you've clicked the Soft Keyboard button, the submenu displays as shown below. Keys in the Soft Keyboard Language List...
- Page 59 Chapter 3: Software Application and Usage 9. Local Keyboard: This item allows the user to manually change the local key- board setting for interaction with a remote host. Use this function to change the language mapping of your browser machine running the remote console host. After you have clicked Local Keyboard button, the submenu displays as shown below.
- Page 60 AOC-SIMLP-B(+)/AOC-SIMLP-3(+) User's Guide 10. Hot Keys: This item allows the user to select a pre-defined hot key from a hot key list. Once a hot key is selected, the command associated with the hot key will be sent to the remote console host for execution. After you've clicked Hot Key button, the submenu displays as shown below.
- Page 61 Chapter 3: Software Application and Usage 11. Remote Console Interface Window: This item allows the local host to interact with a remote server. Through the Remote Console Interface Window, the user can share files stored in the local drive with a user connected to the remote server, download data from a local drive to the remote server, issue commands to manage the remote server, or allow the remote server be controlled and managed by a local user logged in the remote server.
- Page 62 AOC-SIMLP-B(+)/AOC-SIMLP-3(+) User's Guide i./ii. Local Drive List: The box displays a list of local drives available for remote access. Select from the list a local drive that you want to make accessible for a remote server. iii. Refresh: Click this button to refresh the local drive list. iv.
- Page 63 Chapter 3: Software Application and Usage Confirming Message 3-51...
- Page 64 AOC-SIMLP-B(+)/AOC-SIMLP-3(+) User's Guide To Log Out Return to the Home Page and click on the "Log Out" button to log out from Remote Console Interface. Logout 3-52...
-
Page 65: Chapter 4: Frequently Asked Questions
• 3. Follow the prompts to setup the IP Address and MAC address for the AOC- SIMLP-B(+)/SIMLP-3(+). Contacting Supermicro's Technical Support: If you still have problems after trying out all the recommended solutions, please contact our Tech. Support @ (408)503-8000 or visit our web site @ www. - Page 66 AOC-SIMLP-B(+)/AOC-SIMLP-3(+) User's Guide Notes...