
Related Manuals for Sunbeam Espresso Vita EM6200


Summary of Contents for Sunbeam Espresso Vita EM6200
- Page 1 Espresso Vita 15 BAR Pump espresso machine with gauge Instruction Booklet EM6200 Please read these instructions carefully and retain for future reference.
-
Page 3: Table Of Contents
Contents Sunbeam’s Safety Precautions About espresso coffee Features of your Sunbeam Espresso Vita Using the control panel Reference guide to using your espresso machine Programming your espresso machine Preparing your espresso machine before use Guide to the perfect espresso Guide to milk texturing... -
Page 4: Sunbeam's Safety Precautions
• Never leave an appliance unattended while in use. type environments. If you have any concerns regarding the performance and use of your appliance, please visit www.sunbeam.com.au or contact the Sunbeam Consumer Service Line. Ensure the above safety precautions are understood. -
Page 5: About Espresso Coffee
Sunbeam Espresso Vita. The Sunbeam Espresso Vita makes producing We hope you enjoy your new espresso... -
Page 6: Features Of Your Sunbeam Espresso Vita
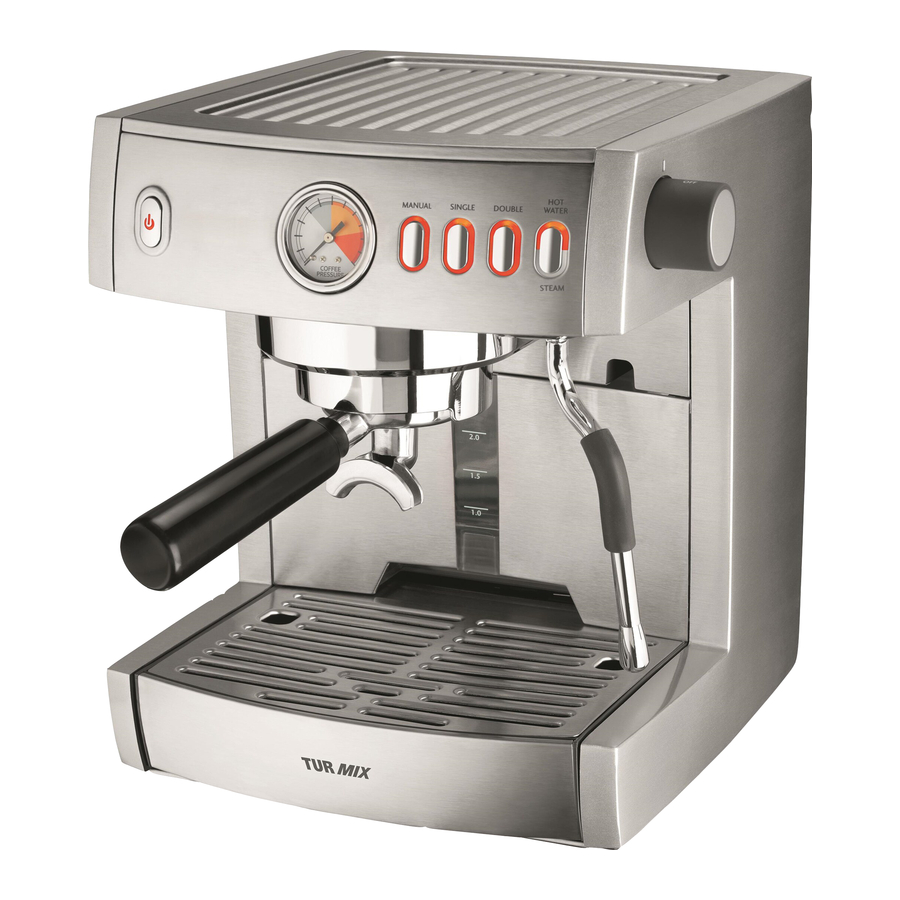
Features of your Sunbeam Espresso Vita Warming plate Effectively pre-warms cups Push button control panel Easy to use control panel delivers an espresso pour, steam or hot water functions. Group head Brass and phenolic group handle Extra cup height clearance... - Page 7 Espresso gauge The gauge measures the resistance to the espresso pour. Programmable control panel For a consistent shot of espresso everytime, simply press either the single or double button. Steam and hot water control dial 2.5L water reservoir Removable from the front for easy filling at the tap.
- Page 8 Features of your Sunbeam Espresso Vita 15 Bar Pump Pre-Infusion Pre-infusion is programmed into the MANUAL, single and double espresso operations. It is a gradual increase of water pressure pre-soaking the coffee cake before full water pressure is applied. This in turn delivers greater body and sweetness to the espresso.
- Page 9 Features of your Sunbeam Espresso Vita (continued) Push Button Control Panel Should the needle fail to reach the target area this is an indication that the serve of espresso is ‘under-extracted’. This occurs when water passes too quickly through the...
-
Page 10: Using The Control Panel
Using the control panel Power Once the espresso machine is switched on and heated, so the light on the ‘POWER’ Press the ‘POWER’ button once to turn the button is red and the lights around the espresso machine on. The light on the button ‘MANUAL’, ‘SINGLE’... - Page 11 Using the control panel (continued) Tip: We recommend using the double cup operation. The coffee maker simply needs to press the ‘SINGLE’ espresso button once to filter when using the programmed ‘DOUBLE’ espresso operation. start and the pour of liquid espresso will stop automatically.
- Page 12 Using the control panel (continued) Programming the Single or Double pours Steam The program function allows the coffee maker The steam function allows the coffee maker to personalise and save their own espresso to produce steam out of the steam wand for pour settings.
- Page 13 Using the control panel (continued) Note: After 10 minutes of inactivity in the Hot Water steam mode, the espresso machine will The hot water function allows the coffee automatically switch back to the ‘READY maker to release a controlled flow of hot MODE’.
-
Page 14: Reference Guide To Using Your Espresso Machine
Reference guide to using your espresso machine Preparing the espresso machine Remove water reservoir from Fill at sink with cold water. Replace the water reservoir. front of unit. Press 'POWER' button to turn Control panel lit and ready to Warming the espresso cups. unit on. - Page 15 Reference guide to using your espresso machine (continued) Place large container under Press the ‘MANUAL’ button both pouring spouts. and allow the water to run through. Press button again to stop. Making the espresso Select appropriate filter and Hold group handle under Place finely ground coffee place into group handle.
- Page 16 Reference guide to using your espresso machine (continued) Turn group handle to the Place glasses/cups below Press the ‘MANUAL’ button right, so it is firmly locked pouring spouts. for a continuous pour. Press into position. button again to stop pour. Remove group handle by Discard the used coffee turning to the left.
- Page 17 Reference guide to using your espresso machine (continued) Swing steam wand to the Place steam wand into milk, Angle jug to rest steam wand side of espresso machine. approx. 1cm below surface on spout and place nozzle just and activate the steam below surface of the milk.
- Page 18 Reference guide to using your espresso machine (continued) Cleaning Remove the drip tray. Remove drip tray grill. Remove both the water reservoir and drip tray to get to the 'cleaning pin'. Insert thinner end of Wrap steam wand with damp Insert thicker end of cleaning cleaning pin into the single cloth and turn steam on for...
-
Page 19: Programming Your Espresso Machine
Programming your espresso machine Programming Double Espresso The Espresso Vita has programming capabilities. Based on café settings the 1.To start programming the espresso machine ‘SINGLE’ and ‘DOUBLE’ espresso functions needs to be in ‘STAND BY MODE’. So the are set at 30 and 60mls. However by machine is plugged in and switched on at following a few simple steps the coffee maker the power point, but the machine itself is... - Page 20 Programming your espresso machine (continued) Important: Although the espresso machine is on at the power outlet ensure that the actual espresso machine power is ‘OFF’. Therefore no lights will be illuminated on the espresso machine control panel. 2.Press and hold down the ‘POWER’ button. 3.When you hear a single long beep this will indicate that the espresso machine will have returned to the original factory...
-
Page 21: Preparing Your Espresso Machine Before Use
Preparing your espresso machine before use 5.Place glasses and cups on the warming 1.Place the espresso machine onto a dry, stable benchtop. plate (6). 2.Ensure the drip tray and grill are in place. Important: For first time use or if the machine has not been used for some time, it is 3.Fill the espresso machine with water. -
Page 22: Guide To The Perfect Espresso
Guide to the perfect espresso Preheat Glasses Then without having made a coffee remove the group handle (21) and inspect the top 1.Preheat the glasses/cups by filling them of the tamped coffee - it should have only a with hot water as this will assist to preserve slight indent from the shower screen. - Page 23 Guide to the perfect espresso (continued) Pre-Infusion Eco Mode and Standby Mode 11. Once the espresso operation has been After 1 hour of non-use in Ready Mode the activated, before the espresso pour starts, espresso machine will automatically switch the progressive pre-infusion feature will to Eco Mode.
-
Page 24: Guide To Milk Texturing
Guide to milk texturing Milk texturing is the steaming of milk. The 4.Swing the steam wand to the side of the steam does two things, heats the milk and espresso machine (26). also the steam mixes air with the milk to 5.Place the steam wand into the milk so that form an ‘emulsion’... -
Page 25: Using The Hot Water Function
Guide to milk texturing (continued) 9. Remove the jug, immediately wipe the the correct temperature. It's important to remember that if the milk is not heated steam nozzle and wand with a clean damp cloth (30) and purge a small amount of long enough the drink will be too cool and if heated for too long it will start to boil at steam. -
Page 26: Espresso Recipes
Espresso Recipes ESPRESSO (SHORT BLACK) MACCHIATO Espresso is a concentrated, full bodied coffee Macchiato, Italian for ‘to stain or mark’. with a stable layer of cream on top – known Traditionally served as a standard espresso as ‘crema’. An espresso is the foundation of with a dash of milk and a small dollop of all café... - Page 27 Espresso Recipes (continued) CAFFE LATTE CAFFE MOCHA An espresso with steamed milk, typically Made in a similar way to a cappuccino but served in a glass. The layer of frothed milk on with the addition of drinking chocolate. top should be 10mm to seal the coffee. Simply stir the chocolate into the espresso prior to adding the steamed milk and froth.
-
Page 28: Care And Cleaning
Group head, group handle & filter baskets Note: Contact Sunbeam on 1300 881 861 The filter baskets and group handle should should you think that the group head seal be rinsed with warm water after each use and needs replacing. - Page 29 Care and Cleaning (continued) Cup warming plate and exterior Important: Never clean the steam wand with an abrasive pad as this will damage the Wipe over the unit with a damp cloth and wipe steam wand. dry. Do not use abrasives or metal scourers as these will scratch the exterior surface.
-
Page 30: Descaling
Sunbeam Espresso Machine Descaling the area at the brewing head, removing all Tablets (EM0010) coffee grinds. Sunbeam Liquid Descaler (KEO100), or 6.Place a sufficiently large container under Vinegar Solution. the group head. 7.Insert the power cord into a 230-240V AC Descaling the espresso machine power outlet and switch the power ‘ON’. - Page 31 Descaling (continued) 14. Press the ‘MANUAL’ button and allow the 10. Leave the machine off for 10-15 minutes to allow the descaling solution to take entire water reservoir to cycle through the group head. Press button again to stop. affect. 11.
-
Page 32: Advanced Programming Options
Advanced programming options Espresso Thermoblock Temperature 4.Press the ‘SINGLE’ button to decrease the Espresso temperature setting or press the The water temperature of this espresso ‘DOUBLE’ button to increase the espresso machine has been calibrated to the precise temperature setting. Please refer to the temperature of 92°C at the group head. - Page 33 Advanced programming options (continued) Steam Thermoblock Temperature 4.Press the ‘SINGLE’ button to decrease the steam temperature or to increase the steam The steam temperature of this espresso temperature press the ‘DOUBLE’ button. machine has been calibrated to deliver a Please refer to the chart below. powerful and dry steam for texturing milk.
- Page 34 Advanced programming options (continued) Steam Wetness or Steam Pump Rate 4.Press the ‘SINGLE’ button to decrease to decrease the steam pump rate or The steam pump rate of this espresso to increase the steam rate press the machine has been preset. Modifying the ‘DOUBLE’...
- Page 35 Advanced Programming Options (continued) Factory Reset To undo any changes made to the program you can revert back to the original factory settings. To do this you need to follow the instructions below: 1.Insert the power cord into a 230-240V AC power outlet and switch the power ‘ON’.
-
Page 36: Trouble Shooting Guide
The group head is dirty. Wipe group head with a damp cloth. The group head is defective. Contact a Sunbeam Service Centre. Group head rubber seal is damaged, Contact a Sunbeam Service Centre. or worn. No coffee runs through. - Page 37 The group head is dirty. Wipe group head with a damp cloth. The group head is defective. Contact a Sunbeam Service Centre. Group head rubber seal is worn or Contact a Sunbeam Service Centre. damaged.
- Page 38 See "Care & Cleaning" pg 26. Machine blocked by scale See “Descaling ” pg 28. build up. Please contact Sunbeam directly on 1300 881 861, if this guide does not solve your query. We have experienced staff on hand to assist, Monday to Friday.
- Page 39 You are also Alternatively, you can send a written claim entitled to have the goods repaired or to Sunbeam at the address listed below. replaced if the goods fail to be of acceptable On receipt of your claim, Sunbeam will...
- Page 40 Sunbeam Corporation Limited 2012. ABN 45 000 006 771 Units 5 & 6, 13 Lord Street Botany NSW 2019 Australia Unit 3, Building D 26 Vestey Drive Mt Wellington Auckland New Zealand Sunbeam Corporation is a division of GUD Holdings Ltd. 03/12...