Table of Contents
Advertisement
HTC-V10X_En.book Page 1 Wednesday, July 21, 2004 2:49 PM
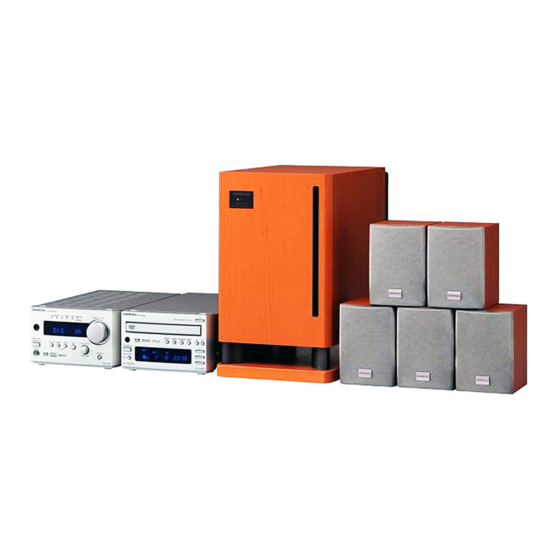
5.1ch Home Theater System
HTC-V10X
HTE-V10X
✔ PR-155X (AV controller)
DV-S155X (DVD Player)
HTP-V10X
✔ SWA-V10X (Subwoofer)
✔ ST-V10X (Speakers)
Instruction Manual
Thank you for purchasing an Onkyo 5.1ch Home
Theater System. Please read this manual thoroughly
before making connections and turning on the power.
Following the instructions in this manual will enable
you to obtain optimum performance and listening
enjoyment from your new 5.1ch Home Theater Sys-
tem.
Please retain this manual for future reference.
Contents
Introduction ........................... 2
Connections ........................ 19
Setting Up ............................ 30
Enjoying Sound................... 34
Listening to the Radio ........ 41
Setting the Time .................. 47
Advanced Setting................ 59
Troubleshooting .................. 66
Miscellaneous ..................... 69
E
n
Advertisement
Table of Contents

Related Manuals for Onkyo HTC-V10X


Summary of Contents for Onkyo HTC-V10X
-
Page 1: Table Of Contents
Advanced Setting....59 Troubleshooting ....66 Miscellaneous ..... 69 Thank you for purchasing an Onkyo 5.1ch Home Theater System. Please read this manual thoroughly before making connections and turning on the power. Following the instructions in this manual will enable you to obtain optimum performance and listening enjoyment from your new 5.1ch Home Theater Sys-... -
Page 2: Important Safety Instructions
HTC-V10X_En.book Page 2 Wednesday, July 21, 2004 2:49 PM WARNING: WARNING AVIS TO REDUCE THE RISK OF FIRE OR ELECTRIC RISK OF ELECTRIC SHOCK RISQUE DE CHOC ELECTRIQUE DO NOT OPEN NE PAS OUVRIR SHOCK, DO NOT EXPOSE THIS APPARATUS TO RAIN OR MOISTURE. -
Page 3: Precautions
2. AC Fuse —The AC fuse inside the HTC-V10X is not user-serviceable. If you cannot turn on IMPORTANT the HTC-V10X, contact your Onkyo dealer. -
Page 4: Introduction
Table of Contents (Basic) Introduction Important Safety Instructions............... 2 Precautions ....................3 Features......................6 Caring for the HTC-V10X................7 Supplied Accessories ................... 8 Advanced Preparing the Remote Controller ............... 11 Index to Parts and Controls................ 12 What is Home Theater? ................18 Connections Connecting the AV Controller (PR-155X) and the subwoofer (SWA-V10X) .. - Page 5 HTC-V10X_En.book Page 5 Wednesday, July 21, 2004 2:49 PM Table of Contents (Advanced) Operating the TV from Remote Controller ..........64 Advanced Setting Up Setting the Distance to the Speakers ............62 Balancing the Speaker Volume Levels............63 Enjoying the Surround Sound About surround sound ....................35 Selecting a surround mode ..................36 Viewing the display ....................38 Adjusting each speaker’s relative volume balance temporarily .......39...
-
Page 6: Features
The subwoofer and speak- ers are housed in a wooden cabinet that improves acoustic performance. *4 Aero Acoustic Drive technology has been developed by Onkyo to maximize subwoofer effi- ciency. The subwoofer features powerful low range sound and generates impressive super bass effects. -
Page 7: Caring For The Htc-V10X
Caring for the HTC-V10X ■ Caring Wipe the HTC-V10X occasionally with a dry silica or soft cloth. For heavier dirt, after dampen- ing a soft cloth in a weak solution of mild detergent and water and wringing it out dry, wipe off the dirt. -
Page 8: Supplied Accessories
3.5 m [3] Note: The HTC-V10X functions at an optimal level when the SWA-V10X subwoofer, ST-V10X speakers, PR-155X AV controller, and DV-S155X DVD player are used together. Any malfunc- tion that occurs when you use the PR-155X with other speakers, or use the speakers with... - Page 9 HTC-V10X_En.book Page 9 Wednesday, July 21, 2004 2:49 PM Supplied Accessories —Continued • Remote controller for the DV-S155X • S Video connectioncable [1] (RC-522DV) [1] Transmits S video signals. Batteries (AA/R6) [2] • Audio connection cable 0.6 m [1] • Optical cable 1.0 m [1] Transmits analog signals.
- Page 10 HTC-V10X_En.book Page 10 Wednesday, July 21, 2004 2:49 PM Supplied Accessories —Continued ■ Using the included cork spacers • Cork spacer for the subwoofer (SWA-V10X) We recommend that you use the Cork spacer included cork spacers so you can enjoy superior sound. The cork spacers also prevent the subwoofer from slipping.
-
Page 11: Preparing The Remote Controller
HTC-V10X_En.book Page 11 Wednesday, July 21, 2004 2:49 PM Preparing the Remote Controller ■ Inserting the batteries 1 Detach the battery cover. 2 Insert two size-AA/R6 batteries. Be sure to match the + and – ends of the batteries with to diagram inside the battery compartment. -
Page 12: Index To Parts And Controls
HTC-V10X_En.book Page 12 Wednesday, July 21, 2004 2:49 PM Index to Parts and Controls ■ Front panel Input signal indicator (orange) Surround indicators (green) Lights up when a signal is being input. Light up to indicate a Surround mode. STANDBY/ON button Turns on the power to the PR-155X MULTI CH indicator (red) or places the unit in Standby mode. -
Page 13: Rear Panel
HTC-V10X_En.book Page 13 Wednesday, July 21, 2004 2:49 PM Index to Parts and Controls —Continued ■ Rear panel DIGITAL INPUT jacks CDR/TAPE/TV/VIDEO IN/OUT jacks Using optical cables, connect these jacks Connect these jacks to the audio input to the DV-S155X DVD player and other and output jacks of a CD recorder, tape components that feature digital outputs. - Page 14 HTC-V10X_En.book Page 14 Wednesday, July 21, 2004 2:49 PM Index to Parts and Controls —Continued ■ Subwoofer SWA-V10X (front panel) POWER indicator Lights up green when POWER the power is turned on. SWA - V10X POWERED SUBWOOFER ■ Subwoofer SWA-V10X (rear panel) SUBWOOFER CONTROL Cooling fan jack...
- Page 15 Use the longest and thickest screws possible, with a head diameter of 4 mm to 10 mm and a thread diameter of 4 mm or less. (Onkyo recommends that you consult a professional home electronics installer.)
- Page 16 HTC-V10X_En.book Page 16 Wednesday, July 21, 2004 2:49 PM Index to Parts and Controls —Continued ■ Remote controller (RC-568S) INPUT button SLEEP button Selects the input source. Sets the sleep timer. CLOCK button Displays the current time. STANDBY/ON button Switches between power DIMMER button standby and on.
- Page 17 Index to Parts and Controls —Continued ■ Remote controller (RC-568S) The following buttons on the remote controller are available when the unit is connected to an Onkyo separate collection series component (DV-S155X, K-501A or CDR-201A) via the connector. Number buttons...
-
Page 18: What Is Home Theater
Depending on the audio-encoding of a particular DVD disc, you can enjoy DTS or Dolby Digi- tal playback. You can also enjoy Onkyo’s proprietary DSP surround sound for TV or MD play- back (see page 35). Front speakers Output complete audio signals. -
Page 19: Connections
HTC-V10X_En.book Page 19 Wednesday, July 21, 2004 2:49 PM Connections ■ Connecting the AV Controller (PR-155X) and the subwoofer (SWA- V10X) Refer to the diagram below to connect the jacks using the included multi-splitter cable. Do not connect the power plug yet. : signal flow SWA-V10X PR-155X... -
Page 20: Connecting The Subwoofer (Swa-V10X) And The Speakers (St-V10X)
HTC-V10X_En.book Page 20 Wednesday, July 21, 2004 2:49 PM Connections —Continued ■ Connecting the subwoofer (SWA-V10X) and the speakers (ST-V10X) Before connecting the speakers Prepare the included speaker cables as follows: 1 Remove the tip of the plastic shield of the speaker cables. 2 Twist the core wires. - Page 21 HTC-V10X_En.book Page 21 Wednesday, July 21, 2004 2:49 PM Connections —Continued Basic positioning example and the role of each speaker Although recommended speaker positions vary depending on the room size and wall material, this section offers a basic positioning example and explains the function of each speaker. Even if you cannot precisely follow the example below, you can still enjoy optimal surround sound by specifying the distance from the listener to the speakers (page 62).
-
Page 22: Connecting The Av Controller (Pr-155X) And The Dvd Player (Dv-S155X)
TAL OUTPUT jack using the included optical cable. To make an connection to other Onkyo components, connect the PR-155X DVD/CD 2CH INPUT jacks to the DV-S155X AUDIO OUTPUT L/R jacks using an audio connection cable. Connect the video output from the DVD player directly to the TV. -
Page 23: Connecting An Md Recorder
You can connect the MD jacks to the audio input/output on an MD recorder. (The following fig- ure illustrates how to connect an optional Onkyo component.) Connect the PR-155X MD IN jacks to the audio output jacks on an MD recorder using an audio connection cable. -
Page 24: Connecting A Cd Recorder, Tape Deck, Or Vcr
INPUT (OPTICAL) CDR/TAPE/TV/VIDEO jack to the digital audio output of the connecting component using an optical cable. To connect an Onkyo CDR-201A, connect the PR-155X to the DIGITAL OUTPUT 2 jacks on the CDR-201A. • Since audio data is recorded on two channels on a CD-R, CD, or cassette tape, Dolby digital and other digital audio playback is unavailable through this connection, even if the connec- tion is digital. -
Page 25: Listening To Tv Surround Sound
HTC-V10X_En.book Page 25 Wednesday, July 21, 2004 2:49 PM Connections —Continued ■ Listening to TV surround sound (CDR/TAPE/TV/VIDEO jack) Connect the PR-155X DIGITAL INPUT (OPTICAL) CDR/TAPE/TV/VIDEO jack to the digi- tal audio output on the TV using an optical cable. If the TV does not feature a digital audio output jack, connect the PR-155X CDR/TAPE/TV/ VIDEO IN jacks to the analog audio output on the TV using an audio connection cable. -
Page 26: About System Functions
An cable is a special system cable designed for use with Onkyo products. Connecting the Onkyo sepatate collection series DVD player, MD recorder and CD recorder: Connecting the system components Refer to pages 19–25 for more information. -
Page 27: Connecting An
HTC-V10X_En.book Page 27 Wednesday, July 21, 2004 2:49 PM Connections —Continued ■ Connecting an cable If you are using an Onkyo product that has an jack, you can use the system functions. • Use the included remote controller to operate the system functions. Point the remote control- ler toward the remote sensor of the PR-155X. -
Page 28: Connecting The Supplied Fm And Am Indoor Antennas (Aerials)
HTC-V10X_En.book Page 28 Wednesday, July 21, 2004 2:49 PM Connections —Continued ■ Connecting the supplied FM and AM indoor antennas (aerials) AM indoor antenna (aerial) FM indoor antenna (aerial) Insert into the hole. Push up and Insert the end Release the lever to hold the lever. - Page 29 HTC-V10X_En.book Page 29 Wednesday, July 21, 2004 2:49 PM Connections —Continued ■ Directional Iinkage Do not use the same antenna (aerial) for both FM and TV (or VCR) reception, since the FM and TV (or VCR) signals can interfere with each other.
-
Page 30: Setting Up
HTC-V10X_En.book Page 30 Wednesday, July 21, 2004 2:49 PM Turning on the PR-155X ■ Before plugging in the PR-155X Make sure that all connections explained on pages 19–25 are complete (the connection to the TV is required). Turning on the PR-155X may cause a momentary power surge, which might interfere with other electrical equipment, such as computers. -
Page 31: Setup
HTC-V10X_En.book Page 31 Wednesday, July 21, 2004 2:49 PM Setup ■ First Time Setup (for European models) The very first time you turn on the PR-155X, the ACCUCLOCK function automatically sets the clock by using the CT (Clock Time) information present in RDS radio broadcasts. While the clock is being set, “WAIT”... -
Page 32: Changing The Input Source Setting
HTC-V10X_En.book Page 32 Wednesday, July 21, 2004 2:49 PM Setup —Continued ■ Changing the input source setting If you have connected an component (excluding the DV-S155X) to the DVD/CD or CDR/ TAPE/TV/VIDEO jacks, you must change the input source setting for the system to func- tion correctly. -
Page 33: Setting The Multi Channel Audio Output
HTC-V10X_En.book Page 33 Wednesday, July 21, 2004 2:49 PM Setup —Continued ■ Setting the multi channel audio output You do not need to set the multi channel audio output if you are using the DV-S155X. If you have connected an optional DVD player (that supports multi channel audio on DVD Audio or Super Audio CDs) via analog multi channel connection, you need to set the multi channel output on the PR-155X. -
Page 34: Enjoying Sound
HTC-V10X_En.book Page 34 Wednesday, July 21, 2004 2:49 PM Playing a Connected Source AV CONTROLLER DIGITAL DSP STEREO MASTER VOLUME MULTI IN STANDBY STANDBY / ON SW LV L CTRL MEMORY TIMER INPUT MULTI JOG CLEAR PHONES MUTING SURROUND PUSH TO ENTER RC-568S 155X The remote controller buttons used in the following step are illustrated inside a gray rectangle (... -
Page 35: Enjoying The Surround Sound About Surround Sound
Enjoying the Surround Sound ■ About surround sound The surround sound of the HTC-V10X enables you to enjoy the audio ambience of a movie the- ater or concert hall in your room. To listen to surround sound, you need to set up the speakers (pages 62–63). -
Page 36: Selecting A Surround Mode
HTC-V10X_En.book Page 36 Wednesday, July 21, 2004 2:49 PM Enjoying the Surround Sound —Continued ■ Selecting a surround mode Input signal indicator Surround mode indicator AV CONTROLLER DIGITAL DSP STEREO MASTER VOLUME MULTI IN STANDBY STANDBY / ON SW LV L CTRL MEMORY TIMER INPUT... - Page 37 HTC-V10X_En.book Page 37 Wednesday, July 21, 2004 2:49 PM Enjoying the Surround Sound —Continued Playback source and available surround modes Dolby Digital Playback source Analog/PCM format Other than 2/0 Input source Cassette tape deck, DVD video DVD video, Video tape, Audio CD, LD Audio CD, listening...
-
Page 38: Viewing The Display
HTC-V10X_En.book Page 38 Wednesday, July 21, 2004 2:49 PM Enjoying the Surround Sound —Continued ■ Viewing the display AV CONTROLLER DIGITAL DSP STEREO MASTER VOLUME MULTI IN STANDBY STANDBY / ON SW LV L CTRL MEMORY TIMER INPUT MULTI JOG MULTI JOG CLEAR PHONES... -
Page 39: Adjusting Each Speaker's Relative Volume Balance Temporarily
HTC-V10X_En.book Page 39 Wednesday, July 21, 2004 2:49 PM Enjoying the Surround Sound —Continued ■ Adjusting each speaker’s relative volume LATE NIGHT balance temporarily You can adjust the relative volume of each speaker. • For information on the SWA-V10X subwoofer setting, refer to page 40. -
Page 40: Adjusting The Subwoofer Level
HTC-V10X_En.book Page 40 Wednesday, July 21, 2004 2:49 PM Enjoying the Surround Sound —Continued ■ Adjusting the subwoofer level You can adjust the SWA-V10X subwoofer volume level using the PR-155X or the remote con- troller. This setting is cancelled when the PR-155X enters standby mode. AV CONTROLLER DIGITAL DSP STEREO... -
Page 41: Listening To The Radio
HTC-V10X_En.book Page 41 Wednesday, July 21, 2004 2:49 PM Listening to the Radio ■ Auto tuning (only from the remote controller) With FM, press and hold down TUNING on the remote control- ler for a moment, then release the button. The frequency auto- matically increases (or decreases) and the next available station is tuned in. -
Page 42: Using Rds (European Models Only)
HTC-V10X_En.book Page 42 Wednesday, July 21, 2004 2:49 PM Listening to the Radio —Continued Rotate MULTI JOG to select AUTO MULTI JOG PUSH TO ENTER Press MULTI JOG to start Auto Pre- set Memory. MULTI JOG flashes. The unit displays the fre- quency value and starts searching for the next available station. -
Page 43: Preset Memory - Receiving And Programming Your Favorite Stations
HTC-V10X_En.book Page 43 Wednesday, July 21, 2004 2:49 PM Listening to the Radio —Continued ■ Preset Memory – Receiving and programming your favorite stations You can preset up to 30 AM and FM stations. If you try to program more stations, the unit dis- plays “MEM FULL”... - Page 44 HTC-V10X_En.book Page 44 Wednesday, July 21, 2004 2:49 PM Listening to the Radio —Continued Press MEMORY. MEMORY The “MEM” indicator lights up and the preset number appears. Note: If you do not proceed to the next step within Tuned Light up ten seconds of pressing MEMORY, the unit displays the previous frequency screen.
-
Page 45: Setting Accuclock To Use A Specific Station
HTC-V10X_En.book Page 45 Wednesday, July 21, 2004 2:49 PM Listening to the Radio —Continued ■ Setting ACCUCLOCK to Use a Specific Station The ACCUCLOCK function normally uses the FM station with the strongest signal to set the clock. If the clock cannot be set properly using that station, you can specify which FM station the ACCUCLOCK function should use. -
Page 46: Listening To A Preset Station
HTC-V10X_En.book Page 46 Wednesday, July 21, 2004 2:49 PM Listening to the Radio —Continued ■ Listening to a preset station AV CONTROLLER DIGITAL DSP STEREO MASTER VOLUME MULTI IN 10 KEY STANDBY Number STANDBY / ON SW LV L CTRL MEMORY TIMER INPUT... -
Page 47: Setting The Time
HTC-V10X_En.book Page 47 Wednesday, July 21, 2004 2:49 PM Setting the Time ■ Setting the clock This manual uses the 24-hour clock display in its explanation of how to set the clock. You can also switch the clock to a 12-hour display. For European models If you cannot set the clock by using the ACCUCLOCK function, you can set it manually. - Page 48 HTC-V10X_En.book Page 48 Wednesday, July 21, 2004 2:49 PM Setting the Time —Continued Rotate MULTI JOG to select a day of the MULTI JOG week. While the desired day of the week is flashing, press MULTI JOG. PUSH TO ENTER MULTI JOG PUSH TO ENTER Rotate MULTI JOG to set the time.
-
Page 49: Displaying The Clock
HTC-V10X_En.book Page 49 Wednesday, July 21, 2004 2:49 PM Displaying the Clock • Press CLOCK on the remote controller. If the clock is not set, “ADJUST” flashes. Please set the clock (see page 47). CLOCK Displaying the current time When the unit is turned on, press CLOCK on the remote controller to display the current day and time. -
Page 50: Using The Timer Functions
HTC-V10X_En.book Page 50 Wednesday, July 21, 2004 2:49 PM Using the Timer Functions ■ Using Sleep Timer At the specified time, the PR-155X enters Standby mode. SLEEP Press SLEEP on the remote controller repeatedly to specify the time required until the unit enters Standby mode. The unit displays “SLEEP 90,”... - Page 51 HTC-V10X_En.book Page 51 Wednesday, July 21, 2004 2:49 PM Using the Timer Functions —Continued Selecting a Timer You can program up to four Timers. Types of Timer • Play Timer: The selected component starts playback at the specified time. • Rec Timer: The selected component starts recording at the specified time. Rec Timer can record on a connected MD recorder or tape deck that is equipped with an connector.
-
Page 52: Programming A Timer
Rotate MULTI JOG to select Play or Rec Timer. MULTI JOG MULTI JOG When the unit displays the desired timer, press MULTI JOG. With Rec Timer, recording will start on a connected Onkyo MD recorder or PUSH TO ENTER PUSH TO ENTER tape deck. - Page 53 HTC-V10X_En.book Page 53 Wednesday, July 21, 2004 2:49 PM Using the Timer Functions —Continued Selecting a component to play MULTI JOG MULTI JOG Rotate MULTI JOG to select a compo- nent to start playing with the timer. When the unit displays the desired compo- PUSH TO ENTER PUSH TO ENTER nent, press MULTI JOG.
- Page 54 HTC-V10X_En.book Page 54 Wednesday, July 21, 2004 2:49 PM Using the Timer Functions —Continued Specifying a day of the week Rotate MULTI JOG to select “ONCE” or “EVERY.” MULTI JOG MULTI JOG With “ONCE,” the timer works once. With “EVERY,” the timer works weekly. After selecting one of the options, press PUSH TO ENTER PUSH TO ENTER...
- Page 55 HTC-V10X_En.book Page 55 Wednesday, July 21, 2004 2:49 PM Using the Timer Functions —Continued Specifying the On time Rotate MULTI JOG to specify the timer On time. MULTI JOG MULTI JOG When the unit displays the desired time, press MULTI JOG. PUSH TO ENTER PUSH TO ENTER Notes...
-
Page 56: Switching The Timer On (Activating) Or Off (Deactivating)
HTC-V10X_En.book Page 56 Wednesday, July 21, 2004 2:49 PM Using the Timer Functions —Continued ■ Switching the timer on (activating) or off (deactivating) • Follow the steps below to cancel the programmed timer, to enable the cancelled timer, or to perform timer recording again. -
Page 57: Checking The Timer Settings
HTC-V10X_En.book Page 57 Wednesday, July 21, 2004 2:49 PM Using the Timer Functions —Continued ■ Checking the timer settings AV CONTROLLER DIGITAL DSP STEREO MASTER VOLUME MULTI IN STANDBY STANDBY / ON SW LV L CTRL MEMORY TIMER INPUT MULTI JOG CLEAR PHONES SURROUND... -
Page 58: Recording
• Set the input source (page 32) to perform Synchro recording, or other system record- ing using Onkyo components that feature the connector. • You cannot perform digital CD Synchro recording from the DV-S155X to an Onkyo MD recorder. -
Page 59: Advanced Setting
HTC-V10X_En.book Page 59 Wednesday, July 21, 2004 2:49 PM Entering Characters ■ Naming the preset stations AV CONTROLLER DIGITAL DSP STEREO You can name the preset stations using up MASTER VOLUME MULTI IN to 8 characters. • You can use the following characters: _ A B C D E F G H I J K L STANDBY M N O P Q R S T U V W X Y... -
Page 60: Changing The Characters
HTC-V10X_En.book Page 60 Wednesday, July 21, 2004 2:49 PM Entering Characters —Continued ■ Changing the characters AV CONTROLLER DIGITAL DSP STEREO MASTER VOLUME MULTI IN STANDBY STANDBY / ON SW LV L CTRL MEMORY TIMER INPUT MULTI JOG CLEAR PHONES SURROUND PUSH TO ENTER 155X... - Page 61 HTC-V10X_En.book Page 61 Wednesday, July 21, 2004 2:49 PM Entering Characters —Continued Deleting the characters Press and hold down MEMORY to dis- MEMORY play “NAME IN.” MULTI JOG Rotate MULTI JOG to display “NAME ERS.” PUSH TO ENTER MULTI JOG Press MULTI JOG to delete all charac- ters.
-
Page 62: Advanced Setting Up Setting The Distance To The Speakers
HTC-V10X_En.book Page 62 Wednesday, July 21, 2004 2:49 PM Setting the Distance to the Speakers This setting enables you to specify the distance from the listening position to the speakers. When this distance is correctly specified, the sound from each speaker reaches the listening position simultaneously, improving your home theater experience. -
Page 63: Balancing The Speaker Volume Levels
HTC-V10X_En.book Page 63 Wednesday, July 21, 2004 2:49 PM Balancing the Speaker Volume Levels Adjust each speaker’s relative volume until each speaker’s test tone sounds equally loud at the listening position. • If you switch DVD audio during the speaker level set- ting, the speaker tone may be muted and the setting mode may be cancelled. -
Page 64: Operating The Tv From Remote Controller
HTC-V10X_En.book Page 64 Wednesday, July 21, 2004 2:49 PM Operating the TV from Remote Controller By programming the TV’s remote control code, you can use the RC-568S remote controller to operate your TV. ■ Programming a TV remote control code Find the three-digit number for the brand name of the component you want to operate in the table on the... - Page 65 HTC-V10X_En.book Page 65 Wednesday, July 21, 2004 2:49 PM Operating the TV from Remote Controller —Continued ■ TV remote control codes • If more than one code is given in the table, try them one by one until you find the code suit- able for your component (i.e.
-
Page 66: Troubleshooting
If you have any trouble, consult the following list. The HTC-V10X is designed to offer the best performance when you use a subwoofer SWA-V10X, and speakers ST-V10X, and an AV controller PR-155X. Onkyo does not guarantee the performance and is not responsible for malfunctions caused by using other speakers or amplifiers. - Page 67 HTC-V10X_En.book Page 67 Wednesday, July 21, 2004 2:49 PM Troubleshooting —Continued About tonal quality Sound may improve if you switch the polarity of the power cable plug. Tonal quality will improve and become stable about 10–30 minutes after you plug in the unit. Tonal quality may be damaged if you bundle the multi-splitter cable along with the speaker cables.
- Page 68 AC outlet, then plug it in again in five seconds. Onkyo is not responsible for damages (such as CD rental fees) due to unsuccessful recordings caused by the unit’s malfunction. Before you record important data, make sure that the material will be recorded correctly.
-
Page 69: Miscellaneous
HTC-V10X_En.book Page 69 Wednesday, July 21, 2004 2:49 PM Specifications ■ PR-155X 150 mV / 50 k Ω (LINE) Input Sensitivity and Impedance 1 V / 600 Ω (STEREO ,VOLUME MAX at max.) Output Level and Impeadance Frequency Response 120 Hz–20 kHz : +1 / –3 dB (FL/FR/C/SL/SR) 20 Hz–120 Hz : 0 / –3 dB (SW) Tuner Section Tuning Frequency Range... - Page 70 HTC-V10X_En.book Page 70 Wednesday, July 21, 2004 2:49 PM Specifications —Continued ■ SWA-V10X Type Bass-reflex (Slit-duct Aero Acoustic Technology) 500 mV / 47 k Ω (FL/FR/C/SL/SR/SW) Input Sensitivity and Impedance 15 W x 2 (6 Ω /JEITA) Maximum output power Front 11 W x 2 (6 Ω...
- Page 71 HTC-V10X_En.book Page 71 Wednesday, July 21, 2004 2:49 PM Memo...
- Page 72 Units 2102-2107, Metroplaza Tower I, 223 Hing Fong Road, Kwai Chung, Printed in Japan N.T., HONG KONG Tel: 852-2429-3118 Fax: 852-2428-9039 I0407-1 SN 29343859 (C) Copyright 2004 ONKYO CORPORATION Japan. All rights reserved. * 2 9 3 4 3 8 5 9 *...