Xerox DocuColor 12 User Manual
Copier/printer
Hide thumbs
Also See for DocuColor 12:
- User manual (252 pages) ,
- Color manual (126 pages) ,
- Supplementary manual (120 pages)
Table of Contents
Advertisement
Quick Links
Advertisement
Table of Contents

Related Manuals for Xerox DocuColor 12


Summary of Contents for Xerox DocuColor 12
- Page 1 DOCUCOLOR 12 COPIER/PRINTER USER GUIDE...
- Page 2 , the stylized X, and all Xerox product names and product numbers mentioned in this publication are registered trademarks of Xerox Corporation. Xerox Canada is a licensee of all the trademarks. Other company brands and product names may be trademarks or registered trademarks of their respective companies and are also acknowledged.
-
Page 3: Safety Notes
Safety Notes The Xerox DocuColor 12 copier/printer and the recommended maintenance supplies have been designed and tested to meet strict safety requirements. Attention to the following notes will ensure the continued safe operation of your copier/printer. Electrical safety • Use only the power cord supplied with this equipment. -
Page 4: Disconnect Device
If any of the following conditions occur, switch off the power to the machine immediately and disconnect the power cord from the electrical outlet. Call an authorized Xerox service representative to correct the problem. – The machine emits unusual noises or odors. -
Page 5: Laser Safety
Class 1 laser product. It does not emit hazardous light, as the beam is totally enclosed during all phases of customer operation and maintenance. DOCUCOLOR 12 USER GUIDE SAFETY NOTES... -
Page 6: Maintenance Safety
Do not perform any maintenance procedures unless you have been trained to do them by a Xerox representative or unless a procedure is specifically described in one of the copier/printer manuals. SAFETY NOTES... -
Page 7: Operational Safety
Operational safety Your Xerox equipment and supplies were designed and tested to meet strict safety requirements. These include safety agency examination, approval, and compliance with established environmental standards. Your attention to the following safety guidelines will help ensure the continued safe operation of your copier/printer: •... -
Page 8: Ozone Safety
The ozone is heavier than air, and the quantity is dependent on copy volume. Providing the correct environmental parameters, as specified in the Xerox installation procedures, ensures that concentration levels meet safe limits. If you need additional information about ozone,... -
Page 9: Notices
• Consult the dealer or an experienced radio/TV technician for help. Changes or modifications to this equipment not specifically approved by the Xerox Corporation may void the authority granted by the FCC to operate this equipment. DOCUCOLOR 12 USER GUIDE... - Page 10 Changes or modifications to this equipment not specifically approved by the Xerox Corporation may void the user’s authority to operate this equipment. Shielded cables must be used with this equipment to maintain compliance with FCC regulations.
-
Page 11: Safety Extra Low Voltage Approval
Safety Extra Low Voltage Approval The Xerox DocuColor 12 copier/printer is in compliance with various governmental agencies and national safety regulations. All system ports meet the Safety Extra Low Voltage (SELV) circuits for connection to customer-owned devices and networks. Additions of customer-owned or third-... - Page 12 Changes or modifications to this equipment not specifically approved by Xerox Europe may void the user’s authority to operate the equipment. Shielded cables must be used with this equipment to maintain compliance with the EMC Directive 89/ 336/EEC.
- Page 13 Changes or modifications to this equipment not specifically approved by Xerox Europe may void the user’s authority to operate the equipment. Shielded cables must be used with this equipment to maintain compliance with the EMC Directive 89/ 336/EEC.
-
Page 14: It's Illegal
Bills, Checks, or Drafts of money drawn by or upon authorized officers of the United States. Stamps and other representatives of value, of whatever denomination, which have been or may be issued under any Act of Congress. NOTICES DOCUCOLOR 12 USER GUIDE... - Page 15 Automobile Licenses - Drivers’ Licenses - Automobile Certificates of Title. The above list is not all inclusive, and no liability is assumed for its completeness or accuracy. In case of doubt, consult your attorney. DOCUCOLOR 12 USER GUIDE NOTICES...
- Page 16 10. The above list is provided for your convenience and assistance, but it is not all inclusive, and no liability is assumed for its completeness or accuracy. In case of doubt, consult your solicitor. NOTICES DOCUCOLOR 12 USER GUIDE...
-
Page 17: Environmental Notices
Reducing the energy consumption of this equipment will help combat smog, acid rain and long-term changes to the climate by decreasing the emissions that result from generating electricity. DOCUCOLOR 12 USER GUIDE XVII NOTICES... - Page 18 Currently, Environmental Choice has more than 1600 approved products and 140 licensees. Xerox has been a leader in offering EcoLogo approved products. In 1996, Xerox became the first company licensed to use the Environmental Choice EcoLogo for its copiers printers, and fax machines.
-
Page 19: Table Of Contents
Contents ..........xix DOCUCOLOR 12 USER GUIDE... - Page 20 Conventions used in this manual ......1-8 2. Getting to know your DocuColor 12 ..... 2-1 Introduction .
- Page 21 Selecting the Paper Supply ....4-22 Programming the Paper Supply for Tray 5 ..4-23 DOCUCOLOR 12 USER GUIDE CONTENTS...
- Page 22 Variable Color Balance ........6-24 DOCUCOLOR 12 USER GUIDE...
- Page 23 Retrieve a job ......8-4 Delete a job ......8-5 DOCUCOLOR 12 USER GUIDE XXIII...
- Page 24 Clearing a stapler jam ....12-13 Troubleshooting ......12-14 CONTENTS XXIV DOCUCOLOR 12 USER GUIDE...
- Page 25 15. Index ..........15-1 DOCUCOLOR 12 USER GUIDE...
-
Page 26: Contents
CONTENTS XXVI DOCUCOLOR 12 USER GUIDE... -
Page 27: About This Manual
“DocuColor 12,” the “DocuColor 12 copier/ printer,” or simply the “copier/printer.” For more information about how the unit functions as a printer, refer to the DocuColor 12 Printer User Guide. This chapter introduces the organization, contents, and conventions of this manual. -
Page 28: Manual Contents
2. Getting to know your DocuColor 12 Chapter 2 provides basic information about the DocuColor 12. It includes an introduction to the Control Panel, Touch Screen, Duplex Automatic Document Feeder (DADF)and Document Glass, and Paper Trays and Paper Path. - Page 29 4. Basic Copying Chapter 4 includes information and procedures for the features that display on the Basic Copying tab: • Output Color • Copy Output • Reduce/Enlarge • Paper Supply DOCUCOLOR 12 USER GUIDE 1–3 ABOUT THIS MANUAL...
- Page 30 These features display on the Image Quality tab: • Original Type • Preset Color Balance • Lighten/Darken • Color Shift and Saturation • Sharpness • Variable Color Balance ABOUT THIS MANUAL 1–4 DOCUCOLOR 12 USER GUIDE...
-
Page 31: Paper
It also includes the correct procedures for loading stock into the paper trays and specific information regarding the paper to use in the DocuColor 12. For more general information about paper, refer to the Color Materials Usage Guide. For specific... -
Page 32: Duplex Automatic Document Feeder
Convenience Stapler. 13. Problem Solving Chapter 13 provides instructions for clearing paper jams, and analyzing and solving hardware, programming, and processor problems. It also provides a number of solutions for improving output quality. ABOUT THIS MANUAL 1–6 DOCUCOLOR 12 USER GUIDE... -
Page 33: Index
DocuColor 12 System Administration Guide and the Recommended Materials List and the Color Materials Usage Guide. For more information about the DocuColor 12 with a Digital Front End (DFE) refer to the DocuColor 12 Printer User Guide. For site planning information, refer to the DocuColor 12 Customer Site Planning Guide. -
Page 34: Conventions Used In This Manual
CAUTION:This symbol alerts you to an operating or maintenance procedure, practice, or condition that, if not strictly observed, could result in damage to or destruction of equipment or loss of data. ABOUT THIS MANUAL 1–8 DOCUCOLOR 12 USER GUIDE... -
Page 35: Getting To Know Your Docucolor 12
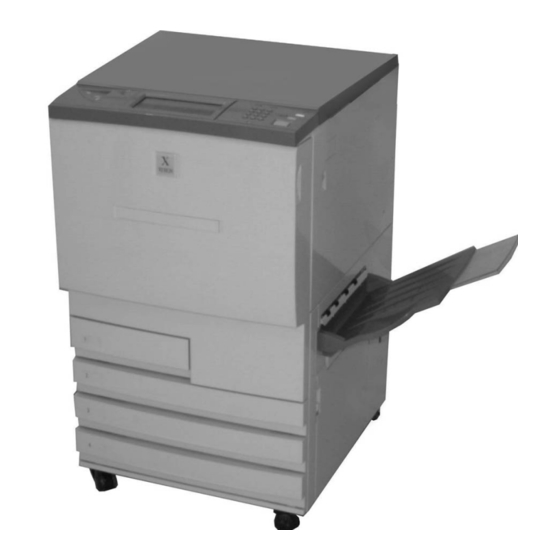
2. Getting to know your DocuColor 12 Introduction The DocuColor 12 copier/printer, Figure 1, provides full-color, digital imaging at approximately 12 copies per minute, depending upon the paper size and the feeding orientation of the paper. It includes an anti-counterfeit function as standard equipment. -
Page 36: Control Panel
The buttons on the right side of the Control Panel (C) and the electronic buttons on the Touch Screen are used to enter the job requirements. GETTING TO KNOW YOUR DOCUCOLOR 12 2–2 DOCUCOLOR 12 USER GUIDE... -
Page 37: Control Panel Buttons
Press the Auditron Access button after you complete your job to exit the user screens and ensure that no one else can make copies using your access number. DOCUCOLOR 12 USER GUIDE 2–3 GETTING TO KNOW YOUR DOCUCOLOR 12... - Page 38 Low Power button - Press this button to initiate the Low Power mode. The DocuColor 12 will also go into Low Power mode automatically if it is not used for a length of time specified by the System Administrator in the Tools Mode.
- Page 39 Touch Screen displays a message to indicate that the copier/printer will start automatically. To cancel the Automatic Start feature before the copier/printer is done warming up, press the Stop button. DOCUCOLOR 12 USER GUIDE 2–5 GETTING TO KNOW YOUR DOCUCOLOR 12...
- Page 40 Stored Job feature, it is applied only to the selected job. NOTE: Clear is not applied if a job is incomplete or the machine is displaying a Jam or Interlock Open screen. GETTING TO KNOW YOUR DOCUCOLOR 12 2–6 DOCUCOLOR 12 USER GUIDE...
-
Page 41: Touch Screen
Copy quantity The copy quantity entered using the keypad appears in the upper-right corner of the message area, Figure 4. Figure 4: Touch Screen with Basic Copying Tab displayed DOCUCOLOR 12 USER GUIDE 2–7 GETTING TO KNOW YOUR DOCUCOLOR 12... -
Page 42: Feature Tabs
System Administrator has selected in Tools mode. Ask your System Administrator for more information regarding these selections, or refer to the “Tools Mode” chapter of the DocuColor 12 System Administrator Guide. GETTING TO KNOW YOUR DOCUCOLOR 12 2–8... - Page 43 Figure 7. Touch the button to select the option described. Icon buttons Blank buttons Figure 7: Sample icon and blank feature and option buttons DOCUCOLOR 12 USER GUIDE 2–9 GETTING TO KNOW YOUR DOCUCOLOR 12...
- Page 44 The Save button, Figure 10, allows you to save a Figure 10: Cancel and Save buttons selected feature or options. GETTING TO KNOW YOUR DOCUCOLOR 12 2–10 DOCUCOLOR 12 USER GUIDE...
- Page 45 Selecting some of the feature buttons causes another screen to display. These screens contain additional information and selections for that feature. Selecting some of the options on these screens displays additional detail screens. DOCUCOLOR 12 USER GUIDE 2–11 GETTING TO KNOW YOUR DOCUCOLOR 12...
-
Page 46: Audio Tones
• The attention tone consists of a series of longer beeps. The attention tone sounds when the copier/printer warm-up cycle is complete. GETTING TO KNOW YOUR DOCUCOLOR 12 2–12 DOCUCOLOR 12 USER GUIDE... -
Page 47: Document Feeder And Document Glass
Start button to begin the scan operation. The feeder will then feed from the top of the stack and place the original face down in the DADF output tray on the right. DOCUCOLOR 12 USER GUIDE 2–13 GETTING TO KNOW YOUR DOCUCOLOR 12... - Page 48 The maximum scanned image size is 11 x 17 inches or A3. To copy an image of this size onto 12 x 17.7 inch or SRA3 paper, you must select 102% enlargement. GETTING TO KNOW YOUR DOCUCOLOR 12 2–14 DOCUCOLOR 12 USER GUIDE...
-
Page 49: Auto Image Rotation
Auto Image Rotation The DocuColor 12 offers an automatic rotation feature for 8.5 x 11 inch original documents input from both the Duplex Automatic Document Feeder and the Document Glass. KEY POINT: The following information applies ONLY when the Auto Tray is selected: If the... -
Page 50: Paper Trays And Paper Path
NOTE: Paper Trays 2, 3, and 4 can also accommodate 12 x 18 inch paper through a special, optional tray setup procedure performed by a Xerox service representative. If you are interested in this option, contact your Xerox service representative. - Page 51 Fuser (8), where the image is fixed to the paper permanently. From the Fuser, the paper passes either through the Post Fuser Area and into the Sorter/Mailbox (9) or into the duplex path (10a, 10b, 10c). DOCUCOLOR 12 USER GUIDE 2–17 GETTING TO KNOW YOUR DOCUCOLOR 12...
- Page 52 For a multiple-copy job in a configuration with a Sorter/Mailbox, one set of output is delivered, face down, to each of three separate bins in 1, 2, 3 order. GETTING TO KNOW YOUR DOCUCOLOR 12 2–18 DOCUCOLOR 12 USER GUIDE...
-
Page 53: Dry Ink (Toner)
When a cartridge is empty, the Touch Screen displays a message indicating that the cartridge needs to be replaced. The DocuColor 12 will not make copies using that color until the cartridge has been replaced. Refer to the DocuColor 12 System Administration Guide for information about replacing the dry ink cartridges. -
Page 54: White Border Edges On Copies
White border edges on copies All copies made on the DocuColor 12 have white border edges on four sides of the copy, as illustrated in Figure 17. There is a factory setting which removes 2 mm from the left, right, top and bottom edges of the scanned original. -
Page 55: Ground Fault Protection
Ground fault protection The DocuColor 12 copier/printer is equipped with a safety feature called a Ground Fault Protector, Figure 18. This device removes all electrical power to the copier/printer if a fault is detected in the power supply to the copier/printer. -
Page 56: Connectivity
Connectivity Your DocuColor 12 copier can be used as a printer when connected to an integrated or external Digital Front End (DFE). Therefore, the DocuColor 12 is referred to as a copier/printer throughout this manual and the DocuColor 12 System Administration Guide. -
Page 57: Moving The Copier/Printer
Moving the Copier/Printer The DocuColor 12 copier/printer should not be moved after it has been installed. Improperly moving the copier/printer may damage the equipment, carpet or floor. lf you must move the copier/printer, please ask your Xerox representative to assist you. -
Page 58: Options And Accessories
The Sorter/Mailbox can function as a 10-bin sorter on the DocuColor 12 (copier only) or as a mailbox on the DocuColor 12 with a Digital Front End (printer only). It can be used as either a mailbox or a sorter on the copier/printer configuration. -
Page 59: Making Copies
3. Making copies This chapter includes instructions for powering on and off the DocuColor 12. It also includes a procedure that leads you quickly through a number of features you may want to use in making copies.You can find detailed information about the features and options referred to in this chapter in the chapters that follow. -
Page 60: Power On And Off
The copier/printer produces color copies at a rate Figure 1: Power Switch - Off Position of approximately twelve copies per minute, depending on the paper size and the feeding orientation of the paper. MAKING COPIES 3–2 DOCUCOLOR 12 USER GUIDE... - Page 61 The Fuser Roll will not be released from the cammed-up position until the power is restored, the Power Switch is in the On position, and the Start button is pressed again. DOCUCOLOR 12 USER GUIDE 3–3 MAKING COPIES...
-
Page 62: Loading Paper
Figure 2. Adjust the paper guides. You can not adjust the guides for Tray 1. Contact a Xerox Service Representative to adjust the paper guides for Tray 1. The paper level must not be above the MAX fill line, as indicated in the tray. -
Page 63: Paper Tray 5
Do not fill Paper Tray 5 above the fill line on the paper guide. NOTE: Remove all copy stock from Paper Tray 5 when the job is complete. Dust and moisture can affect stock, causing copy quality defects. Figure 3: Loading Paper Tray 5 DOCUCOLOR 12 USER GUIDE 3–5 MAKING COPIES... -
Page 64: Quick Copy
DADF Tray, as in Figure 5. The Document Feed Lamp lights when the document is in the correct position. Ensure that the paper guide is against the original document. Figure 5: Placing a document in the DADF Feeder Tray MAKING COPIES 3–6 DOCUCOLOR 12 USER GUIDE... - Page 65 Remove the copies from the Output Tray or Sorter/Mailbox on the right side of the copier/ printer. • Remove the original document(s) from the Document Glass or Original Catch Tray of the DADF. DOCUCOLOR 12 USER GUIDE 3–7 MAKING COPIES...
-
Page 66: Making Copies Using Features
Select the required quantity. • Use the Keypad to enter the quantity. • Press the Clear (C) button on the Numeric Keypad to clear an incorrect quantity. Figure 7: Keypad and Clear Key MAKING COPIES 3–8 DOCUCOLOR 12 USER GUIDE... - Page 67 If you require more than 10 sets, you must break them up into multiples of 10 to copy. NOTE: If the Sorter/Mailbox is configured as a Mailbox, only the Top tray option will be visible on the Touch screen. DOCUCOLOR 12 USER GUIDE 3–9 MAKING COPIES...
- Page 68 Transparencies may not be used for two- sided copying. • Transparencies cannot be delivered to the Sorter/Mailbox bins. They must be directed to the Catch Tray. NOTE: See the Sorter/Mailbox section for additional information. MAKING COPIES 3–10 DOCUCOLOR 12 USER GUIDE...
- Page 69 • Touch More... to see additional options, as illustrated in Figure 11. Touch the desired option and touch the Save button to return to the Basic Copying screen. Figure 11: Paper Supply screen DOCUCOLOR 12 USER GUIDE 3–11 MAKING COPIES...
- Page 70 Figure 14. Touch Flip on Long Edge for two-sided, head-to-head output, as for books. Touch Flip on Short Edge for two- sided, head-to-toe output, as for calendars. Figure 14: 1 to 2 Sided Copying option MAKING COPIES 3–12 DOCUCOLOR 12 USER GUIDE...
- Page 71 Touch Flip on Short Edge for two-sided, head-to-toe output, as for calendars. Touch the icon that most closely resembles the Original Orientation for the document on the Document Glass. DOCUCOLOR 12 USER GUIDE 3–13 MAKING COPIES...
- Page 72 Figure 19: Preset Color Balance screen Quality tab. If other features are desired, select the appropriate feature tab and feature button on the Touch Screen. Refer to the appropriate chapters for more detailed information about each feature. MAKING COPIES 3–14 DOCUCOLOR 12 USER GUIDE...
- Page 73 Remove the original document(s) from the Document Glass or Original Catch Tray of the DADF. • If you used Paper Tray 5, remove the copy stock from Tray 5 and store it properly. DOCUCOLOR 12 USER GUIDE 3–15 MAKING COPIES...
-
Page 74: Preserving Your Color Output
Your color output, which is made from color dry inks (toners), requires a little special attention. To help preserve the fidelity of your color output, Xerox recommends that you consider the following: Adhesive tapes and adhesives Some adhesive tapes and adhesives (glues) contain solvents that may soften or dissolve the color dry inks. -
Page 75: Basic Copying
Copy Output The Copy Output feature enables you to select the destination of the output. Available options differ, based on whether the DocuColor 12 uses the Output Catch Tray or has a Sorter/Mailbox. DOCUCOLOR 12 USER GUIDE 4–1... -
Page 76: Reduce/Enlarge
More..• Features and options discussed in this chapter follow the factory default settings. You may see different settings, depending on the options your System Administrator has selected in Tools mode. BASIC COPYING 4–2 DOCUCOLOR 12 USER GUIDE... -
Page 77: Output Color
The dry inks (toners) do not contain the metallic particles necessary to accurately reproduce gold and silver colors or the fluorescent properties that are required to reproduce fluorescent colors. DOCUCOLOR 12 USER GUIDE 4–3 BASIC COPYING... -
Page 78: Auto Color
, select the Full Color option. With the Auto Color option, some very dark colors may be sensed as black and therefore copied as black. In these cases, select the Full Color option. BASIC COPYING 4–4 DOCUCOLOR 12 USER GUIDE... -
Page 79: Full Color
Figure 5: Example of 3 Pass Color NOTE: Process Black is created using Gray Component Removal and uses equal amounts of Cyan + Magenta + Yellow Dry Inks to create the black in the document. DOCUCOLOR 12 USER GUIDE 4–5 BASIC COPYING... -
Page 80: Black
NOTE: Using this option will not create a color separation. Close examination will reveal that multiple colors are used to create the output that Figure 7: Example of Single Color appears to be a “single” color. BASIC COPYING 4–6 DOCUCOLOR 12 USER GUIDE... -
Page 81: Selecting Output Color
More... option to display the Output Color screen, as in Figure 8. Touch Single Color. Touch the desired color. Touch Save to return to the Basic Copying tab. Figure 8: Output Color Screen with Single Color Options DOCUCOLOR 12 USER GUIDE 4–7 BASIC COPYING... -
Page 82: Copy Output
1, 1, 1, 2, 2, 2, 3, 3, 3. If the DocuColor 12 does not have a Sorter/ Mailbox, only one output tray is listed, as illustrated in Figure 9. No other option is available. - Page 83 If the DocuColor 12 has a Sorter/Mailbox, output may be directed to the Sorter/Mailbox Bins or Offset Catch Tray. Use the following procedure to make your choice. NOTE: If the Sorter/Mailbox is configured as a Mailbox, only the Top Tray option will be visible on the Touch screen.
- Page 84 Transparencies may not be used for two- sided copying. • Transparencies cannot be delivered to the Sorter/Mailbox bins. They must be directed to the Catch Tray. NOTE: See the Sorter/Mailbox section for additional information. BASIC COPYING 4–10 DOCUCOLOR 12 USER GUIDE...
-
Page 85: Reduce/Enlarge
Copies may be reduced to 25% or enlarged to 400%. KEY POINT: If the image on the document extends to the edges of the paper, select the Copy All option to avoid image loss on the copies. DOCUCOLOR 12 USER GUIDE 4–11 BASIC COPYING... -
Page 86: Auto
NOTE: The Auto Paper option in Paper Supply is not available when Auto% is selected. Setting basic options On the Basic Copying Tab, select the desired Reduce/Enlarge option, as in Figure 13. Figure 13: Reduce/Enlarge options on the Basic Copying Tab BASIC COPYING 4–12 DOCUCOLOR 12 USER GUIDE... -
Page 87: Advanced Options For Reduce/Enlarge
Basic Copying tab enables you to set reduction or enlargement according to the following options illustrated in Figure 14: • Preset% • Variable% • Independent X-Y% Figure 14: Additional Options for Reduce/Enlarge DOCUCOLOR 12 USER GUIDE 4–13 BASIC COPYING... -
Page 88: Preset
Touch Copy All again to return to normal copying. Touch Save to return to the Basic Copying tab. BASIC COPYING 4–14 DOCUCOLOR 12 USER GUIDE... -
Page 89: Variable
8.5 x 14 inch to 8.5 x 11 inch 141% A4 to A3 154% 5.5 x 8.5 inch to 8.5 x 11 inch 220% 3.5 x 8.5 inch to 8.5 x 11 inch Table 1: Percentage conversions DOCUCOLOR 12 USER GUIDE 4–15 BASIC COPYING... - Page 90 Screen to enter a specific percentage, from 25 through 400. The values increase or decrease in the displayed value box according to your entries. Touch Save to return to the Basic Copying tab. BASIC COPYING 4–16 DOCUCOLOR 12 USER GUIDE...
-
Page 91: Independent X - Y
All of the Independent X-Y options require you to enter the original orientation that most closely resembles how the document is Figure 19: The X and Y Directions on the placed on the Document Glass. Document Glass DOCUCOLOR 12 USER GUIDE 4–17 BASIC COPYING... -
Page 92: Independent X - Y%: Variable
Touch the icon that most closely resembles the orientation of the original document on the Document Glass. Touch Save to return to the previous Reduce/ Enlarge screen. Touch Save to return to the Basic Copying tab. BASIC COPYING 4–18 DOCUCOLOR 12 USER GUIDE... -
Page 93: Independent X - Y%: Auto
Touch the icon that most closely resembles the orientation of the original document on the Document Glass. Touch Save to return to the previous Reduce/ Enlarge screen. Touch Save to return to the Basic Copying tab. DOCUCOLOR 12 USER GUIDE 4–19 BASIC COPYING... -
Page 94: Paper Supply
System Administrator or use the Tools Mode to change the paper weight for the specified tray before loading paper. NOTE: Contact a Xerox Service Representative to change the default size of Paper Tray 1. BASIC COPYING 4–20... -
Page 95: Auto Tray Switching - Tools Mode
Copying tab of the Touch Screen. The copier/ printer draws paper from Tray 2 until it is depleted, then switches automatically to Tray 3. For further information on this feature, see the System Administration Guide, Tools section. DOCUCOLOR 12 USER GUIDE 4–21 BASIC COPYING... -
Page 96: Selecting The Paper Supply
NOTE: If you select Paper Tray 5, go to the procedure “Programming the Paper Supply for Tray 5.” Notice that the copier/printer icon highlights the location of the paper tray that is selected. Touch Save to display the Basic Copying tab. BASIC COPYING 4–22 DOCUCOLOR 12 USER GUIDE... -
Page 97: Programming The Paper Supply For Tray 5
Figure 25. Figure 25: Tray 5 screen NOTE: The paper size and type is set back to the defaults each time you select “Clear All” or the machine time out is reached. DOCUCOLOR 12 USER GUIDE 4–23 BASIC COPYING... - Page 98 Figure 29: Tray 5 Non Standard Sizes the Y (length) dimensions. Touch the appropriate Paper Type. Touch Save to return to the Paper Supply screen. Touch Save to return to the Basic Copying tab. BASIC COPYING 4–24 DOCUCOLOR 12 USER GUIDE...
-
Page 99: Added Features
(head-to-toe), 2 to 1, 2 to 1 (head-to-head), and 2 to 1 (head-to-toe). Book Copying The Book Copying feature splits the image of an open book original into pages to enable copying of each bound page. DOCUCOLOR 12 USER GUIDE 5–1 ADDED FEATURES... -
Page 100: Margin Shift
You may select a standard international, standard US paper size, or a non-standard size. The Auto Detected feature enables the copier/printer to identify the size of the original automatically. ADDED FEATURES 5–2 DOCUCOLOR 12 USER GUIDE... -
Page 101: Mixed Size Originals
• Features and options discussed in this chapter follow the factory default settings. You may see different settings, depending on the options your System Administrator has selected in Tools mode. DOCUCOLOR 12 USER GUIDE 5–3 ADDED FEATURES... -
Page 102: Sided Copying
Touch Flip on Long Edge for two-sided, head-to-head output, as for books. – Touch Flip on Short Edge for two-sided, head-to-toe output, as for calendars. Figure 4: 1 to 2 Sided Copying option ADDED FEATURES 5–4 DOCUCOLOR 12 USER GUIDE... - Page 103 Touch Flip on Short Edge for two-sided, head-to-toe output, as for calendars. Touch the icon that most closely resembles the Original Orientation for the document on the Document Glass. Touch Save to return to the Added Features tab. DOCUCOLOR 12 USER GUIDE 5–5 ADDED FEATURES...
-
Page 104: Manual 2 Sided Copying
Position your copies in Paper Tray 5 with the image side down. Ensure the top of the image is oriented in the same direction as the top of the original document. Copy as a 1 Sided Copy. ADDED FEATURES 5–6 DOCUCOLOR 12 USER GUIDE... -
Page 105: Book Copying
Variable Erase/Center Area Erase option. KEY POINT: Place the bound document face down in the upper left corner of the Document Glass, as illustrated in Figure 9. Figure 9: Book copy position DOCUCOLOR 12 USER GUIDE 5–7 ADDED FEATURES... - Page 106 KEY POINT: If the selected quantity is more than one, the copier/printer completes all the copies of the image on the right side of the glass, then all the copies of the image on the left side. ADDED FEATURES 5–8 DOCUCOLOR 12 USER GUIDE...
-
Page 107: Book Copying Off
Features tab to display the Book Copying screen. Touch the Book Copying Off icon, as in Figure 10. Touch Save to return to the Added Features tab. Figure 10: Book Copying screen with the Book Copying Off option selected DOCUCOLOR 12 USER GUIDE 5–9 ADDED FEATURES... -
Page 108: Normal Book Copying
Figure 11: Book Copying screen with right page, touch the Left Page Only icon. Normal Book Copying selected • To scan and copy the right page without the left page, touch the Right Page Only icon. ADDED FEATURES 5–10 DOCUCOLOR 12 USER GUIDE... - Page 109 The bound document should be placed face down with the upper outside corner of the right page in the upper left corner of the Document Glass. Touch Save to return to the Added Features tab. DOCUCOLOR 12 USER GUIDE 5–11 ADDED FEATURES...
-
Page 110: Right To Left Format
Left Page Only icon. Figure 12: Book Copying screen with Right to Left Format icon selected • To scan and copy the right page without the left page, touch the Right Page Only icon. ADDED FEATURES 5–12 DOCUCOLOR 12 USER GUIDE... - Page 111 The bound document should be placed face down with the upper outside corner of the right page in the upper left corner of the Document Glass. Touch Save to return to the Added Features tab. DOCUCOLOR 12 USER GUIDE 5–13 ADDED FEATURES...
-
Page 112: Calendar Format
Touch the Book Copying icon on the Added Features tab to display the Book Copying screen. Touch the Calendar Format icon as in Figure 13. Figure 13: Book Copying screen with Calendar Format selected ADDED FEATURES 5–14 DOCUCOLOR 12 USER GUIDE... - Page 113 The bound document should be placed face down with the upper left corner of the top page in the upper left corner of the Document Glass. Touch Save to return to the Added Features tab. DOCUCOLOR 12 USER GUIDE 5–15 ADDED FEATURES...
-
Page 114: Margin Shift
Figure 15: Margin Shift screen After you have selected a Margin Shift option, the Added Features screen displays a check in the feature check box beside the set values. ADDED FEATURES 5–16 DOCUCOLOR 12 USER GUIDE... -
Page 115: No Shift
Figure 17: Margin Shift screen with No Shift Shift for the other side. selected Touch the icon that most closely resembles the Original Orientation for the document on the Document Glass. Touch Save to return to the Added Features tab. DOCUCOLOR 12 USER GUIDE 5–17 ADDED FEATURES... -
Page 116: Auto Center
Document Glass and the orientation of the selected paper supply. The copier/printer completes a prescan to determine the size of the document. Figure 18: Example of Auto Center ADDED FEATURES 5–18 DOCUCOLOR 12 USER GUIDE... - Page 117 If desired, repeat steps 2-4 for the other side. Auto Center selected Touch the icon that most closely resembles the Original Orientation for the document on the Document Glass. Touch Save to return to the Added Features tab. DOCUCOLOR 12 USER GUIDE 5–19 ADDED FEATURES...
-
Page 118: Corner Shift
Document Glass and by the orientation of the selected paper supply. The copier/printer completes a prescan to determine the size of the document. Figure 21: Example of Corner Shift ADDED FEATURES 5–20 DOCUCOLOR 12 USER GUIDE... - Page 119 If desired, repeat steps 2-5 for the other side. Touch the icon that most closely resembles the Original Orientation for the document on the Document Glass. Touch Save to return to the Added Features tab. DOCUCOLOR 12 USER GUIDE 5–21 ADDED FEATURES...
-
Page 120: Variable Shift
The orientation of the image on the copies is determined by the placement of the document on the Document Glass and by the orientation of the selected paper supply. Figure 24: Example of Variable Shift ADDED FEATURES 5–22 DOCUCOLOR 12 USER GUIDE... - Page 121 0 to 432 mm. Notice that the values in the box increase or decrease according to your selection and that the icon illustrates the direction of the shift. DOCUCOLOR 12 USER GUIDE 5–23 ADDED FEATURES...
- Page 122 If desired, repeat steps 2-5 for the other side. Touch the icon that most closely resembles the Original Orientation for the document on the Document Glass. Touch Save to return to the Added Features tab. ADDED FEATURES 5–24 DOCUCOLOR 12 USER GUIDE...
-
Page 123: Edge Erase
If you request an edge erase of 5 mm, the output copy uses a 5 mm edge erase. If you select an edge erase of 1 mm, the factory setting of 2 mm is applied. DOCUCOLOR 12 USER GUIDE 5–25 ADDED FEATURES... -
Page 124: No Erase
Touch the icon that most closely resembles the Figure 28: No Erase option on the Original Orientation for the document on the Edge Erase screen Document Glass. Touch Save to return to the Added Features tab. ADDED FEATURES 5–26 DOCUCOLOR 12 USER GUIDE... -
Page 125: Variable Erase For Edges
Erase feature is the same as the center erase setting of Book Copying. • For some original image sizes, Center Area Erase does not occur exactly in the center of the output image. DOCUCOLOR 12 USER GUIDE 5–27 ADDED FEATURES... - Page 126 Touch Save to return to the Added Features tab, which now displays the new edge erase values. Use the diagram on the screen when you place the original onto the Document Glass to ensure expected results. ADDED FEATURES 5–28 DOCUCOLOR 12 USER GUIDE...
-
Page 127: Original Size
Document Glass. Undesirable copy output may occur. • If you select Auto Detect, the DocuColor 12 performs a prescan and assumes the original document and anything that is on the Document Glass (pens, pieces of paper, etc.) are to be copied. - Page 128 4 x 6 8.5 x 11 LEF 8 x 10 3.5 x 5 A4 Land- scape 8.5 x 11 SEF 11 x 14 B5 Land- scape 5.5 x 8.5 5 x 7 A5 Land- scape ADDED FEATURES 5–30 DOCUCOLOR 12 USER GUIDE...
-
Page 129: Mixed Size Originals
Touch Save to return to the Added Features tab. NOTE: You may use as many different sized originals for Mixed Sized Originals as you wish providing you are using standard size paper and have the appropriate paper in the Paper Trays. DOCUCOLOR 12 USER GUIDE 5–31 ADDED FEATURES... - Page 130 ADDED FEATURES 5–32 DOCUCOLOR 12 USER GUIDE...
-
Page 131: Image Quality
Image Quality features: Original Type The selection of the correct Original Type (for example, Photo & Text, Text, Photo, Graphics & Maps) ensures that the DocuColor 12 uses its fullest scanning capability for that document type. DOCUCOLOR 12 USER GUIDE 6–1... -
Page 132: Preset Color Balance
IMAGE QUALITY 6–2 DOCUCOLOR 12 USER GUIDE... -
Page 133: Original Type
Original Type that best describes your document. Figure 3: Original Type screen NOTE: The System Administrator selects the default Original Type. The Original Type icon on the Feature Folder displays the currently selected Original Type as the default. DOCUCOLOR 12 USER GUIDE 6–3 IMAGE QUALITY... -
Page 134: Photo & Text
Figure 4: Example of Photo & Text You can adjust the automatic recognition levels of text and photos. For details, refer to the System Administration Guide, or ask your System Administrator for assistance. IMAGE QUALITY 6–4 DOCUCOLOR 12 USER GUIDE... - Page 135 Use this option when copying photographs or extremely fine halftones. • Xerographic Copy Use this option when using a Xerographic reproduction (copy) as the original document. Touch Save to return to the Image Quality tab. DOCUCOLOR 12 USER GUIDE 6–5 IMAGE QUALITY...
-
Page 136: Text
• Select Light Text if the text on the original document is indistinct or in pencil and should be enhanced for the output copy. Touch Save to return to the Image Quality tab. IMAGE QUALITY 6–6 DOCUCOLOR 12 USER GUIDE... -
Page 137: Photo
Touch the Original Type icon on the Image Quality tab to display the Original Type screen. Touch the Photo icon to display the Photo detail screen, illustrated in Figure 9. Figure 9: Photo detail screen DOCUCOLOR 12 USER GUIDE 6–7 IMAGE QUALITY... - Page 138 Use this option when copying photographs or extremely fine halftones. • Xerographic Copy Use this option when using a Xerographic reproduction (copy) as the original document. Touch Save to return to the Image Quality tab. IMAGE QUALITY 6–8 DOCUCOLOR 12 USER GUIDE...
-
Page 139: Graphics & Maps
Quality tab to display the Original Type screen. Touch the Graphics & Maps icon, as illustrated in Figure 11. Touch Save to return to the Image Quality tab. Figure 11: Graphics & Maps icon selected DOCUCOLOR 12 USER GUIDE 6–9 IMAGE QUALITY... -
Page 140: Preset Color Balance
The Normal option, illustrated in Figure 13, makes no changes to the image quality and produces copies with the same quality and density as those of the original. The Preset Color Balance default is Normal. Figure 13: Example of Normal IMAGE QUALITY 6–10 DOCUCOLOR 12 USER GUIDE... -
Page 141: Lively
The option increases the Color Saturation to the most vivid setting and adjusts the Lighten/Darken setting one step lighter. Figure 14: Example of Lively DOCUCOLOR 12 USER GUIDE 6–11 IMAGE QUALITY... -
Page 142: Bright
The Bright option decreases the low density settings for Yellow, Magenta, Cyan, and Black. It increases the color saturation, adjusts the Lighten/ Darken setting two steps darker, and selects the highest Sharpness setting. Figure 15: Example of Bright IMAGE QUALITY 6–12 DOCUCOLOR 12 USER GUIDE... -
Page 143: Warm
The Warm option decreases the Low and Medium density settings for Yellow and Cyan, and increases the Medium setting for Magenta. Figure 16: Example of Warm DOCUCOLOR 12 USER GUIDE 6–13 IMAGE QUALITY... -
Page 144: Cool
The Cool option decreases the Low, Medium, and High density settings for Yellow and Magenta, and increases the Low, Medium, and High setting for Cyan. Figure 17: Example of Cool IMAGE QUALITY 6–14 DOCUCOLOR 12 USER GUIDE... -
Page 145: Background Suppression
Auto Suppression Background Suppression Auto Suppression increases contrast and sharpness for clearer output. The copy will appear brighter than the original. Dark colors will be come dark and light colors will become lighter. DOCUCOLOR 12 USER GUIDE 6–15 IMAGE QUALITY... - Page 146 Image Quality tab to display the Preset Color Balance screen, illustrated in Figure 19. Touch the appropriate button for the desired color balance. Touch Save to return to the Image Quality tab. Figure 19: Preset Color Balance screen IMAGE QUALITY 6–16 DOCUCOLOR 12 USER GUIDE...
-
Page 147: Lighten/Darken
Figure 22: Lightened image or text on the back side of the document. The automatic background suppression function helps to reduce or eliminate the background in these situations. Figure 23: Darkened image DOCUCOLOR 12 USER GUIDE 6–17 IMAGE QUALITY... - Page 148 • Using the illustrated bar as a guide, touch the button under the section that best reflects the desired degree of darkness or lightness. Touch Save to return to the Image Quality tab. IMAGE QUALITY 6–18 DOCUCOLOR 12 USER GUIDE...
-
Page 149: Color Shift/Saturation
The lower bar shifts to the left. Again, all Figure 27: Color shift toward Warm colors in between these original document colors also shift in the same direction. Figure 28 illustrates the Cool setting. Figure 28: Color shift toward Cool DOCUCOLOR 12 USER GUIDE 6–19 IMAGE QUALITY... -
Page 150: Saturation
Normal saturation. No change is made to Figure 29: Normal saturation the flowers based on your selection. Three levels of Saturation are illustrated in Figure 29, Figure 30, and Figure 31. Figure 30: Maximum saturation Figure 31: Minimum saturation IMAGE QUALITY 6–20 DOCUCOLOR 12 USER GUIDE... - Page 151 Coolest to Warmest. Figure 32: Color Shift/Saturation screen Touch the button for the desired Saturation in the range from Most Pastel to Most Vivid. Touch Save to return to the Image Quality tab. DOCUCOLOR 12 USER GUIDE 6–21 IMAGE QUALITY...
-
Page 152: Sharpness
Use the Sharpen levels to increase the amount of edge definition for original documents such as maps, line art, or graphics that should have crisp lines. Figure 36 illustrates the results of this setting. Figure 35: Softer Figure 36: Sharper IMAGE QUALITY 6–22 DOCUCOLOR 12 USER GUIDE... - Page 153 Figure 37. Using the diamond illustrations as guides, touch the button that best reflects the desired degree of softness or sharpness. Figure 37: Sharpness screen Touch Save to return to the Image Quality tab. DOCUCOLOR 12 USER GUIDE 6–23 IMAGE QUALITY...
-
Page 154: Variable Color Balance
Figure 39: Normal KEY POINT: It is important to remember that adjusting the amount of any of the process colors has an effect on the other colors. Figure 40: Maximum magenta Figure 41: Minimum magenta IMAGE QUALITY 6–24 DOCUCOLOR 12 USER GUIDE... - Page 155 • Touch the down arrow to decrease the amount of color to be applied. If desired, repeat steps 2 and 3 for other colors. Touch Save to return to the Image Quality tab. DOCUCOLOR 12 USER GUIDE 6–25 IMAGE QUALITY...
- Page 156 IMAGE QUALITY 6–26 DOCUCOLOR 12 USER GUIDE...
-
Page 157: Output Formats
The Multiple-Up feature enables you to copy up to eight images from multiple originals onto a single page. Repeat Image With Repeat Image, you can copy a single image multiple times onto one page. DOCUCOLOR 12 USER GUIDE 7–1 OUTPUT FORMATS... -
Page 158: Transparency Separators
OUTPUT FORMATS 7–2 DOCUCOLOR 12 USER GUIDE... -
Page 159: Multiple-Up
Do not use 12 x 18-inch or SRA3 paper. The order and final rotation of images depend on the selections you make for the Image Order and Original Orientation options, which are described below. DOCUCOLOR 12 USER GUIDE 7–3 OUTPUT FORMATS... -
Page 160: Pages Up
Originals illustrated in Figure 4: • Left-to-right / top-to-bottom Left-to-right / top-to-bottom • Right-to-left / top-to-bottom • Top-to-bottom Right-to-left / top-to-bottom Two landscape originals Landscape / top-to-bottom Figure 4: 2-Up image placement OUTPUT FORMATS 7–4 DOCUCOLOR 12 USER GUIDE... -
Page 161: Pages Up And 8 Pages Up
Vertically, beginning from the upper right from upper right corner corner Vertical, beginning from upper left corner Vertical, beginning from upper right corner Figure 5: 4 Pages Up or 8 Pages Up image placement DOCUCOLOR 12 USER GUIDE 7–5 OUTPUT FORMATS... -
Page 162: Number Of Images Per Page
8.5 x 11 inches 11 x 17 inches Table 1: Number of images per multiple-up page (US sizes) Output Copy Paper Size Original Document Size Table 2: Number of images per multiple-up page (International sizes) OUTPUT FORMATS 7–6 DOCUCOLOR 12 USER GUIDE... - Page 163 Image Order to follow. Touch the icon that most closely resembles the Original Orientation for the document on the Document Glass. Touch Save to display the Output Formats tab. DOCUCOLOR 12 USER GUIDE 7–7 OUTPUT FORMATS...
-
Page 164: Repeat Image
For example, if you select 1 columns of 4 rows, 4 images print on the output, as illustrated in Figure 10. If you select 2 columns with 5 rows, 10 images print in two columns. Figure 10: Example of Repeated Image OUTPUT FORMATS 7–8 DOCUCOLOR 12 USER GUIDE... - Page 165 (432 mm) in the X direction. • Do not use 12 x 18-inch or SRA3 paper. The order and final rotation of images depend on the selections you make for the Image Order and Original Orientation options. DOCUCOLOR 12 USER GUIDE 7–9 OUTPUT FORMATS...
- Page 166 Touch the icon that most closely resembles the Original Orientation for the document on the Document Glass. Touch Save to display the Output Formats tab screen. OUTPUT FORMATS 7–10 DOCUCOLOR 12 USER GUIDE...
-
Page 167: Transparency Separators
KEY POINT: For this feature to operate, make sure there is paper of the same size and orientation in a tray other than Paper Tray 5. Figure 15: Example of Transparencies with Blank Separators DOCUCOLOR 12 USER GUIDE 7–11 OUTPUT FORMATS... - Page 168 • Do not use heavy paper as separators. • The following features may not be used in conjunction with Transparency Separators: – Multiple-Up – 2 Sided – Repeat Image OUTPUT FORMATS 7–12 DOCUCOLOR 12 USER GUIDE...
- Page 169 Figure 18: Separator Tray screen KEY POINT: If you load transparencies into Tray 5, it is automatically set to transparencies. The Tray 5 window does not pop up like it does when separators are selected. DOCUCOLOR 12 USER GUIDE 7–13 OUTPUT FORMATS...
-
Page 170: Covers
The paper size and orientation must be the same for the whole job. KEY POINT: You must have a Sorter to have the Covers feature available. OUTPUT FORMATS 7–14 DOCUCOLOR 12 USER GUIDE... - Page 171 This setting copies the first and last originals on cover stock. Selecting both the Front Cover and Front and Back Cover options displays a screen from which you can select paper stock and paper supply. DOCUCOLOR 12 USER GUIDE 7–15 OUTPUT FORMATS...
- Page 172 NOTE: You must have a Sorter to have the Covers feature available. NOTE: You must select “collated” for your covers jobs. NOTE: You may not select Tray 5 for covers jobs. Figure 19: Collated Button OUTPUT FORMATS 7–16 DOCUCOLOR 12 USER GUIDE...
-
Page 173: Creating Covers
Figure 21: Output Format - Covers button Touch one of the following options: No Covers Figure 22: Output Format - Covers options If you do not wish to create a cover, go to Step 4. DOCUCOLOR 12 USER GUIDE 7–17 OUTPUT FORMATS... -
Page 174: Front Cover
Figure 23: Paper trays button Touch the correct Cover Stock Tray and Paper Supply Tray. Touch Save to save the selections. Figure 24: Paper trays options You are now ready to proceed to step 4. OUTPUT FORMATS 7–18 DOCUCOLOR 12 USER GUIDE... -
Page 175: Front And Back Covers
Touch Save and the Output Formats tab screen is displayed You are now ready to print your covers. Press Start. Be certain you place the correct cover stock in the specified paper tray. Figure 26: Front and Back Covers button DOCUCOLOR 12 USER GUIDE 7–19 OUTPUT FORMATS... -
Page 176: Invert Image
Shift is selected and the image is programmed to move to the right, the image would actually be moved to the left if Mirror Image is selected.) Figure 28: Example of a mirror image OUTPUT FORMATS 7–20 DOCUCOLOR 12 USER GUIDE... - Page 177 Touch the Mirror Image button to select the mirror image option. Touch the Save button to display the Invert Image screen. Touch the Save button to display the Output Figure 30: Mirror Image screen Formats tab. DOCUCOLOR 12 USER GUIDE 7–21 OUTPUT FORMATS...
-
Page 178: Negative Image
With the Negative Image option, you can select a single output color to produce a copy that has the selected color as the background color with shades of the color in the image area. Figure 32: Sample negative image OUTPUT FORMATS 7–22 DOCUCOLOR 12 USER GUIDE... - Page 179 Touch the Negative Image icon to select a Figure 34: Negative Image screen negative image or image inversion. Touch the Save button to display the Invert Image screen. Touch the Save button to display the Output Formats tab. DOCUCOLOR 12 USER GUIDE 7–23 OUTPUT FORMATS...
-
Page 180: Poster Mode
This option enables you to specify from a series of preset poster sizes and the enlargement is calculated automatically. NOTE: Repeat Image, Transparency Separators and Covers options are not available when Poster has been selected. OUTPUT FORMATS 7–24 DOCUCOLOR 12 USER GUIDE... -
Page 181: Preset Poster Size
Place the original document on the Document Glass in the same orientation (short or long edge first) as the orientation of the selected Poster copy paper in the paper trays (short or long edge first). DOCUCOLOR 12 USER GUIDE 7–25 OUTPUT FORMATS... - Page 182 • Do not interrupt the Poster job. • Do not use the following features with Poster • 2 Sided • Book Copying • Variable Erase for the Center Area OUTPUT FORMATS 7–26 DOCUCOLOR 12 USER GUIDE...
-
Page 183: Creating Posters
The Poster Mode button is now displayed. Figure 36: Output Formats - Poster Mode button Touch one of the following options: No Poster, Variable Poster Size or Preset Poster Size. Figure 37: Poster options DOCUCOLOR 12 USER GUIDE 7–27 OUTPUT FORMATS... -
Page 184: No Poster
Values range from 100% to 400% for the length or width. Notice that the values in the boxes increase or decrease according to your selection. Touch Save to save the selections. Go to Step 4. OUTPUT FORMATS 7–28 DOCUCOLOR 12 USER GUIDE... -
Page 185: Preset Poster Size
Figure 40: Preset poster sizes Touch Save and the Output Formats tab screen is displayed. You are now ready to print your poster. Be certain you place the correct stock in the specified paper tray. DOCUCOLOR 12 USER GUIDE 7–29 OUTPUT FORMATS... - Page 186 OUTPUT FORMATS 7–30 DOCUCOLOR 12 USER GUIDE...
-
Page 187: Job Assembly
DOCUCOLOR 12 USER GUIDE 8–1 JOB ASSEMBLY... -
Page 188: Stored Jobs
You may want to record the job details with the job number in a notebook for future reference. JOB ASSEMBLY 8–2 DOCUCOLOR 12 USER GUIDE... -
Page 189: Store A Job
NOTE: You can not select a job number that already has a job stored in it. You must delete the currently stored job first. Once you have deleted the job you may store the new programming under the same job number. DOCUCOLOR 12 USER GUIDE 8–3 JOB ASSEMBLY... -
Page 190: Retrieve A Job
Only those buttons associated with jobs will be selectable. Touch the button for the job (1-10) to be retrieved. Touch the Confirm button. Press the Start button to process the job. JOB ASSEMBLY 8–4 DOCUCOLOR 12 USER GUIDE... -
Page 191: Delete A Job
Touch the No button to cancel the deletion. Touch the Confirm button to display the Job Assembly tab. You can now store a new job in the copier/printer memory in place of the job you deleted. DOCUCOLOR 12 USER GUIDE 8–5 JOB ASSEMBLY... - Page 192 JOB ASSEMBLY 8–6 DOCUCOLOR 12 USER GUIDE...
-
Page 193: Overview
This chapter contains basic information about loading paper or transparencies and about using paper trays. It also includes some paper usage guidelines for the DocuColor 12. Good quality, 24 lb (90 gsm) bright, white paper with a smooth finish is the standard for color output, as it reduces show-through on 2-sided output and provides the best quality output. - Page 194 NOTE: Paper Trays 2, 3, and 4 can also accommodate 12 x 18 inch paper through a special, optional tray setup procedure performed by a Xerox service representative. If you are interested in this capability, contact your Xerox service representative.
-
Page 195: Paper Tray 5
Paper Tray 5. CAUTION:Do not, at any time, place any objects or materials other than the appropriate stock on Paper Tray 5. Copier/printer damage may occur. Figure 2: Paper Tray 5 DOCUCOLOR 12 USER GUIDE 9–3 PAPER... -
Page 196: Auto Tray Switching - Tools Mode
Tray 2 Paper Supply button on the Basic Copying tab of the Touch Screen. The copier/ printer draws paper from Tray 2 until it is depleted, then switches automatically to Tray 3. PAPER 9–4 DOCUCOLOR 12 USER GUIDE... -
Page 197: Loading Stock
Paper Usage section in this chapter for the recommended paper stock selections, or refer to Figure 3: Opening a ream of paper with seam the Recommended Materials List and the Color side up Materials Usage Guide. DOCUCOLOR 12 USER GUIDE 9–5 PAPER... - Page 198 Testing has shown that paper handling and copy performance vary with room temperature, humidity, paper quality, image area on copies, etc. All of these variables interact and, in some cases, you must decide which paper loading method works best. PAPER 9–6 DOCUCOLOR 12 USER GUIDE...
-
Page 199: Using Transparencies
Offset Catch Tray before running additional sets. NOTE: If the copier/printer has a Sorter/Mailbox, the transparency copies are delivered to the Offset Catch Tray. Transparencies cannot be sorted or stacked in separate bins. DOCUCOLOR 12 USER GUIDE 9–7 PAPER... -
Page 200: Loading Paper Into Trays 1, 2, 3, And 4
Figure 5: A fully opened Paper Tray illustrated in Figure 6. Do not fill the paper tray above the fill line, illustrated in Figure 6 and Figure 7. Fill line Figure 6: Loading a Paper Tray PAPER 9–8 DOCUCOLOR 12 USER GUIDE... - Page 201 Close the paper tray slowly to avoid shifting the Figure 8: Adjusting the Right Paper Guide paper stack. This ensures that the paper is in the correct position when the paper tray is in the operating position. DOCUCOLOR 12 USER GUIDE 9–9 PAPER...
-
Page 202: Loading Stock Into Paper Tray 5
Load letter-head paper face up. • If you are loading transparencies, load them with the white stripe side facing down and as the leading edge. (The leading edge is the edge that feeds into the copier/printer first.) PAPER 9–10 DOCUCOLOR 12 USER GUIDE... - Page 203 Do not interleave transparencies with paper in Paper Tray 5. Select the Transparency Separator feature and the copier/printer will insert blank sheets from a different paper tray between the output transparencies loaded in Paper Tray 5. DOCUCOLOR 12 USER GUIDE 9–11 PAPER...
- Page 204 CAUTION:Do not place any objects or materials other than the appropriate stock on Paper Tray 5. Copier/printer damage may occur. Figure 11: Grasping the Paper Tray 5 tab Figure 12: Extending Paper Tray 5 PAPER 9–12 DOCUCOLOR 12 USER GUIDE...
- Page 205 Push Paper Tray 5 toward the copier/printer until it is securely in place. NOTE: In most cases you will never adjust the front edge guide. Adjust the front edge guide only for 12” x 18” paper. DOCUCOLOR 12 USER GUIDE 9–13 PAPER...
-
Page 206: Using 12 X 18 Inch Or Sra3 Paper
Paper Tray 5. 2. Lift and reposition the Paper Guide in the slot appropriate for the paper size you are using. 3. Tighten the registration thumb screw. Figure 14: Front Paper Guide and registration thumb screw PAPER 9–14 DOCUCOLOR 12 USER GUIDE... - Page 207 Select the appropriate size and type for the stock you have loaded. Refer to “Programming the Paper Supply for Tray 5” for more information. When the job is complete, return the paper guides for Paper Tray 5 to their normal position. DOCUCOLOR 12 USER GUIDE 9–15 PAPER...
-
Page 208: Paper Usage
Color Materials Usage Guide. For additional specific information regarding materials that have been tested and approved for use in the DocuColor 12, refer to the Recommended Materials List and the Color Materials Usage Guide. This list is available off the main Xerox web site (www.xerox.com) and will be... - Page 209 • Any sizes between 11 x 17 inches • A6 and 12 x 18 inches or between A3 and SRA3 Capacity Using Xerox 20 lb (75gsm) or equivalent or Xerox Europe (80gsm): • Paper Tray 1: 500 sheets • Paper Trays 2, 3, 4: 550...
- Page 210 Xerox Europe Colotech + form distribution of paper fibers) • Xerographic copy paper paper • Carbonless papers • Xerox 4024 DP or Xerox • Colored paper* • Clear transparencies (no stripe) Europe Premier for black • Coated papers • Rough paper only •...
-
Page 211: Overview
Overview This chapter describes the Duplex Automatic Document Feeder (DADF), illustrated in Figure 1, for the DocuColor 12 copier/printer. The DADF automatically feeds up to 50 of the same size documents or mixed size documents, one at a time, onto the Document Glass, feeding the top sheet first. - Page 212 NOTE: Using the DADF, black and white output is produced at 50 copies per minute. NOTE: For additional information on materials, see the Recommended Materials List and the Color Materials Usage Guide. DUPLEX AUTOMATIC DOCUMENT FEEDER 10–2 DOCUCOLOR 12 USER GUIDE...
- Page 213 Injury or a document jam may occur. Figure 2: Duplex Automatic Document Never cheat the safety interlock switches. They Feeder components control the built-in safety features of the feeder. DOCUCOLOR 12 USER GUIDE 10–3 DUPLEX AUTOMATIC DOCUMENT FEEDER...
-
Page 214: Component Names And Functions
Documents placed on the Duplex Automatic Document Feeder Tray feed in top-to-bottom sequence directly onto the Document Glass. Documents are delivered to the Document Output Tray, in order and face down, after they have been copied. DUPLEX AUTOMATIC DOCUMENT FEEDER 10–4 DOCUCOLOR 12 USER GUIDE... -
Page 215: Document Specifications
8.5 x 5.5 inches, 8.5 x 11 inches, 8.5 x 14 inches, 11 x 17 inches, A4. – European market A5, A4, A3, 8.5 x 13 inches, 8.5 x 14 inches, 8.5 x 11 inches, 11 x 17 inches. DOCUCOLOR 12 USER GUIDE 10–5 DUPLEX AUTOMATIC DOCUMENT FEEDER... - Page 216 Enter the document size by using the Original Size feature or use the Edge Erase feature in the Added Features tab. Refer to the section “Added Features” for more information. DUPLEX AUTOMATIC DOCUMENT FEEDER 10–6 DOCUCOLOR 12 USER GUIDE...
-
Page 217: Documents Not Recommended
DADF belt is copied) • Documents with black carbon • Documents smaller than A5 size (8.5 x 5.5 inches) • Paper weight heavier than 32 lb (128 gsm) DOCUCOLOR 12 USER GUIDE 10–7 DUPLEX AUTOMATIC DOCUMENT FEEDER... -
Page 218: Loading The Documents
If the guide is set too loose, the documents may skew as they feed, which could cause a document jam. Figure 4: Adjusting the document guide DUPLEX AUTOMATIC DOCUMENT FEEDER 10–8 DOCUCOLOR 12 USER GUIDE... - Page 219 Press the Start button. The documents automatically feed one by one, onto the Document Glass. The feeding begins from the top of the stack of documents. Figure 5: Extending the DADF Output Tray DOCUCOLOR 12 USER GUIDE 10–9 DUPLEX AUTOMATIC DOCUMENT FEEDER...
-
Page 220: Clearing A Document Jam
Document Chute, as illustrated in Left Cover Figure 7. Document Chute Remove the jammed documents. Check for and remove any torn pieces of paper. Figure 7: Opening the Left Cover and the Document Chute DUPLEX AUTOMATIC DOCUMENT FEEDER 10–10 DOCUCOLOR 12 USER GUIDE... - Page 221 Document Glass, as illustrated in Figure 9. Remove any paper that is jammed in the DADF belt, as illustrated in Figure 10. Close the DADF. Figure 9: Raising the DADF Figure 10: Removing jammed paper DOCUCOLOR 12 USER GUIDE 10–11 DUPLEX AUTOMATIC DOCUMENT FEEDER...
- Page 222 Reload the stack of documents into the Duplex Automatic Document Feeder according to the instructions on the Touch Screen. Reposition the document guide. Press the Start button to restart your copy job. DUPLEX AUTOMATIC DOCUMENT FEEDER 10–12 DOCUCOLOR 12 USER GUIDE...
-
Page 223: Overview
11. Sorter/Mailbox Overview The DocuColor 12 copier/printer may be equipped with an optional Sorter/Mailbox, as illustrated in Figure 1. The Sorter/Mailbox contains the following components: Sorter/Mailbox Release Lever Sorter/Mailbox Bins: Copies are delivered here in the Sort or Stack Mode. - Page 224 Injury or a document jam may occur. This switch shuts off the Sorter/Mailbox power when you open the front doors or when you move the Sorter/Mailbox to the right to clear a paper jam. SORTER/MAILBOX 11–2 DOCUCOLOR 12 USER GUIDE...
-
Page 225: Using The Sorter/Mailbox
Using the Sorter/Mailbox The optional Sorter/Mailbox performs like a sorter for the DocuColor 12 standalone copier configuration. It performs like a sorter or mailbox for the DocuColor 12 copier/printer configuration. Contact your Xerox representative to change functionality. When you use the optional Sorter/Mailbox, copies... - Page 226 Offset Catch Tray. NOTE: • Any job that uses Paper Tray 5 is always delivered to the Offset Catch Tray. • The number of collated sets is limited to 10, the number of bins. SORTER/MAILBOX 11–4 DOCUCOLOR 12 USER GUIDE...
-
Page 227: Clearing A Paper Jam
Figure 2. Figure 2: Sorter/Mailbox Release Lever Remove any paper that is caught in the interface between the copier/printer Right Door and Sorter/ Mailbox, as illustrated in Figure 3. DOCUCOLOR 12 USER GUIDE 11–5 SORTER/MAILBOX... - Page 228 3. Remove the jammed paper gently. 4. Lift the handle to secure the baffle. 5. Close the Left Front Door. Figure 3: Removing paper from the interface area Figure 4: Behind the Left Front Door SORTER/MAILBOX 11–6 DOCUCOLOR 12 USER GUIDE...
- Page 229 Continue your copy job if a message on the screen directs you to press Start to continue. If the Paper jam message reappears, repeat the preceding steps to clear a remaining paper jam. Figure 6: Behind the Right Front Door (lower portion) DOCUCOLOR 12 USER GUIDE 11–7 SORTER/MAILBOX...
- Page 230 SORTER/MAILBOX 11–8 DOCUCOLOR 12 USER GUIDE...
-
Page 231: Introduction
12. Accessories High Capacity Feeder Introduction A High Capacity Feeder (HCF) may be attached to and used with your DocuColor 12 Copier/Printer (Figure 1). Although labeled Tray 6, the High Capacity Feeder is referred to as the HCF. The HCF is an optional accessory for the DocuColor 12 Copier/Printer. -
Page 232: Loading Paper
Align the tabs on the bottom and top of the guide with the slots on the bottom and top of the tray for the new size. Push the guide firmly into the slots until it is secure. Figure 3: The HCF Paper Guide ACCESSORIES 12–2 DOCUCOLOR 12 USER GUIDE... -
Page 233: Clearing An Hcf Paper Jam
Clearing an HCF paper jam Follow the Touch Screen messages in order to clear the jam. Slide the HCF away from the printer, as illustrated in Figure 4. Figure 4: Moving the HCF from the printer DOCUCOLOR 12 USER GUIDE 12–3 ACCESSORIES... - Page 234 (Figure 5). Remove any wrinkled or damaged paper from the paper stack. Close the paper tray and slide the HCF to the right, into position against the printer. Figure 5: Opening the tray to remove jammed paper ACCESSORIES 12–4 DOCUCOLOR 12 USER GUIDE...
-
Page 235: Accessing The Hcf From The Client Workstation
Select the Device Options tab. From the Installable options scroll menu, select Tray 6 (High Capacity Feeder). From the “Change setting for Tray 6 (High Capacity Feeder)” menu, select Installed. Click OK and close the Printers window. DOCUCOLOR 12 USER GUIDE 12–5 ACCESSORIES... - Page 236 Select the Device Settings tab. Scroll through the list and highlight Tray 6 (High Capacity Feeder). From the “Change Tray 6 (High Capacity Feeder) setting” menu, select Installed. Click OK and close the Printers window. ACCESSORIES 12–6 DOCUCOLOR 12 USER GUIDE...
- Page 237 Highlight the file and click Select. In the Chooser, select Setup. A list of options displays. Select Configure. At the High Capacity Feeder option, select Installed, and then select OK. Click OK and close the Chooser. DOCUCOLOR 12 USER GUIDE 12–7 ACCESSORIES...
-
Page 238: Overview
Convenience Stapler Overview The Convenience Stapler (Figure 6) may be attached to and used with your DocuColor 12 Copier/Printer. The Convenience Stapler attaches to the back left corner of your DocuColor 12 Copier/Printer work surface. Figure 6: DocuColor 12 with a Convenience... -
Page 239: Indicator Lights
When the red light is on, the staple cartridge has fewer than 20 staples available and should be replaced. • When the green and red lights are off, a jam has occurred or the stapler is unplugged. Figure 8: Indicator Lights DOCUCOLOR 12 USER GUIDE 12–9 ACCESSORIES... - Page 240 Ordering staple cartridges The stapler contains a cartridge,108R00053, that holds 5000 staples and is easily replaceable. Call the numbers listed below for consumable supplies: 1-800-822-2200 Canada: 1-800-668-0199 Canada (French):1-800-668-0133 Europe: _______________ Latin America: _______________ ACCESSORIES 12–10 DOCUCOLOR 12 USER GUIDE...
-
Page 241: Using The Stapler
Figure 9. • When the set is inserted into the stapler, a switch activates the stapling action automatically. • Remove and reinsert the set if another staple is required. Figure 9: Paper guides DOCUCOLOR 12 USER GUIDE 12–11 ACCESSORIES... -
Page 242: Adding Staples
Push the cartridge firmly to the back until the cartridge clicks into place. Close the cover by moving it down until it clicks close. Figure 11: Removing the cartridge ACCESSORIES 12–12 DOCUCOLOR 12 USER GUIDE... -
Page 243: Clearing A Stapler Jam
If the set itself is jammed, remove the staple cartridge, as described in “Adding Staples,” then pull out the jammed set. Clear the jammed staple and reinsert the cartridge or insert a new cartridge. DOCUCOLOR 12 USER GUIDE 12–13 ACCESSORIES... -
Page 244: Troubleshooting
Check the power cord for the stapler to ensure that it is plugged in (Figure 12). Figure 12: The Stapler power cord Perform the procedure for “Clearing a stapler jam.” If the stapler is still not operating correctly, call for assistance. ACCESSORIES 12–14 DOCUCOLOR 12 USER GUIDE... -
Page 245: 13. Problem Solving
13. Problem Solving Overview The DocuColor 12 Copier/Printer is designed to help you find and solve problems as they happen. The copier/printer can detect problems and display the corrective action on the screen, as illustrated in Figure 1. If the... - Page 246 With the power on and the copier/printer in a fault condition, press the Stop button on the Control Panel. Record the following information so that you can provide it to the Xerox representative at the support center: • With the Stop button depressed, record the displayed Fault Codes.
-
Page 247: Paper Jam Clearance
The Touch Screen displays the appropriate message screen for the area of the copier/printer which needs to be checked until all jams are cleared. DOCUCOLOR 12 USER GUIDE 13–3 PROBLEM SOLVING... -
Page 248: Preventing Paper Jams
Excessive curl of the paper sometimes causes paper jams. • Load freshly opened paper into the appropriate paper tray. If the paper jams cease, dispose of the paper that caused the jams. PROBLEM SOLVING 13–4 DOCUCOLOR 12 USER GUIDE... -
Page 249: Paper Jam Behind The Left Door
If a paper jam occurs near Paper Tray 5, lift the release lever on Paper Tray 5 and open the panel, as illustrated in Figure 5. Close all open panels. Figure 5: Opening the Paper Tray 5 Panel DOCUCOLOR 12 USER GUIDE 13–5 PROBLEM SOLVING... -
Page 250: Paper Jam Behind The Right Door
Open the Right Door, as illustrated in Figure 7. Figure 7: Opening the Right Door Remove all paper that is visible in the area. Close the Right Door. If there is a Sorter/Mailbox, push the Sorter/ Mailbox back into place. PROBLEM SOLVING 13–6 DOCUCOLOR 12 USER GUIDE... -
Page 251: Paper Jam Behind The Front Door
Check the Touch Screen for a new message indicating the area of the jam. KEY POINT: Check and clear all jams in the Paper Path Module before closing the module. Figure 9: Rotating the green handle clockwise DOCUCOLOR 12 USER GUIDE 13–7 PROBLEM SOLVING... - Page 252 In the Fuser area, 2, carefully pull any paper in the entry area to the left to free it, as illustrated in Figure 11. Figure 11: Fuser Area 2 PROBLEM SOLVING 13–8 DOCUCOLOR 12 USER GUIDE...
- Page 253 Firmly push in the Paper Path Module until it is in place. Turn the green handle counterclockwise to lock the module, as illustrated in Figure 14. Figure 14: Rotating the green handle counterclockwise DOCUCOLOR 12 USER GUIDE 13–9 PROBLEM SOLVING...
-
Page 254: Paper Jam Inside A Paper Tray
Adjust the edge guides so they are lightly touching Figure 15: Clearing a Paper Jam inside a Paper Tray the paper. Close the paper tray slowly to avoid shifting the paper stack. PROBLEM SOLVING 13–10 DOCUCOLOR 12 USER GUIDE... -
Page 255: Paper Jam Inside Paper Tray 5
Adjust the edge guide each time you load paper into Paper Tray 5. Figure 17: Lifting the top of Paper Tray 5 • If Paper Tray 5 is not fully extended, paper jams or misregistration may occur. DOCUCOLOR 12 USER GUIDE 13–11 PROBLEM SOLVING... -
Page 256: Resolving Hardware Problems
If power is restored, continue to operate the copier/ printer normally. If the GFP reactivates, call your representative. Refer to section 1, “Get- ting to know your DocuColor 12,” for addi- tional information. PROBLEM SOLVING 13–12... -
Page 257: Resolving Programming Problems
Refer to chapter 2, “Getting to know your DocuColor 12,” for more information about buttons. You cannot complete the programming. The Attempt to complete all the programming copier/printer times out too quickly and more quickly. -
Page 258: Resolving Processor Problems
Ensure that the height of the stack does not exceed the MAX fill line. the Paper Tray 5 Check that the paper guide is not too tight. The paper guide should be adjusted to be just snug against the paper stack. PROBLEM SOLVING 13–14 DOCUCOLOR 12 USER GUIDE... - Page 259 (75 gsm). Also, avoid imaging the copy paper in the area of the fold or the ies made on paper that crease. has been folded or creased. Handle the copy paper carefully. Slight folds or creases may result in output deletions. DOCUCOLOR 12 USER GUIDE 13–15 PROBLEM SOLVING...
- Page 260 Duplex Auto- rate before using them as original documents. matic Document Feeder. PROBLEM SOLVING 13–16 DOCUCOLOR 12 USER GUIDE...
- Page 261 Place the copier/printer and paper in a room with air conditioning and low humidity to minimize the moisture in the environment. Attempt to copy on thicker paper or on paper stock that is less sensitive to moisture. DOCUCOLOR 12 USER GUIDE 13–17 PROBLEM SOLVING...
- Page 262 Load Paper in Tray 6 Check that paper is loaded correctly and the paper size guide is properly set. message is displayed. Ensure that paper is not loaded over the maximum fill line. PROBLEM SOLVING 13–18 DOCUCOLOR 12 USER GUIDE...
-
Page 263: Resolving Output Quality Problems Using The Basic Copying, Added Features, Or Image Quality Tabs
• Ensure that the selected Original Type is Graphics & Map. The entire document is not being copied Enter the Original Size. Reduce the image. Ensure that the document placement matches the Original Orientation setting. DOCUCOLOR 12 USER GUIDE 13–19 PROBLEM SOLVING... - Page 264 Shift feature or the Edge Erase feature of the Added Features tab. Program the Original Size in the Added Fea- tures tab for the dark bordered document that you wish to copy. PROBLEM SOLVING 13–20 DOCUCOLOR 12 USER GUIDE...
- Page 265 Select less color (toward Pastel) Saturation in the Image Quality tab. Output has low contrast. Select more color (toward Vivid) Saturation in the Image Quality tab. Select the Graphics & Maps option in the Original Type feature. DOCUCOLOR 12 USER GUIDE 13–21 PROBLEM SOLVING...
- Page 266 Select the Text or Graphics & Maps option in the Original Type feature. Ensure that the document is held flat on the Document Glass and that the document cover is closed as much as possible. DO NOT force the cover closed. PROBLEM SOLVING 13–22 DOCUCOLOR 12 USER GUIDE...
- Page 267 Feeder (DADF). Ensure that the Edge Erase is at No Erase (2 mm). Increasing the amount of Edge Erase should remove more of the dark bands. Increasing the amount of Edge Erase, however, may eventually cause image loss. DOCUCOLOR 12 USER GUIDE 13–23 PROBLEM SOLVING...
- Page 268 Duplex Automatic Docu- ment Feeder (DADF). Copies made from a newspaper, a map, or a The DocuColor 12 copier/printer detects low photograph have background when Original densities of color and reproduces them. This Type is defined as Graphics & Maps or is especially true with the Graphics &...
-
Page 269: Original Type Selection And Output
Photo Balance functions. The System Administrator can select Text or Photo for Photo & Text and Text modes. Refer to the “Tools Mode, System Image Quality” section in the System Administration Guide for more information. DOCUCOLOR 12 USER GUIDE 13–25 PROBLEM SOLVING... - Page 270 PROBLEM SOLVING 13–26 DOCUCOLOR 12 USER GUIDE...
-
Page 271: 14. Technical Information
14. Technical Information Overview The information in this section is provided for your convenience and can be supplemented with information provided by your Xerox sales or service representative. 7 14 DOCUCOLOR 12 USER GUIDE 14–1 TECHNICAL INFORMATION... -
Page 272: Electrical Power Requirements (115 Vac - 60 Hz)
Max. Power Consumption 2.112 kVA Current Loads @ 115V Warm-up 12.5 Amps (1.60 kVA) (approx.) Stand-by Average 7 Amps (800 VA) (approx.) Average Run 10 Amps (1.2 kVA) (approx.) Mode (4-Color) 7 14 TECHNICAL INFORMATION 14–2 DOCUCOLOR 12 USER GUIDE... -
Page 273: Electrical Power Requirements (220-240 Vac - 50 Hz)
2.2 kVA @ 220 Volts Current Loads @ 240V Warm-up 8.0 Amps (1.6 kVA) (approx.) Stand-by Average 3.8 Amps (800 VA) (approx.) Average Run 5.7 Amps (1.2 kVA) (approx.) Mode (4-Color) 7 14 DOCUCOLOR 12 USER GUIDE 14–3 TECHNICAL INFORMATION... -
Page 274: Environmental Requirements
The copier/printer carries the CE symbol for the 220-240 V, 50 Hz version. RFI Emissions This copier/printer complies with the following: • US/Canada: FCC Class B, ICES-003 Class B • Europe: EMC Directive (89/336/EEC) -EN55022-A Class B, EN61000-3-2. 7 14 TECHNICAL INFORMATION 14–4 DOCUCOLOR 12 USER GUIDE... -
Page 275: Capabilities
* From Document Glass to the Output Catch Tray, the black and white output rate is 50 copies per minute.With a DADF, the black and white output rate is 40 copies per minute. 7 14 DOCUCOLOR 12 USER GUIDE 14–5 TECHNICAL INFORMATION... -
Page 276: Physical Dimensions
NOTE: The dimensions listed include the Processor and the standard Catch Tray. Floor space requirements can vary depending on copier/printer options and placement location. Contact your Xerox sales or service representative to evaluate your exact requirements. Copier with DADF Width 24.5 in. -
Page 277: System Modes Of Operation
Ready Mode to Lower Power Mode As set by System Administrator: 1-240 minutes Factory Default: 15 minutes Low Power Mode to Sleep Mode As set by System Administrator: 15-240 min- utes Factory Default: 60 minutes 7 14 DOCUCOLOR 12 USER GUIDE 14–7 TECHNICAL INFORMATION... -
Page 278: Copy Rates For Paper Trays 1, 2, 3, And 4: Normal Paper
Document Glass. Black / White Mode Color Mode Simplex Duplex Simplex Duplex B5 LEF B5 SEF A4 LEF A4 SEF Letter LEF Letter SEF Legal SEF B4 SEF A3 SEF 7 14 TECHNICAL INFORMATION 14–8 DOCUCOLOR 12 USER GUIDE... -
Page 279: Copy Rates For Paper Trays 2, 3, And 4: Limited Heavyweight Paper
(106—128 gsm) fed from trays 2, 3, and 4 are listed below. Black / White Mode Color Mode Simplex Simplex B5 LEF B5 SEF A4 LEF A4 SEF Letter LEF Letter SEF Legal SEF B4 SEF A3 SEF 7 14 DOCUCOLOR 12 USER GUIDE 14–9 TECHNICAL INFORMATION... -
Page 280: Copy Rates For Tray 5
A4 / Letter LEF 64—105 gsm OHP (Transparency) A4 / Letter LEF Heavyweight Paper A4 / Letter LEF 106—163 gsm Extra Heavyweight Paper A4 / Letter LEF 164—250 gsm Postcard Postcard SEF 7 14 TECHNICAL INFORMATION 14–10 DOCUCOLOR 12 USER GUIDE... -
Page 281: Dadf Specifications
68 dB(A) Dimensions Width: 25.19 inches (640 mm) Height: 5.11inches (130 mm) Depth: 21.06 inches (535 mm) Weight 28.7 lbs. (14 kg) Machine space Within the space required for the copier/printer 7 14 DOCUCOLOR 12 USER GUIDE 14–11 TECHNICAL INFORMATION... - Page 282 100 sheets of 20 lb. (75 gsm) paper Weight 75 lbs (34 kg) Dimensions Width: 28 (711.2 mm) Height: 40.5 inches (1029 mm) Depth: 24.3 inches (616 mm) Noise while running 56 dB(A) 7 14 TECHNICAL INFORMATION 14–12 DOCUCOLOR 12 USER GUIDE...
-
Page 283: Metric Conversion Chart
11 x 17 279 x 432 12.5 297 x 420 13.0 12 x 17 305 x 432 13.4 12 x 18 305 x 457 13.45 SRA3 320 x 450 12.6 x 17.7 7 14 DOCUCOLOR 12 USER GUIDE 14–13 TECHNICAL INFORMATION... - Page 284 7 14 TECHNICAL INFORMATION 14–14 DOCUCOLOR 12 USER GUIDE...
- Page 285 Basic Copying tab: 4-1–4-24 Buttons: 2-3 2 Sided Copying: 5-4 Clear: 2-6 Copy Output: 4-8 Clear All: 2-5 Output Color: 4-3 Interrupt: 2-4 Overview: 4-1 Low Power button: 2-4 Paper Supply: 4-20 Numeric Keypad: 2-3 DOCUCOLOR 12 USER GUIDE 15-1 Index...
- Page 286 Duplex Automatic Document Feeder Tray: 10-4 Preset Color Balance: 6-10 Duplex path: 2-17 Sharpness: 6-22 Variable Color Balance: 6-24 Independent X-Y (Reduce/Enlarge): 4-15, 4-17 Edge deletions Auto%: 4-19 Problem solving: 13-21 Variable%: 4-18 Edge Erase: 5-25–5-28 Information screen Index 15-2 DOCUCOLOR 12 USER GUIDE...
- Page 287 Making copies: 3-1–3-16 Transparency Separators: 7-11 Making copies with features: 3-8–3-15 Output Quality Problems Margin Shift: 5-16–5-24 Background: 13-24 Auto Center: 5-18 Show-through: 13-20, 13-22 Corner Shift: 5-20 Black border: 13-20, 13-24 No Shift: 5-17 DOCUCOLOR 12 USER GUIDE 15-3 Index...
- Page 288 Auto Paper: 13-15 Paper Tray 5: 9-3 Copies cause DADF jams: 13-16 Copy Rates: 14-10 Excessive paper curl: 13-17 Feed problem solving: 13-14 Image deletions: 13-15 Jam clearance: 13-11 Multiple feed: 13-14 Loading Paper: 9-10 Index 15-4 DOCUCOLOR 12 USER GUIDE...
- Page 289 Left Cover: 11-1 Message area: 2-7 Offset Catch Tray: 11-1 Option buttons: 2-9 See Sorter/Mailbox: 2-17 Problem solving: 13-13 Specifications: 14-11, 14-12 Save button: 2-10 Using the: 11-3 Using: 2-11 Sorter/Mailbox: 11-1–11-7 Transfer Drums: 2-17 DOCUCOLOR 12 USER GUIDE 15-5 Index...
- Page 290 Two-Sided Copying: 5-4 Uncollated output (Sorter/Mailbox): 11-4 Variable Color Balance: 6-24 Variable Edge Erase: 5-27 Variable Image Repeat: 7-8 Variable Shift: 5-22 Variable%: 4-18 Variable% (Reduce/Enlarge): 4-15 Warm (color balance): 6-13 White border edges: 2-20 Index 15-6 DOCUCOLOR 12 USER GUIDE...
- Page 292 Prepared by: Xerox Corporation Multinational Customer and Service Education 780 Salt Road Webster, New York 14580 701P33271...