ActionTec GT724WGR User Manual
Wireless dsl modem
Hide thumbs
Also See for GT724WGR:
- Quick start manual (8 pages) ,
- Specifications (4 pages) ,
- User manual (91 pages)

Related Manuals for ActionTec GT724WGR


Summary of Contents for ActionTec GT724WGR
-
Page 1: User Manual
Wireless DSL Modem Model #: GT724WGR User Manual Ver 1.0 Solutions for the Digital Life ™... -
Page 2: Table Of Contents
Table of Contents 1 Introduction Minimum System Requirements Features Getting to Know the Modem 2 Performing a Quick Setup Accessing Quick Setup Screens Changing the Password 3 Viewing the Modem’s Status Broadband Connection Status Network Status 4 Configuring Wireless Settings Accessing Wireless Setup Basic Wireless Setup Wireless Advanced Settings... - Page 3 Actiontec Wireless DSL Modem User Manual 6 Configuring Security Settings Accessing Wired Security Screens Admin User Name and Password Firewall Port Forwarding DMZ Hosting NAT (Network Address Translation) 7 Configuring Internet Access Controls Accessing Internet Access Control Screens Services Blocking...
-
Page 4: Introduction
Introduction Thank you for purchasing the Actiontec Wireless DSL Modem. The Modem is the simplest way to connect computers to a high-speed broadband connection. This easy-to-use product is perfect for the home office or small business. If you want to take your computing to the next level, the Wireless DSL Modem is sure to be one of the keys to your success. -
Page 5: Features
Actiontec Wireless DSL Modem User Manual Features ADSL WAN port (RJ-11) Full-rate ANSI T1.413 Issue 2, ITU G.992.1(G.dmt) and G.992.2(G.lite) standard compliance Auto-handshake for different ADSL services Bridged Ethernet over ATM, PPP over ATM, PPP over Ethernet Precise ATM traffic shaping... -
Page 6: Getting To Know The Modem
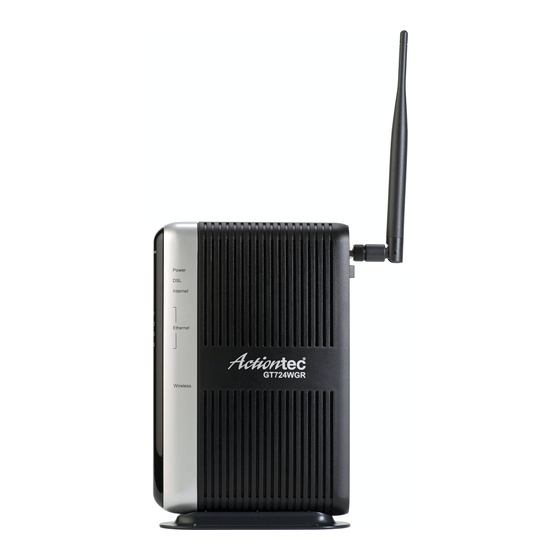
Chapter 1 Introduction Getting to Know the Modem This section contains a quick description of the Modem’s lights, ports, etc. The Modem has several indicator lights (LEDs) on its front panel and a series of ports on its rear panel. Front Panel The front panel of the Modem features eight lights: Power, DSL, Internet, Ethernet (4), and Wireless. - Page 7 Actiontec Wireless DSL Modem User Manual Internet Light When the Internet light glows steadily, the Modem is connected to the DSL provider. Ethernet Lights The Ethernet lights illuminate when the Modem is connected to one or more computers via its yellow Ethernet ports.
- Page 8 Chapter 1 Introduction Reset Switch Depressing the Reset switch restores the Modem’s factory default settings. To reset the Modem, depress and hold the Reset switch for five to seven seconds. The reset process will start after releasing the switch, during which the Power light will turn from green to orange.
- Page 9 Actiontec Wireless DSL Modem User Manual This page left intentionally blank.
-
Page 10: Performing A Quick Setup
Performing a Quick Setup This chapter is a guide through a quick set up of the Modem, including how to connect the Modem to the To complete the quick setup, have the Welcome Letter or Worksheet handy. If the document is not available, contact the immediately. - Page 11 Actiontec Wireless DSL Modem User Manual 2. Another screen appears. Click Manual Setup for Internet Access. 3. Follow the instructions in the“Welcome to the Quick Setup”screen, then click Next. 4. At the top of the next window, select the type of connection used by the ISP.
-
Page 12: Changing The Password
Chapter 2 Performing a Quick Setup 5. Click Apply at the bottom of the screen. 6. Read the instructions on the next screen. The Modem is successfully configured. The Power light flashes rapidly while the Modem restarts, then glows steadily green when fully operational. - Page 13 Actiontec Wireless DSL Modem User Manual 4. Click Apply at the bottom of the screen. 5. Read the instructions on the next screen. The user name and password are successfully changed. Once the Modem has rebooted, the new user name and password are active. To access the Modem’s Web Configuration screens, the new user name and password...
-
Page 14: Viewing The Modem's Status
Viewing the Modem’s Status After configuring the Modem, the Modem’s connection and network status can be viewed. The Internet connection status is viewed in the “Broadband Connection Status” screen, while the network status is viewed in the “My Network” screen. Broadband Connection Status To view the Modem’s connection statistics, select Status from the strip of icons at the top of any Gatetway GUI screen. - Page 15 Actiontec Wireless DSL Modem User Manual PPP Status The middle section of the Broadband Connection Status screen displays the status of the Modem’s PPP connection, including user name, authentication failures, and packets sent and received. DSL Status The bottom section of the Broadband Connection Status screen displays the status of the Modem’s DSL connection, including mode settings, connection status, and...
-
Page 16: Routing Table
Chapter 3 Viewing the Modem’s Status In the menu on the left side of the Broadband Connection Status screen, there are two other options available to view: NAT Table and Routing Table. Click to gen- erate the option of choice. NAT Table Selecting NAT Table generates the “NAT Table”... -
Page 17: Network Status
Actiontec Wireless DSL Modem User Manual Network Status To view the Modem’s network status, select My Network from the strip of icons at the top of any Modem GUI screen. The “My Network” screen appears, listing all devices connected to the network. From this screen, various settings can be accessed, including Website blocking, Schedule Rules, and Enable Application. -
Page 18: Configuring Wireless Settings
Configuring Wireless Settings This chapter explains how to set up the Modem’s wireless network capabilities, includ- ing setting up wireless security and viewing the wireless connection status. Accessing Wireless Setup To access the Wireless Settings configuration screens, follow these instructions: 1. - Page 19 Actiontec Wireless DSL Modem User Manual A login window appears. Enter the user name and password in the appropri- ate text boxes, then click OK. ☞ Note: The default user name is “admin.” The default password is “password.” 4. The “Wireless Basic Settings” screen appears, which guides the user through a...
-
Page 20: Basic Wireless Setup
Chapter 4 Configuring Wireless Settings Basic Wireless Setup To perform a basic setup of a wireless network using the Modem: 1. In the “Wireless Basic Settings” screen, turn the Modem’s wireless radio on by selecting On. 2. Create a name for the wireless network and enter it in the “ESSID” text box. 3. -
Page 21: Wireless Security
Actiontec Wireless DSL Modem User Manual Wireless Security The first section of the Wireless Advanced Settings screen involves wireless security (securing wireless traffic as it transmits through the air). The Modem offers three types of wireless security: WPA WEP, and WEP+802.1x.. - Page 22 Chapter 4 Configuring Wireless Settings Selecting WEP in the Wireless Advanced Settings screen generates the “WEP Key” screen. Here, the authentication type, encryption level, and WEP keys are entered to activate WEP (Wired Equivalent Privacy) security encryption for the wireless network.
- Page 23 Actiontec Wireless DSL Modem User Manual 256-bit 256-bit WEP requires one or more keys, each key comprising 29 hexa- WEP - decimal pairs. A hexadecimal digit consists of an alphanumeric character ranging from 0-9 or A-F. To create a 256-bit WEP key, activate Key 1 by clicking in the appro- priate circle, select “256 bit”...
- Page 24 Chapter 4 Configuring Wireless Settings ESSID Broadcast Selecting ESSID Broadcast in the Wireless Advanced Settings screen generates the “ESSID Broadcast” screen. To prevent unwanted computers from joining the Modem’s wireless network by using an ESSID of “Any,” select Disable in the ESSID Broadcast screen. To broad- cast the wireless network’s ESSID, select Enable.
- Page 25 Actiontec Wireless DSL Modem User Manual This feature allows the user to control the wireless LAN network by denying or allowing wireless access by specifying the MAC address of the wireless client(s) allowed or denied access on the wireless network. To do this, follow the instruc- tions on-screen.
-
Page 26: Wireless Status
Chapter 4 Configuring Wireless Settings Wireless Status To view the Modem’s wireless status and settings, select Wireless Status from the menu on the left side of the “Wireless Basic Settings” screen. The “Wireless Status” screen appears, which displays all of the settings of the Modem’s wireless network settings. - Page 27 Actiontec Wireless DSL Modem User Manual This page left intentionally blank.
-
Page 28: Configuring Advanced Setup Options
Configuring Advanced Setup Options This chapter explains how to configure the Modem’s advanced setup options, such as Remote Management, DHCP settings, and Quality of Service (QoS). Accessing the Advanced Setup Options To access the “Advanced Setup” options, follow these instructions: 1. - Page 29 Actiontec Wireless DSL Modem User Manual 2. The Main screen appears. Click Advanced Setup. A login window appears. Enter the user name and password in the appropri- ate text boxes, then click OK. ☞ Note: The default user name is “admin.” The default password...
-
Page 30: Dsl Settings
Chapter 5 Configuring Advanced Setup Options 4. The “Advanced Setup” screen appears. To modify a specific configuration, click on its name in the menu bar on the left, or from the list in the middle of the screen. DSL Settings To access DSL Settings, select DSL Settings from the “Advanced Setup”... -
Page 31: Dhcp Settings
Actiontec Wireless DSL Modem User Manual DHCP Settings Selecting DHCP Settings in the “Advanced Setup” screen generates the “DHCP Settings” screen. The Modem has a built-in DHCP (Dynamic Host Configuration Protocol) server that automatically assigns a different IP address to each computer on the network, eliminating IP address conflicts. - Page 32 Chapter 5 Configuring Advanced Setup Options Ending IP Address This is the IP address at which the DHCP server stops assigning IP addresses. We recommend keeping the factory default settings (192.168.0.254). The beginning and ending IP addresses define the IP address range of the Modem.
-
Page 33: Lan Ip Address
Actiontec Wireless DSL Modem User Manual DNS Server 2 This is the secondary DNS provided by the ISP. If the ISP provided secondary DNS server information, enter it here. If not, leave the text box intact. When finished in this screen, click Apply to activate any changes made. -
Page 34: Wan Ip Address
Chapter 5 Configuring Advanced Setup Options WAN IP Address Selecting WAN IP Address in the “Advanced Setup” screen causes a warning screen to appear. Read the on-screen warning, then click Yes to continue. The “WAN IP Address” screen appears. - Page 35 Actiontec Wireless DSL Modem User Manual WAN IP Address allows manual set up of the IP address of the Modem. To do this: ☞ Note: Some DSL providers use PPPoE to establish communica- tion with an end user. Other types of broadband Internet con- nections (such as fixed point wireless) may use either DHCP or static IP address.
-
Page 36: Qos Settings Upstream
Chapter 5 Configuring Advanced Setup Options QoS Settings Upstream Selecting QoS Settings Upstream from the “Advanced Setup” screen causes the “QoS Upstream Settings” screen to appear. QoS (Quality of Service) allows the prioritization of certain types of data traf- fic (such as VoIP traffic) over other types of traffic (such as standard data). Both upstream (data coming into the network) and downstream (data going out of the network) traffic can be prioritzed using QoS. - Page 37 Actiontec Wireless DSL Modem User Manual Total Available Bandwidth Displays the total amount of available bandwidth (in kilobits per second). High Priority Bandwidth Enter the amount of high priority bandwidth to be used by the prioritized traffic type (cannot exceed total available bandwidth).
-
Page 38: Qos Settings Downstream
Chapter 5 Configuring Advanced Setup Options QoS Settings Downstream Selecting QoS Settings Downstream from the “Advanced Setup” screen causes the “QoS Downstream Settings” screen to appear. The “QoS Downstream Settings” screen is identical to the “QoS Upstream Settings” screen, with the exception of the “Trusted Mode” and “Set IP Precedence” options. Use this screen to configure QoS for data going out of the network. -
Page 39: Qos Status
Actiontec Wireless DSL Modem User Manual QoS Status Selecting QoS Status from the “Advanced Setup” screen causes the “QoS Status” screen to appear. This screen displays the status of QoS upstream and downstream traffic, and differentiates both streams into high priority and normal priority traffic. -
Page 40: Telnet Timeout Setting
Chapter 5 Configuring Advanced Setup Options 3. Activate Remote Management by selecting the appropriate On radio button. 4. Write down the WAN IP address of the Modem (see “WAN IP Address”). 5. On a computer outside of the network, open a Web browser and enter the Modem’s WAN IP address in the Address text box. -
Page 41: Dynamic Routing
Actiontec Wireless DSL Modem User Manual Dynamic Routing Selecting Dynamic Routing in the “Advanced Setup” screen generates the “Dynamic Routing” screen. If another gateway or router is set up behind the Modem in the network configu- ration, consult the documentation that came with the other gateway to see what kind of Dynamic Routing is required, then select the needed option. -
Page 42: Upnp (Universal Plug And Play)
Chapter 5 Configuring Advanced Setup Options UPnP (Universal Plug and Play) Selecting UPnP in the “Advanced Setup” screen generates the “ ” screen. In this screen, the Universal Plug and Play option is turned on or off by activating the appropriate circle. -
Page 43: Remote Syslog Capture
Actiontec Wireless DSL Modem User Manual Remote Syslog Capture Selecting Remote Syslog Capture in the “Advanced Setup” screen generates the “Remote Syslog Capture” screen. In this screen, the user can configure the Modem to allow a remote computer to access the Modem’s system activity logs. -
Page 44: Configuring Security Settings
Configuring Security Settings This chapter explains how to configure the Modem’s wired security capabilities, including firewall settings, hosting, and network address translation. Accessing Wired Security Screens To access the Wired Security configuration screens, follow these instructions: 1. Open a Web browser. In the “Address” text box, type: http://192.168.0.1 then press Enter on the keyboard. -
Page 45: Admin User Name And Password
Actiontec Wireless DSL Modem User Manual A login window appears. Enter the user name and password in the appropri- ate text boxes, then click OK. ☞ Note: The default user name is “admin.” The default password is “password.” 4. The “Security” screen appears. To modify a specific configuration, click on its name in the menu bar on the left, or from the list in the middle of the screen. -
Page 46: Firewall
Chapter 6 Configuring Security Settings Firewall Selecting Firewall in the Security screen generates the “Firewall Settings” screen. Select the level of security needed for the network. ☞ Note: If VPN connections need to made through the Modem, the Firewall must be set to Off. No VPN connections can be made if the Firewall setting is at Custom, High, Medium, or Low. - Page 47 Actiontec Wireless DSL Modem User Manual High If High is selected in the “Firewall Security Level” screen, the services with a check mark beside them will remain open (either incoming, outgoing, or both, depending on the checkmarks), as shown in the figure below. These settings can be modified to customize the firewall settings.
- Page 48 Chapter 6 Configuring Security Settings Medium If Medium is selected in the “Firewall Security Level” screen, the services with a check mark beside them will remain (either incoming, outgoing, or both, depending on the checkmarks), as shown in the figure below. These settings can be modified to cus- tomize the firewall settings.
- Page 49 Actiontec Wireless DSL Modem User Manual If Low is selected in the “Firewall Security Level” screen, the services with a check mark beside them will remain open (either incoming, outgoing, or both, depending on the checkmarks), as shown in the figure below. These settings can be modified to customize the firewall settings.
-
Page 50: Port Forwarding
Chapter 6 Configuring Security Settings Port Forwarding Selecting Port Forwarding in the Security screen generates the “Port Forwarding” screen. This screen allows certain programs to bypass the Modem’s built-in firewall, allow- ing access to parts of the network (for hosting a Web or ftp server, for example). To use, select the name of a computer on the network from the “... - Page 51 Actiontec Wireless DSL Modem User Manual Rule Management To create a custom set of rules, click the “User” radio button, then click New. The “Rule Management” screen appears. In this screen, the user can create a custom rule not defined in the programming.
-
Page 52: Dmz Hosting
Chapter 6 Configuring Security Settings For multiple ports: 1. Enter the rule name in the “Rule Name” text box. The name is usually based on the application or game title. 2. Set “Protocol” to “TPC.” 3. Enter the starting port number of the port range in the “Port Start” and “Port Map Start”... -
Page 53: Nat (Network Address Translation)
Actiontec Wireless DSL Modem User Manual DMZ hosting is used to support online gaming and Internet conferencing services. These programs usually require multiple open ports, making the network acces- sible from the Internet. DMZ hosting symbolically places the DMZ host computer outside of the Modem’s network. -
Page 54: Configuring Internet Access Controls
Configuring Internet Access Controls This chapter explains how to configure the Internet access controls of the Modem, such as services blocking, Web site blocking, and schedule rules. Accessing Internet Access Control Screens To access the Internet Access Control configuration screens, follow these instructions: 1. -
Page 55: Services Blocking
Actiontec Wireless DSL Modem User Manual A login window appears. Enter the user name and password in the appropri- ate text boxes, then click OK. ☞ Note: The default user name is “admin.” The default password is “password.” 4. The “Internet Access Control” screen appears. To modify a specific setting, click on its name in the menu bar on the left, or from the list in the middle of the screen. -
Page 56: Website Blocking
Chapter 7 Configuring Internet Access Controls 2. Select the Internet service(s) to be blocked by clicking in the appropriate check box. 3. Click Apply to block the selected service from the selected computer. Website Blocking Selecting Website Blocking in the Internet Access Control screen generates the “Website Blocking”... -
Page 57: Schedule Rules
Actiontec Wireless DSL Modem User Manual Schedule Rules Selecting Schedule Rules in the Internet Access Control screen generates the “Schedule Rules” screen. Schedule rules allow computers on the network to access the Internet at scheduled times only. To set up schedule rules for a computer on the network: 1. - Page 58 Chapter 7 Configuring Internet Access Controls 4a. If “Daily” was selected in step 3, create a period of Internet access (or rule) by selecting a beginning time (from the “From” drop-down menu) and end- ing time (from the “To” drop down menu). If allowing Internet access to a particular computer from 6 p.m.
- Page 59 Actiontec Wireless DSL Modem User Manual ☞ Note: When using “Weekly” scheduling, an access period cannot include 12 a.m (midnight). To create an access period that includes midnight, create two access periods, one that ends at 12 a.m. on one day, and one that begins at 12 a.m on the following day.
-
Page 60: Configuring The Modem's Utilities
Configuring the Modem’s Utilities This chapter explains how to use the Modem’s utilities, including how to restore default settings, upgrade the Modem’s firmware, and perform a ping test. Accessing the Utilities Screens To access the Utilities configuration screens, follow these instructions: 1. - Page 61 Actiontec Wireless DSL Modem User Manual A login window appears. Enter the user name and password in the appropri- ate text boxes, then click OK. ☞ Note: The default user name is “admin.” The default password is “password.” 4. The “Utilities” screen appears. To modify a specific configuration, click on its...
-
Page 62: Restore Default Settings
Chapter 8 Configuring the Modem’s Utilities Restore Default Settings To restore the Modem to its factory default settings, select Restore Default Settings from the Utilities screen. When the “Restore Default Settings” screen appears, click Restore Default Settings. Any changes made to the Modem’s settings will be lost and the factory default settings restored. -
Page 63: Web Activity Log
Actiontec Wireless DSL Modem User Manual Web Activity Log The Web Activity Log provides information about the Web sites each computer on the Modem’s network has visited. To access the Web Activity Log, select Web Activity Log from the Utilities screen. -
Page 64: System Log
Chapter 8 Configuring the Modem’s Utilities System Log The System Log provides information about the Modem’s activity. To access the System Log, select System Log from the Utilities screen. System Log (Size) Select the size of the system log displayed here. The smaller the size, the shorter the length of the system log saved. -
Page 65: Oam Ping Test
Actiontec Wireless DSL Modem User Manual OAM Ping Test Selecting OAM Ping Test from the Utilities screen generates the “ Ping Test” screen, which is used to check whether the Modem is properly connected to the network. Follow the on-screen instructions to perform the test. -
Page 66: Reboot
Chapter 8 Configuring the Modem’s Utilities Reboot Selecting Reboot from the Utilities screen generates the “Reboot” screen. From this screen, the Modem can be rebooted. To do this: 1. From the first Reboot screen, click Reboot. 2. A confirmation window appears. Click OK. 3. - Page 67 Actiontec Wireless DSL Modem User Manual This page left intentionally blank.
-
Page 68: Troubleshooting
Troubleshooting This chapter contains a list of problems that may be encountered while using the Modem, and techniques to try and overcome the problem. Note that these tech- niques may not solve the problem. This chapter also includes a list of frequently asked questions. - Page 69 Actiontec Wireless DSL Modem User Manual Ensure the Subnet Mask address is set to 255.255.255.0 by clicking Status in the “Main Menu” screen. Verify the Modem’s settings are the same as the computer by clicking Status in the “Main Menu” screen.
-
Page 70: Frequently Asked Questions
Chapter 9 Troubleshooting Time out error occurs when entering a URL or IP Address Verify all the computers are working properly. Ensure the settings are correct. Ensure the Modem is on and connected properly. Verify the Modem’s settings are the same as the computer by clicking Status in the “Main Menu”... - Page 71 Actiontec Wireless DSL Modem User Manual Will my Xbox work with the Modem? Yes, the Modem is compatible with the Xbox. You need to set a static IP on the Xbox in the Xbox live network settings, and forward ports 3074 (both UDP and TCP), 53 (both UDP and TCP), and 88 (UDP) if you run into DSL resolution errors.
- Page 72 Chapter 9 Troubleshooting Can my wireless signal pass through floors, walls, and glass? The physical environment surrounding the Modem can have a varying effect on signal strength and quality. Generally, the more dense the object (a concrete wall compared to a plaster wall, for example), the greater the interference. Concrete or metal-reinforced structures will experience a higher degree of signal loss than those made of wood, plaster, or glass.
- Page 73 Actiontec Wireless DSL Modem User Manual I used DHCP to configure my network. Do I need to restart my computer to refresh my IP address? No. Follow these steps to refresh your IP address: Windows 2000 - Select Start, Run, type “cmd,” and press Enter. At the DOS prompt, type “ipconfig /release,”...
- Page 74 Chapter 9 Troubleshooting Security What is the default username for the Modem? The default username for the router is “admin” and the default password is “password” (all lower case, no quotation marks). To activate the password to protect the Modem, change the default password. Remote management will not be available on the Modem until the default password is changed.
- Page 75 Actiontec Wireless DSL Modem User Manual This page left intentionally blank.
-
Page 76: A Specifications
Specifications General Model Number GT724WGR (Wireless DSL Modem) Standards Base IEEE 802.3 Base IEEE 802.3 g (Wireless) IEEE 802.11 .dmt .lite 1.413 RFC 1483 2364 2516 Protocol LAN - CSMA WAN - , Static DHCP Full-rate Interface ADSL switched ports... -
Page 77: Wireless Operating Range
Actiontec Wireless DSL Modem User Manual Wireless Operating Range Indoors Up to 91M (300 ft.) @ 54 Mbps Outdoors Up to 457M (1500 ft.) @ 54Mbps Topology Star (Ethernet) LED Indicators Power, DSL, Internet, Ethernet (4), Wireless Environmental Power External, 12V DC, 600mA... -
Page 78: B Setting Up Static Ipon A Computer
Setting up Static IP on a Computer To communicate with the Modem from a computer on the network (to use the Modem’s GUI, for example), the user may have to switch the IP address settings from DHCP-enabled to static IP on the computer, so that the computer and the Modem are on the same subnet. - Page 79 Actiontec Wireless DSL Modem User Manual 3. Another menu appears. Select Control Panel. 4. When the “Control Panel” window appears, double-click Network and Dial- up Connections.
- Page 80 Appendix B Setting up Static IP on a Computer 5. In the “Network and Dial-up Connections” window, double-click Local Area Connection. A number may be displayed after the Local Area Connection. If there is more than one Local Area Connection listed, locate the one that cor- responds to the network card installed in the computer by finding the name of the network card in the “Device Name”...
- Page 81 Actiontec Wireless DSL Modem User Manual 8. In the “Components checked are used by this connection” list box, double- click Internet Protocol (TCP/IP). 9. The “Internet Protocol ( ) Properties” window appears. TCP/IP 10. In the General tab, make sure the radio button next to “Obtain an Address automatically”...
- Page 82 Appendix B Setting up Static IP on a Computer 12. Enter the following numbers in the “Subnet mask” text box: 255.255.255.0 Press the space bar on the keyboard to add the periods between the numbers. 13. Enter the following numbers in the “ ”...
-
Page 83: Windows Xp
Actiontec Wireless DSL Modem User Manual Windows XP 1. From the desktop, click Start button in the lower left corner. 2. From the menu that appears, select Control Panel. 3. When the “Control Panel” window appears, double-click Network Connections. - Page 84 Appendix B Setting up Static IP on a Computer 4. In the “Network Connections” window, double-click Local Area Connection. A number may be displayed after the Local Area Connection. If more than one Local Area Connection is listed, locate the one that corresponds to the network card installed in your computer by finding the name of the network card in the “Device Name”...
- Page 85 Actiontec Wireless DSL Modem User Manual 7. The “Internet Protocol ( ) Properties” window appears. TCP/IP 8. In the General tab, make sure the radio button next to “Use the following Address” is active (contains a black dot). If the radio button is already active, leave it alone.
-
Page 86: Windows Vista
Appendix B Setting up Static IP on a Computer 15. Close the Network and Dial-up Connections window by clicking on the “x” button at the upper right corner of the window. The computer is now set up with a static address, allowing the user to access the Modem’s Windows Vista... - Page 87 Actiontec Wireless DSL Modem User Manual 4. The “Network and Internet” window appears. Click Network and Sharing Center. 5. The “Network and Sharing Center” screen appears. From the menu on the left, click Manage network connections.
- Page 88 Appendix B Setting up Static IP on a Computer 6. The “Network Connections” screen appears.. Double-click Local Area Connection. 7. The “Local Area Connection Properties” window appears. In the “This con- nection uses the following items” list box, double-click Internet Protocol ( TCP/IP...
- Page 89 Actiontec Wireless DSL Modem User Manual 8. The “Internet Protocol ( ) Properties” window appears. TCP/IP 9. In the General tab, make sure the circle next to “Use the following Address” is selected. When active, a black dot appears in the circle. If the circle already contains a black dot, leave it alone.
-
Page 90: C Service Acronyms
Service Acronyms The following information is related to the Firewall options (Custom, High, Medium, and Low) section in the “Configuring Security Settings” chapter of this manual. This appendix explains the meaning of the service acronyms included with the various lev- els of firewall security, and the ports used by each service. - Page 91 Actiontec Wireless DSL Modem User Manual IMAP, IMAPv3 Internet Message Access Protocol. Protocols for retrieving E-mail messages. uses uses IMAP TCP 143 IMAP TCP 220 IPSEC IKE, IPSEC ESP IP Security. Protocols which support the secure exchange of packets at the IP layer.
- Page 92 Appendix C Service Acronyms SMTP Simple Mail Transfer Protocol. A protocol used to transfer E-mail between computers over the Internet. Can be used to send and receive mail. Uses TCP 25 SNMP Simple Network Management Protocol. A set of protocols for managing net- works.
- Page 93 Actiontec Wireless DSL Modem User Manual This page left intentionally blank.
-
Page 94: D Glossary
Glossary Access Point A device that allows wireless clients to connect to one another. An access point can also act as a bridge between wireless clients and a “wired” network, such as an Ethernet network. Wireless clients can be moved anywhere within the cover- age area of the access point and remain connected to the network. - Page 95 Actiontec Wireless DSL Modem User Manual Ethernet Network A standard wired networking configuration using cables and hubs. Firewall A method preventing users outside the network from accessing and/or damag- ing files or computers on the network. Gateway A central device that manages the data traffic of your network, as well as data traffic to and from the Internet.
- Page 96 Appendix D Glossary PPPoE (Point-To-Point Protocol over Ethernet)/ PPPoA (Point-To-Point Protocol over ATM) Methods of secure data transmission. Router A central device that manages the data traffic of your network. Subnet Mask A set of four numbers configured like an address used to create address numbers used only within a particular network.
- Page 97 Actiontec Wireless DSL Modem User Manual This page left intentionally blank.
-
Page 98: Notices
Modifications The FCC requires the user to be notified that any changes or modifications made to this device that are not expressly approved by Actiontec Electronics, Inc., may void the user’s authority to operate the equipment. Declaration of conformity for products marked with the FCC logo – United States only. - Page 99 Actiontec Wireless DSL Modem User Manual 2. This device must accept any interference received, including interference that may cause unwanted operation. ☞ Note: To comply with FCC RF exposure compliance require- ments, the antenna used for this transmitter must be installed to...
-
Page 100: Limited Warranty
Software: Actiontec Electronics warrants to Customer that each software program licensed from it will perform in substantial conformance to its program specifica- tions, for a period of ninety (90) days from the date of purchase from Actiontec Electronics or its authorized reseller. Actiontec Electronics warrants the media con- taining software against failure during the warranty period. - Page 101 The repaired or replaced item will be shipped to Customer, at Actiontec Electronics’ expense, not later than thirty (30) days after Actiontec Electronics receives the defective product.
- Page 102 This warranty gives you specific legal rights which may vary depending on local law. Dispute Resolution: The customer may contact the Director of Technical Support in the event the Customer is not satisfied with Actiontec Electronics’ response to the complaint. In the event that the Customer is still not satisfied with the response of the Director of Technical Support, the Customer is instructed to contact the Director of Marketing.
- Page 103 Actiontec Wireless DSL Modem User Manual Governing Law: This Limited Warranty shall be governed by the laws of the State of California, U.S.A., excluding its conflicts of laws and principles, and excluding the United Nations Convention on Contracts for the International Sale of Goods.