Table of Contents
Advertisement
Quick Links
Advertisement
Table of Contents

Related Manuals for Geemarc Ampli250


Summary of Contents for Geemarc Ampli250
-
Page 2: Table Of Contents
CONTENTS CONTENTS PHONE BOOK Create a Phone Book Entry DESCRIPTION VIP and Reject Functions Review Numbers and INTRODUCTION Names in the Phone Book Unpacking the Telephone Dialing Phone Book Entry Modify a Phone Book Entry INSTALLATION Delete a Phone Book Entry Location Save Numbers and Names from Belt Clip Use... -
Page 3: Description
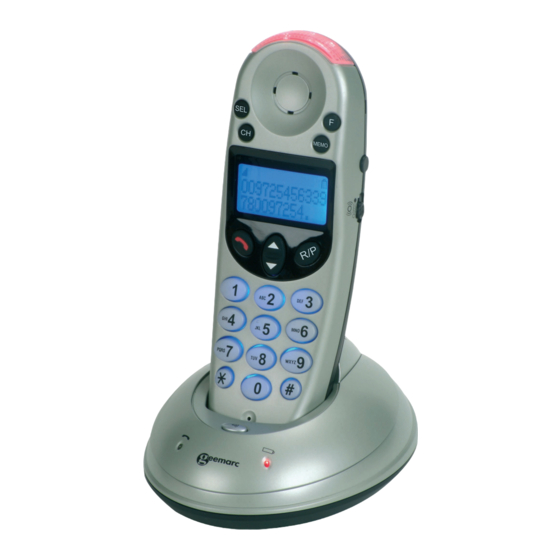
DESCRIPTION Handset MEMO 1. Visual Ringer indicator: A bright flashing light that flashes with each ring of the telephone. 2. F button (FLASH/DELETE): Press to answer an incoming call if you have Call Waiting or to be used to cancel an action/entry or clear a stored Caller ID call. - Page 4 DESCRIPTION 7. Charge pins: Enables charging. 8. 2.5mm headset jack: To connect your hands-free headset. 9. Arrow DOWN button: Use to highlight or scroll through the menu. 10. (TALK): Press to answer an incoming call, to place a call or to end a call.
- Page 5 DESCRIPTION Base 1. Page icon button (PAGE): Press to page the handset. The handset will ring for about 25 seconds then end the paging automatically. 2. Charger indicator LED: Lights up when handset is placed on the base for charging. (RED) 3.
-
Page 6: Introduction
Its is important that you read the instructions below in order to use your Geemarc telephone to its full potential. Keep this user guide in a safe place for future reference. -
Page 7: Unpacking The Telephone
INTRODUCTION Unpacking the Telephone When unpacking the telephone, you should find the following in the box: • 1 Handset • 1 Base • 1 AC Mains power adaptor • 1 6ft Modular Telephone line cord • 1Belt clip • 3 x NiMH AAA rechargeable batteries •... -
Page 8: Installation
INSTALLATION Location Ensure you situate the telephone close enough to the power socket (120V AC wall outlet) and telephone jack (RJ11C) so that the cables will reach safely without stretching. Also, the mains power needs to be easily acces- sible in case you need to disconnect the power quickly. Make sure the telephone is at least 1 metre away from other electrical products e.g.TV, radio and monitors so as to avoid interference. -
Page 9: Setting Up
INSTALLATION Setting Up Plug the power cable into the jack (12V DC 500mA) on the base. Plug the adaptor into the mains supply (standard 120V AC electrical outlet). The Power/Charging indicator lights up (red). Note: Always connect the AC Adapter to the telephone before you plug it into the AC power outlet. -
Page 10: Battery Use
INTRODUCTION Note: Before replacing the battery compartment cover – you may want to select setting for the AUTO AMPLIFY MODE Battery Use If the low battery icon is displyed and you hear the warning tone (3 beeps), you will need to recharge your handset before you can use it. If the phone does not have enough power, it will switch itself off automatically until it is returned to the base . -
Page 11: Base Settings
BASE SETTINGS Base Ringer Volume A slider switch located on the bottom of the telephone base allows the base ringer volume to be adjusted. The following settings are available HI/MED/LO/OFF. -
Page 12: Handset Settings
HANDSET SETTINGS Handset Registration The handset that came with your base is already registered to the base (factory setting). However, if it is not, follow this procedure: Press and hold the PAGE button on the base unit. Keep this pressed throughout the registration procedure. -
Page 13: Area Code
HANDSET SETTINGS Area Code When you use your phone for the first time or if you have moved to a differ- ent area code, you need to enter your area code into the phone. Press SEL button on handset. LCD will display PROGRAM Press 1. -
Page 14: Handset Shaker Settings
HANDSET SETTINGS Handset Shaker Settings A switch located on the right side of the telephone handset allows the hand- set shaker to be activated when receiving an incoming call. The On/Off switch can be found on the right hand side of the handset. -
Page 15: Volume And Tone
VOLUME AND TONE Receiving Volume and Tone Adjustment You can increase the receiving volume and adjust the receiving tone ac- cording to your own hearing requirements. The AMPLIFY button on the right side of the handset allows extra receiving and tone functions to be activated during the conversation in an ad hoc fashion. -
Page 16: Using The Telephone
USING THE TELEPHONE Making a Call Pick up handset. Press When you hear dialing tone, dial the number on the keypad. You can press F to cancel an incorrect entry To end the call simply press again or place the handset on the base Pre-Dialling Pick up handset. -
Page 17: Last Number Redial
CH. Use with a Hearing Aid The Geemarc AMPLI250 can be used with hearing aids. These hearing aids must be equipped with a T-coil. Ensure you switch the hearing aid to... -
Page 18: Phone Book
PHONE BOOK Names and phone numbers can be stored in the phone book. The phone book can contain 60 entries with the name and phone numbers of your correspondents. Create a Phone Book Entry Enter the telephone number (and code) you wish to store –... -
Page 19: Vip And Reject Functions
PHONE BOOK VIP and Reject Functions When storing a name, if you add “*” at the end – it will be labelled as a VIP number. The handset ringer will always ring when a VIP call is received irrespective of whether the ringer is set to On or Off. When storing a name, if you add “... -
Page 20: Dialing Phone Book Entry
PHONE BOOK Dial a Phone Book Entry Press MEMO then find the required phone book entry using one of the methods used in Review Numbers and Names in the Phone Book section above Press . The number will be dialled automatically Modify a Phone Book Entry Press MEMO then find the required phone book entry using one of the methods used in Review Numbers and Names... -
Page 21: Delete A Phone Book Entry
PHONE BOOK Delete a Phone Book Entry Press MEMO then find the required phone book entry using one of the methods used in Review Numbers and Names in the Phone Book section above Press F twice. The single record will be deleted. Delete all Phone Book EntrieS Delete all Phone Book Entries Press MEMO when in standby. -
Page 22: Caller Display
CALLER DISPLAY The features described in this section are only available if you subscribe to a Caller Display service from your network provider. Caller Display means you can see who is calling on your handset display (provided the number is not withheld, unavailable or is an international call). -
Page 23: Dial A Number From The Caller Display List
CALLER DISPLAY Dial a Number from the Caller Display Log Press ▲ or ▼ when in standby Use ▲ or ▼ to scroll through the call log to find the number you wish to dial Press . The number will be dialled automatically Delete an Entry from the Caller Display Log Press ▲... -
Page 24: New Message
NEW MESSAGE Message Waiting If you are connected to certain type of switchboards, you may get a mes- sage waiting/voicemail service. MESSAGE will flash on the LCD display. Press F twice to delete the icon. -
Page 25: Additional Handsets
Using Several Handsets If you buy new handsets to use with your Geemarc AMPLI250 telephone, they will have to be registered to the base before you can use them. See Handset Registration section. -
Page 26: Optional Accessories
OPTIONAL ACCESSORIES Headset & Magnetic Loop If you wish you can connect a headset or a neck loop to the jack located on the bottom of the handset. You can still use all phone functions as described before. To answer a call simply press to take the line and press a second time to release the line. -
Page 27: Troubleshooting
TROUBLESHOOTING General Checks • Make sure that the telephone line cord and adaptor are correctly plugged in and they are not damaged. • Make sure the batteries are inserted correctly. • Make sure that the batteries are fully charged. • Connect another telephone to the telephone PTT socket or move your telephone to another socket to track if the failure is coming from your telephone or your PTT socket. - Page 28 TROUBLESHOOTING No tone when you press • Make sure the batteries are inserted correctly. • Make sure that the batteries are fully charged. • Make sure handset is registered to the base A warning tone is heard during a call: •...
-
Page 29: Safety Information
SAFETY INFORMATION General Only use the correct Geemarc authorised power supply with the product. Do not open the unit (except to replace the batteries). Contact the helpline for all repairs. Never dispose of batteries in a fire. There is a serious risk of explosion and/ or the release of toxic chemicals. -
Page 30: Regulatory Compliance
REGULATORY COMPLIANCE Part 68 of FCC rules information - This equipment complies with Part 68 of the FCC rules and the require- ments adopted by the ACTA. On the bottom of this equipment is a label that contains, among other information, a product identifier in the format US: AAAEQ##TXXXX. - Page 31 REGULATORY COMPLIANCE you to make necessary modifications to maintain uninterrupted service. - If trouble is experienced with this equipment, for repair or warranty infor- mation, please contact our customer service staff at: 248-577-5400 If the equipment is causing harm to the telephone network, the telephone company may request that you disconnect the equipment until the problem is resolved.
-
Page 32: Guarantee
Warranty service is available only with proof of purchase. Simply send the Ampli250 (postpaid) and a copy of your sales slip as proof of purchase to: Sonic Alert Inc., 1050 E. Maple Road, Troy MI 48083...