Table of Contents
Advertisement
Before using this unit, care-
fully read the sections enti-
tled: "Using the unit safe-
ly", p. 2 and "Important
Notes", p. 4. These sections
provide important informa-
tion concerning the proper
operation of the unit. Addi-
tionally, in order to feel as-
sured that you have gained a
good grasp of every feature
provided by your new unit,
the Owner's manual should
be read in its entirety. The
manual should be saved and
kept on hand as a conve-
nient reference.
Owner's Manual
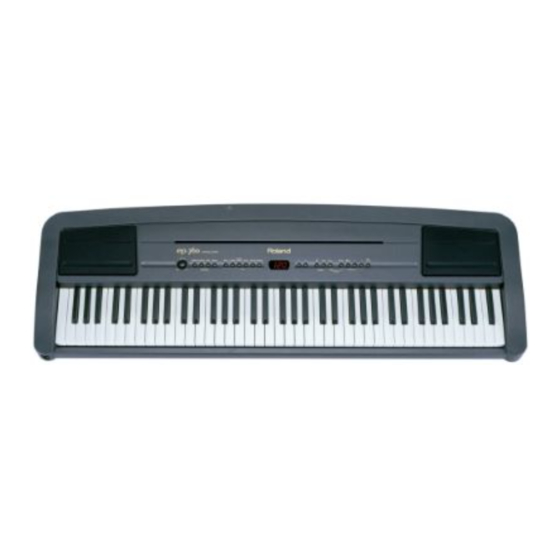
Thank you, and congratulations on your choice of the Roland Digital Piano ep-760.
Main Features
Piano sounds with rich resonance and wide-ranging expressiveness
The stereo sampling piano sound generator realistically reproduces even the sound
of the hammers striking the strings, producing the tones of a high-quality concert
grand piano. Maximum polyphony of 64 notes ensures that you can use the pedal
freely without running out of notes.
A variety of practice features to help you develop your musicality
In addition to a metronome, the ep-760 features a two-track recorder, which allows
you to experience piano lessons in a way possible only on electronic pianos.
65 piano songs built-in
The built-in songs are mainly classical pieces, and include compositions for listening
enjoyment as well as for lessons.
Copyright © 2002 ROLAND CORPORATION
All rights reserved. No part of this publication may be reproduced in
any form without the written permission of ROLAND CORPORATION.
Advertisement
Table of Contents

Related Manuals for Roland EP-760


Summary of Contents for Roland EP-760
-
Page 1: Main Features
Owner’s Manual Thank you, and congratulations on your choice of the Roland Digital Piano ep-760. Main Features Piano sounds with rich resonance and wide-ranging expressiveness The stereo sampling piano sound generator realistically reproduces even the sound of the hammers striking the strings, producing the tones of a high-quality concert grand piano. -
Page 2: Using The Unit Safely
Refer all short circuits. Damaged cords are fire and shock servicing to your retailer, the nearest Roland Ser- hazards! vice Center, or an authorized Roland distributor, ...................... - Page 3 ......................your retailer, the nearest Roland Service Center, or 108d: Selection an authorized Roland distributor, as listed on the • If you need to move the instrument, take note of “Information”...
-
Page 4: Important Notes
• To avoid possible breakdown, do not use the ep-760 in a wet area, such as an area exposed to rain or other mois- ture. -
Page 5: Table Of Contents
Contents Using the unit safely .................2 6. Connecting external devices ......27 Connecting to audio equipment ............27 Important Notes............4 Connecting to a computer...............27 Connecting MIDI devices..............28 Panel descriptions ............6 What’s MIDI?................28 MIDI transmit channel settings..........28 Front panel ..................6 Transmitting a performance you recorded ......29 Rear panel....................7 Appendices ............. -
Page 6: Panel Descriptions
[Split] button Divides the keyboard into right-hand and left-hand [G(Rec)] button areas, allowing you to play a different sound in each area Puts the ep-760 in recording-standby mode (p. 20~23). (p. 13). [1] button [Reverb] button Plays back or records a performance separately for each Adds reverberation to the sound (p. -
Page 7: Rear Panel
Pedal sockets (Damper & Soft) This is where you need to connect the supplied ACO Your ep-760 comes with one DP-2 footswitch that can be adapter. Do not use any other adapter. used as Damper, Soft, or Sostenuto pedal (p. 8). In order... -
Page 8: Before You Start Playing
24. Soft pedal NOTE When you hold down this pedal and play the keyboard, Before moving the ep-760, be sure to remove the music stand as the sound will have a softer tone. a safety precaution. Sostenuto pedal... -
Page 9: Connecting Headphones
Before you start playing Connecting headphones NOTE The ep-760 is equipped with a protection circuit. A brief interval The ep-760 has two jacks for plugging in headphones. (a few seconds) after power up is required before the unit will This allows two people to listen through headphones operate normally. -
Page 10: Enjoying The Songs
Enjoying the songs Listening to built-in songs The ep-760 comes with 65 piano songs on-board. See also “Playing along with the built-in songs”, p. 18 and “Songs”, p. 106. I Playing back all songs continuously (All Song Play) The built-in songs can be played back consecutively. -
Page 11: Performance
2. Performance Performance Performing with a variety of sounds The ep-760 contains 20 built-in sounds (or “Tones”). The tones are organized into five Tone groups, which are assigned to the Tone buttons. Selecting a tone group Each time you press the [Variation] button, the but- ton’s indicator will change color, and the four sounds... - Page 12 Performance I Adjusting the volume balance in Dual performance (Dual Balance) You can change the volume balance between the two layered sounds in Dual performance. Hold down the [Transpose] button, and press Press the [+] or [–] button to change the value.
-
Page 13: Playing Different Tones With The Left & Right Hands (Split)
Performance Playing different tones with the left & right hands (Split) Dividing the keyboard into right-hand and left-hand areas, then playing different sounds in each is called “Split performance.” The boundary key is called the “split point.” The split point key is part of the left-hand keyboard area. Split performance can be used only with Tones numbered “1”... -
Page 14: Using The Metronome
Using the metronome I Sounding the metronome The ep-760 features a built-in metronome. While a song plays back, the metronome will sound at the tempo and time signature (Beat) of that song. 1, 4 Sounding the metronome If you press the [+] and [–] buttons simultaneously, the... -
Page 15: Applying Effects To The Sound
• When you play back a built-in song, the reverb effect will automatically be turned on (the button’s indicator lights). Chorus effect The ep-760 also features a Chorus effect that is automati- cally switched on whenever you select an “E.Piano” Tone. The level cannot be changed, nor is the effect avail- able for other Tones. -
Page 16: Transposing The Keyboard (Transpose)
Performance Transposing the keyboard (Transpose) By using the “Transpose function,” you can transpose your performance without changing the notes you play. For example, even if the song is in a difficult key with numerous sharps ( ) or flats ( ), you can transpose it to a key that is easier for you to play. -
Page 17: Adjusting The Keyboard Touch (Key Touch)
Performance Adjusting the keyboard touch (Key Touch) You can adjust the touch (playing feel) of the keyboard. Press the [Key Touch] button. Each time you press the [Key Touch] button, the but- ton’s indicator will change color, and the feel of the The button’s indicator will light, and the feel of the keyboard will change. -
Page 18: Playing Along With The Built-In Songs
“Count-In.” ton indicator will light in green. While the song num- On the ep-760, if you playback a song while the metro- ber is displayed, it will light in red. nome is sounding, two measures of lead-in count will Press the [+] or [–] button to adjust the tempo. -
Page 19: Playing Each Hand Separately
Performance Playing each hand separately The built-in songs allow you to select the performance part that will be played back. The left-hand performance of the built-in songs is assigned to the [1] button, while the right-hand performance is assigned to the [2] button. -
Page 20: Recording Your Performance
4. Recording your performance ep-760 Recording your performance You can easily record your performances. A recorded performance can be played back to hear your own playing, or to add additional parts. If you see the following... The following recording methods are available on the... -
Page 21: Recording Along With A Song
[1] button; to record your right-hand part, press the [2] button. The indicators of the button you pressed and of the [®(Play)] button will flash, and the ep-760 enters re- cording-standby mode. If “dEL” appears in the display, refer to p. 20. -
Page 22: Selecting/Recording Each Hand Separately
Recording your performance Selecting/recording each hand separately The recorder of the ep-760 has two recording tracks, allowing you to record the left and right hands separately. Use the [1] or [2] button to specify the recording track. If you want to re-do the recording, you can re-record just a specific track. -
Page 23: Erasing Recorded Performances
Recording your performance Erasing recorded performances You can erase a recorded performance. Erasing a performance from the specified Erasing the entire song track You can erase a song you’ve recorded. You can select a recorded track and erase it. Hold down the [Song/Tempo] button and press Hold down either the [1] or [2] button, and the [G(Rec)] button. -
Page 24: Changing Various Settings
• This setting is valid only for some piano tones. It cannot be made for other Tones. tune the ep-760’s reference pitch to the pitch of another instrument. The standard pitch generally refers to the • This function is only meaningful if you connect the supplied DP-2 footswitch to the Pedal [Damper] socket. -
Page 25: Setting The Tuning Curve (Stretch Tuning)
When performing in ensemble with other instruments, be aware left and right hand keyboard area. that depending on the key, there may be some shifting of the Initial setting: OFF pitch. Tune the ep-760 to the fundamental pitch of the other instruments. -
Page 26: Disabling Everything Except Piano Play (Panel Lock)
DP-6 or BOSS FS-5U) connected to the Pedal [Soft] socket can also be used as Sostenuto pedal. The “Panel Lock” function locks the ep-760 in a state If you press the [G(Rec)] button in step B of “Function where only piano performance can be used, and all but- settings”, a display like the following will appear. -
Page 27: Connecting External Devices
Output R/L (Line Out, Aux Out) You can connect audio devices to play the sound of the ep-760 through the speakers of your audio system, or to record your performance on a tape recorder or other record- ing device. ep-760 When connecting, please use an audio cable with a standard phone plug (sold separately). -
Page 28: Connecting Midi Devices
• If you are using Dual performance (p. 11) or Split performance ep-760 (p. 13) on the ep-760, only the channel you specify here will be transmitted. If you press the [Strings] button in step B of “Making MIDI-related settings”, a display like the following will Set Local Off if you have connected the ep-760 to a MIDI appear. -
Page 29: Transmitting A Performance You Recorded
Local Off setting. MT units transmit Local Off messages when their power is switched on. If you turn on the power in the order of the ep-760 → MT series, Local Off will be set automatically. -
Page 30: Appendices
No sound is heard corded song, the song will be recorded at the first-recorded tempo. • Is the volume of the ep-760 turned all the way down? (p. 9) Please erase the previously recorded song before you re-record. (p. 23) •... -
Page 31: Error Messages/Other Messages
Appendices Error messages/other messages Display Meaning User. Stores recorded performances (p. 20). Usr. The “.” in the display indicates that there is performance material already recorded (p. 20). Built-in song number (p. 10). This appears when a song with a pickup (a song that does not start on the first beat) is played back. This appears when you attempt to delete a recorded song (p. -
Page 32: Easy Operation List
Appendices Easy operation list Here’s a quick run-down of all functions provided by your ep-760, and how to access them. “+” means “press while holding down the preceding button”. “→” means “release the previous button(s) and press”. Master Tuning (p. 24) •... -
Page 33: Main Specifications
Appendices Main specifications Keyboard Keyboard 76 keys Touch Sensitivity Preset 4 Levels Keyboard mode Whole, Dual (adjustable dual balance), Split (adjustable split point) Sound Generator Max. polyphony 64 voices Tones 5 groups, 20 variations Temperament 7 types, selectable tonic Stretched Tuning 2 types Master tuning 415.3 Hz~466.2 Hz (0.1 Hz Step) - Page 34 Appendices...