Table of Contents
Advertisement
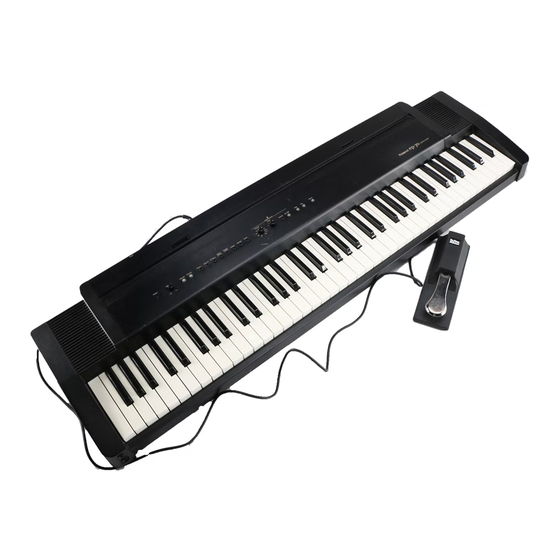
DIGITAL PIANO
USING THE UNIT SAFELY ...................................................................... 2
IMPORTANT NOTES ............................................................................. 4
Main Features of the ep-90/70 ................................................. 5
Button Descriptions................................................................... 6
Getting Ready .......................................................................... 8
1. Connecting the Power Cord ................................................................................. 8
2. Securing the Cord ................................................................................................... 8
3. Connecting the Pedal ............................................................................................. 9
4. Turning the Power On and Off ............................................................................ 9
5. Adjusting the Volume ......................................................................................... 10
6. Setting the Music Stand ....................................................................................... 10
7. Connecting Headphones (Sold Separately) ...................................................... 10
Listening to the Demo Songs ................................................... 11
Playing/Stopping the Demo Songs........................................................................ 11
Selecting a Song for Playback.................................................................................. 12
About the Demo Songs............................................................................................. 13
Playing the Keyboard............................................................. 14
Selecting the Instrumental Sound You Wish to Play ........................................... 14
Layering Two Instrument Sounds-Dual Play .................................................... 14
Adding Reverberation to the Sound-Reverb Effect........................................... 15
Adding Breadth to the Sound-Chorus Effect ..................................................... 16
Sounding the Metronome ........................................................................................ 17
Try Recording Your Performance ............................................ 19
Recording ................................................................................................................... 19
Listening to the Recorded Performance................................................................. 21
Deleting Recorded Songs ......................................................................................... 21
Convenient Functions......................................................................... 22
Disabling Buttons-Panel Lock ............................................................................. 22
Transposing without Changing Your Fingering-Key Transpose ................... 22
Adjusting the Pitch of the Sound-Master Tuning ............................................. 23
Connecting to Audio Equipment ......................................................... 24
About the Jacks ......................................................................................................... 24
Making the Connections ......................................................................................... 24
Connecting to MIDI Devices ................................................................ 25
About the MIDI Connectors ................................................................................... 25
Making the Connections ......................................................................................... 25
(Local On/Off and Omni On/Off) ........................................................................ 26
Set the MIDI Channel .............................................................................................. 27
Transmitting/Receiving Sound Selection Data-Program Change ................. 28
Turning Transmission and Reception of Control Changes On/Off ................. 29
Transmitting Performance Data from MIDI Out ................................................. 29
Troubleshooting ................................................................................ 30
Functions Assigned to the Keyboard .................................................. 31
MIDI Implementation Chart................................................................ 32
Specifications .................................................................................... 33
Index ............................................................................................... 34
Before using this unit, carefully read the sections entitled: "USING THE UNIT SAFELY" (p. 2)
and "IMPORTANT NOTES" (p. 4). These sections provide important information concerning
the proper operation of the unit. Additionally, in order to feel assured that you have gained a
good grasp of every feature provided by your new unit, Owner's manual should be read in its
entirety. The manual should be saved and kept on hand as a convenient reference.
Copyright © 1999 ROLAND CORPORATION
All rights reserved. No part of this publication may be reproduced in any form
without the written permission of ROLAND CORPORATION.
Owner's Manual
Advertisement
Table of Contents

Related Manuals for Roland ep-90/70


Summary of Contents for Roland ep-90/70
-
Page 1: Table Of Contents
DIGITAL PIANO Owner’s Manual USING THE UNIT SAFELY ... 2 IMPORTANT NOTES ... 4 Main Features of the ep-90/70 ... 5 Button Descriptions... 6 Getting Ready ... 8 1. Connecting the Power Cord ... 8 2. Securing the Cord ... 8 3. -
Page 2: Using The Unit Safely
• Do not attempt to repair the unit, or replace parts within it (except when this manual provides specific instructions directing you to do so). Refer all servicing to your retailer, the nearest Roland Service Center, or an authorized Roland distributor, as listed on the “Information” page. - Page 3 • Before using the unit in a foreign country, consult with your retailer, the nearest Roland Service Center, or an authorized Roland distributor, as listed on the “Information” page.
-
Page 4: Important Notes
• Do not apply undue force to the music stand while it is in use. • Use a cable from Roland to make the connection. If using some other make of connection cable, please note the following precautions. -
Page 5: Main Features Of The Ep-90/70
The ep-90/70 faithfully simulates these characteristics of the acoustic piano. Eight Tones for use in a wide variety of musical genres The ep-90/70 features not only piano tones, but eight different internal tones that you can use in a variety of musical genres. -
Page 6: Button Descriptions
[Organ] Button [Strings] Button [Choir] Button By holding down three of these buttons while you then press a specific key, you can make various settings on the ep-90/70 (p. 26–p. 29). → “Functions Assigned to the Keyboard” (p. 31) Volume Reverb... - Page 7 Press this button to access the demo songs (p. 11). By holding down this button while you then press a specific key, you can make various settings on the ep-90/70 (p. 22, p. 23). → “Functions Assigned to the Keyboard” (p. 31)
-
Page 8: Getting Ready
If the supplied AC adaptor is the ACB or ACK type, step 1 of the procedure is not necessary. 1. Connect the supplied AC adaptor and AC cord. 2. Connect the AC adaptor to the DC In jack on the rear panel of the ep-90/70. fig.3-01 DC In 9V Power Power 1200 mA 2. -
Page 9: Connecting The Pedal
By connecting an additional pedal, you can use both a damper pedal and a soft pedal simultaneously. To purchase an additional pedal (DP-2/DP-6), please contact the dealer where you purchased the ep-90/70. 4. Turning the Power On and NOTE Once the connections have been completed, turn on power to your various devices in the order specified. -
Page 10: Adjusting The Volume
Assemble the music stand as shown in the diagram. fig.2-02 NOTE Before moving the ep-90/70, be sure to remove the music stand as a safety precaution. 7. Connecting Headphones (Sold Separately) The ep-90/70 features two headphone jacks. This allows two... -
Page 11: Listening To The Demo Songs
Listening to the Demo Songs The ep-90/70 features eight internal piano songs. Playing/Stopping the Demo Songs fig.4-01 Power Volume Reverb Chorus Press the [Demo] button, and confirm that the indicator has lit. The [Play] button’s indicator starts blinking. fig.4-02.e Demo... -
Page 12: Selecting A Song For Playback
Listening to the Demo Songs It is not possible to change the tempo of a demo song. NOTE If you press the [Demo] button while the metronome is sounding (p. 17), the metronome will NOTE stop sounding. It is not possible to sound the metronome while a demo song is playing. Selecting a Song for Playback Here’s how you can select and play a desired demo song. -
Page 13: About The Demo Songs
Scott Wilkie is a contemporary jazz recording artist, based in southern California. He tours frequently with his own band, and also appears as an artist for Roland in the U.S., Japan, Europe and South America. His debut solo album, Boundless, was released worldwide in 1999 on Narada/Virgin Records. -
Page 14: Playing The Keyboard
The ep-90/70 allows you to play using eight different sounds including piano. The ep-90/70’s sounds are called “Tones.” Use the eight Tone buttons to select tones. When the ep-90/70 is turned on, the tone is reset to “Piano 1”. fig.5-01.e Power... -
Page 15: Adding Reverberation To The Sound-Reverb Effect
Adding Reverberation to the Sound—Reverb Effect The ep-90/70 allows you to add reverberation to what you play on the keyboard. With the Reverb Effect, you can get a pleasant reverberation, making it sound as if you were performing in a concert hall or similar space. -
Page 16: Adding Breadth To The Sound-Chorus Effect
When playing in Dual Play mode, the on/off status of the [Chorus] button is not stored in memory. Switching [Chorus] on/off will affect only the music you play on the ep-90/70’s keyboard. If you MEMO press the [Chorus] button during playback of a demo song or a recorded performance, it has no effect. -
Page 17: Sounding The Metronome
Sounding the Metronome You can start or stop the metronome with a single button. In addition to adjusting the tempo and time, you can also change the sound and volume of the metronome. fig.5-09 Power Volume Reverb Chorus Press the [On/Off] button, and the metronome will begin sounding. fig.5-10.e On/Off Press... -
Page 18: Changing The Metronome Tempo
Playing the Keyboard ■ Changing the Metronome Tempo The metronome tempo is adjusted by the [Tempo] knob. You can select a tempo in the range of 40–208. fig.5-13.e (Tempo becomes slower/Tempo becomes faster) Tempo 96 108 ■ Changing the Time of the Metronome Use the [Beat] knob to select the time of the metronome. -
Page 19: Try Recording Your Performance
When you record, pay attention to the setting of the [Tempo] knob. Be sure to set it to the tempo MEMO at which you wish to record. Only one song can be recorded on the ep-90/70. If a previously recorded performance exists, it NOTE will be erased the moment you begin recording another performance. - Page 20 Try Recording Your Performance Use the [Beat] knob to select the time for the song. The time of the song cannot be changed during or after recording. fig.6-04 Beat Press the [Rec] button to turn on the indicator. The keyboard is put in record standby mode. The [Play] button’s indicator flashes.
-
Page 21: Listening To The Recorded Performance
You can use the following methods to save the recorded performance on the external devices. MEMO - Connect an audio device to the ep-90/70, and record your performance on a cassette tape or other media (p. 24). - Connect a MIDI sequencer, and record the performance on the sequencer (p. 25). -
Page 22: Convenient Functions
[Demo] button, press the C2 key. fig.7-04.e Demo While holding down Press NOTE The transposition setting is effective only on sounds performed on the ep-90/70’s keyboard. This setting is not effective on tones from external MIDI messages played on the ep-90/70. (sharps) or... -
Page 23: Adjusting The Pitch Of The Sound-Master Tuning
Adjusting the Pitch of the Sound—Master Tuning In situations such as when playing in ensemble with other instruments, you can adjust the ep-90/70’s reference pitch to that of another instrument. Middle A is generally used as the standard reference pitch for tuning instruments. -
Page 24: Connecting To Audio Equipment
NOTE If the device you are connecting is monaural, connect it to the L (Mono) jack. In this case, do not connect the R jack of the ep-90/70. NOTE Use a cable from Roland to make the connection. If using some other make of connection cable, please note the following precautions. -
Page 25: Connecting To Midi Devices
Connecting to MIDI Devices Read this chapter if you wish to connect the ep-90/70 to an external MIDI devices. If the ep-90/70 is connected to a MIDI sequencer, such as one from the MT series, a performance recorded on the ep-90/70 can be transmitted to the MIDI sequencer. -
Page 26: Cautions When Connecting An External Midi Device (Local On/Off And Omni On/Off)
■ Disconnecting the ep-90/70’s keyboard and internal sound generator—Local On/Off When the ep-90/70 is connected to a MIDI sequencer or the like, set it to Local Off. As shown in the diagram, the data that is produced when you play the keyboard will reach the sound generator by two routes, (1) and (2), causing each note to be played in duplicate. -
Page 27: Set The Midi Channel
The connected devices must be set to use the same MIDI channels, otherwise no sound will be produced. - In a setup where you wish to play the ep-90/70 and also have another MIDI-equipped instrument or sound module play the same notes, you should first set the... -
Page 28: Transmitting/Receiving Sound Selection Data-Program Change
“On” (it will transmit/receive Program Change messages). If you set it to “Off,” the ep-90/70 will no longer send out Program Change message when you change the tone being used. Also, the ep-90/70 will then ignore any Program Change messages when that are sent to it by an external unit, and will not change the tone it is playing. -
Page 29: Turning Transmission And Reception Of Control Changes On/Off
Each time the power is turned on, the instrument will always be set to “On” (it will transmit/receive all Control Change messages). If you set it to “Off” the ep-90/70 will no longer send or receive any Control Change messages. While holding down the [Piano 1] button, [Piano 2] button, and [Harpsichord] button, press the “A5”... -
Page 30: Troubleshooting
The recorded performance has been deleted ❍ The performance data that you recorded will disappear when the power of the ep-90/70 is turned off (p. 19). ❍ If you record again after recording, the first-recorded performance will be erased (p. 19). -
Page 31: Functions Assigned To The Keyboard
Functions Assigned to the Keyboard ■ Function assignments to the keyboard fig.11-00.e ep-70 ep-90 1, 2: While holding down the [Demo] button, press the appropriate key on the keyboard. fig.11-01 Demo 3–8: While holding down the [Piano 1], [Piano 2], and [Harpsichord] buttons, press the appropriate key on the keyboard. -
Page 32: Midi Implementation Chart
* A separate publication titled “MIDI Implementation” is also available. It provides complete details concerning the way MIDI has been implemented on this unit. If you should require this publication (such as when you intend to carry out byte-level programming), please contact the nearest Roland Service Center or authorized Roland distributor. MIDI Implementation Chart Transmitted 1–16... -
Page 33: Specifications
Specifications ep-90/70 : Roland Digital Piano <Keyboard> ● Keyboard ep-70: 76 weighted keys with touch-sensitivity ep-90: 88 weighted keys with touch-sensitivity ● Keyboard Mode Whole Dual < Sound Generator> ● Maximum Polyphony 64 voices ● Tones 8 (Piano 1, Piano 2, Electric Piano, Vibraphone, Harpsichord, Organ, Strings, Choir) ●... -
Page 34: Index
Index Beat ...18 Chorus...16 Control Change ...29 Delete ...21 Damper Pedal ...9 Demo Song ...11–13 Dual Play ...14 Headphones ...10 Input R/L Connector...24 Key Transpose ...22 Local On/Off ...26 Master Tuning ...23 Metronome ...17 Sound ...18 Tempo ...18 Time...18 Volume...17 MIDI Channel ...27 MIDI Connector...25 Music Stand...10... - Page 35 Information When you need repair service, call your nearest Roland Service Center or authorized Roland distributor in your country as shown below. SINGAPORE AFRICA AFRICA Swee Lee Company 150 Sims Drive, EGYPT SINGAPORE 387381 TEL: 6846-3676 Al Fanny Trading Office...
- Page 36 IMPORTANT: THE WIRES IN THIS MAINS LEAD ARE COLOURED IN ACCORDANCE WITH THE FOLLOWING CODE. BLUE: NEUTRAL BROWN: LIVE As the colours of the wires in the mains lead of this apparatus may not correspond with the coloured markings identifying the terminals in your plug, proceed as follows: The wire which is coloured BLUE must be connected to the terminal which is marked with the letter N or coloured BLACK.