Table of Contents
Advertisement
Quick Links
Advertisement
Table of Contents

Related Manuals for Janome COVER PRO 900CP


Summary of Contents for Janome COVER PRO 900CP
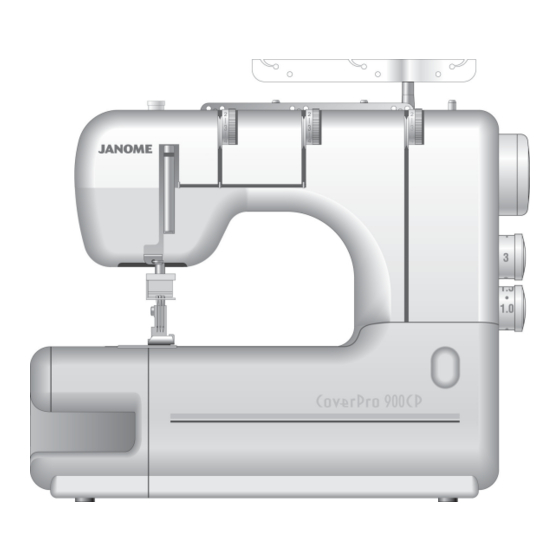
- Page 1 INSTRUCTION BOOK COVER PRO 900CP...
-
Page 2: Important Safety Instructions
IMPORTANT SAFETY INSTRUCTIONS When using an electrical appliance, basic safety precautions should always be followed, including the followings: Read all instructions before using this appliance. DANGER — To reduce the risk of electric shock: An appliance should never be left unattended when plugged in. Always unplug this sewing machine from the electric outlet immediately after using and before cleaning. - Page 4 795-800-003 (E) Printed in Taiwan...
-
Page 5: Table Of Contents
TABLE OF CONTENTS KNOW YOUR MACHINE Names of Parts ....................2 Standard Accessories ..................3 GETTING READY TO SEW Connecting the Machine to the Power Supply ........... 4 Controlling Sewing Speed .................. 4 How to Turn the Handwheel ................5 Opening and Closing the Looper Cover ............. -
Page 6: Know Your Machine Names Of Parts
KNOW YOUR MACHINE Names of Parts q Differential feed dial w Stitch length dial e Handwheel r Spool stand t Spool holder y Spool pin u Thread guide bar i Thread guide post o Thread guide plate !0 Looper thread tension dial !1 Carrying handle !2 Right needle thread tension dial !3 Pressure adjusting screw... -
Page 7: Standard Accessories
Standard Accessories Set of needles: 2 X #80/12, 3 X #90/14 (Schmetz EL X 705) Screwdriver (Large) Screwdriver (Small) Tweezers Nets Spool holder caps Lint brush Needle threader Attachment screws (for fixing optional accessories) (Refer to the instructions of the optional accessory) !0 Accessory box... -
Page 8: Getting Ready To Sew Connecting The Machine To The Power Supply
GETTING READY TO SEW Connecting the Machine to the Power Supply 1 Turn off the power switch, and connect the machine plug to the machine socket. 2 Connect the power supply plug to your power supply. 3 Turn on the power switch. Power switch Machine plug Machine socket... -
Page 9: How To Turn The Handwheel
How to Turn the Handwheel Always turn the handwheel toward you (Counterclockwise). Handwheel Opening and Closing the Looper Cover To open: (A) While pushing with the thumb to the right as far as it will go, pull the looper cover toward you. To close: (B) Lift the looper cover and push it against the machine. -
Page 10: Raising Or Lowering The Presser Foot
Raising or Lowering the Presser Foot By raising or lowering the presser foot lifter, the presser foot goes up or down. * While in operation, keep the presser foot lowered except when threading the machine or test running without threads. NOTE: Thread tension will be released when the presser foot lifter is raised. -
Page 11: Adjustment Of Stitch Length
Adjustment of Stitch Length To adjust the stitch length, turn the dial. The larger the number, the longer the stitch. The stitch length can be adjusted from 1 to 4 mm. q Stitch length dial w Setting mark e To lengthen r To shorten * For regular sewing, set the stitch length at 3 –... -
Page 12: Changing Needle
Changing Needle WARNING: Turn the power switch off and unplug the machine before changing needles. Turn the handwheel toward you to raise the needle to its highest position. q Handwheel Then loosen the needle clamp screw for the needle you are going to remove. -
Page 13: Setting The Thread Guide Bar
Setting the Thread Guide Bar Pull the thread guide bar up as far as it will go. Turn the thread guide bar so that the thread guides are right above the spool pins. q Thread guide bar w Thread guide e Spool pin r Stoppers t Thread guide post... -
Page 14: Threading The Machine
Threading the Machine WARNING: Turn the power switch off and unplug the machine before threading the machine. Thread the machine in the following order: 1 Left needle thread 2 Right needle thread 3 Looper thread Raise the presser foot lifter. q Presser foot lifter NOTE: Always thread the machine with the presser foot raised. -
Page 15: Threading The Needles
Threading the needles Thread each needle in the following steps: 1 Draw the thread through the Left side thread guide bar from back to front as shown (A). NOTE: If the thread is coming out from the thread guide notch, pass the thread through the thread guide hole again as shown (B). -
Page 16: How To Use The Threader
3 Hold the thread at both ends and tug gently to ensure the thread is correctly inserted between the tension disks. ( If the presser foot lifter is raised, the thread easily inserts between the tension discs.) e Tension dial r Tension disks 4 Pass the thread through the thread guide (A) from the right. -
Page 17: Threading The Looper
Threading the looper Thread the looper in the following steps: 1 Draw the thread through the right side thread guide bar from back to front as shown (A). NOTE: If the thread is coming out from the thread guide notch, pass the thread through the thread guide hole again as shown (B). - Page 18 3 Hold the thread at both ends and tug gently to ensure the thread is correctly inserted between the tension disks. ( If the presser foot lifter is raised, the thread easily inserts between the tension disks.) e Tension dial r Tension disks 4 Pass the thread through the looper thread guide (A) from the right.
-
Page 19: Stitch Types Cover Stitch
STITCH TYPES Cover Stitch This stitch forms 5 mm wide two parallel rows of the straight stitch on the right side, widely used on cuffs and stretch welts of T-shirts etc. q Left needle w Right needle Type of Fabric Needle Size Type of Thread Fine knits Light to... -
Page 20: Chain Stitch
Chain Stitch This stitch is sewn with a single needle and forms a chain of looper thread on the wrong side of the fabric. This is a durable and flexible stitch used for seaming knit fabrics, attaching elastics, attaching bias tapes etc. Thread one of the three needles and looper. -
Page 21: Finishing The Seam
Finishing the Seam To achieve the best results, use a piece of scrap fabric at the beginning and end of the seam. Beginning of the seam 1 Raise the presser foot and insert a piece of scrap fabric under the foot. Lower the foot and turn the handwheel several times toward you. -
Page 22: Removing The Fabric In The Middle Of The Stitching
Removing the Fabric in the Middle of the Stitching 1 Raise the needles to their highest position by turning the handwheel toward you. q Handwheel 2 Raise the presser foot with the presser foot lifter. w Presser foot lifter 3 Pull the needle threads before the needle eyes. This prevents the threads from being caught when removing the fabric. -
Page 23: Hemming With The Cover Stitch
Hemming with the Cover Stitch 1 Fold up the edge of the fabric to the wrong side and press. 2 Draw a line with a tailor’s chalk on the right side of the fabric to mark the fabric edge. 3 Place the fabric so the left needle drops just to the left side of the marked line. -
Page 24: Cover Stitch Applications
Cover Stitch Applications Hemming on sleeves and waistlines q Sleeve w Waistline Attaching laces and tapes q Tape or lace w Right side of the fabric e Wrong side of the fabric Attaching elastics q Right side of the fabric w Wrong side of the fabric e Elastic Decorative stitch... -
Page 25: Care Of Your Machine Cleaning The Feed Dogs And Looper Area
CARE OF YOUR MACHINE Cleaning the Feed Dogs and Looper Area WARNING: Turn the power switch off and unplug the machine before cleaning. NOTE: Do not dismantle the machine in any way other than what is explained in this section. 1 Remove the presser foot and needles. -
Page 26: Troubleshooting
Troubleshooting Reference Problem Cause See pages 10-14. Needle thread 1. The machine is not threaded correctly. See pages 15, 16. breaks. 2. The thread tension is too tight. See page 8. 3. The needle is bent or blunt. See page 8. 4.