Table of Contents
Advertisement
Quick Links
Advertisement
Table of Contents

Related Manuals for Janome Quilt Maker Pro 18 VERSA


Summary of Contents for Janome Quilt Maker Pro 18 VERSA
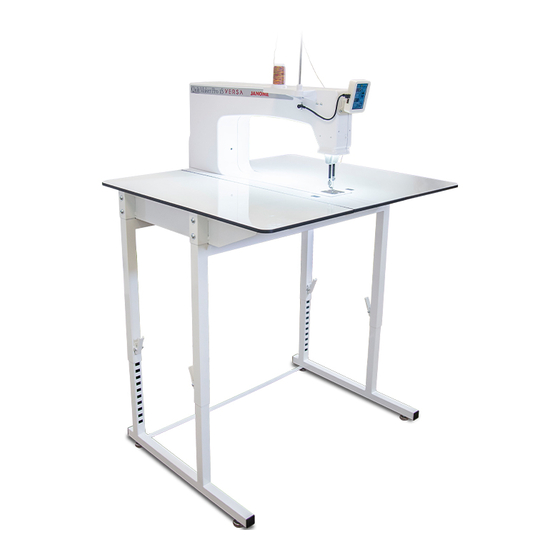
- Page 1 Janome Quilt Maker Pro 18 VERSA Service Manual...
-
Page 2: Table Of Contents
About the Quilt Maker Pro 18 VERSA . . . . . . . . . . . . . . . . . -
Page 3: About The Quilt Maker Pro 18 Versa
. a fine running quilting machine is possible each and every time. The Quilt Maker Pro 18 VERSA machine is constructed About the Manual and Support The purpose of this service manual is to help the... -
Page 4: General Specifications
General Specifications Sewing Opening Dimensions: (245 mm X 470 mm) 8.25” X 18” Sewing Speed: Manual Mode: Min 90 spm, Max 2200 spm, Regulated Mode: Min 0 spm, Max full speed Stitches Per Inch: 4spi – 18spi Needle System: 134 (135 X 7) Needle Sizes, (recommended): 12/80 - 20/125 Hook System:... -
Page 5: Assembly Torque Specifications
It is therefore advised that this torque specification not exceed 6 Nm. • Base plates • Handlebars 6. 6 mm hex tool set screw, Class 8.8@ 4.5 Nm (Uses a 3 mm hex tool tool) • Hand wheel Janome-America.com Page 5... -
Page 6: Lubrication Specifications
#1-#6 Kit QM49262 All the above in box w/ booklet Lubricating Schedule The Quilt Maker Pro 18 VERSA lubricating schedule should be followed every year up to every two years to ensure top mechanical performance. Page 6 Quit Maker Pro 18 VERSA... -
Page 7: Section 1: General Observations Of Front Frame Cover, Mast And Hand Wheel
Remove the front cover (see removing front cover), loosen the hand-wheel set screw, position the hand wheel and re-tighten the set screw. (3 mm handle hex tool) Janome-America.com Page 7... - Page 8 1. General Observation - Continued 3 . Check/Inspect: Test the condition of the thread guides, the takeup/check spring, the take-up lever, the thread stirrup and the needle bar thread guide. Check for any abrasions, cuts, or electroplating blistering. Test each guide by flossing it with thread, left to right and front to back in all directions, checking for any sharp defects that may damage or cut the thread .
-
Page 9: Section 2: Removal Of
Note: the tension cable remains connected to front cover with the control board . Janome-America.com Page 9... -
Page 10: Section 3: Lubrication
3. Lubrication Lube #1 (Red) in the seven places shown below, on each side of the shaft between the bearing and the shaft. Then use Lube #2 (Blue) between the bearing outer diameter and the bearing support at each of the seven places. Apply one drop of Lube #6 (Purple), to the... - Page 11 Add grease sparingly to the presser-bar slide and plunger. Add a small amount between the stylus and cams of both the presser-bar lifting link and the hopping-mechanism lifting arm. (4 places) (Also lubricate two lower bearings, not shown.) Janome-America.com Page 11...
-
Page 12: Section 4: Securing Flats And Screws
4 Checking and Securing Flats and Screws The Quilt Maker Pro 18 VERSA has been designed using flats and special screws to help prevent loop lift timing from slipping, except at the hook. (If the hook cannot slip then something has to break when something goes wrong. The hook is designed to be adjusted without removing the front cover.) - Page 13 360º. To ensure that there is no tightness or play, the collar should be checked through a full rotation until it has minimal tightness and minimal play . Janome-America.com Page 13...
-
Page 14: Section 5: Axial Play Check And Adjustment
5. Axial Play Check and Adjustment Axial or end play on shafting can result in noise, wear and faulty sewing. Check: 1. Check the main-shaft by pushing and pulling on the hand wheel. (Figure 5.1) Note: A small amount of main shaft axial play is permissible. Too much main shaft play, however, may cause noise and or stitching issues. -
Page 15: Section 6: Adjusting The Base Plate Feet
Note: This is done on a precision surface plate at the factory during assembly . If a correction is necessary: Thin shim washers may be used as shown in (Figures 6.1 and 6.2). Figure 6.1 Figure 6.2 Janome-America.com Page 15... -
Page 16: Section 7: Adjusting The Motor Drive/Timing Belt Tension
7. Adjusting the Motor Drive/Timing Belt Tension The Quilt Maker Pro 18 VERSA machine utilizes a Tools required: 3 mm handle hex tool, 0. 5 mm feeler single motor drive/timing belt system. gauge, 8 mm open end wrench Tools required: 4 mm handle hex tool Check: With the machine front cover removed. -
Page 17: Section 8: Adjusting The Hopping Foot Adaptor
8. Adjusting the Hopping Foot Adaptor The Quilt Maker Pro 18 VERSA features the “KinetiQuilt” hopping mechanism, allowing the hopping foot to move (hop) up, down and dwell on the fabric when the needle is in the fabric. This allows fabric to move through the machine similar to a normal sewing machine with a feed dog. -
Page 18: Section 9: Adjusting The Presser Bar Height (Internal Adjustment)
9. Adjusting the Presser Bar Height (Internal Adjustment) Tools: 3mm Handle hex tool, 0.5mm feeler gauge Important: Make sure the hoping foot adaptor was set correctly in the previous section before doing this step . Check When the needle bar is in its lowest position, the hopping foot should be no higher than 0.5mm above the needle plate. -
Page 19: Section 10: Needle Position, Check And Adjustment
. • Tighten screws A and B in Figure 10.2 . Note: If needle position changes, repeat the process. Do not tighten screw D or G at this time. Figure 10.2 Janome-America.com Page 19... - Page 20 10. Needle Position, Check, & Adjustment - Continued Adjustment for X axis: Cover On Note: That adjustment is done with the front frame cover on. Important Note: The picture shows the cover off for illustration purposes only! The primary adjustment is accomplished using the right side of the head frame shown in (Figure 10.3) .
-
Page 21: Section 11: Timing - Checking Loop Lift And Needle Distance
9. Check the axial distance between the needle and the hook point. The hook point should lightly touch (brush) the needle Figure 10.4 inside the scarf. Too much needle distance may cause shredding or Loop lift and needle height both set correctly skipped stitches. Janome-America.com Page 21... -
Page 22: Section 12: Timing- Adjusting - First Rotate The Basket Down
12. Timing - Adjusting, First Rotate Basket Down Important Note: The final timing and needle distance adjustment must be done with the front machine cover on . If correction of loop lift or needle distance is necessary, then the basket must first be rotated down: with the bobbin case basket in the normal position, the basket needle guard may deflect the needle and this makes it difficult to accurately adjust... -
Page 23: Section 13: Timing - Adjusting Loop Lift And Needle Distance
(needle distance) on its shaft, as well as radially (loop lift), setting the hook point relative to the needle, as described on the next page. For radial position of loop lift see Figure 13.1 above. Figure 13.3 Janome-America.com Page 23... - Page 24 13. Timing - Adjusting Loop Lift and Needle Distance – Continued 4. Adjust the needle distance by sliding the hook axially on the hook shaft toward the needle until the hook barely touches (lightly brushes) inside the needle scarf. Note: It is better for the hook to barely touch the needle than to be too far away from the needle.
-
Page 25: Section 14: Adjusting Needle Height
• If correction is necessary, slightly loosen the needle bar driver screw while holding the needle bar with the other hand. Rotate radially until the hole is at front and re- tighten the driver screw firmly. Thread guide hole to front Figure 14.2 Figure 14.3 Janome-America.com Page 25... - Page 26 14. Adjusting the Needle Height – Continued Note: Under NO circumstance should the needle bar clamp screw be completely loosened. Failure to observe this caution can result in the uncoupling of the needle bar from the needle bar driver. If this happens, do not run the machine.
-
Page 27: Section 15: Adjustment Of The Stop Finger
• The machined edge helps support the stop-finger Figure 15.2 from twisting to the side, allowing the basket to spin out of position, be hit by the needle and damaged. • Tighten screw A. Stop-finger cutout Figure 15.3 Janome-America.com Page 27... -
Page 28: Section 16: Adjusting The Needle Height With Cylinder Tool
16. Adjusting the Needle Height with Cylinder Tool Tools required: Flat screwdriver, #3 x 150 mm in length, needle-height cylinder tool. Check: Turn the hand wheel in the direction of motion until the hook point becomes even with the right side of the needle as shown in (Figure 16.1). -
Page 29: Section 17: Electronic Adjustments And Indicators
Needle Distance Section) 17. Electronic Adjustments and Indicators System Power The Quilt Maker Pro 18 VERSA operates at voltage levels between 100 and 240VAC, 50 or 60 Hz. This means it can be run in most countries as long as the appropriate power cord or adapter plug is used. -
Page 30: Indications Of Speed/Needle Position Sensor
Indications of Speed/Needle Position Sensor The main shaft speed and needle position sensor mounts to the main shaft near the back hand wheel. It is composed of a disk with two encoder regions. The outermost region consists of 100 small segments to provide speed feedback to the control system. -
Page 31: Indications Of Speed/ Needle Postition Failure
Make sure the encoder disk is positioned properly in the sensor board . d. If all connections are good, then it may be necessary to change the encoder board and cable . Janome-America.com Page 31... -
Page 32: Power Supply
Power Supply The Quilt Maker Pro 18 VERSA machine has one 48V DC power supply mounted within the free arm at the bottom of the machine. This power supply provides 48V DC to the motor and the control-Board. Symptoms of a Failed Power Supply... -
Page 33: Control Board
Control Board The Quilt Maker Pro 18 VERSA machine has the control board mounted inside the main front cover casting. The main control board uses the following 8 connections (all are labeled with the name except the handlebars which are labelled J18 and J 17): •... -
Page 34: Led Identification
LED Identification Control Pod Power LEDs Near the top of the control board are two green LEDs. The control board receives an input of +48V from the power supply and it converts this voltage into When you first power on the Quilt Maker Pro 18 two different voltage levels. -
Page 35: Top Tension Calibratiion
• The code on the front and rear handle bars is different. The front has “F “code and the rear has “R” code. Summary: the front and rear handle bar displays are not interchangeable Janome-America.com Page 35... -
Page 36: Burn In Note
To get into Burn-In : Press the Diagnostics Bar 5 times: • After pressing the diagnostics button (heart shape) in tools, touch the bar at the top of the screen 5 times or until the machine enters burn-in mode. • To shut off burn-in, switch the main power button to the off position. -
Page 37: Display Screens
Using the Touch-Screen Display The Quilt Maker Pro 18 Versa has a color touch-screen display on the front of the machine. Settings are changed using this display . Main Screen Manual Mode Button Functions The Machine is in Manual Mode when the M is blue . - Page 38 (E) Basting Mode In Manual Operation The Quilt Maker Pro 18 Versa has a basting mode that causes a stitch to be formed at a specified time interval – every 0.5 second, 0.75 second, 1.0 second, 1.5 second, or 2.0 seconds.
- Page 39 Blue indicates the selected button. The Needle Stop buttons indicate the position the needle will stop, up or down, when the foot pedal is released or the Play button is turned off. Janome-America.com Page 39...
-
Page 40: Main Screen Regulated
(I) Up/Down/Tie Off The arrow buttons can assist in creating tie off stitches, basting, or needle-positioning functions without the use of the foot pedal. Pressing and releasing the arrow button quickly will send the needle to the next needle stop position. If the needle is up, pressing the button will cause the needle to move to the down position. - Page 41 In Precision mode, the needle will not move until the fabric moves across the table. In Cruise mode, the needle will stitch immediately at the Cruise speed as soon as you press the Play button or on the foot pedal. Janome-America.com Page 41...
-
Page 42: Tools Menu
. See page 36 for burn-in information. Set Language The Quilt Maker Pro 18 Versa screens can appear in English, French, German, or Spanish. On the Tools Screen, press the lower left icon to cycle between English, Français, Deutsch, and Español. - Page 43 Low Bobbin The Quilt Maker Pro 18 Versa includes a low bobbin alarm to estimate how soon the bobbin thread will run out. This low bobbin capacity is based on an estimate of how much of a particular thread can fit on a bobbin, in...
- Page 44 To see the lifetime stitch counter for the machine, see the Information screen. Alarms The Quilt Maker Pro 18 Versa has alarms that can be turned on or off. The overspeed alarm is enabled by pressing the alarm button next to the speed icon.
- Page 45 • Motion Sensor Test (Stitch Regulation) • Needle Sensor Test • Tension Calibration • Foot Pedal Test Press the Home button to return to the Main menu screen or the Tools button to return to the Diagnostics screen option. Janome-America.com Page 45...
-
Page 46: Diagnostic Tests
Diagnostics Tests Motor Sensor Test The Motor Sensor Test helps you determine if there may be a problem with the Quilt Maker Pro 18 Versa Rotate the hand wheel motor. Slowly rotating the hand wheel should result in an SLOWLY. - Page 47 360° rotation of the hand wheel, this indicates a failed beep for the rest of the cycle. test and the machine should be inspected by a quali fied Failing Test: Janome repair technician . No beep or solid beep as you rotate the hand wheel one full rotation. Janome-America.com...
- Page 48 Foot Pedal Test The Pedal test will help determine if there is a problem with the Quilt Maker Pro 18 Versa foot pedal. Slowly depress the foot pedal, a percent of depression will appear in the white box. The foot pedal should be controllable from 0 to 100%.
-
Page 49: Update
6. When the machine update button is selected,the display screen stays on and a count down number appears above the machine update button icon. A four tone signal sounds when the update on the machine is done. Janome-America.com Page 49... -
Page 50: System Information
Quilt Maker Pro 18 Versa machine the display version, and the sensor version. Press the Home button to return to the Main menu screen or the Tools button to return to the Diagnostics menu screen . -
Page 51: Getting Started
My Speed setting and the foot pedal, and moves the fabric to get an even, consistent stitch. In order to become comfortable using the Quilt Maker Pro 18 Versa, quilters can begin with a few simple techniques using a sample quilt sandwich (two pieces of fabric with a layer of batting between them). -
Page 52: Troubleshooting
You can correct many problems on your own. If you need additional help, contact your local, authorized Janome retailer . First check the following: 1 . The AC power cord is properly connected and both power switches are turned on. - Page 53 • Balance the tension of the needle thread after ensuring the bobbin tension is adjusted correctly. (For more information about adjusting tension, see Bobbin and Bobbin Tension and Easy-Touch Tension™ in the Using Your Machine section of this manual.) Janome-America.com Page 53...
- Page 54 Bobbin case is damaged, • Since thread slides over the surface of the bobbin case at a high corroded, dirty, etc. speed, make sure the case is free of any lint or foreign matter that could impede thread passage through the machine . Moving the quilt too fast •...
- Page 55 . Needle is burred, bent or dull, or • Change the needle at least once per quilt. Make sure the needle is installed incorrectly installed to the top of the stop hole in the needle bar. Janome-America.com Page 55...
- Page 56 Consult a repair technician to polish any hard-to-reach or delicate areas, or if the burr is inside the throat. Wrong type of needle • Use only the needles recommended by Janome (134, sizes 12 through 21). Other possible problems • Needle too close to hook, causing friction and possible collision of hook point and needle (causing broken thread).
-
Page 57: Notes
Notes Janome-America.com Page 57...