Advertisement
Quick Links
Advertisement

Related Manuals for Fisher-Price P0097


Summary of Contents for Fisher-Price P0097
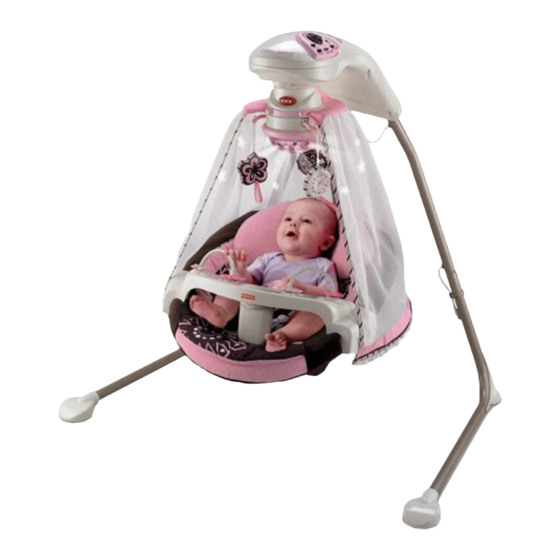
- Page 1 P0097 www.fi sher-price.com...
- Page 2 Renseignements pour les consommateurs Información para el consumidor WARNING AVERTISSEMENT ADVERTENCIA To prevent serious injury or death from falls and being strangled in the restraint system: • Always use restraint system. Never rely on the tray to restrain child. • Never use with an active child who may be able to climb out of the product. •...
- Page 3 Renseignements pour les consommateurs Información para el consumidor IMPORTANT! Please keep these instructions for future reference. • Please read these instructions before assembly and use of this product. • Adult assembly is required. Tools needed for assembly: Allen Wrench (included) and Phillips screwdriver (not included). •...
-
Page 4: Consumer Information
Consumer Information Información para el consumidor ¡IMPORTANTE! Guardar estas instrucciones para futura referencia. • Leer estas instrucciones antes de ensamblar y usar este producto. • Requiere montaje por un adulto. Herramientas necesarias: llave inglesa (incluida) y destornillador de estrella (no incluida). •... - Page 5 Note: Please remove tape before first-time use. Tray Remarque : Retirer le ruban adhésif avant la Plateau première utilisation. Bandeja Nota: Despegar la cinta antes de usar el producto porprimera vez. 3 Toys (Toys may be different) 3 jouets (ils peuvent différer) 3 juguetes (los juguetes pueden variar) Pad with Headrest...
- Page 6 NE PAS l’utiliser si des pièces manquent ou sont endommagées. Communiquer avec Fisher-Price pour obtenir des pièces de rechange et des instructions au besoin. N’utiliser que des pièces du fabricant.
- Page 7 Assembly Retainer Dispositif de retenue Sujetador Power Cord Cordon d'alimentation Cable eléctrico • Fit the power cord into the retainer on the lower leg. • Insérer le cordon d'alimentation dans le dispositif de retenue de la section inférieure de montant. •...
- Page 8 Assembly Button Bouton Botón Feet Pieds Pata • Stand the assembly upright. • Pull the legs out so that the buttons “snap” into the holes in the motorized frame. • When standing behind the product, all four feet should be flat upon the floor. And, check for an L marking on the left foot and an R marking on the right foot.
- Page 9 Assembly Seat Siège Asiento Side Rail Structure tubulaire latérale Riel lateral • Fit the side rails to the side tabs on the seat. • Insert four #10 x " (1.9 cm) screws into the side rails. • Fully tighten the screws with the Allen wrench. •...
- Page 10 Assembly Slots Fentes Coussin Ranuras Almohadilla • Insert the waist belts through the slots in the pad. Make sure the waist belts are not twisted. • Glisser les courroies abdominales dans les fentes du coussin. S’assurer qu’elles ne sont pas tortillées. •...
- Page 11 Assembly Seat Handle Poignée du siège Asa del asiento • Fit the pad edges around the rim of the seat. • Fit the pad around the seat handles. • Placer les bords du coussin sur le rebord du siège. • Fixer le coussin aux poignées du siège. •...
- Page 12 Assembly Lower Seat Tube Tube inférieur du siège Tubo de asiento inferior • Fit the lower seat tube into the short tube on the seat back. • Fixer le tube inférieur du siège dans le tube court du dossier. • Ajustar el tubo de asiento inferior en el tubo corto del respaldo.
- Page 13 Assembly Upper Seat Tube Tube supérieur du siège Tubo de asiento superior Lower Seat Tube Tube inférieur du siège Tubo de asiento inferior • Tip the assembly on it’s side on a flat surface. • Fit the lower seat tube into the upper seat tube. •...
- Page 14 Assembly • Fit the strings on each toy up into the slot in each mobile hanger. • Pull the toy down to be sure it is secure. • Insérer la ficelle des jouets dans la fente des fixations pour mobile. •...
- Page 15 Battery Installation Installation des piles Hint: Install batteries if you need to use this swing away from an outlet. We recommend using alkaline batteries for longer battery life. Remarque : Installer des piles dans le produit pour l'utiliser dans un endroit où il n'y a pas de prise électrique à...
- Page 16 Battery Safety Information Conseils de sécurité concernant les piles Información de seguridad sobre las pilas In exceptional circumstances, batteries may leak fluids that can cause a chemical burn injury or ruin your product. To avoid battery leakage: • Do not mix old and new batteries or batteries of different types: alkaline, standard (carbon-zinc) or rechargeable (nickel-cadmium).
- Page 17 Utilisation de la balançoire et du mobile Button Bouton Botón Montant Pata To Unfold • Firmly pull the legs outward. Make sure the buttons snap into the notches in the motorized frame. • Check to be sure the legs are locked into position by pushing the legs inward.
- Page 18 Utilisation de la balançoire et du mobile Waist Belt Courroie abdominale Cinturón de la cintura Crotch Pad Sangle d'entrejambe Almohadilla de la entrepierna Restraint Belts • Place your child in the seat. • Position the crotch pad between your child’s legs. •...
- Page 19 Utilisation de la balançoire et du mobile PRESS APPUYER PRESIONAR TURN TOURNER GIRAR CRADLE BERCEAU CUNA You can adjust the motion of the swing: side to side or front to back. • Press the seat tube button to unlock the seat tube. •...
- Page 20 Utilisation de la balançoire et du mobile AC Power Use • Place the swing near a standard wall outlet. • Plug the AC adaptor into the power cord extending from the back of a leg. • Plug the AC adaptor into the wall outlet. •...
- Page 21 Utilisation de la balançoire et du mobile Power Source Switch Interrupteur d'alimentation Interruptor de fuente de alimentación Music and Sounds Switch Interrupteur musique/sons Volume Dial Interruptor de música/sonidos Sélecteur de volume Botón de volumen Swing Dial • Turn the swing dial to any of six swing speed settings •...
- Page 22 Utilisation de la balançoire et du mobile Swing Dial • Girar el botón del columpio para seleccionar una de seis velocidades de movimiento. • Apagar O el movimiento de columpio cuando esta función no se use. Consejos: • Como sucede con la mayoría de columpios accionados por pilas, la cantidad de movimiento se reducirá...
- Page 23 Swing and Mobile Use Utilisation de la balançoire et du mobile Uso del columpio y móvil • Lean the swing frame against a wall for storage. IMPORTANT! Remove the batteries for long-term storage. Hint: The legs may be disassembled for long-term storage. Press the button on each lower leg and remove them from the upper legs.
- Page 24 Delegación Tlalpan, C.P. 14020, México, D.F. R.F.C. MME-920701-NB3. CHILE Mattel Chile, S.A., Avenida Américo Vespucio 501-B, Quilicura, Santiago, Chile. Fisher-Price, Inc., a subsidiary of Mattel, Inc., East Aurora, New York 14052, U.S.A. ©2008 Mattel, Inc. All Rights Reserved. ® and ™ designate U.S. trademarks of Mattel, Inc.