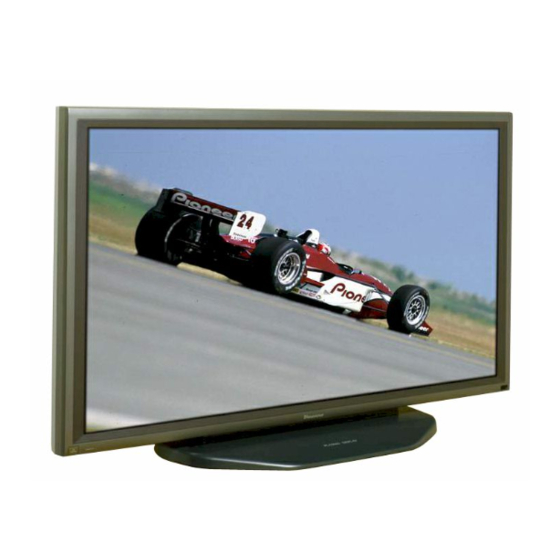
Pioneer PDP-505HD Operating Instructions Manual
Hide thumbs
Also See for PDP-505HD:
- Operating instructions manual (122 pages) ,
- Service manual (99 pages)
Table of Contents
Advertisement
Quick Links
Advertisement
Table of Contents

Related Manuals for Pioneer PDP-505HD


Summary of Contents for Pioneer PDP-505HD
- Page 1 5 5HD...
- Page 2 IMPORTANT CAUTION CAUTION: The lightning flash with arrowhead symbol, within exclamation point withill equilateral tr]allgte TO PREVENT RISK OF ELECTRIC all equilateral triallg]e, is intended to alert the user to intended alert user presence importarlt operaLirl_ ma_nLerlance (servlcirl_) the presellce of Unlr_sulated "dangerous voltage"...
- Page 3 IMPORTANT SAFETY INSTRUCTIONS GROUNDING POLARIZATION All the safety operat READ INSTRUCTIONS OBJECT LIQUID ENTRY Never pLsh objects ir_atrL_ctior_s ShOLIId read be_e product • f tJis product is equippe(! witl a poalized (ifany kir!d irltothis product through opei1illgs as opera)ted allematirlg cLirlent lillepILlg (a plLIg _lavirlg orle they rI1a_ toLich dallgeloLis voltage poillts or sllort RETAIN...
- Page 4 Address: RO. BOX 1760, LONG BEACH, CA., 90801-1760 U.S.A. Phone: (800)421-1625 For Consumer URL http://www.Pioneerelectronics.com Thank you very much for purchasing this PIONEER product, Notes on Installation Work: Before using your Plasma Display, please carefully read the This product is marketed assuming that it is installed by qualified "Safety Precautions"...
- Page 5 • Optional table top stand (sold separately) Stand designed specifically for PDP-505HD table top placement (For details, please consult the deale_ where this unit was purchased) •...
-
Page 6: Table Of Contents
SAFETY PRECAUTIONS ......DISPLAY PANEL ADJUSTMENTS ..28 Understanding the MENU screens ....BEFORE PROCEEDING ......Picture adjustments ..........How to use this manual ........Viewing a fast moving picture (3D Y/C LEVEL) ..........Checking supplied accessories ......Reducing the amount of digital noise PART NAMES FUNCTIONS... -
Page 7: Before Proceeding
How to use his manual The following example is an actual operation that shows how one might adjust the contrast of the picture screens shown at each step are provided as a visual This manual is set up to follow the course of actions and guide to confirm that the procedure is p_oceeding as it operations in the o_der that would seem most logical for should... - Page 8 Press A/W to select CONTRAST, then press SET/SELECT. The CONTRAST adjustment scleen appeals. Press 41/1_ to adjust the CONTRAST setting. The CONTRAST setting is adjusted, When you have finished adjusting the CONTRAST setting, press SET/SELECT to return to the PICTURE adjustment menu screen. Having made an adjustment to the CONTRAST setting, the MODE setting displays "USER (STD)"...
-
Page 9: Checking Supplied Accessories
Checkin 9 supplied accessories Check that the following accessories were supplied, _1}' Power cord Bead band x 2 _2_, R emote control unit • Operating Instructions • Warranty _3) AA (LR6) batteries x 2 _4_Cleaning cloth (for wiping front panel) _5_Speed clamp x 2... -
Page 10: Main Unit
Operation Main unit When optional speakers have been connected, the operation panel on the main unit will not be operable Main unit MENU button Press to open and close the on-screen menu (pages _1 _ _1_' M ain power switch 17 to 38) Use to switch the main power of the unit on and off, ADJUST (A/W/4/I_) -
Page 11: Remote Control Unit
Remete ¢ent em uni (4) AUTO SCREEN button This unit incorporates the use of a "learning" remote control unit This page describes the buttons and controls Use for automatic selection of screen size (page 23), directly connected with the functioning of the main panel unit For more information about how this remote control _5_ MENU button... -
Page 12: Part Names And Functions
_NPLJT4 _1_CONTROL IN/OUT _5_Synchronizing signal impedance selector switch For connection of PIONEER components that bear the Depending on the connections made at INPUT3, it mark, Making CONTROL connection enables may be necessa W to set this switch to match the... -
Page 13: Installation And Connections
• When possible, plea,,e install using parts and accessories manufactured by PIONEER PIONEERwill not he held responsible for accident or damage caused by the use of parts and accessories manufactured by other companies •... -
Page 14: About The Input Jacks On This Unit
Connection to INPUT1 About the input jacks this unit Connect the output jacks of components to the input Connect an AV component that has a video or S-video jacks of this unit following the list below (pages 10 to 14), output jack to the INPUTljacks on the main unit, It is possible to use both the VIDEO and S-VIDEO jacks of... -
Page 15: Connection To Input3 And Input4
Connection te INPUT3 and NPUT4 Connection to AV components Various components can be connected to the INPUT3 and Make component video connections for AV components INPUT4jacks After connections are made, on-screen with component video output capability, setup is necessary to match the characteristics of the connected component, Please see pages 17 to 19 for... - Page 16 Make GONSYNC connections foranAV component with output thathas thesynchronization signal layered ontop Make composite SYNC connections for a component ofthegreen signal, with output that has the vertical synchronization signal layered on top of the horizontal synchronization signal, When connecting to INPUT3 When connecting to INPUT3 @@@@ c_/P_...
- Page 17 Connection to a personal When connecting to INPUT4 computer Connection method differs depending on the computer type When connecting, please thoroughly read the ANALOG computer's instruction manual Before making connections, be sure to make sure that the personal computer's power and this unit's main power is off, For the PC input signals and screen sizes that this unit is compatible with, please refer to supplement...
-
Page 18: About Dtv Set Top Box Connection
Abeut DTV Set Top Box connection To ensure proper connection, please carefully read the instruction manual supplied with the DTV Set lop Box, The Set Top Box output signals that this unit is compatible with are as follows, Jackswhere connection is possible Dot x Line, Scanning Signal type Signal Format... -
Page 19: Control Cord Connection
Centm cord connection Pewer ¢erd connection When control cord connections are made, remote CONtrOl Connectthe power cord after allcomponentconnections operation of connected PIONEER components that bear have been completed the _ logo mark is done through the remote sensor on... -
Page 20: How To Route Cables
Hew te reute cables Speed clamps and bead bands are included with this unit for bunching cables together Orlce components connected, follow the following steps to route cables, AS viewed from the rear of the display 2 Bunch separated cables together and secure Organize cables together using the provided them with the provided bead bands. -
Page 21: Setting Up The System
Press A/V to select SET UP, then press Setu£ after connection SET/SELECT. After components have been connected to INPUT3 or INPUT4, on-screen setup is necessary Follow the procedure described below and make settings as they apply to the type of components connected, (Procedures are written in reference to the remote control unit unless the button or control is only present on the... - Page 22 Press _,/v to select FORMAT, then press Set SIGNAL and FORMA] as follows SET/SELECT. SET UP SIGNAL FORMAT Connected _ component COMPONENT1* Component video output VIDEO of a DTV Set Top Box with HDTV output COMPONENT Component video output VIDEO of a DTV Set Top Box with FORMAT can only be selected when "VIDEO"...
- Page 23 Press A/V to select G ON SYNC, then press G ON SYNC setup SET/SELECT. The RGB video signal is normally composed of 5 signals; R, G, B, HD and VD With G ON SYNC connection, howeveb the signal is composed of 3 signals; R, G (G, HD and VD combined) and B, If the component being used is a model where G ON...
-
Page 24: Operations
Press INPUT on the remote control unit or the Selecting an input source main unit to select the input. On the control panel of the main unit, input changes This section explains the basic operation of this unit each time INPUT is pressed as follows, Outlined on the following pages is how to turn the main powe_ on and of], put this unit in the operation or standby mode and how to select connected components,... - Page 25 To create a still image of the video To confirm display settings image on the screen QJ GU<Z)_ --STILL SCRE_ --DISPLAY Press STILL on the remote control unit. INPUT4 The image culrently being viewed is preselved on the 480kHZ screen This flJnction is convenient for viewing things on the screen that would no_mally be clea_ed before the_e was ample time to view it (recipes in a cooking p_og_am for example)
-
Page 26: Screen Size Selection
Screen Size Se ectien Notes • When the NATURAL WIDE, CINEMA WIDE, ZOOM, or FULL setting is used to display a non-wide screen 4:3 picture fully on This unit incorporates screen modes of various height and a wide screen, a portion of the picture may be cut off or appear deformed width ratios For optimal viewing, we recommend that you select the screen mode that best matches the video... - Page 27 Notes Auto selection (AUTO SCREEN) • For some DVD/LD and video software being used, upper or A number of different video formats will appear on the lower portions of the picture may be cut, or parts of the black scleen in a space smaller than the actual screen size in bands may be viewable o_de_ to presewe the aspect ratio of the original format •...
- Page 28 Moving the screen position Press A/V to adjust the V.POSITION setting. upward or downward Adjustable range: e CINEMA WIDE setting :-15to15 When a vista size movie etc,, is viewed at the CINEMA • ZOOM setting : -25 to 25 WIDE or ZOOM setting, the image may net be centered After sdecting, press SET/SELECT to enter your on the screen, and may extend past the edge of the...
- Page 29 Automatic selection of screen size according to input signal By distinguishing between signals such as S1, $2 and HDTV video signals, screen size is automatically selected and the following indicators a_e displayed on the screen, Input signal Operation Screen indication When $1 video signal (squeeze) is input "FULL"...
-
Page 30: Power Save
POWER SAVE Press A/V to select the POWER SAVE mode. • When "OFF" is selected, this unit will stay in Using the POWER SAVE function of this urfit, the power operation mode regardless of whether a mode can be automatically put in standby mode when a synchronization signal is input or not video or computer... -
Page 31: Labeling The Inputs
Press A/V to select LABEL, then press Labeling the inputs SET/SELECT. This function enables you to apply a label of up to 8 The characte_ window opens, and the cursor is moved characters for each of the 4 inputs to the bottom right come_ of the characte_ window, 1,. -
Page 32: Display Panel Adjustments
Press •/v to select the appropriate submenu and Understanding the MENU screens press SET/SELECT. Pressing the MENU button on the remote control unit opens the MAIN MENU screen The MAIN MENU screen • Use the PICTURE adjustment screen to modify the is the primary starting screen for all internal system actual video image that appears on the screen adjustments... - Page 33 Press </1_ to select the setting. The following settings can be selected: This unit has three programmed picture quality settings in • STD ..Sets standard picture quality memory that are designed for use with various video • MOVIE ..Reduces contrast making dark images gerHe You can select a programmed setting that best easier to see, Ef%ctive for movies that...
- Page 34 Make any necessary adjustments to the screen Saving screen adjustments to the settings as described on the next page. USER mode setting • If any of the programmed modes (STD, MOVIE, or The USER mode can be set for each of the fou_ video GAME) are adjusted, a new USER mode is created signal inputs (INPUT1 to 4) and the two PC signal inputs based on the programmed...
-
Page 35: Picture Adjustments
Press _1/1_ to adjust the picture quality as desired. Adjusting the picture quality Change florn the cente_ position is saved to the USER The PICTURE adjustment screen provides the adjustment mode setting (page 30) items listed in the right column, After selecting, press SET/SELECT to enter your selection When you have finished... -
Page 36: Viewing A Fast Moving Picture (3D Y/C Level)
Press A/V to select OTHER, then press Viewing a fast moving picture SET/SELECT. (3Dwc LEVEL) When viewing a fast moving picture such as might be experienced with a sports program, setting this mode to an appropriate level as determined by the video source will reduce picture blur, and produce a clearer image, •... -
Page 37: Reducing The Amount Of Digital Noise In The Video Image (3D Nr Level)
Press A/V to select OTHER, then press Reducing the amount of digitam SET/SELECT. noise in the video image LEVEL) When viewing a video image via the INPUT1 S-VIDEO jack, it is possible to reduce the amount of digital noise in the luminance and chromanance channels of the S-video signal... -
Page 38: Adjusting The Color Temperature Of The Screen (Color Temp)
Press A/V to select OTHER, then press Adjusting the ce_er temperature ef SET/SELEC_ the screen (COLORTEMP) This function enables the video image to be set to one of five different tones, Press A/V to select COLOR TEMP, then press 2,3,4,5 SET/SELECT. -
Page 39: Setting The Film Mode
Press A/V to select OTHER, then press Setting the F LM MODE SET/SELEC_ The FILM MODE function automatically detects movie film recorded at 24 flames per second, and converts it into a high quality progressive video image delivering the picture at the same rate as it was recorded, •... -
Page 40: (Highcontrast)
Press A/V to select OTHER, then press Viewing in a bright _ocatien SET/SELECT. (HIGHCONTRAST) When viewing a picture in a bright location, setting this mode to "ON" will enable you to obtain a clear video image, • Set this mode to "OFF" when not viewing in a bright location, Press A/V to select HIGH CONTRAST, then press... -
Page 41: Making The Pc Image Brighter (Abl)
Making the PC image b_ighter Press A/V to select ABL, then press SET/SELECT. Set this mode to "ON" to brighten the image during PC signal input, When ABL is set to "ON", the brightness of the image will change according to changes in the input signal If you are bothered by changes to brightness during operation, set this mode to "OFF"... -
Page 42: Adjusting The Screen
Press A/V to select the adjustment item, then Adjusting the screen press SET/SELECT. Adjust when INPUT2, INPUT3 or INPUT4 is selected, (Adjustments on this page cannot be made when INPUT 1 is selected) The SCREEN adjustment screen provides the adjustment items listed in the right column Press <1/I_ to carry out the adjustment. -
Page 43: Operating Other Devices
Simultaneously press EDIT and the number Remote cede set button "1". The LED indicatol starts blinking 1o operate other manufacturers' audio/video components using the remote control unit supplied with the plasma Select the desired manufacturer, display panel, remote control signals need to be set, Select from the table on the following page, There are two methods of setting remote control signals Ex) To select a PHILIPS LD player, press the number... - Page 44 Manufacturer's preset remote control signals CBL/SAT DVD/LD PIONEER PIONEER1 (CABLE) PIONEER PIONEER (DVD) PIONEER 2 (CABLE) FISHER PANASONIC (DVD) JERROLD 1 (CABLE) FISHER SAMSUNG (DVD) JERROLD 2 (CABLE) FISHER SONY (DVD) JERROLD 3 (CABLE) GOLDSTAR TOSHIBA (DVD) JERROLD 4 (CABLE)
- Page 45 Point the transmitters of both remote control To learn remote control signals units toward each other with about 0.8 to 2.0 inch To operate odrer manufacturers' remote control signals (2 to 5 cm) between them, and press the POWER that cannot be p_eset using the remote control unit, have...
-
Page 46: Remote Control Unit Functions
Transmitting FAVO_I_S {4_ RECEIVER INPUT button Remote control unit setting buttons _1_ EDIT/LEARN button Selects the input source connected to the receiver, EDIT: When the EDIT/LEARN button is plessed at the _5_RECEIVER VOL (volume) +, - buttons same time as number button 1 the mode will change to preset code edit mode. - Page 47 Mode switch Cl_GU ELl _J _C_EE_ (b®® ©®® d)®@ ® VCR control buttons (4_ _ (REW) button When the mode switch is set to TV/VCR, the _ernote Rewinds the tape and allows picture seamh, control unit can operate both the main unit (TV) (page 7) (5_ •...
- Page 48 Mode switch _J GL_ELY_J _:RE_N ® CABLE control buttons _._ SOURCE POWER button CABLE and SAT cannot be selected at the same time, Turns the power of the cable converter on and off When the mode switch is set to CBL/SA] the cable FL4) C H ENTER button* Fix the selected channel with the direct channel converter connected to this unit can be operated using...
- Page 49 Mode switch CLkGLJ_(_J _EEN SAT control buttons _4) Select/Set buttons (SET/SELECT, <, 1_, A, v) CABLE and SA] cannot be selected at the same time, 4, 1_, A, V: Pless the button to select items on the SAT GUIDE seleen ol SA] menu seleen SET/SELECT;...
- Page 50 DTV control buttons _5) CH (channel) +, - button When the mode switch is set to DTV, your DTV Set Top Press plus (+) or minus (-) to tune in a higher or lower channel, Box can be operated using buttons (1} to (_ of this remote control unit.
- Page 51 _1}, DTV MENU button When this button is pressed, the DTV menu screen will be displayed, _2_,DTV GUIDE button When this button is pressed, the DTV guide screen will be displayed, Select/Set buttons (SET/SELECT, _1, I_, A, v) 4, D,-,A, v: Press the button to select items on the DTV menu scleen SET/SELECT: Press to activate the selected function, DTV INFO button...
- Page 52 Mode switch _GLP_ Q®Q ®®® DVD/LD control buttons _59_ (SCAN) button DVD and LD cannot be selected at the same time Continue p_essing to scan in the reverse direction, • (STOP) button If the DVD/LD is preset by "Remote code set up", the remote control unit button will function as follows when the mode Playback is stopped when p_essing once, switch of the remote control unit is set to DVD/LD,...
-
Page 53: Additional Information
Resetting the unit to factory set Regular cleaning will extend the life and performance of this unit, The recommended way to clean the display and When the unit is in the operation mode, press related parts is described below RETURN on the control panel on the main unit. Before cleaning, be sure to unplug the power cord from ¢... -
Page 54: Control Unit
nsertin 9 the batteries in the remote Operating range of the remote centroM unit When operating the remote control unit, point it at the remote sensor ([]D located on the front panel of the main unit, The remote control unit is operable up to 23 feet While pressing down... -
Page 55: Troubleshooting
What may at first seem to be an maMJnction, may be _emedied with a quick check, Please check to see if a warning is displayed on the screen If displayed, refe_ to page 53 and check the mode If there is no display check to see if the p_oblem is listed below, The p_oblem may also be caused by something othe_ than this unit so please also check the othe_ components... - Page 56 Problems commonly mistaken as breakdown Problem Possible Solution • The screen is displayed in a • Check the input signal compatibility chart (pages 55 and 56) small stze • Is an appropriate screen size selected? (pages 22 and 25) • Letter breakup on screen •...
- Page 57 CAUTION About the plasma panel's Panel sticking and after-image protection function The brightness of this display will deteriorate slightly • Displaying the same images such as still images for a long time may cause aP:el-image lagging, when an image with little movement such as a This may eccul in the following two cases photograph or computer image is continuously...
-
Page 58: Specifications
INPUT 4 Mini D-Sub 15 pin (socket connector) (1" RGB signal (G ON SYNC compatible) General RGB , 0,7 Vp-p/75 _/no sync Light emission panel .... 50 inch plasma display panel HD/CS, VD .,, TTL level Number of pixels ..........1280 x 768 /positive and negative polarity 2,2 k_... - Page 59 Supplement 1-1 Video signal compatibilty table (INPUT1, INPUT2) Screen size Vertical Horizontal INPUT of Remarks frequency frequency Signal format CINEMA NATURAL this unit Fv (Hz) Fh (kHz) NORMAL FULL ZOOM WIDE WIDE Composite NTSC INPUT1 15734 15734 Component 48@ (DVD) INPUT2 31 5 Component...
- Page 60 Supplement PC signal cornpatibilty table (INPUT3, INPUTZ Screen size (Dot x line) Resolution Vertical Horizontal Remarks (Dot x line) frequency frequency ORIGINAL 4.3 NORMAL FULL 640x400 564Hz 24 8kHz NEC PC 9800 1280x768 701Hz 31 5kHz NEC PC 9800 60Hz 640x480 31 5kHz 640x480...
-
Page 61: Explanation Of Terms
E×planation of Terms Supplement Signal assignment of INPUT 4 (Mini D-Sub 15 pin socket connector) Aspect ratio The TV screen's width to height ratio is referred to as its aspect ratio The aspect ratio on standard TVs is 4:3 and on wide TVs or High Definition TVs it is 16:9 S jack (S VIDEO jack) This jack separates and transmits the video signal as two signals;...