
Related Manuals for Fisher & Paykel DW820


Summary of Contents for Fisher & Paykel DW820
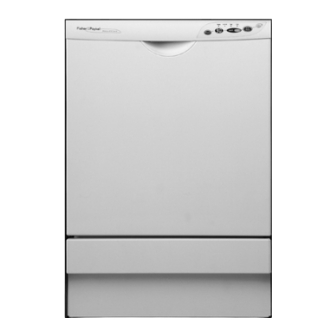
- Page 1 DW820 and DW920 models Dishwasher Installation instructions and User guide NZ & AU...
-
Page 3: Table Of Contents
Contents Installation instructions Introduction Quick operating instructions Control panel Loading the dishwasher Detergent Rinse aid Wash programmes Changing the preset options Australian/New Zealand Standard AS2007.1 Care guide Care and cleaning Problem solving Fault codes Manufacturer’s warranty Customer care Important! Please note, some models shown in this book are not available in all markets. It is important that the Installation instructions/User Guide should be retained with the appliance for future reference. -
Page 4: Installation Instructions
Plumbing Drainage The recommended method of installation for a Fisher & Paykel DW920 and DW820 Dishwasher is shown in Diagrams 1, 2 & 3 on Page 5. The diagrams are designed to eliminate problems that often occur with combined sink-dishwasher waste systems. - Page 5 The hot water supply should ideally be at a temperature of 60-65°C at the point of entry to the dishwasher and must not exceed 75°C. The water pressure to the dishwasher shall be no less than 30kPa (4.3psi) and no more than 960kPa (140psi).
-
Page 6: Specifications
Depth Electrical Drying Water Pressure Water Temperature Place Setting Door open (D) 595mm (DW820 & DW920) 825-875mm 595mm 555mm 230-240 vAC Residual Heat / 1500 Watt Element Minimum 30 kPa (4.3 psi) Maximum 960 kPa (140 psi) Cold water recommended. - Page 7 Plumbing and drainage options Switched power socket Diagram 1: Dishwasher Switched power socket Diagram 2: Dishwasher & waste disposal unit Switched power socket Diagram 3: Dishwasher using sink trap with dishwasher drain hose spigot Waste Water Waste 200mm MIN Hose supplied...
-
Page 8: Introduction
After your Dishwasher has been installed, please check that: The Dishwasher has been installed in accordance with installation instructions. There are no water leaks from the hose connections which can be seen under the Dishwasher or at the tap. First use Before you start, check the following: The power cord is plugged in and the switch is on. -
Page 9: Quick Operating Instructions
Note: If a power failure occurs and the Dishwasher is in the middle of a wash programme, it will stop. Once the power is restored, the dishwasher will restart that part of the wash sub cycle again and continue on with the wash programme. -
Page 10: Control Panel
820 Model Only - The wash programme light will be lit up. The next time the Dishwasher is turned on, it will default to the last wash programme used. To completely stop the Dishwasher press the POWER button. Any remaining water in the Dishwasher will be pumped out. -
Page 11: Eco Button
This feature is useful if you want to take advantage of off peak power rates. (Check with your local Electricity Supplier if this is available), or if you wish to start the Dishwasher at a later time. To cancel the Delay start function Press and hold the START/PAUSE button until the “h”... - Page 12 Time remaining display (920 Model Only) This indicates the approximate time remaining in the wash programme. The Time Remaining Display is based on 20°C or 60°C incoming supply, depending on whether the water connection is cold or hot. If your incoming water deviates from the above temperatures, the Time Remaining Display will make the necessary adjustments to the wash time during the selected wash programme.
-
Page 13: Loading The Dishwasher
Scrape off large food scraps and remove bones, crusts, toothpicks and any similar items. Load the dishes, taking care not to overload the dishwasher. Check there are no items blocking the path of the spray arm. Check by giving the top and bottom spray arm a turn before you close the door. -
Page 14: Cutlery Basket
Cutlery basket A removable cutlery basket sits in the centre of the lower basket. Load cutlery handles down for the best wash performance. Take care when loading and unloading sharp knives or prongs. Mix spoons, knives and forks within each section of the basket. -
Page 15: Detergent
Detergent Detergent usage The detergent dispenser is located on the inside of the Dishwasher door. Check the Wash Programme Chart for the correct amount of detergent or consult the detergent manufacturer’s instructions. Filling the detergent dispenser To fill the detergent compartment: Press the latch if the detergent dispenser lid is closed. -
Page 16: Rinse Aid
Like all household cleaners, store the bottle out of children’s reach. Drying To assist in drying, open the dishwasher door slightly at the end of the programme. Slide the top basket out a little to keep the door ajar. Rinse aid window... -
Page 17: Wash Programmes
Wash programmes programmes Standard programmes... -
Page 18: Changing The Preset Options
The beeps at the end of each wash programme can be removed by following the steps below. Press the POWER button to turn the Dishwasher off. Press the ECO button and while holding down, press the START/PAUSE button and hold together for approximately five seconds until you hear one short beep. -
Page 19: Australian/New Zealand Standard As2007.1
Australian/New Zealand standards AS2007.1 Loading patterns Fisher & Paykel Dishwashers are tested to Australian/New Zealand Dishwasher Standards for both wash and dry performance. The loading pattern for AS 2007.1 is shown below. Detergent quantities For testing to AS2007.1 we recommend the use of 5g on the door and 25g detergent in the dispenser. -
Page 20: Care Guide
Dishwasher. Remember, if you are in doubt about any aspect concerning items washed in the Dishwasher, follow the instructions from the manufacturer of the items, or wash the item by hand. Glassware Most everyday glassware is Dishwasher safe. -
Page 21: Care And Cleaning
Dishwasher. Cleaning the spray arms Unload both Dishwasher baskets and slide them out. The top basket requires the two front rail clips on the slides to be removed before the basket can be pulled out. -
Page 22: Problem Solving
Problem solving If the Dishwasher does not appear to be operating properly, check this chart before you call for service. Problem The dishwasher will not start. Dishwasher does not drain. Dishes do not come out clean. Possible cause Door not closed properly. - Page 23 Use the recommended quantity of detergent. Moisture can be trapped if items are too closely loaded. Ensure the dishwasher is not overloaded. Refill the rinse aid dispenser if the indicating window is clear. Check that there is nothing obstructing the opening of the dispenser lid.
-
Page 24: Fault Codes
If the continuous beeps cannot be removed by pressing the POWER button, turn the Power off at the mains supply, wait 10 seconds, and turn the Dishwasher on again. If the continuous beeps still occur, call your Fisher & Paykel Dealer or Authorised Service Centre. -
Page 25: Manufacturer's Warranty
Manufacturer’s warranty When you purchase any new Fisher & Paykel whiteware Product you automatically receive a two year Manufacturer’s Warranty covering parts and labour for servicing. Fisher & Paykel undertakes to Repair or, at its option, replace without cost to the owner either for material or labour any part of the Product, the serial number of which appears on the Product, which is found to be defective within TWO YEARS of the date of purchase. -
Page 26: Customer Care
Customer care Check the things you can do yourself. Refer to your User Guide and check: your appliance is correctly installed you are familiar with its normal operation If after checking these points you still need assistance please refer to the following: In New Zealand If you need assistance...* Call your Fisher &... - Page 28 You should therefore check with your Dealer to ensure this booklet correctly describes the product currently available. www.fisherpaykel.com NZ AU Dishwasher Insrallation instructions and User Guide Published: 5/2004 Part No. 521766 I Purchaser Suburb...