Table of Contents
Advertisement
Изделие изготовлено в Индонезии
© 2011 JVC KENWOOD Corporation
KDC-4554U
KDC-4054UB
KDC-4054UR
KDC-3454UQ
KDC-3354UGY
KDC-3254URY
KDC-3054UG
KDC-3054UR
KDC-3054URY
KDC-316UR
CD-RECEIVER
INSTRUCTION MANUAL
CD-RECEIVER
BEDIENUNGSANLEITUNG
РAДИОПРИЕMНИК С KOMПAKT–ДИСKAMИ
ИHCTPУKЦИЯ ПO ЭKCПЛУATAЦИИ
АВТОМАГНІТОЛА
ІНСТРУКЦІЯ З ЕКСПЛУАТАЦІЇ
GET0744-001A (E0/E20)
Advertisement
Table of Contents

Related Manuals for Kenwood KDC-4054UR


Summary of Contents for Kenwood KDC-4054UR
- Page 1 KDC-4554U KDC-4054UB KDC-4054UR KDC-3454UQ KDC-3354UGY KDC-3254URY KDC-3054UG KDC-3054UR KDC-3054URY KDC-316UR CD-RECEIVER INSTRUCTION MANUAL CD-RECEIVER BEDIENUNGSANLEITUNG РAДИОПРИЕMНИК С KOMПAKT–ДИСKAMИ ИHCTPУKЦИЯ ПO ЭKCПЛУATAЦИИ АВТОМАГНІТОЛА ІНСТРУКЦІЯ З ЕКСПЛУАТАЦІЇ Изделие изготовлено в Индонезии © 2011 JVC KENWOOD Corporation GET0744-001A (E0/E20)
-
Page 2: Table Of Contents
CONTENTS Safety Function settings Preparation Troubleshooting How to attach/detach the faceplate Installation/connection How to reset your unit Basic procedure Basic operations Warning Caution Getting started Wiring connection Canceling the display demonstration Installing the unit Setting the demonstration mode Removing the unit Adjusting the clock Specifications Initial settings before operations... -
Page 3: Safety
Kenwood dealer. Bazı Zararlı Maddelerin Kullanımının When you purchase external components, Sınırlandırılmasına Dair Yönetmeliğe uygun check with your Kenwood dealer to make olarak üretilmiştir. sure that they work with your model and in This product complies with Directive, your area. -
Page 4: Preparation
Preparation How to attach/detach the faceplate How to reset your unit If this unit fails to operate properly, press the reset button. Do not expose the faceplate to direct Reset button sunlight, excessive heat, or humidity. Also The unit returns to factory settings when the avoid places with too much dust or the reset button is pressed. -
Page 5: Basic Operations
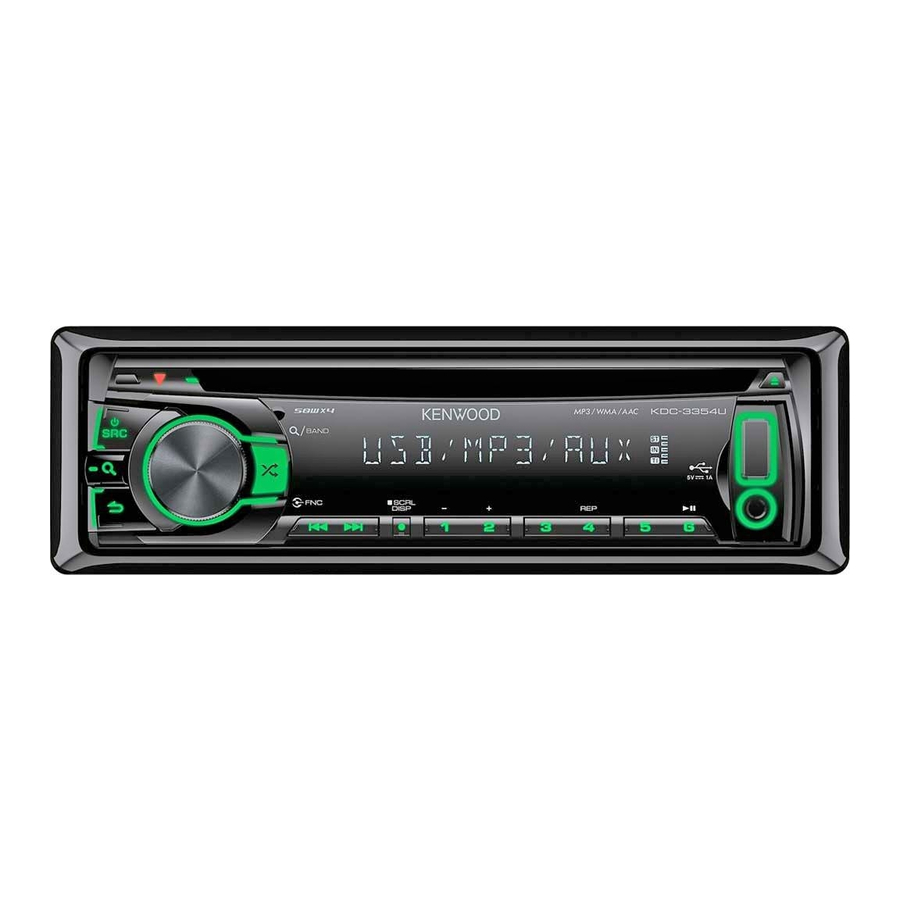
Basic operations Display window Loading slot Ejects the disc Volume knob USB terminal Detaches the faceplate Auxiliary input jack The following indicator lights up when... The illustration and button names used for : A stereo broadcast is received (FM). explanation in this manual are of : A disc is in the unit. - Page 6 When you press or hold the following button(s)... Button General operation Turns on. Turns off if pressed and held. Selects the available sources (TUNER, USB/ iPod, CD, AUX, STANDBY), if the power is turned on. • If the source is ready, playback also starts. •...
-
Page 7: Getting Started
Getting started Canceling the display demonstration The display demonstration is always turned on unless you cancel it. When you turn on the power (or after you reset the unit), the display shows: [CANCEL DEMO] \ [PRESS] \ [VOLUME KNOB] 1 Press the volume knob. [YES] is selected as the initial setup. -
Page 8: Listening To The Radio
F/W UP xx.xx YES *: Starts upgrading the firmware. ; NO: Cancels (upgrading is not activated). For details on how to update the firmware, see: www.kenwood.com/cs/ce/ Listening to the radio Hold for about 2 seconds to memorize the current station. -
Page 9: Adjust [Settings] Mode Settings
Adjust [SETTINGS] mode settings While listening to the radio... 1 Press the volume knob to enter [FUNCTION] mode. 2 Turn the volume knob to select [SETTINGS], then press to enter. 3 Turn the volume knob to make a selection, then press to confirm. See table below for selection. -
Page 10: Listening To A Disc/ Usb Device/ Ipod
Listening to a disc/ USB device/ iPod Loading slot Ejects the disc. (“NO DISC” appears and “IN” indicator goes off.) Press to select track/file. USB terminal Hold to fast-forwards/reverses. Slide open the cover, Press to select previous/next folder. then make the following •... -
Page 11: Selecting Repeat Play
– Applicable only if “RANDOM OFF” is selected initially. About “KENWOOD Music Editor” – For This unit supports the PC application “KENWOOD Music : Changes the iPod browsing item to Editor Light ver1.1” or later. “songs. ” When you use the audio file with database information added by the “KENWOOD Music Editor Light ver1.1,”... -
Page 12: Functions Of
MODE ON: Control iPod from the iPod *. item will display a correct title, etc. “APP&iPod MODE”/ “APP&iPod” appears You cannot operate iPod if “KENWOOD” or “✓” on the display. displayed on iPod. MODE OFF: Control iPod from the unit. -
Page 13: Listening To The Other External Components
Listening to the other external components Preparation : Make sure [ON] is selected for [BUILT-IN AUX] / [BUILTIN AUX]. (page 7, 8) Auxiliary input jack 1 Press SRC to select “AUX.” 2 Turn on the external component and start playing. 3 Turn the volume knob to adjust the volume. -
Page 14: Basic Operations
Direct Music Search to the previous level, press the • Not available if Random Play is selected. button again.) • Not applicable for iPod and Kenwood Music : Returns to the previous item (in Editor. Music Search mode). 1 Press DIRECT to enter Direct Music EXIT : Exit from setting mode. -
Page 15: Function Settings
Function settings 1 Press the volume knob to enter [FUNCTION] mode. 2 Turn the volume knob to select [AUDIO CONTROL] / [AUDIO CTRL] or [SETTINGS], then press to enter. 3 Turn the volume knob to make a selection, then press to confirm. See table below for selection. - Page 16 [AUDIO CONTROL] / [AUDIO CTRL] : While listening to any source except in STANDBY state... Item Selectable setting (Preset: *) DETAILED SET/ DETAIL SET LPF SUBWOOFER/ Except for LPF SUB-W THROUGH *: All signals are sent to the subwoofer. ; 85HZ/ 120HZ/ 160HZ: Frequencies higher than 85 Hz/ 120 Hz/ 160 Hz are cut off.
-
Page 17: Troubleshooting
[SETTINGS] Item Selectable setting (Preset: *) DISPLAY (for DISP DIMMER ON: Dims the display illumination. ; OFF *: Cancels. TEXT SCROLL AUTO */ ONCE: Selects to scroll the display information automatically, or scroll only once. ; OFF: Cancels. TUNER SET TI/ NEWS SET/ AF SET/ REGIONAL/ AUTO ATP SEEK/ ATP SEEK: Selectable only if any source other than tuner source is selected. - Page 18 Symptom Remedy/Cause “COPY PRO” appears. A copy-protected file is played. “READ ERROR” appears. Copy the files and folders for the USB device again. If the error message is still displayed, initialize the USB device or use other USB devices. “NO DEVICE” appears. No USB device is connected.
-
Page 19: Installation/Connection
Mounting and wiring this product requires Be sure to ground this unit to the car’s skills and experience. For safety‘s sake, leave chassis again after installation. this work to professionals. If you experience problems during installation, consult your Kenwood dealer. -
Page 20: Wiring Connection
P. CONT control wire) To the terminal that is grounded when either the telephone rings Brown or during conversation. (To connect the Kenwood navigation (Mute control wire) MUTE system, consult your navigation manual.) Connecting the ISO connectors on some VW/Audi or... - Page 21 (Not used.) (Power control wire) P. CONT To the terminal that is grounded when either the telephone rings or Brown during conversation. (To connect the Kenwood navigation system, (Mute control wire) MUTE consult your navigation manual.) Car fuse box Ignition key switch...
-
Page 22: Installing The Unit
Installing the unit Connect the wiring harness to the unit. Other wiring connection has been completed earlier. (page 20, 21) Before attaching, make sure the direction of the escutcheon is correct. Dashboard of your car (Wider hooks on the top side.) Bend the appropriate tabs to hold the mounting sleeve firmly in place. -
Page 23: Specifications
Specifications FM tuner section USB interface USB standard: USB1.1/ 2.0 (Full speed) Frequency range: Maximum supply current: DC 5 V FM1/ FM2/ FM3 (50 kHz space): 87.5 MHz — 108.0 MHz File system: FAT16/ 32 AAC decode: AAC-LC “.m4a” files FM1/ FM2 (50 kHz space): MP3 decode: Compliant with MPEG-1/2 Audio 87.5 MHz —...