Q-See QC444 User Manual
H.264 network dvr variable cif and d1 recording options
Hide thumbs
Also See for QC444:
- Quick installation manual (10 pages) ,
- Quick installation manual (10 pages)
Table of Contents
Advertisement
Advertisement
Table of Contents

Related Manuals for Q-See QC444


Summary of Contents for Q-See QC444
- Page 1 User Manual MODEL QC444 H.264 NETWORK DVR Variable CIF and D1 Recording Options...
-
Page 2: About This Manual
© 2011 Q-See. Reproduction in whole or in part without written permission is prohibited. All rights reserved. This manual and software and hardware described herein, in whole or in part, may not be reproduced, translated, or reduced to any machine-readable form without prior written approval. -
Page 3: Table Of Contents
5.2 Calculating the Recording Capacity of a Hard disk Drive 3.6 Schedule APPENDIX 3.7 Motion, Video Loss and Camera Masking Detection A.1 Troubleshooting Motion Detection Video Loss A.2 Minimum Computer Configuration Camera Masking Event Response Q-SEE PRODUCT WARRANTY Questions or Comments? Contact Us 3.8 Backup... -
Page 4: Introduction
INTRODUCTION CHAPTER 1 To prevent damage to your Q-See product or injury to yourself or to others, read and understand the following safety precautions in their entirety before installing or using this equipment. Keep these safety instructions where all those who use the product will read them. -
Page 5: Features And Specifications
FEATURES AND SPECIFICATIONS Included Mouse and Remote Control This combo DVR integrates a DVR (Digital Video Recorder) and LCD screen together. It is In addition to the front panel button controls, system can also be booted up and shut down an excellent digital monitor with a sleek appearance and innovative capabilities which are using the included remote control or mouse. -
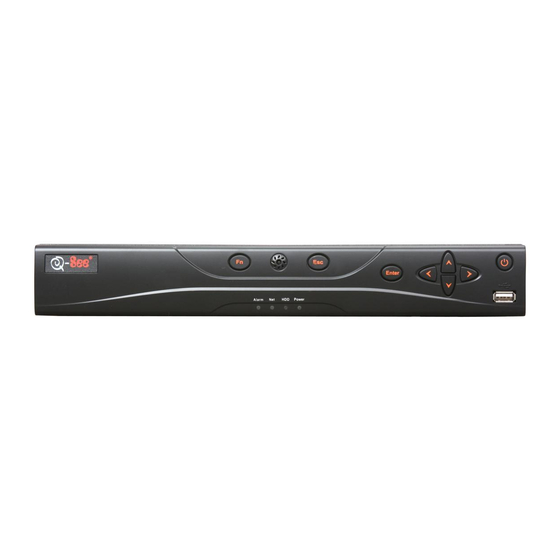
Page 6: Connections And Controls
2.2 REAR PANEL CONNECTIONS AND CONTROLS CHAPTER 2 2.1 FRONT PANEL PICTURE 2-2 PICTURE 2-1 Number Item Function Number Item Function Single Channel Viewing Mode: Opens Color Adjustment Function Video In Ports BNC Connectors for video feed from cameras (4) Button Virtual Keyboard: Backspace function Audio In... -
Page 7: Mouse Control
2.3 MOUSE CONTROL VIRTUAL KEYBOARD This DVR can be controlled through the USB mouse, the remote control or by using the The virtual keyboard is contextual. For example, it will only show digits when the field is for numeral entries. In fields where letters and symbols can be entered, users can switch between buttons on the front panel of the device. -
Page 8: Remote Control
2.4 REMOTE CONTROL The buttons on the Remote Control operate in the same manner as on a conventional DVR remote. Some buttons have multiple functions depending on which menu is being accessed. Num Name Function Mult Multiple-window Switch between multiple-window and one-window view switch 0-9 number key Input password, channel or switch channel. -
Page 9: Basic Operation
In Live View, along with the channel(s), you will see the system date and time displayed along BASIC OPERATION CHAPTER 3 with the name and icons indicating the status of each channel. Setting the system date and time and changing the channel names is covered in Section 4.3 under the Settings menu. This chapter is intended to get your system operational in a baseline format now that you’ve connected your system and turned it on. -
Page 10: Main Menu
LOGOUT IMPORTANT! It is highly recommended that you change your system Selecting the Shutdown icon in the Main Menu will open the Shut Down window. password after you log on for the first time. Record your changes and keep that information stored securely as the system will prevent access if the This window allows you to choose to log out incorrect login information is attempted three times within a 30-minute period. -
Page 11: Search And Playback
3.5 SEARCH AND PLAYBACK SEARCH The Search and Playback window can be accessed through the Shortcut menu. You can To begin a search for an event: view the playback from any camera that was activate during the recording session. STEP 1. Enter the date to be searched. 1p 2p You can also click on the clock icon StartTime Type... -
Page 12: Playback
Zoom Files will be listed by their start time. In addition, when the DVR records a file, it In multi-screen playback, you may click on a channel to bring it to full-screen view. Double- 1p 2p also indicates the type of recording and it clicking the screen again will further enlarge the screen and remove the playback bar. -
Page 13: Schedule
Player software included on the Manuals and Software disc that came with this that when regular recording is selected, the DVR will be already be recording whether a Motion DVR or available for free download at Q-See.com by searching for your model Detection event occurs or not. -
Page 14: Motion, Video Loss And Camera Masking Detection
3.7 MOTION, VIDEO LOSS AND CAMERA MASKING You cannot use Copy/Paste in Motion Detection because each channel will have a different DETECTION display. Right-clicking will exit the screen and your settings will be saved. The Detect menu is a submenu of the Setting menu and contains the Motion Detection Sensitivity –... -
Page 15: Backup
3.8 BACKUP The Set button will appear when either This DVR supports backing up files from the hard drive to both an external USB storage Work Day or Free Day is selected in the device as well as over a network. Network downloads are covered in the Remote drop-down. -
Page 16: Menus
Once you have selected the files, press Start MENUS CHAPTER 4 to begin the download. A progress bar will be displayed showing estimated time remaining. Once you’re ready to move beyond basic operation, the other menus in the system will allow During the download, the Start button will you to configure the DVR to your individual needs. -
Page 17: Main Menu
In the case of a hard drive error, the system will come directly to this menu. An error may be 4.1 MAIN MENU indicated if the hard drive time and system time do not match. To resolve this issue, adjust The Main Menu can be accessed at any time from the Live View by right-clicking the mouse the time in the General setting menu located in the Setting menu (See Section 4.3) and and bringing up the Short Cut Menu. -
Page 18: Version
PICTURE 4-7 You can update the firmware using this menu. Check your product’s page at www.Q-See. com to see if you have or need the latest version of the firmware. If your system is operating without problems, we recommend that you do not update the firmware unless there is an added feature that you need. -
Page 19: Encode
Pack Duration – Rather than creating 24-hour long files when a channel is set to record all ENCODE the time, this allows you to set the maximum record length between one to two hours This window allows you to manage the quality of the recording from each channel as well as (measured in minutes). -
Page 20: Snapshot
Audio/Video – Selecting this box adds an audio feed (if you have a microphone located at SNAPSHOT or near the camera). On the Extra Stream, you can enable the Audio (first box in that In addition to taking video of an event, the DVR can be set to record - and transmit - still column) only if the Video box is also toggled. -
Page 21: Schedule
Remote Monitoring Guide included on the CD that came with your DVR or available for download from www.Q-See.com. Interval – This is the time – from 5 to 120 seconds – that the DVR will display each group of channels before moving to the next group in the tour. -
Page 22: Advanced
ABNORMALITY 4.4 ADVANCED This window allows you to set up alarms for disk and system disconnection errors as well as The settings in this menu cover user accounts, hard disk management, video display, and how these alarms are handled. Each type of alarm can be independently enabled along with system maintenance. -
Page 23: Auto Maintainenance
The Memo field allows you to include a note about the user or group that is only visible in this HARD DISK DRIVE CHAPTER 5 window. Toggling the Reusable box allows more than one user to log in using this account Your DVR uses a standard desktop computer SATA (Serial Advanced Technology Attachment) hard disk Creating a group gives you the ability to set the access privileges for as many users and any drive and will support up to a 2TB (terabytes) drive. -
Page 24: Calculating The Recording Capacity Of Ahard Disk Drive
5.2 CALCULATING THE RECORDING CAPACITY OF A HARD DISK DRIVE While the physical data capacity of a hard drive is fixed, how much video you can record upon it depends on your recording configurations. Higher quality recordings will take up more space on the drive and setting the DVR to record for more frequently will fill it up more rapidly. -
Page 25: Appendix
APPENDIX There is no audio when monitoring. Possible Causes: a. Channel with audio is not full screen, make the channel you want to hear audio on full A.1 TROUBLESHOOTING screen. b. Audio cable is damaged. The DVR does not boot up properly Possible Causes: c. -
Page 26: Minimum Computer Configuration
18. Forgot local menu operation password or network password Supports MOST* AGP and PCI-E Video Cards a. Contact Q-See tech support and we can generate a new password for the unit. with 128MB of RAM or more with full Direct Draw support. -
Page 27: Q-See Product Warranty
Q-SEE PRODUCT WARRANTY Q-See is proud to back all of our products with a conditional service warranty covering all hardware for 12 months from the date of purchase. Additionally, our products also come with QUESTIONS OR COMMENTS? CONTACT US a free exchange policy that covers all manufacturing defects for one month from the date of purchase. - Page 28 Digital Peripheral Solutions, Inc. 8015 E. Crystal Drive Anaheim, CA 92807...