
Related Manuals for Fantasea FG15


Summary of Contents for Fantasea FG15
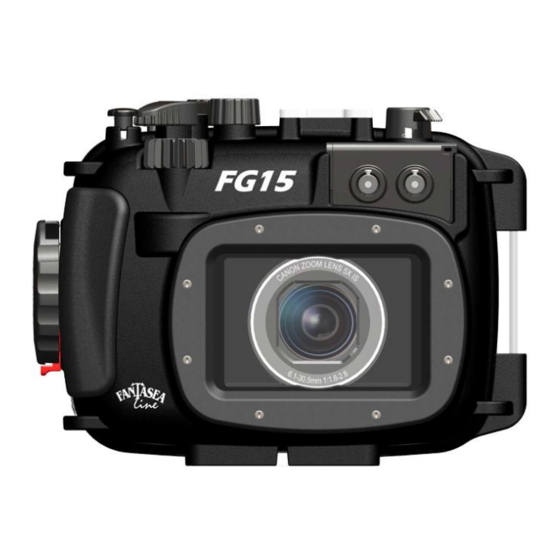
- Page 1 Fantasea Line FG15 Housing (Cat. No. 1390) For Canon PowerShot G15 Instruction Manual FG15 Housing Instruction Manual 20130402...
-
Page 2: Table Of Contents
............................21 CCESSORIES ..........................21 OUSING TRAP ................. 22 ONNECTOR FOR IGHTING CCESSORIES ............................22 ETECTOR FG15 H ......................22 OUSING CCESSORY YSTEM CARE & MAINTENANCE ........................... 23 FANTASEA PRODUCT CONSUMER LIMITED WARRANTY ............24 FG15 Housing Instruction Manual 20130402... -
Page 3: Disclaimer
While every effort has been made in order to ensure that the information included in this instruction manual is accurate and complete, no liability will be accepted for any errors or omissions. Fantasea Line reserves the right to change product specifications and features described herein at any time without prior notice. -
Page 4: Features & Specifications
Features & Specifications Depth rated to 60m/200 feet Made from durable injection molded Polycarbonate Access to all camera controls and functions Shock resistant Double O-ring main seal Special cold-shoe mount for lighting accessories Removable double fiber optic cable connection plate ... -
Page 5: Included In Package
INCLUDED IN PACKAGE 1. FG15 Housing 6. Screwdriver 2. Removable flash diffuser with secure line 7. Silica gel packs 3. Hand lanyard 8. O-ring remover 4. Silicone grease 9. Spare back door O-ring seal 5. Anti-glare hood for LCD screen 10. -
Page 6: Identification Of Housing Parts
IDENTIFICATION OF HOUSING PARTS 1. Please refer to the Canon PowerShot G15 camera instruction manual for detailed descriptions and instructions regarding all camera controls and Note functions. 2. It is strongly recommended that you familiarize yourself with all the controls topside before using these controls underwater. Top/Front Side of Housing - Corresponding numbered descriptions are found on the following page 7. - Page 7 Numbered descriptions below refer to corresponding numbers on the top/front housing graphic on the previous page: 1. Front Dial - Turning this dial swivels the front dial of the camera within an opposite direction. This allows for altering shutter speed and aperture, navigating through camera menus and more. Note that housing front dial directions are opposite to camera front dial directions when turned.
- Page 8 7. Cold-Shoe Mount for Lighting Accessories- Enables mounting a flash, video light, torch or focus light on top of the housing by using a dedicated connector. For further information regarding such connectors, please visit the Fantasea website – www.fantasea.com 8. Flash Push Down Control – This control allows blocking the camera built-in flash after it has been popped-up by using the Flash Up switch.
- Page 9 10. Lens Port- The housing lens port is compatible with a wide variety of accessory filters and lenses. For a selection of lens accessories available, please visit the Fantasea website – www.fantasea.com 11. Tripod Mounting Screw Holes – Enable mounting the housing on a tray, thereby allowing for the addition of various image enhancement accessories to your underwater photo system.
- Page 10 13. AF Frame Selector / Delete – a. In shooting mode, press this button to move or resize the AF frame. b. In playback mode, press this button to delete images. – AE-L/FE-L / Filtering Image Display a. In shooting mode, press this button to lock exposure or focus prior to shooting an image. b.
-
Page 11: The Canon Powershot G15 Digital Camera
25. Playback (Image Review)- Pushing this control activates the camera playback button. 26. Shortcut – Pushing this control activates the camera shortcut button. Note that the function of this button can be assigned through camera menus. 27. Flash Up – Turning this control counterclockwise pops up the camera built-in flash. Note that once the camera built-in flash has been popped up, it can be disabled again using the Flash Push Down Control (no. -
Page 12: Setting Up The Housing
Canon PowerShot G15 Highlights 12MP 1/1.7" Canon CMOS sensor 28-140mm equivalent F1.8-2.8 lens, 4-stop 'Intelligent IS' Full HD video recording capabilities at 1080p resolution DIGIC 5 processor ISO 80-12800 Fixed 3" 920k dot PureColor II G screen ... - Page 13 b. Install the hand lanyard on the housing by inserting it through the lanyard loop on the bottom right of the housing (facing from back), then pulling it through itself and testing it in order to make sure it is secure (image #1). c.
-
Page 14: Opening The Housing
Image #3 Image #4 OPENING THE HOUSING 1. Lift the small red tab located at the bottom of the latch dial upwards, as indicated by the arrow direction (image #5). There is no need to apply any force. 2. While holding the lock dial up, turn the latch dial counterclockwise until the red latch tab is located at the top of the latch and cannot be turned any further (image #6). -
Page 15: Checking The O-Ring
CHECKING THE O-RING 1. Prior to each closure of the housing, the back door O-ring should be visually inspected. If there is any debris present, including dirt, sand, dust, hair, grease or any other matter, it must be cleaned to ensure a proper watertight seal. 2. -
Page 16: Closing The Housing
2. Lift the housing Mode Dial so it doesn’t interfere with camera installation (image #9). 3. Hold the camera parallel to the housing and then gently install it inside (image #10). Avoid inserting one side of the camera prior to the other, as this will make the installation difficult and might cause damage to the camera or housing. -
Page 17: Removing The Camera From The Housing
Image #12 Image #11 4. Gently try pulling the back door away from the front door. If the housing is properly closed, it should be impossible to open the back door. 5. Visually inspect the O-ring for proper closure. Make sure it isn’t twisted or out of the groove and that no foreign matter has been caught in the seal, such as secure lines, sand, grit, hairs or any other foreign substance. -
Page 18: Using The Camera Built-In Flash
2. When opening the housing, it is important to hold it so the lens port is facing down. This will prevent the camera from slipping out of the housing while being opened. 3. Open the housing as described in the section “Opening the Housing”, pull up the mode control and carefully remove the camera from the housing. -
Page 19: Optional Accessories
The FG15 Housing can be used with underwater slave flashes. These external flashes feature a slave sensor which triggers the external flash to fire in sync with the internal camera flash. For the full selection of Fantasea flashes and lighting sets compatible with the FG15 Housing, please refer to the Fantasea website – www.fantasea.com Most underwater slave strobes are capable of synchronizing with the internal camera flash without any cables under certain diving conditions. - Page 20 Remove the Fiber Optic Cable Plate from the housing. Insert your fingers beneath the adaptors installed inside the plate and push the plate upwards till it is removed from its slot. Prior to installing the fiber optic cable on the Fiber Optic Cable Plate, make sure that the two black adaptors are firmly and properly installed inside the plate (image #15).
-
Page 21: Flash & Video Lighting Sets
FLASH & VIDEO LIGHTING SETS A variety of Fantasea flash and video lighting sets are available for the FG15 Housing, enabling you to further enhance your images and videos. These sets include trays, Flex arms, slave flashes, powerful and stylish video lights, fiber optic cables, focus lights, padded bags and more. -
Page 22: Cold-Shoe Connector For Lighting Accessories
The Cold-Shoe Mount featured on the housing enables mounting a flash, video light, night dive torch or focus light on top of the housing by using a standard Cold-Shoe connector mount. For further information regarding such connectors, lights and flashes, please visit the Fantasea website – www.fantasea.com LEAK DETECTOR A leak detector can be installed inside the housing in order to detect moisture. -
Page 23: Care & Maintenance
CARE & MAINTENANCE The Fantasea FG15 Housing requires only a minimum amount of care for safe and reliable performance. The following tips will enable you to get the best results: 1. Always rinse your housing in streaming fresh water and if possible soak the housing in a fresh water tub or rinse tank for about 20 minutes after every dive in order to dissolve the salt water crystals from around the controls and openings of the housing. -
Page 24: Fantasea Product Consumer Limited Warranty
ONE (1) YEAR, (two years, where required by law as determined by the origin of the authorized dealer). This warranty is effective from the date of retail purchase from Fantasea or an authorized Fantasea dealer, by the original end-user purchaser (“Warranty Period”). This warranty does not cover any commercial use of the product.