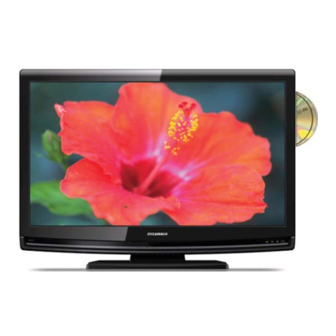
Sylvania LD320SSX Owner's Manual
32-inch 720p lcd hdtv/dvd combo
Hide thumbs
Also See for LD320SSX:
- Owner's manual (166 pages) ,
- Manual d'utilisation (55 pages) ,
- Manual del usuario (54 pages)
Table of Contents
Advertisement
LD320SSX
Owner's Manual
Guide d'utilisation
Manual del Usuario
Hii_ml
++
MODEL NUMBER
SERIAL NUMBER
IT] DOLBY
DIGITAL I
Disc
ONLY
TO RECEIVE DIGITAL/ANALOG
SIGNAL,
YOU MUST CONNECT
ANTENNA.
POUR RECEVOIR LE SIGNAL
NUMCRIQUE/ANALOGIQUE,
VOUS
DEVEZ CONNECTER
L'ANTENNE.
PARA RECIBIR LA SENAL DIGITAL/
ANALOGICA,
DEBE CONECTAR LA
ANTENA.
© 2009 Funai Electric Co., Ltd.
Advertisement
Table of Contents

Related Manuals for Sylvania LD320SSX


Summary of Contents for Sylvania LD320SSX
- Page 1 LD320SSX Owner's Manual Guide d'utilisation Manual del Usuario Hii_ml IT] DOLBY DIGITAL I Disc ONLY TO RECEIVE DIGITAL/ANALOG SIGNAL, YOU MUST CONNECT ANTENNA. POUR RECEVOIR LE SIGNAL NUMCRIQUE/ANALOGIQUE, VOUS DEVEZ CONNECTER L'ANTENNE. PARA RECIBIR LA SENAL DIGITAL/ ANALOGICA, DEBE CONECTAR LA ANTENA.
-
Page 2: Precautions
The model and serial numbers ofthis unit m ay befound o nthecabinet. Model No.: You should record and retain t hose n umbers forfuture r eference. Serial No.: [] Precautions WARNING: TO REDUCETHE RISK OF FIREOR ELECTRICSHOCK, DO NOT EXPOSETHIS APPARATUS TO RAIN OR MOISTURE. -
Page 3: Trademark Information
This a pparatus should notbeplaced inabuilt-in i nstallation such a s abookcase orrack u nless proper ventilation isprovided. Make s ure toleave a space of3.2 inches (8cm) ormore a round t his apparatus. Disconnect the mains p lug toshut o ffwhen f indtrouble o rnotinuse. The mains p lug shall remain readily operable. CAUTION: Danger of explosion if battery is incorrectly replaced. -
Page 4: Supplied Accessories
[] Supplied Accessories owner's manual quick start guide remote control registration card Phillips pan screw for (1EMN24259) (1EM N24499) (NF033UD) (1EMN24700) attaching the stand x 4 (FPH34200) batteries (AA x 2) • If you need to replace these accessories, please refer to the part No. with the illustrations and call our toll free customer support... -
Page 5: Features
[] Features • DTV/TV/CATV • Dolby Digital Sound ....- You can use your remote control to select - Enjoy Dolby Digital multi-channel surround sound channels which are broadcast in digital format when you connect the unit to your Dolby Digital conventional analog format. - Page 6 [] Contents Precautions ..........DVD Functions Trademark Information ........OPERATINQ INTRODUCTION Playable Media ......... Supplied Accessories ........Unplayable Media ........Attaching the Stand ........Playback ..........Symbols Used in this Manual ......Disc Menu ..........Features ..........Resume Playback ........Control Panel ...........
-
Page 7: Control Panel
[] Control Panel 0 (power) (p. 15) Press to turn the unit on and off. I_ (play) (p. 36) Press to begin the disc playback. • (stop) (p. 36) Press to stop the disc playback. _ (eject) (p. 36) Press to eject the disc. CH A/V (p. - Page 8 [] Remote Control Function INPUT SELECT (p. 17) Press to access connected external devices like a BD/DVD recorder. POWER (p. 15) Press to turn the unit on and off. Number buttons (p. 16) • Press to select channels. • Press to select chapter, title (DVD), or track (CD) directly.
-
Page 9: Installing The Batteries
13. DISC MENU (p. 36) 21. REV _1 / FWD _ (p. 37) Press to display the menu on the disc. Press to begin slow forward or slow reverse ii ....... 14. TITLE (p. 36) playback during the pause mode (DVD) and ii iii_i_ii Press to display the title menu (DVD). -
Page 10: Antenna Connection
Before you connect... Be sure your antenna or other device is connected properly before plugging in the AC power cord. [] Antenna Connection Connect the RF coaxial cable on your home outlet to the antenna input jack of this unit. rear of this unit e.g.) VHF/_... - Page 11 [] External Device Connection [HDMI Connection] HDMI connection offers the highest picture quality. i....... HDMI (High-Definition Multimedia Interface) transports high definition video and multi-channel digital audio iii!!! through a single cable. i C_ e.g.) rear of this unit HDMI cable BD/DVD recorder with...
- Page 12 [Component Video Connection] RCA component video connection offers better picture quality for video devices connected to the unit. If you connect to the unit's COMPONENT video input jack, connect an RCA audio cable to the audio L/R jack of COMPONENT accordingly. e.g.) RCA component video...
- Page 13 [Video Connection] RCA video connection offers standard picture quality for video devices connected to the unit. If you connect to the unit's video input jack, connect an RCA audio cable to the audio L/R jack of VIDEO accordingly. When the audio jack of the video device is monaural, connect an RCA audio cable to the audio L input jack.
-
Page 14: Cable Management
[PC Connection] This unit can be connected to your PC that has a DVI terminal. Use an HDMI-DVI conversion cable for this connection and it requires stereo mini plug-RCA conversion cable as well. If you connect this unit to your PC, you can use this unit as a PC monitor. e.g.) stereo mini plug-RCA... -
Page 15: Initial Setup
[] Initial Setup Thissection will guideyouthroughtheunit'sinitial settingwhichincludes Use [Cursor _11_] to select the desired location setting, selecting a languageforyouron-screen menuandautoscan, which then press [ENTER[. automatically scans andmemorizes v iewablechannels. Before youbegin: Makesureifthe unitisconnectedtoantennaorcables. After making all the necessary connections, press [POWER] to turn on the unit. ii i£i POWER ii !i:? -
Page 16: Channel Selection
[] Channel Selection [] Volume Adjustment Select channels by using[CHA/V] or [the Numberbuttons]. Thissection describes h owto adjustthevolume. T hemutefunction, w hich turnsthesoundoff andon, isalsodescribed. • To select the memorized channels, use [CH •IV] [the Number buttons]. • To select the non-memorized channels, Use [VOL._/_] to adjust the audio volume. -
Page 17: Still Mode
[] Still Mode [] Switching Audio Mode Youcanpause the imageshownontheTVscreen. Thissection describes h owto switch the audioin theanalogmodeandhow toswitch the audiolanguagein the digitalmode. Press [PAUSE I I] to pause the image shown on the TV Press [AUDIO] to display the currently selected screen. -
Page 18: Tv Screen Information
[] TV Screen Information Youcandisplaythecurrently selected channel o r otherinformation suchas the audiomodeonthe TVscreen. In the digitalmode,thedetailedbroadcasting i nformation for the current In theanalogmode,the currentchannel n umberandthe audiomodeare channel s uchasprogramtitle, programguides aredisplayed. displayed. Press [INFO] to display the details of the currently Press [INFO]. - Page 19 [] TV Screen Display Mode 4 typesofdisplaymodes canbeselected whenthe broadcasting s tation ii ii:}i issending 4:3 or 16:9videosignal.And3 typesofdisplaymodes canbe selected forPCinputsignal. Press [SCREEN MODE @3] repeatedly to switch the TV aspect ratio. MODZ il ZII_! iiiii!_!:i _ii_i!ii'!!! For 16:9 video signal For 4:3 video signal Sidebar Full...
-
Page 20: Main Menu
[] Main Menu [] Autoscan Thissection describes t heoverviewofthe mainmenudisplayed whenyou If youswitchwires(e.g.,betweenantennaandCATV) or if youmovethe press [SETUP]. F ormoredetails,seethereference pageforeachitem. unitto a differentareaafter the initial setting,or if yourestore the DTV Themainmenuconsists o f thefunction settingitemsbelow. channel y oudeleted,youwill needto perform autoscan. Beforeyou begin: Makesureif the unit isconnected toantennaorcables. -
Page 21: Channel List
[] Channel List [] Manual Register Thechannels s electedherecanbe skipped whenselectingthechannels Thisfunction letsyouaddthechannels t hat werenot added by ii ii:i!i ¸ using[CH A/V]. theautoscan dueto thereceptible condition at theinitial setting. Those channels canstill be selected with [the Numberbuttons]. ii ......ii ii,_i,_,_! Press [SETUP] to display the main menu. -
Page 22: Antenna Confirmation
[] Antenna Confirmation [] Language Selection Youcanchoose English, S panish, or French asyouron-screen language. Thisfunction letsyou check the digitalsignalstrengthofeachchannel. Press [SETUP] to display the main menu. Press [SETUP] to display the main menu. Use [Cursor AIr] to select"CHANNEL", then press [ENTER]. -
Page 23: Picture Adjustment
[] Picture Adjustment Youcanadjustbrightness, contrast, c olor,tint, sharpness a ndcolor ii ii:i!i ¸ temperature. Beforeyou begin: Youmustset"Home"in "Location"(Referto page33). ii ....... Otherwise, t he settings youadjusted will notbe memorized after youturn offthe unit. ii II,_C,_! _iiiii Brightness, Contrast, Color, Tint, Sharpness, Press [SETUP] to display the main menu. -
Page 24: Sound Adjustment
[] Sound Adjustment Youcanadjustthe sound mode,equalizer a ndsomeothersoundfunctions. Auto Volume Leveling This function keeps a constant loudness differential Beforeyou begin: Youmustset"Home"in "Location"(Referto page33). between the TV commercials and the programs. Otherwise, t he settings youadjusted will notbe memorized after youturn offthe unit. Use [Cursor AIr] to select the desired option, then... -
Page 25: Closed Caption
[] Closed Caption ... Youcanview closed captioning (CC) f orTVprograms, m ovies andnews. Closed captionrefers to textof dialogue or descriptions displayed on- Use [Cursor A/V] to select "Caption Service", then screen. press [ENTER[. Press [SETUP] to displaythe main menu. Use [Cursor A/V] to select "DETAIL", then press [ENTER]. - Page 26 In additionto thebasic closed captiondescribed onpage25, DTVhasits Youcan changethe captionstyle suchasfont, coloror size,etc. ownclosed captioncalleddigitalcaptionservice. U sethismenuto change the settings fordigitalcaption service. Use [Cursor A/V] to select "Digital Caption Service", Use [Cursor A/V] to select "Caption Style", then press then press [ENTER[. [ENTER].
- Page 27 Font Style Edge Color Closed Captioning font style can be changed as below. Edge color of the displayed caption can be switched below. Font Size Font size of the displayed caption can be switched Edge Type below. Edge type of the displayed caption can be switched as ii _::iiiii below.
-
Page 28: Child Lock
[] Child Lock Childlockreads the ratingsforprograms, t hendeniesaccess t o the programs whichexceed the ratinglevelyouset. Withthisfunction, y ou canblockcertainprograms inappropriate forchildrenandanychannels or externalinput modes canbe invisible. See the following description for setting each item. Press [SETUP] to displaythe main menu. Use [Cursor A/V] to select... - Page 29 Particularchannels o r external input modes canbe invisible in this MPAARatingisthe ratingsystem createdby MPAA(MotionPicture function. Association o fAmerica). Use [Cursor A/V] to select "Channel Lock", then press [ENTER]. [ENTER]..ii Use [Cursor A/V] to select the desired rating, then Use [Cursor A/V] to select the desired rating, then press [ENTER[ repeatedly...
- Page 30 Rating Category Use [Cursor A/V] to select "TV Rating", then press [ENTER]. TV-MA Mature audience only higher TV-14 Unsuitable for children under TV-PG Parental guidance suggested TV-G General audience TV-Y7 Appropriate for all children 7 and older TV-Y Appropriate for all children lower Sub Rating Category...
- Page 31 Although the defaultcode"0000" issupplied with the unit,youcanset yourown PINCode. i ,,ili_ii_i Use [Cursor A/V] to select "New Password", then press i iTi [ENTER]. i::ili!,i! i ii:__!i i iiiii_ii!i Press [the Number buttons] to enter the new 4-digit PIN Code. • Enter PIN Code again in "Confirm password:' entry field.
-
Page 32: Pc Settings
[] PC Settings Thisfunction letsyouadjustthe PC screen positionduringPCinputthrough the HDMI1 inputjack, Press [SETUP] to display the main menu. Adjust the setting. Position Reset Use [Cursor A/V] to select "Reset", then press [ENTER]. Use [Cursor A/V] to select "DETAIL", then press [ENTER]. -
Page 33: Energy Saving Mode
[] Location [] Energy Saving Mode Youcanset whetherthepowerconsumption issavedor not. When youselect"Retail", thepowerconsumption m aypossibly exceed the limitedrequirement ofthe ENERGY STAR ® qualification ..ii ......Press [SETUP] to display the main menu. Press [SETUP] to display the main menu. ii ii,_i,_,_! Use [Cursor A/V] to select "DETAIL", then press... - Page 34 [] Current Software Info Thisfunction shows whatversion of thesoftwarecurrentlyused. Press [SETUP] to display the main menu. Use [Cursor A/V] to select "DETAIL", then press [ENTER]. Use [Cursor A/V] to select "Current Software Info", then press [ENTER[. Confirm the version of the software currently used.
-
Page 35: Playable Media
[] Playable Media DVD-VIDEO DVD-RW DVD-R DVD+RW DVD+R CD-DA CD-RW CD-R V_DEO digital video (MPfG2) digital audio 5 inches (12 cm) [] Unplayable Media NEVER play back the following discs• Otherwise, malfunction may result! 3 inch (8 cm) disc, DVD-RAM, DVD-audio, CD-i, photo CD, Video CD, DVD with region codes other than 1 or ALL, DTS-CD,... -
Page 36: Playback
[] Disc Menu [] Playback Beforeyoubegin: Turn ontheamplifier a ndanyother equipment w hich isconnected t othisunit. Somediscs contain discmenuswhichdescribe the contentsof the disc or Make sure theexternal audio receiver (notincluded) aresettothecorrect channel. allowyoutocustomize discplayback, or title menuwhichliststhetitles available onthe DVD. Press [POWER] to turn on the unit. -
Page 37: Fast Forward / Fast Reverse
•_ ii [] Fast Forward / Fast Reverse Once a desired zoom factor is set, Press [FWD IH_] or [REV _1_1]repeatedly use [Cursor • / • / < / I_] to slide the zoomed picture i;;ii_i_i, during playback to select the desired across the TV screen. -
Page 38: Search Functions
[] Search Functions Using [SKIP _ / I_IH] During playback, press [SKIP _/IHH] repeatedly until a desired chapter, title or track will be selected. current chapter/track _(CH) (TR) Youcanselectchapters, t itlesor tracks onthedisc. During playback, press [MODE] repeatedly until [SKIP F_] [SKIP _] _;_', °r... -
Page 39: Repeat Playback
{£ Press [the Youcanselectthedesiredtimewhichthe discisplayedbackfrom. Number buttonsl to select your desired chapter, title or track. 1 During playback, press [MODE] repeatedly until " "/ ..appears. e.g.) DVD M(}DE @ @ @ Note: Use [Cursor A/V] repeatedly until ..appears. •... -
Page 40: Repeat A-B Playback
[] Repeat A-B Playback [] Programmed Playback You can repeat playback between A and B on a disc. During playback, press [MODE] repeatedly until Youmaydetermine the orderin whichtracks will playback..appears. In stop mode, press [MODE] repeatedly until "PROGRAM" menu appears. Press [ENTER] at your desired... -
Page 41: On-Screen Display
[] On-screen Display You can check the information about the current disc by pressing [INFO] on the remote control. i 7: ('_';;e appears only when multi- angle is available on the DVD i }3 current playback status current playback status i i:!!:ii remaining time of the current... - Page 42 (nosubtitles) _ENG (English subtitles) SomeDVDmay contain scenes which havebeenshot simultaneously from various angles.Youcan changethe (French subtitles) camera angleif"_ "appears on the screen. I f"ANGLE ICON"is setto"OFF"in"OTHERS" m enu,"_ "will notappear.(Referto page47.) Press [BACK] to exit. During playback, press [MODE] repeatedly until BACK "...
- Page 43 This f eature a llows you toassign aspecific p oint onadisc t obecalled back l ater. To set a marker Thisunitallowsyoutoselect a sound modeduringCDplayback. During playback, press [MODE] repeatedly until ../ ..appears. During playback, press [AUDIO] repeatedly until the e.g.) DVD desired sound mode appears.
- Page 44 [] DVD Language Setting You can change the desired language when playing back the disc, Press [SETUP] to display main menu. SUBTITLE _1, _2 (Default: OFF) Select the desired subtitle language. ;Ii{ Use [Cursor A/V] to select"DVD", then press [ENTER]. DISC MENU (Default:...
-
Page 45: Dvd Audio Setting
[] DVD Audio Setting Choose theappropriate audiosettings foryourequipment.It onlyaffects duringthe playback of DVD. Press [SETUP] to display the main menu. DOWN SAMPLING (Default: This function is available only on digital outputting of a disc recorded in 96kHz. S_TU__ il ..... Use [Cursor A/V] to select"DVD", then press [ENTER]. -
Page 46: Parental Setting
[] Parental Setting Parentalsettingprevents yourchildren fromviewinginappropriate Use [Cursor AI V] to select the desired item, then press materials,(password p rotected,)Playback w ill stopif the ratingsexceed [ENTER]. the levels youset. Press [SETUP] to display the main menu. PARENTAL LEVEL ALL : All parental locks are cancelled. -
Page 47: Others
Others Youcanchange theotherfunctions. STILL MODE (Default: AUTO) Press [SETUP] to display the main menu. Set the picture quality in the still mode. ii ....... If you select"AUTO", it automatically selects the best i 2:i resolution setting ("FRAME"or"FIELD") based on the date characteristics of the pictures. - Page 48 [] Reset to the Default Setting [] Language Code List Youcanresetall the settings exceptforthe parentalsettingand0n-screen Language Code Language Code menulanguage. Marathi 5964 Abkhazian 4748 Moldavian 5961 Afar 4747 Press [SETUP] to display the main menu. Afrikaans 4752 Mongolian 5960 Albanian 6563 Nauru 6047...
- Page 49 [] FAQ ii ii:i_i,; ii ..... • Check the antenna or cable connection to the main unit. • Check the batteries of the remote control. • Check if there is an obstacle between the infrared sensor window and the remote control.
- Page 50 [] Troubleshooting Guide If the unit does not perform properly when operated as instructed in this manual, check the following chart and all connections once before calling for service. Make sure the AC power cord is plugged Make sure that the AC outlet supplies the proper voltage, plug another...
- Page 51 i....... iii!ii • This unit will memorize the volume level from the last time you adjusted You switch to a different input • If the volume of the sound from another device is higher or lower, then the and the volume. loudness will change.
-
Page 52: Troubleshooting Guide
[] Glossary ATSC Dolby Digital Region Code Acronym that stands for Advanced The system developed by Dolby Regions associate discs and players with Television Systems Committee and the Laboratories to compress digital sound. It particular areas of the world. name of the digital broadcasting standards. offers stereo sound (2ch) or multi-channel This unit will only play back discs that have... -
Page 53: Cable Channel Designations
iiiiiiii!i [] Cable Channel Designations ii !ii!: If yousubscribe t o cableTV,thechannels aredisplayed as1-135.Cablecompanies o ftendesignate channels with lettersor letter-numbercombinations. ii G Please check with yourlocalcablecompany. Thefollowingisa chartof common cablechannel d esignations. TVDisplay IV Display TVDisplay TVDisplay TVDisplay TVDisplay TVDisplay [] Other Specifications [] General... -
Page 54: Limited Warranty
WARRANTY COVERAGE: or a part that has been modified without written company per- This warranty obligation is limited to the terms as set forth mission, or (d) if any serial number has been removed or defaced, below. or (e) product, accessories or consumables sold "AS IS"...