Table of Contents
Advertisement
Advertisement
Table of Contents

Related Manuals for Zanussi ZSF 6161


Summary of Contents for Zanussi ZSF 6161
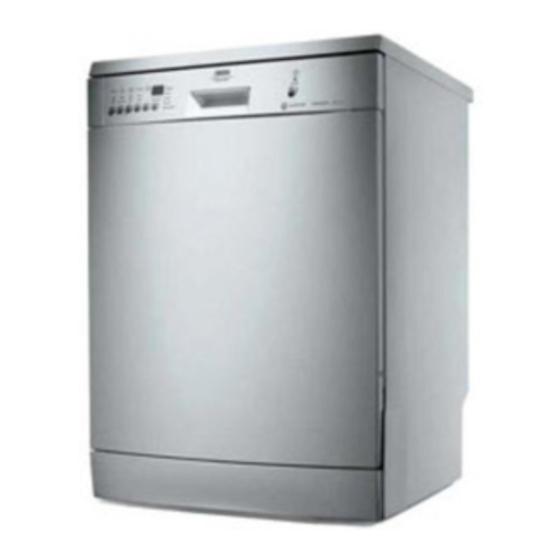
- Page 1 User manual Dishwasher ZSF 6161...
-
Page 2: Table Of Contents
Thank you for selecting our appliance We wish you lots of enjoyment with your new appliance and we hope that you will consider our brand again when purchasing household appliances. Please read this user manual carefully and keep it throughout the product life cycle as a reference document. -
Page 3: Safety Information
Safety information • Under no circumstances should you attempt In the interest of your safety and to ensure the to repair the machine yourself. Repairs car- correct use, before installing and first using the ried out by inexperienced persons will cause appliance, read this user manual carefully, in- injury or serious malfunctioning. -
Page 4: Control Panel
Installation • All sides of the dishwasher must never be drilled to prevent damage to hydraulic and • Check your dishwasher for any transport electric components. damage. Never connect a damaged ma- CAUTION! chine. If your dishwasher is damaged con- tact your supplier. -
Page 5: Control Panel
Control panel Programme selection buttons Delay start button Indicator lights On/Off button and On/Off indicator light Digital display Function buttons... -
Page 6: Setting Mode
Setting mode The appliance is in setting mode when the On/Off in- IMPORTANT! dicator light illuminates and all programme lights are If a programme light is illuminated, the last performed off. programme is still set. Always remember that when performing the following In this case the programme has to be cancelled: operations: Simultaneously press and hold the two Cancel buttons... - Page 7 Programme selection buttons • Starting the washing programme: 1. Press the On/Off button. 2. Press the button corresponding to the required programme, the corresponding light remains illu- minated while the other programme lights turn off. In the digital display will appear, flashing, the run- ning time of the programme (in minutes).
- Page 8 Delay start button This option allows the start of the programme to be delayed from 1 to 19 hours. After having selected the washing programme press the delay start button until the flashing number of the hours for the delay start will appear in the digital display.
-
Page 9: Washing Programmes
Washing programmes Programme Degree of soil Type of load Programme description Intensive 70° Heavy soil Crockery, cutlery, pots Prewash and pans Main wash 2 intermediate rinses Final rinse Drying Automatic 65° 50° Normal / Light soil. Crockery and cutlery Prewash Main wash 1 or 2 intermediate rinses Final rinse... -
Page 10: First Use
During the "Automatic" programme the tem- matically adjusted between 50°C and 65°C perature of the main wash water is also auto- depending on the amount of soil on the dishes. First use – Set the water hardness to level 1. Before using your dishwasher for the first time: IMPORTANT! •... -
Page 11: Setting The Water Softener
Water hardness Adjusting the water hardness Use of salt setting Clarke °TH mmol/l manually electronically 64 - 88 91 - 125 9,0- 12,5 level 10 53 - 63 76 - 90 7,6 - 8,9 level 9 46 - 52 65 - 75 6,5 - 7,5 level 8 36 - 45... -
Page 12: Filling With Dishwasher Salt
Examples: Examples: displayed = level 5 if the current level is 5, by pressing function displayed = level 10 button A once, level 6 is selected. if the current level is 10, by pressing func- 4. To change the level, press function button tion button A once, level 1 is selected. -
Page 13: Filling With Rinse Aid
Filling with rinse aid Open the lid. Fill up with rinse aid. The Clean up any rinse aid maximum level for filling is which overflows. Close indicated by "max" the lid and press until it locks. IMPORTANT! CAUTION! Top up the rinse aid when the light on the control panel Never fill the rinse aid dispenser with any other sub- illuminates. -
Page 14: Load Cutlery And Dishes
Load cutlery and dishes – Dishes and items of cutlery must not lie Sponges, household cloths and any object that inside one another, or cover each other. can absorb water may not be washed in the – To avoid damage to glasses, they must dishwasher. - Page 15 Load cutlery. For best re- Place knives and other The cutlery basket is in two parts which can be sep- sults we recommend you items of cutlery with sharp arated to give greater loading flexibility. To separate to use the cutlery grid pro- points or edges with their the two parts, slide them horizontally in opposite di- vided (if the size and di-...
-
Page 16: Upper Basket
Load upper basket. Light Glasses with long stems For glasses with long items (plastic bowls etc.) can be placed upside stems (according to the must be loaded in the up- down in the cup racks. size and dimensions), set per basket and arranged For taller items, the cup the glass holder to the left so they do not move. -
Page 17: Use Of Detergent
To lower the basket to the original position proceed as follows: 1. Pull out the basket until it stops. 2. Carefully lift both sides upwards and then allow the mechanism to drop back down slowly, keeping hold of it. IMPORTANT! IMPORTANT! Never lift or lower the basket on one side only When the basket is in the higher position you... -
Page 18: Unloading The Dishwasher
Detergent tablets cleaning power during short washing pro- grammes. Therefore, please use long washing Detergent tablets from different manufacturers programmes when using detergent tablets, to dissolve at different rates. For this reason, ensure the complete removal of detergent re- some detergent tablets do not attain their full siduals. -
Page 19: Cleaning The Spray Arms
Replace the filters and lock by turning the handle clockwise to the stop. Cleaning the spray arms 1. Unplug the appliance and then turn off the water. NEVER try to remove the spray arms. 2. Leave the door ajar to prevent the forma- tion of any unpleasant smells. -
Page 20: Environmental Concerns
Environmental concerns Packaging material The symbol on the product or on its pack- aging indicates that this product may not be The packaging materials are environmentally treated as household waste. Instead it should friendly and can be recycled. The plastic com- be taken to the appropriate collection point for ponents are identified by markings, e.g. - Page 21 Fault code and malfunction Possible cause and solution • The sink spigot is blocked. appears in the digital display. Clean out the sink spigot. The dishwasher will not drain. • The water drain hose has not been correctly laid or it is bent or squashed.
-
Page 22: Technical Data
The wash results are not satisfactory The dishes are not clean • The wrong washing programme has been selected. • The dishes are arranged in such a way as to stop water reaching all parts of the surface. The baskets must not be overloaded. -
Page 23: Consumption Values
Consumption values The consumption values are intended as a iations of the power supply and the amount of guide and depends on the pressure and the dishes. temperature of the water and also by the var- Consumption values Programme Programme duration (in Energy consumption (in Water (litres) minutes) -
Page 24: Installation
Upper basket Cutlery basket Lower basket cup racks: position A Installation ers. This dishwasher must be fed with cold WARNING! water. Any electrical and/or plumbing work required to install this appliance should be carried out by a WARNING! qualified electrician and/or plumber or compe- Only use, for connection to the water mains, tent person. -
Page 25: Inlet Hose
Inlet hose Connect the inlet hose to a water tap with an external thread of 3/4”. The inlet hose can be turned either to the left or the right to suit the installation by means of the locknut. The locknut must be correctly fitted to avoid water leaks. -
Page 26: Electrical Connection
Electrical connection ble has to be replaced, contact your local Serv- ice Force centre. The plug must be accessible after the appliance CAUTION! has been installed. Safety standards require the appliance to be Never unplug the appliance by pulling on the earthed. - Page 28 To buy accessories, consumables and spare parts at our online shop please visit: www.zanussi-electrolux.co.uk 117968450-00-032008...