Advertisement
Quick Links
Advertisement

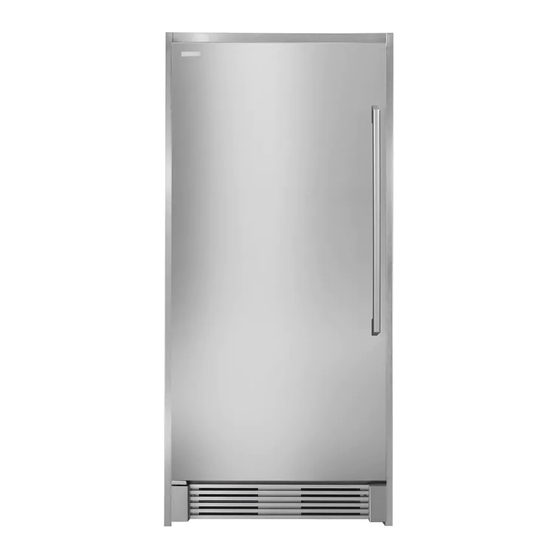
Summary of Contents for Electrolux EI32AF65JS0
- Page 1 Use Et Care Guide Guia de Uso y Cuidado Congelador Guide d'utilisation et d'entretien...
- Page 2 Finding information Please Read And Save This Guide Thank you for choosing Electrolux, our new premium brand in home appliances. This Use & Care Guide is part of our commitment to customer satisfaction and Model and Serial product quality throughout the service life of your new Number Plate appliance.
- Page 3 precautions listedbelow. i_i!_!_i!i_ii_!i!_...
- Page 4 Safety Electrical Information The freezer must be plugged into its own G[ounding type dedicated 115 Volt, 60 Hz, AC-only non-GFCI wall receptacle electric outlet. The power cord of the appliance Do not, under is equipped with a three-prong grounding plug for any circumstances, your protection against electrical shock hazards.
- Page 5 Feature Overview Understanding Features and Terms Your Electrolux freezer is designed for optimal convenience and storage flexibility. The illustration below is provided to assist you with familiarizing yourself with product features and terminology. ice Bin Pure ice Maker IQ Touch TM...
- Page 6 Jiiii!i!!il;:_@!_!_!;!_!ili_!:iiii:@ii!!i!iiiiii@iii_!ii!i!_ii Installation Required Tools Youwillneedthefollowingtools: Heod Wrench Set t [[ ti Ths Use & Care Gude provdes genera nsta aton and operating instructions foryour model. recommend using a service or kitchen contracting Allow the following c!ea[ances for ease of installation, proper a=rctrculatlon, and plumbing professionaltoinstallyourfreezer.
- Page 7 i_i!_!_i!i_ii_!i!_ Matching Refrigerator and Freezer Door Handle installation Toe Grill Toe Grille Removam To remove the toe grille, use a Phillips head screwdriver and remove the two screws holding the toe grille to the cabinet. Then pull the toe grille away from the unit.
- Page 8 Levelin To Level The Freezer: Slide second unit into place leaving a minimum gap of 3/16" between units for door swing While unit is lying on its back for wood skid removal, clearance. note the location of the four (4) leg levelers installed at This last step may require at least one extraction each corner.
- Page 9 Door Removal and Temperature Control Door Remova_ if door must be removed: Unplug the unit or switch the breaker that supplies Hinge power to the unit to the off position. Remove the plastic top hinge cover. Hold the door in place while removing the top hinge from the cabinet.
- Page 10 Resetting Air Filter Alarm LEDwillbeilluminated g reen forthree(3)seconds, i!_!_i!i_ii_!i!_!_i!i_ii_!i!_!_i!i_ii_!i!_!_i!i_ii_!i!_!_i!i_ii_!i!_!_i!i_ii_!i!_!_i!i_ii_!i!_!_i!i_ii_!i!_!_i!i_ii_!i!_!_ii_i...
- Page 11 willilluminate a ndtheaudible alarmwillsound untilthedooris closed. TheaudiblealarmcanbeturnedoffbypressingtheALARMOFFkeyorbyclosingthedoor. Ifthedoorisajar for15minutes, theinteriorlightwillturnoff. Temp Sensing Error Alarm Thesensoralarmsignalsyouthataproblem existswithate, mperaturesensor. Theaudiblealarmwillsound afterone (1) hourandthedisplaywillalternatebetween"E8 or"E9 and-10°F(-23°C) atY2 second intervals. The__ntr__wi__thenenteram_dethatrunsthefreezerinamannerthatmaintainsthefact_ryset_abinet temperature. TheaudiblealarmcanbeturnedoffbypressingtheALARMOFFkey. Stuck Key Alarm Thestuckkeyalarmw ,sound fthecontro readsakeypressfor ongerthan3Oseconds Theaud b ealarm,, willsoundandwillbelimitedtoone minuteandwillstopautomatically.
- Page 12 !_i_i_i!_!!i_!_i!i_!_i!!_!_i_!i_i_!_!_i!i_!_!i_i!_!_i_i_!i_;_i_!i_!i!_!_!i_ii!_iii_ii_i_i_i_!i!i;i_i_!!_ii!i_i_i!_i_i_i_!!!_Ji_i Electronic Control Features Sabbath Node TheSabbath Mode isafeaturethatdisablesportionsofthefreezerand itscontrolsinaccordancewiththe observanoeoftheweekiySabbathand religious holidayswithintheOrthodoxJewishoommunity. T__nit_ate_r_an_ei_abbat_M_de_pres_theC_NTR___L_CKandTEMPM__Ekey_atthesame_meand holdforthree (3) seconds. Thedisplaywill nowshow"Sb andtheconfirmationtonewillsound. WhenAC poweriscycledwhilethecontrol is inSabbath mode, thecontrolentersint, oSabbathmodeautomatically. "Sb willagainbedisplayed. While inSabbathMode, thedisplaywillshow"Sb. Intheinterestoffoodsafety, onlytheHIGHTEMPAlarm remainsactiveandtakesprecedenceoverother Sabbath Mode features. Forice making, thewiresignalarmofthe ice makermustbe liftedtoitsOFFpositionand...
- Page 14 Connectin Water Supply To Freezer To connect the water supply to the rear of the unit Water Supply (See illustration below): Ensure that the unit is unplugged• The ice maker (if equipped) requires a permanent Flush the supply line until water is clear by placing water supply to function correctly.
- Page 15 discoloration andtaste. Turning Your Ice Maker Off To stop the ice maker, lift the wire signal arm until it clicks and locks in the "up" or OFF position, The...
- Page 16 Storage Components Luxury Design Glass Shelving Multi-position adjustable slide out glass shelves can be moved to any position for larger or smaller packages. The shipping spacers that stabilize the shelves for shipping may be removed and discarded. To Adjust The Shelves Lift front edge up.
- Page 17 iiii_ii_:_!;!_!!i Sto age Co po e ts Adjustable Door This model is equipped with adjustable door bins that can be moved to suit individual needs. • Lift the bin straight up. • Remove the bin. • Place the bin in desired position. Lower the bin onto supports until locked in place.
- Page 18 Stori Food & Savi Energy Energy Saving Ideas Vacation And Moving Tips Short Vacations: • Locate the freezer in the coolest part of the room, out of direct sunlight, and away from heating ducts • Leave the freezer operating during vacations of or registers.
- Page 19 etc.) in dishwasher. i_i!_!_i!i_ii_!i!_ Glass Shelves • Soap and water Allow glass to warm to room temperature before...
- Page 20 Warranty Information Your appliance is covered by a one year limited warranty. For one year from your original date of purchase, Electrolux will repair or replace any parts of this appliance that prove to be defective in materials or workmanship when such appliance is installed, used, and maintained in accordance with the provided instructions.
- Page 21 temperature tostabilize. i_i!_!_i!i_ii_!i!_...
- Page 22 _;Ji_!_i_!_i_ii!i_i_!_!_i!ii_!_i_i_!_;_!_i_i_i_!_i!_!i!_i_!_i_ SolutionsTo Common Problems i_i_iiiiiiiiiiiiiiiiii_ii_iiii__i_iii_!i!ii_iiii___i!i___i!i___i!i____!___!i!i_!i!i_i!_;_i___!____!_iii_!_!i!_!_i!i!;_ii;i_i_i;i_i!__i_i!_ii_i!___ii!___!ii!i_!_! SoundAndNoise(Coniinued_ i:i:ii_ii_iiii_ii_iiiii_:i_:i_:i_ii_i!i_i!i_i!i_i!i_iii!i_i!ii!ii__i__!!ii__ii_iJi_:!_ii!!_!ii_i!_ PoppJngorcracking I* Metal parts undergo expansion I Thisis normal. Soundwill leveloffordisappearas sound when compressor contract on as n hot water p pes Freezer cont nues to run /i:iii:ii/iii_i!iii_iii!!iiiii!i!!ii!i!iiiiiiiiii!iii_i_iiiiill comeson: sound. , circulating throughout the system.


