Kenmore 233.52345590 Use & Care Manual
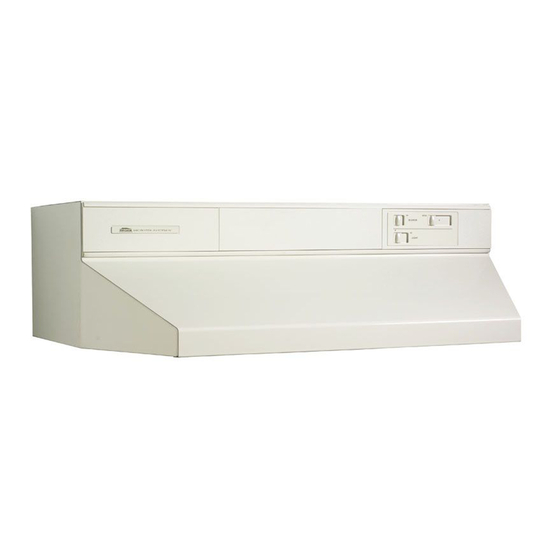
30/36/42" wide - stainless 30/36/42" wide - bisque 30/36/42" wide - white 30/36/42" wide - black installation manual
Hide thumbs
Also See for 233.52345590:
- Owner's manual (3 pages) ,
- Installation use and care manual (32 pages)
Advertisement
Available languages
Available languages
Quick Links
Download this manual
See also:
Owner's Manual
ood
Use & Care / installation Manual
cocina
Manual de uso y cuidado /instalaci6n
Models
Modelos
233.52340590
(3o"
wide - Stainless)
233.52344590
(30"
wide - Bisque)
233.52345590
(3o"
wide - White)
233.52349590
(30" wide - Black)
233.52440590
(36" wide - Stainless)
233.52444590
(36" wide - Bisque)
233.52445590
(36"
wide - White)
233.52449590
(36" wide - Black)
233.52540590
(42" wide - Stainless)
233.52544590
(42" wide - Bisque)
233.52545590
(42" wide - White)
233.52549590
(42" wide - Black)
0
u
0
99043206C
Sears, Roebuck and Co,, Hoffman Estates, UL60179 U,S,A,
www,sears,com
Advertisement

Related Manuals for Kenmore 233.52345590


Summary of Contents for Kenmore 233.52345590
- Page 1 Use & Care / installation Manual cocina Manual de uso y cuidado /instalaci6n Models 233.52340590 (3o" 233.52540590 (42" wide - Stainless) wide - Stainless) Modelos 233.52344590 (30" 233.52544590 (42" wide - Bisque) wide - Bisque) 233.52345590 (3o" 233.52545590 (42" wide - White) wide - White) 233.52549590 (42"...
- Page 2 if within 1 year from the date of installation, any part of this SECTION ..............PAGE range hood fails to function properly due to a defect in mate- Warranty ................rial or workmanship, Sears will repair the part or furnish and Safety instructions ...............
- Page 3 WARNING: To reduce the risk of electric shock, disconnect from power supply before cleaning. [_ON BLOWER Aluminum mesh filters Clean frequently using hot water and a mild detergent or in your dishwasher. The aluminum mesh filters should be washed approximately every month depending on the amount of us- ['HLO...
- Page 4 Amuminum Grease Fimters (75 W Maximum) (f_) Light Bulbs (2 per hood) Purchase locally. OPTmONAL PARTS (purchase separateJy) Damper / Duct Connector (For use with 3¼" x 10" duct) NonoDucted Filter Kit (Clean Cooking Fiiter) (2 per hood) Sears Part No. 50185 Parts Bag Spmashpmate (4 hood mounting screws inside)
- Page 5 Kenmore range h oods a redesigned toperform efficiently when attached toIong runs ofduct. A sa point o freference, thishood wiII f unction atapproximately 80% ofitsrated airftow when 200equivalent feetof7"round d uctwork isattached. Use thischart tocalculate the equivalent duct length of your system.
- Page 6 1. Determine whether hood will discharge vertically, hori- ROOF CAP zontally, or non-ducted. 3W' X 10" DUCT For vertical or horizontal discharge, run ductwork between (For vertical discharge) the hood location and a roof cap or wall cap. For best results, use a minimum number of transitions and elbows.
- Page 7 1. Remove anddiscard: _ from nose ofhood, SHiPPiNG TAPE Protective Plastic from light lens, and Cardboard FHler PROTECTIVE from bottom of hood. Remove and set aside: Damper / Duct Connecter. PLASTIC --_ DAMPER/DUCT CONNECTOR CARDBOARD FILLER 2. Remove Bottom Cover from hood. Set cover and mount- ing screws aside.
- Page 8 1. Choose t hecorrect blower position foryourinstaIlation. Forvertical discharge: Make surethatthe Bmower Dis- DUCT chargA lines up with the Duct Opening in the top of the hood. Lift up the blower, slip the b!ower mounting rods into brackets on blower and tighten knurled nuts securely. Plug in blower.
- Page 9 2. Remove appropriate TOP RECTANGULAR Duct Knockout(s_ from top or back of hood. DUCT KNOCKOUT (Remove for 3¼" x 10" vertical dJsc,#arge) REAR RECTANGULAR DUCT KNOCKOUT (Remove for 3X" x 10" horizenta! discharge) TOP/BACK SHiPPiNG 3= Attach 31A" × 10" Damper/Duct Connector over knockout EDGE...
- Page 10 1. Re@osition the btower for non-ducted discharge. FRONT BLOWER Move the Blower Mountin_ Rods to the Front Holes in HARGE the hood support channels. Position the blower so that it lines up with the Louvered Opening on the hood front. ._"_ LOUVERED Slip the blower mounting rods into brackets...
- Page 11 HOUSE WIRING WARNING: To reduce the risk of electric shock, (120 VAC) make sure power is switched off at the service panel Lock or tag service panel to prevent power from being switched on accidentally. 1. Connect House Wiring (120 VAC) to hood. Use a piece of Cardboard to protect the cooktop, if necessary.
- Page 12 Hang hood from (4)Mountin_ (from parts bag). Slide hood towards w alluntilmounting screws a reen- gaged innarrow endof(4)_homes. Tighten m ounting screws s ecurely. CAUTION: D onot pushonfilter or fan blade! Pushing onthefilterorfanblade may cause them tointerfere w ithotherhood parts. 2.
- Page 13 5. Replace Bottom Cover. DUCTED HNSTALLATHONS ONLY Push filters up into recess at top of hood. Swing filters in and pull down. Make sure that Tab on filter is toward outside and bottom of hood. PULL DOWN (3") SWING IN _ 6.
- Page 14 PART NUMBER DESCRIPTION 97007656 Wiring Box Cover 99150478 #8-18 x 3/8 Phillips Truss Head Screws (4 Required)* 97007895 Bottom Cover - White 97007631 Bottom Cover - Stainless Steel 97011974 Bottom Cover - Black 97015498 Bottom Cover - Bisque 99110605 Light Lens 99270536 Bulb Holder ( 2 Required) 97007541...
- Page 16 SECCIQN ..............PAGINA Si dentro de 1 aho de la fecha de la instalaci6n, cualquier parte de esta campana de cocina deja de funcionar en forma apropiada debido a defecto en el material o mano de obra, Sears reparar_ la pieza afectada o proveer_ e instalar_ una pieza nueva sin cargo.
- Page 17 s. o[ I,,, ADVERTENCIA: Para reducir eJ riesgo de una descarga et_ctrica, desconecte el suministro et_ctrico antes de timpiar ta unidad. BLOWER F{mtros de maria de aluminio Limpie frecuentemente los filtros con agua caliente y un detergente suave. Los filtros se pueden lavar en lavaplatos. debe lavar filtros...
- Page 18 Fimtres degrasa dealuminie BombiHas de l_aximo 75 '7,/) per campana) Adquieralas Iocalmente. PIEZAS OPTATmVAS (compra $eparada) Conector deregumador Equipo de fimtros sin conductos tiro/conducto (Parausecon un ductode 8=3 x25=4 c m[3¼"x10"]) P]aea posteiror Piezas Sears Nos= 58120 30" Negro/Bisque 58128 30"...
- Page 19 Las campanas de cocina Kenmore fueron disehadas para su desempef_o ÷ficiente cuando se las suieta a largos recorridos de conducto, Como punto de referencia, esta campana funcionara a aproximadamente et 80% de su fluio de aire nominal cuando se le sujeta 81 m (200 pies)
- Page 20 1. Determine si la descarga de Ia campana ser_ vertical, horizontaI o sin conducto. TAPADETECHO CONDUCTODE 8.3 cm x 25.4 cm En el case de descarga vertical u horizontal, tienda los conductos entre e! Iugar donde se instaIara la campana y el tap6n de techo o el tap6n de pared.
- Page 21 1. Retire y deseche: La CINTA DE cinta de embalajA de Ia nariz de la PL/_STICO DE EMBALAJE campana, el pmastico de protecci6n del Iente de Iuz y el PROTECCION relleno de carton de la parte inferior de la campana. Retire y fije aparte: Conector de requmador de tiro/...
- Page 22 1. EscojaIa posici6n correctadel ventilador p arasu instalaci6n. ABERTURA Para una descarga verticaE: Aseg0rese deque ladescarga dem ventHador este alineada conIa abertura deBducto en MONTAJE la parte superior de la campana. Levante eI ventilador, deslice Ias barras de montaje deI ventilador dentro de las I', vE"T IL °°R escuadras en el ventilador...
- Page 23 AGUJERO CIEGO DEL CONDUCTO RECTANGULAR SUPERIOR 2. Quite el para losconductos apropiados delaparte superior odelaparte posterior de (Quite para descarga vertical lacampana. de 8.3x25.4 cm [3X" x 10"]) AGUJERO CIEGO DEL CONDUCTO RECTANGULAR POSTERIOR (Quite para descarga horizonta/ de 8.3x25.4 cm [3X"...
- Page 24 ORIFICIO DESCARGA 1, Vuelva a colocar e lventiiador parala descarga sin FRONTAL conducto. Mueva l as barras de montaje del soplador hacia los orificios frontames en los canaies de soporte de la campana. Coloque el ventilador de manera que se encuentre atineado con la abertura de persiana en la parte fronta! de Ia campana, Deslice Ias barras de...
- Page 25 CABLEADO DE LA CASA ADVERTENCHA: Para reducir eJ riesgo (120 VCA) descargas et_ctricas, asegQrese de apagar eJ interruptor de aHmentaci6n el_ctrica en el paneJ de servicio. BJoquee o rotule el panel de servicio para evitar que alguien conecte accidentaJmente ta energ_a eJ_ctrica. 1.
- Page 26 ORIFIOIOTIPO BOCALLAVE TORNILLO DE MONTAJE (4) 1. Cuelgue Iacampana deIos(4) torniHos de montaj_e_(que se encuentran en Ia botsa de piezas). Deslice la campana ..hacia la pared hasta que Ios tornillos de montaje queden conectados en e! extreme angosto de los (4) odfieioe tipo boeaHave.
- Page 27 5. Vuelva a colocar lacubierta i nferior. iNFERiOR EMPUJE HACNA ADENTRO_}} ETNQUETA 6. Instale los montajes deI filtro sin conductos. Empuje el montaje dei filtro hacia arriba de la campana. El aJa fle×ible sobre los filtros fiexionara contra ios lades superiores de Ia abertura. Empqe el montaje hacia arriba hasta que Ia parte inferior deJ montaje...
- Page 28 CLAVE PIEZA 97007656 CubJerta de la caja de cables 99150478 TorniJJo met&lico Phillips para chapa metalJca de enrejado de 8-18 x 3/8 (se necesitan 4)* 97007895 Cubierta inferior - blanca 97007631 Cubierta inferior - acero inoxidable 97011974 Cubierta inferior - negra 97015498 Cubierta inferior - bisque 99110605...
- Page 32 iiiiiiiiiiiiiiiiiiiiiu_ ..HHHHHHHHHH Your Home iiiiiiiiiiiiiiii iiiiiiiiiiiiiiii For repair-in your home-of all major brand appliances, iiiiiiiiiiiiiiii lawn and garden equipment, or heating and cooling systems, iiiiiiiiiiiiiiii no matter who made it, no matter who sold it! iiiiiiiiiiiiiiii For the replacement parts, accessories iiiiiiiiiiiiiiii owner's...