Advertisement
Quick Links
ge.com
>,
C'q
Safety
Instructions
.....
2-7, 22, 23, 24
Operating
Instructions
Oxen
..................
] 0-16
............
8, 9
........
19
Broiler
Pan and Grid
........
20
Burners
...................
18
Control
Panel
and I_obs
.....
18
Grates
....................
1 7
............
1 7
Lift-Off
Oven
Door
..........
20
.................
18
Oven
Interior
..............
21
Painted
Surfaces
............
21
.....
19
Shelves
...................
18
Th ermosta
t Adj ustm ent .......
] 4
22-33
12 .......................
33
Troubleshooting
Tips
.......
34
Consumer
Support
X4'arranty ..................
35
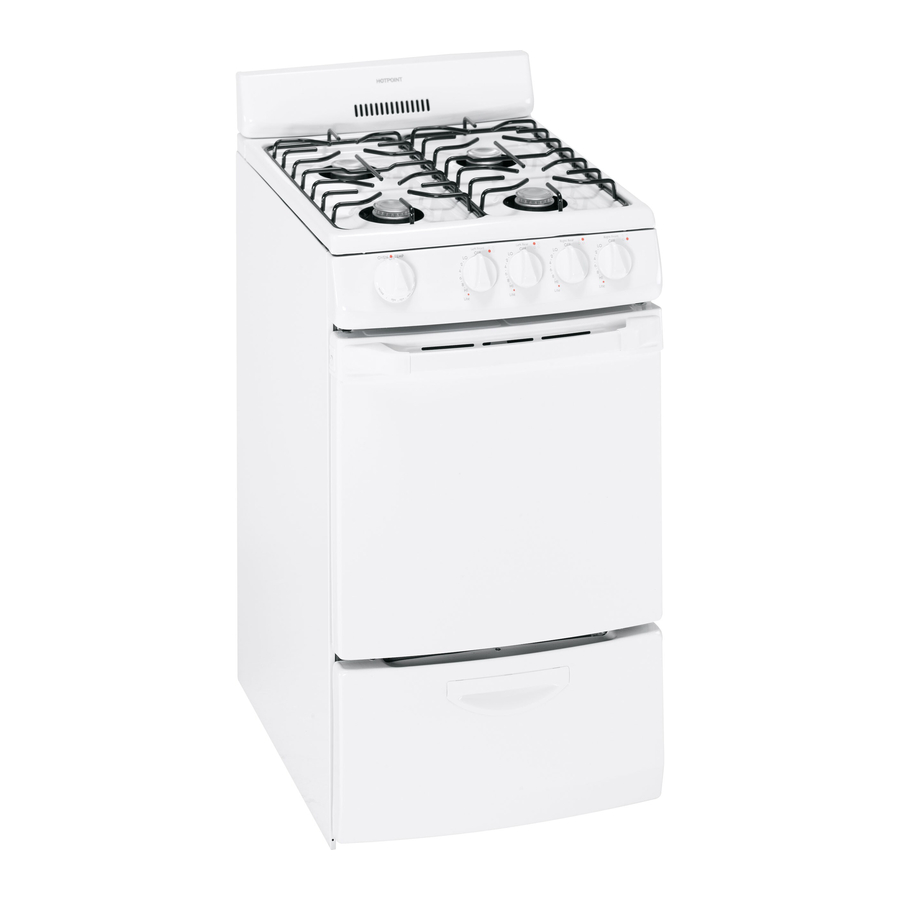
HOTPOINT
RGA ,,20
RGA 724
Write the model and serial numbers
here:
Model #
Serial #
You can find them
on a label
under
the
cooktop.
See the i,itt-Up
Cooktop
section
in this malmal
for instluctions
on how to
lift the cooktop.
183D9542PO02 49-85104
12-05JR
Advertisement

Related Manuals for Hotpoint RGA720


Summary of Contents for Hotpoint RGA720
-
Page 1: Table Of Contents
HOTPOINT Safety Instructions ..2-7, 22, 23, 24 RGA ,,20 Operating Instructions Oxen ....] 0-16 RGA 724 Surface Burners .... 8, 9 Care Cleaning Broiler Compartment ..Broiler Pan and Grid ..Burners ....Control Panel and I_obs .. - Page 2 IMPORTANT SAFETY INFORMATION. READALLINSTRUCTIONS BEFORE USING. WARNING! For your safety, the information in this manual must be followed to minimize the risk of fire or explosion, electric shock, or to prevent property damage, personal injury, or loss of life. WARNING:if the information in this manual is not followed...
- Page 3 ge.com WARNING! IMPORTANT SAFETY N OtiCE The Cafifomia Safe Drinking Water and Toxic Enforcement Act requires the Governor of Cafifomia to publish a list of substances known to the state to cause birth defects or other reproductive harm, and requires businesses to warn customers of potential exposure to such substances. Gas appliances can cause minor exposure to four of these substances, namely benzene, carbon monoxide, formaldehyde and soot, caused primarily by the incomplete combustion of natural gas LP fuels.
- Page 4 IMPORTANT SAFETY INFORMATION. READALLINSTRUCTIONS BEFORE USING. SAFETY P RECAUTIONS Clean only parts listed ira this Owner's _; Locate tire rang.e out of kitchen traffc Manual. paflt arm out of locations to prm.ent drafty' pilot outag.e (on standing pilot models) Nexer wear loose fating or hanging arm poor air circulation.
- Page 5 _e.com COOK MEAT ANDPOULTRY THOROUGHLY... Cook meat and poultry thoroughly--meat to at least an INTERNAL temperature of 160°Fand poultry to at least an INTERNAL temperature of 180°ECooking to these temperatures usually protects against foodbome illness. OVEN Stand away from the range when opening the door of a hot oven. The hot air and steam that escape can cause bums to hands, face and eyes.
-
Page 6: Surface Burners
IMPORTANT SAFETY INFORMATION. READALLINSTRUCTIONS BEFORE USING. WARNING! SURFACE BURNERS Use proper pan size--a void pans that are unstable or easily tipped. Select cookware ha ving flat bottoms large enough to cover bumer grates. Toavoid spillovers, make sure cookware is large enough to contain the food properly. - Page 7 ge.com SURFACE BURNERS (cont.) _:; V_]len a pilot goes out (on standing pilot _:; Do not place or store items fllat can melt models), you will demct a faint odor of gas or catch fire on the grates, ex_n when as your signal to religt_t fl_e pilot.
- Page 8 Usingthe gas surface burners. Throughout this manual, features and appearance may vary from your model Surface Lighting Instructions for Electric Ignition Models Thesurfaceburners on some modelsare fit by electrode (ff the spark igniter electric i)?nition,eflYnlnatlngthe need for standing pilot lights with constant/)/burnlbg flames. exposed.
- Page 9 ge.com How to Select Flame Size Watch the flame, not the knob,as you reduce heat The flame sloeon a gas burner shou/d match the cookware you are using. For safe handling of cookware, never let the Never let the flame extend up the sides of the cookware.
-
Page 10: Care And Cleaning
Usingthe oven. Throughout this manual, features and appearance may vary from your model OvenControl OVEN • TEMP Youroven/s controlled by an OVENTEMPknob. /t can take up to 90seconds before the flame comes _dter tile oven reaches tile selected temperature, tile oven burner maintains tile selected temperature. - Page 11 ge.com Oven Shelf Positions The oven has tour shelf supports-- A (bottom), B, C and O (top). Shelf positions fin" cooking are suggested in the Using your oven for baking and Using your oven for roasting sections. Theovenhas4 shelfpositions. Oven Vents of pots and pans on the •...
- Page 12 Usingtheovenforbaking. To avoid possible bums, place the shelves in the desired position before you turn the oven on. How to Set the Oven ForBaking Close tile o_en door Then tile fi)od fi)r doneness turn tile V_] Check OVEN TEMP knob to tile desired tile minimmn time on tile recipe.
- Page 13 ge.com Cookies Flat cookie sheets (without sides) Do not use a cookie sheet so lmge that it touches the walls or the door of the oven. produce bette_qoo]dng cookies. ())()]des Never entirely cover a shelf with a lmge baked in a jelly roll pan (short sides...
- Page 14 Usingthe oven for masting. Roasting is cooking by dry heat. Tender meat or poultry can be roasted uncovered in your oven. Roasting temperatures, steady, keep spattering which should be low and to a minimum. Roasting is really a baking procedure Roasting is easy;just used for meats.
-
Page 15: Broiler Compartment
Usingthe oven for broiling, gecom Broiling is cooking food by direct heat from above the food. Most fish and tender cuts of meat can be broiled. Follow these steps to keep spattering and smoking to a minimum. Yourrange has a compartment below the oven for broiling. A specially designed broiler pan allows dripping fat to drain away from the food. - Page 16 Using theovenforbroiling. Broiling Guide [] The o_en door and broiler compariment [] _hen arrangdng_ _ fi)od on })an, do not dmv, er must be closed during broiling. let thtt_ edges hano over the sides. fiat drippings will soil the broiler [] Alv, a_s use the broiler that...
-
Page 17: Lift-Up Cooktop
Care and cleaning of the range, gecom Be sure electrical power is off and aft surfaces are cool before cleaning any part of the range. Proper care and cleaning are important so your range will give you efficient and satisfactory service. Follow these directions carefully in caring for your range to assure safe and proper maintenance. -
Page 18: Metal Parts
Cam and cleaning of the range. Burners Theholes in the surfaceburners of yourrange To remove burned-on food, soak tile sm{hce must be kept clean at all t/?nesforproper /iTnition of mild liquid burner ill a solution andan even,unhamperedflame. detergent and hot watei: Soak tile sm_hce burner fbr 20 to 30 minutes. -
Page 19: Removable Ovenbottom
ge.com Removable OvenBottom First renlove shelves fl'onl oven. Toreplace: oven bottom lifts fl'oIn the front. (;rasp each side of tile oxen bottoin Toremove: guide its rear tabs into the slots in tile back of tile oxen. ÷ models so equipped, i'eino_.e knurled screw... - Page 20 Care and cleaning of the range. Broiler Pan and Grid _dter broiling, remove tile broiler If food has bm'ned on, sprinkle tile grid fl'on/ tile oven. Remove tile grid fl'om tile with detergent while hot and cover with pan. Carefiflly pour out grease fl'om tile wet paper towels or a dishcloth.
- Page 21 ge.com Porcelain Oven Interior If necessa_ you may use an ovencleaner With proper care, the porcelain enamel Follow packagedirections. finish on the inside of the oven will stay ne_qooking tor yeats. Cautionsabout using spray-on oven cleaners: Let the rangecool before cleaning. We reconmtend that you wear rubber •...
-
Page 22: Installation Instructions
Installation Range Instructions IN THE COMMONWEALTH BEFORE YOU BEGIN MASSACHUSETTS Read these instructions completely carefully. • This product must be installed a licensed plumber or gas fitter, Installation of this range must conform with local codes, or in the absence of local codes, •... - Page 23 Installation instructions FOR YOUR SAFETY MATERIALS YOU MAY NEED • Gas line shut-off valve Do not store or use combustible materials, gasoline or other flammable vapors • Pipe joint sealant or UL-approved pipe liquids in the vicinity of this or any other thread tape with...
- Page 24 Installation instructions -AWARNING! Avoid placing cabinets above the range. To reduce the hazard caused by reaching iNSTALLATiON SAFETY over the open flames of operating burners, install a ventilation hood over the range iNSTRUCTiONS that projects forward at least 5" beyond the front of the cabinets.
- Page 25 Installation Instructions DiMENSiONS AND CLEARANCES Provide adequate clearances between range adjacent combustible surfaces. These dimensions must be met for safe use of your range. The range be placed with 0" clearance below cooktop at the back wall. Minimum I_-- 13"-_ _,__C cabinets on Minimum...
- Page 26 Installation instructions LOCATION -A WARNING! Do not locate the range where it may be ANTI-TIP DEVICE subject to strong drafts. Any openings the floor or wall behind the range should All ranges can tip and injury could be sealed. Make sure the openings around result.
- Page 27 Installation instructions PROVIDE ADEQUATE Never use an old connector when installing a new range. If the hard piping GAS SUPPLY method is used, you must carefully align Your range is designed to operate at a the pipe; the range cannot be moved after the connection is made.
- Page 28 Installation instructions RECOMMENDED GAS AND ELECTRIC SUPPLY LOCATION NOTE: Recommended hook-up locations behind range. Gas fittings and shut-off cock should NOT protrude more than 2" from the wall to allow the range to fit against the wall. 30 tt ;feCr"e'°,?4c;des connections.
- Page 29 Installation instructions ELECTRICAL CONNECTIONS SEAL THE OPENINGS (on electric ignition models) Seal any openings in the wall behind range and in the floor under the range Electrical Requirements when hookups are completed. 120-volt, 60 Hertz, properly grounded dedicated circuit protected by a 15-amp 20-amp circuit...
- Page 30 Installation Instructions LIGHT THE OVEN PILOT LIGHT THE PILOTS (cont.) (on standing pilot models) Adjust the Surface Burner Pilots if Necessary Be sure the OVEN TEMP knob is in the OFF position. 1. Raise the cooktop, Open the oven door and remove 2.
- Page 31 Installation instructions ADJUST THE OVEN BURNER AIR QUALITY OF FLAMES SHUTTER IF NECESSARY (CONT.) The combustion quality of burner flames For LP Gas: needs to be determined visually. The flame should have approximately (A) Yellow flames: 1-inch blue cones. After 30 seconds Further adjustment...
- Page 32 Installation instructions iNSTALL THE ANTI-TIP DEVICE LEVEL THE RANGE For proper cooking and baking, WARNING - range must be leveled. Leveling legs are located on each corner at the base of the • Range must be secured with range, approved Anti-Tip device.
- Page 33 Parts may be obtained and carefully attempting to tilt the range through General Electric/Hotpoint Factory forward. Service Centers or General Electdc/Hotpoint authorized Customer Care ® servicers. CONVERT TO LP GAS (or convert back...
- Page 34 Before you call for service... Problem Possible Causes What To Do Adjust Oven temperature Oven thermostat • See tile the oven thermostat-Do it yourself! section. too hot or too cold needs adjustment. Topburners do not light The pilots axe not fit. * Oil n/odels with standing...
- Page 35 GasRange Warranty. Aft warranty service provided by our Factory Service Centers, Staple your receipt here. or an authorized Customer Care®technician. To schedule service, Proof of the original purchase on-line, 24 hours a day, visit us at ge.com, or carl 800.GE.CARES date is needed to obtain service (800.432.2737).
-
Page 36: Consumersupport
ConsumerSupport. GE Appliances Website ge.com Have a question or need assist;race with your appliance? Try the (;E Al)pliances Website 24 hom_ a (la); any day of the vear'. For greater convenience faster se_Mce, you can download Owner's Manuals, order parts, catalogs, or even schedule...