Table of Contents
Advertisement
allUl.fa
OPERATING I NSTRUCTIONS
INSTRUCCIONES DEMANEJO
MODED'EMPLOI
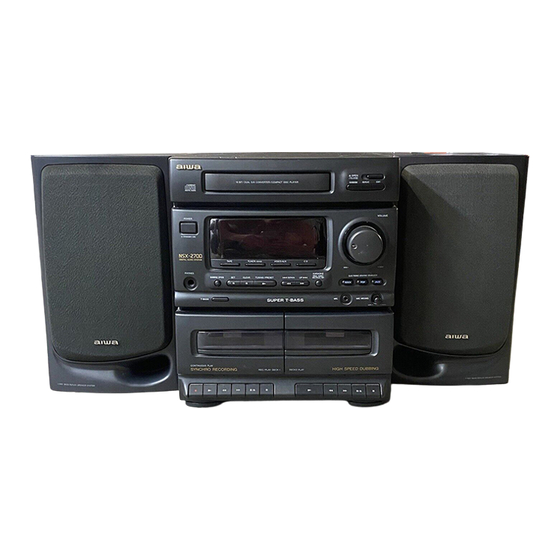
NSX-2700
COMPACT DISC STEREO SYSTEM
SISTEMAESTEREOFONICODE DISCOCOMPACTO
OWNER'S
RECORD
For your convenience,
record the model
number and
serial number (you will find them on the rear of your set)
in the space provided below.
Please refer to them when
you contact
your AIWA dealer in case of difficulty,
Model No.
CX-N2700
U
Serial No.
F
Model No.
Serial N0 ...............
[
SX-N3200
]
......
]
t
COMPACT
DISC STEREO CASSE'rrE
RECEIVER
RADIOCASSE'n'E
ESTEREO CON DISCO COMPACTO
CX-N2700 u
SPEAKER
SYSTEM
SISTEMA
DE ALTAVOCES
SX-N3200
DIGITAL
AUDIO
]
WARNING:
TO REDUCE THE RISK OF FIRE OR ELECTRIC SHOCK, DO NOT EXPOSE THIS APPLIANCE
/
TO RAIN OR MOISTURE.
/
Advertisement
Table of Contents

Related Manuals for Aiwa NSX-2700


Summary of Contents for Aiwa NSX-2700
- Page 1 (you will find them on the rear of your set) RADIOCASSE'n'E ESTEREO CON DISCO COMPACTO in the space provided below. Please refer to them when CX-N2700 u you contact your AIWA dealer in case of difficulty, Model No. CX-N2700 SPEAKER SYSTEM Serial No. SISTEMA...
- Page 2 FOREWORD Welcome to Aiwa NSX-2700 Congratulations on your purchase of an Aiwa unit. RISK OF ELECTRIC SHOCK This unit belongs to you when you master the operations. DO NOT OPEN Read these Operating Instructions to optimize the performance of your unit.
- Page 3 Aiwa NSX-2700 F_licitations pour votre achat d'un appareil Aiwa. Muchas gracias pot su acertada compra del aparato Aiwa. La lecture de ce mode d'emploi vous permettra de mattriser I'utilisation Este aparato le ofrece muchos deleites si Io utiliza en su debida forma.
-
Page 4: Table Of Contents
TABLE OFCONTENTS PRECAUTIONS ................ CONNECTIONS ................ BASIC CONNECTIONS ............CONNECTION WITH OUTDOOR ANTENNA ....BEFORE OPERATION ............ON THE MAIN UNIT ............ON THE REMOTE CONTROL ........... CLOCK SETTING ..............SOUND ADJUSTMENT ............CD PLAYING ............BASIC OPERATION ............SELECTING A TRACK DIRECTLY ........20 RANDOM PLAY .............. - Page 5 ON. • If the AC cord is brokenor damaged, or if the wiresare exposed, contact your dealer or an Aiwa service station and have it replaced or repaired immediately. On condensation When the room is heated, you sometimessee water drops on your windows;this is called condensation.
-
Page 6: Precautions
Aiwa pour le faire remplacerou rdparer. centrode reparaciones Aiwa para solicitar reparaci6n o reemplazo. Condensation Condensaclbn Lorsqu'unepiece estchauffee, onvoit parfois des gouttes d'eau sur AI calentar una sala, a veces pueden verse gotitasde agua en las les vitres;... -
Page 7: Connections
CONNECTIONS BASIC CONNECTIONS Connect the equipmentand accessoriesfollowing steps 1 to 3. After connectingthe following items, as shown in illustrationI_II, the unitis ready for operation. • Refer also to page 30 on connecting optional equipment, for example, a television or turntable. oo I 1 Connect the speakers with the unit. - Page 8 CONNECTIONS To position each antenna FM feod(_r antenna Extend this antenna horizontally in a T- shape and fix its ends to the wall with cellophane tape. Do not bring the ends of the FM feeder antenna near metal objects or curtain rails. AM 100pantenna To stand the antenna on a surface, fix the claw to the slot.
-
Page 9: Before Operation
BEFORE O PERATION ON THE MAIN UNIT To turn on the unit _ See Illustration If_. Press the POWER button. PHONES For 4 seconds after turning on the unit, onlythe function buttons and the VOLUME control can be operated. After use Press the POWER button to turn off the power. - Page 10 ANTES DELAOPERACION AVANT L'UTILISATION UNITE PRINCIPALE UNIDAD PRINCIPAL Pour mettre la chaTne sous tension _ Volr I'lllustratlon If_l. Para encender el aparato _ Vdase la Ilustracl6n _. Presione el bot6n POWER. Appuyer sur la touche POWER. Pendant les quatre secondes qui suivent la mise sous tension de Durante 4 segundos despu_s de encender el aparato, podrfin operarse s61o los botones de funci6n y el control de volumen la cha;ne, seules les touches de fonction et la commande VOLUME...
-
Page 11: Clock Setting
CLOCK SETrlNG _!_ii<q,_xi_ix, i _!i!i!il ! i_i i¸ i!! _i_,? _, v> ..When the AC cord is connected, the clock display flashes. Carry out the following steps while the power is off. =L .... 1 Press the II SET button to enter the clock setting 2, 4 mode. - Page 12 AJUSTE DELRELOJ REGLAGE DEL'HORLOGE Ouand on branche le cordon secteur, raffichage de rhorloge Cuando est_ conectado el cord6n CA, parpadea la visualizaci6n clignote. Effectuer les op6rations suivantes avec I'alimentation del reloj. Siga los pasos descritos a continuaci6n durante desconexi6n de la alimentaci6n. couple.
-
Page 13: Sound Adjustment
SOUND ADJUSTMENT VOLUME To adjust the volume with the VOLUME control on the main unit To increase the volume, turn the VOLUME control clockwise. To decrease the volume, turn the VOLUME control counter- clockwise. To adjust the volume with the VOLUME buttons on the remote control To increase the volume, press the A button. - Page 14 AJUSTE DEL SONIDO REGLAGE DUSON [] VOLUMEN VOLUME Pour rdgler le volume avec la commande VOLUME Para ajustar el volumen con el control de volumen VOL- UME de la unidad principal I'unitd principale Pour monter le volume, toumer la commande VOLUME vers la Para aumentar el volumen, gire el controlde volumen VOLUME a droite.
-
Page 15: Cd Playing
BASIC OPERATION Press the CD button. Press the & OPEN/CLOSE button to open the disc <1,,11DOWN, compartment. I_1_ UP Load a disc with the label side up. To load an 8cm (3 in.) disc, put it onto the innercircle of the tray. Press the &... - Page 16 OPERACION B ASICA UTILISATION DEBASE Presione el bot6n CD. Appuyer sur la touche CD. Appuyer sur la touche _& OPEN/CLOSE pour Presione el bot6n &__ O PEN/CLOSE para abrir el ouvrir le compartiment t_disque. compartimiento de disco. 3 Coloque un disco con su etiqueta hacla arrlba. 3 Mettre un disque en place avec I'dtiquette en haut.
-
Page 17: Selecting A Track Directly
.._,_._ _ _s_, " SELECTING A TRACK DIRECTLY Any track can be selected by using the numeric buttons on the remote control. _ See illustration IE'I. Press the numeric buttons and the + 10 button on the remote control to select a track and press the I_ button to begin play with that track. - Page 18 SELECCION DIRECTA D EUNA CANCION SELECTION DIRECTE D'UNEPLAGE A I'aide des touches num_riquesde la t_l_commande, on peut Utilizando los botones num6ricos del control remoto, puede s_lectionner directement n'importe quelle plage. _ Voir I'illustration seleccionarse cualquier cancion. --* V6ase la ilustraci6n I_1.
-
Page 19: Programmed Play
PROGRAMMED PLAY ._, -_._ _ _,_,_ _,A_--_ _ _ _,_ "4"_¸_'_¸°¸_¸_''_ ..(Operating with only the remote control) c:3 c:) c:31_ The prayer has a memory functionthat allows play of up to 30 tracks L_ db c:> in any order. C_) _ While pressing the SHIFT button, press the PRGM button in the stop mode. - Page 20 REPRODUCCION PROGRAMADA LECTUREPROGRAMMEE (Operando s61ocon el control remoto) (Commande unlquement avec la t61#commande) El reproductor tiene una funci6n de memoria que le permite Le lecteur possbde une fonction de m_morisation qui permet la reproducir hasta 30 canciones en cualquier orden. lecture d'un maximum de 30 plages dans I'ordre d_sir_.
-
Page 21: Tape Playback
..BASIC OPERATION 1 Press the TAPE button. I........ 11© Press the [] / &-- b utton to open the cassette holder and insert a tape. © QO___ 9.) _:_ Push the cassette holder to close it. Insert the tape with the side to be played facing you and the exposed side down. - Page 22 UTILISATIONDE BASE OPERACION B ASICA 1 Presione el boten TAPE. 1 Appuyer sur la touche TAPE. Appuyer sur la touche • / • pour ouvrir le porte- 2 Presione el boten • I & para abrir el portacassette e inserte el cassette. cassette puis inserer une cassette.
-
Page 23: Radio Reception
BASIC OPERATION (See Illustration [] .) i_1-1- 1 Press the TUNER/BAND button to set one of the r4-2,4 bands. FM--* AM _ 1 -2- 2 Check whether the manual tuning mode is se- lected. [L__TJ_IA-_] _--TI_TE]-I ____ ..=-._-_,,_.i-. In the manual tuning mode, the preset number is not displayed. ((_ in the display shows the position of the preset number.) If the preset number is displayed, press the I_ TUNING/... - Page 24 UTILISATION DEBASE OPERACION B ASICA (Voir I'illustration [].) (V0ase la ilustracibn [] .) 1 Presione el bot6n TUNER/BAND para fijar una de 1 Appuyer sur la touche TUNERIBAND pour las bandas. sdlectionner une des gammes. FM --* [--* FM--=" AM-] 2 Confirme que se ha selecclonado el mode de 2 Contr61er si le mode accord manuel est s_lectionnl_.
-
Page 25: Tuningintoa Preset Station
TUNINGINTOA PRESET STATION Press the TUNER/BAND button to select a band.... 0 _ ° _!:I _ ° ; _ Check whether the preset tuning mode is selected..W @5 II SET _" • CLEAR If a preset number (_) is displayed, the preset tuning mode is already selected. - Page 26 ACCORD SURUNESTATION SINTONIZACION D EUNAEMISORA MEMORISEE MEMORIZADA Preslone el bot6n TUNER/BAND para seleccionar 1 Appuyer sur la touche TUNER/BAND pour una banda. sdlectionner une gamme. 2 Contr61er si le mode accord prdrdgld Confirme que se ha seleccionado el modo de sdlectionnd.
-
Page 27: Other Sources
L jack of the VI DEO/AUX jack. _ See illustration iiii; ili Connecting a turntable Use a turntable with an equalizer amplifier (Aiwa PX-E900, PX- E800, etc). LISTENING T OOTHER SOURCES After connecting, carry out the following steps to listen to the POWER source. - Page 28 L des prise VIDEO/AUX. _ Voir ilustracibn _1, I'illustration []. Para la conexi6n de un tocadiscos Connexion d'un tourne-dlsque Utiliser un tourne-disque avec amplificateur &_galiseur (Aiwa PX- Utilice uno provisto del amplificador ecualizador (Aiwa PX-E900, PX-E800, etc.).
-
Page 29: Recording
..BASIC RECORDING RECORDING FROM A CD, RADIO CONNECTED EQUIPMENT Preparation • Wind up the tape to the point recording starts. • Note that recording is done on onlyone side of the tape. • Use only normal (type ]) tapes.. - Page 30 GRABACION B ASICA ENREGISTREMENT DEBASE ENREGISTREMENTA PARTIR D'UN DISQUE GRABACION DE UN DISCO COMPACTO, RADIO O EQUIPO CONECTADO COMPACT, DE LA RADIO OU DE L'APPAREIL CONNECTE Preparaclbn • Enrolle la cinta hasta el punto inicialde la grabaci6n. Preparation • Tenga en cuenta que la grabaci6n se realiza s61oen una cara de •...
-
Page 31: Recording From Tape To Tape
BASIC RECORDING RECORDING FROM TAPE TO TAPE Prepgr_tion • Wind up the tape to the point recording starts. • Note that recording is done on only one side of the tape. • Use only normal (type I) tapes. I_1_ Press the TAPE button. Insert the tape to be recorded on into deck 1. - Page 32 GRABACION BASICA ENREGISTREMENT DE BASE ENREGISTREMENT CASSETTE GRABACION DE CINTA A CINTA CASSETTE Preparativos • Enrolle la cinta hasta el punto inicial de la grabaci6n. Preparation • Tenga en cuenta que se grabar_ s61o una cara de la cinta. • Bobiner la cassette jusqu'au point de debut de renregistrement. •...
-
Page 33: Ai Editrecording
AI EDITRECORDING 3, 6 By inputting the recording time of the tape, the tracks to be recorded are programmed by the AI function.When the AI function detects EDIT_ _._jJO¢•7 ......_i • the possibility of a cut short through the track, it arranges the order so that no track is cut off during recording. - Page 34 ENREGISTREMENT AVEC MON- TAGE ETCALCUL D UTEMPS GRABACION C ONEDICION AI En entrant la duree de la cassette, les plages & enregistrer sont Registrando el tiempo de grabaci6n de ia cinta, se programan selectionnees par la fonction calcul du temps. Quand cette fonction canciones a grabarse mediante la funci6n AI.
- Page 35 AI EDIT RECORDING EDIT To stop recording in the middle Press the • / _ button on deck 1 to stop the deck, and press the • button. To clear the editing contents Press the • CLEAR buttontwice in the stop mode so that the red line surrounding"AI EDIT"...
- Page 36 ENREGISTREMENT A VEC MONTAGE CALCUL DU TEMPS GRABACION CON EDICION AI Pour arr_ter I'enreglstrement en cours Para Interrumplr la grabaci6n en el medlo Appuyer sur la touche • / _ de la platine 1 pour arr_ter cette Presione el bot6n •/_ del deck 1 para parar el deck, y presione demi_re, puis appuyer sur la touchem.
-
Page 37: Timer
The unit can be turned on at a specified time every day by the built- in timer. You can also set a time for recording from any source. The timer-on period is factory-set to 60 minutes. This period can be changed when you set the timer. - Page 38 REGLAGE D ELAMINUTERIE AJUSTE DELTEMPORIZADOR Avec la minuterie int_grde, I'appareil peut _tre mis sous tension El aparato puede encenderse a la hora especificada cada dia chaque jour & I'heure spdcifide. La minuterie peut dgalement mediante el temporizador incorporado. Usted podrA fijar el tiempo commander I'enregistrement &...
- Page 39 "° .._ '°_ ...._....TIMER SETTING 9 Adjust the volume and tone. © 10 m 10 Press the POWER button to turn the unit power off. Only (_ is displayed, and the unit enters the timer standby mode.
- Page 40 REGLAGE DE LA MINUTERIE AJUSTE DEL TEMPORIZADOR 9 Ajuste el volumen y el tono. 9 R_gler le volume et la tonalitd 10Presione el bot6n POWER para desconectar 10Appuyer sur latouche POWER pour mettrel'appareil hors tension. alimentacibn del aparato. Se visualiza s61o(_ y el aparato entra en el modo de espera. Seul (_ est affich&...
-
Page 41: Sleep Timer Setting
SLEEP TIMERSETrlNG When the sleep timer is used, the power is automatically turned off after the specified time has elapsed. You can also carry out the following steps while the power is off. While pressing the SHIFT button, press the SLEEP button on the remote control. - Page 42 REGLAGE DELAMINUTERIE AJUSTE DEL D'ARRET CRONODESCONECTADOR Quand on utilise laminuterie d'arr_t, I'appareil est automatiquement Con el uso del cronodesconectador, la alimentaci6nsedesconecta mis hors tension au bout d'un temps sp6cifi_. autom&ticamente despues de transcurrir el tiempo especificado. On peut aussi effectuer les _tapes suivantes avec I'alimentation Usted podr,_ seguir tambien los siguientes pasos durante la desconexi6n de la alimentaci6n.
-
Page 43: Karaoke
In this case, turn the MIC MIXING control toward MIN. Recommended microphone The use of a unidirectional type microphone is recommended to prevent howling. Aiwa optional unidirectionalmicrophone: DM-H18, DM-H15, etc. iiii_i:i USEFUL F UNCTIONS FORKARAOKE This unit enables CDs or tapes to be used for Karaoke sources. - Page 44 MIC MIXING Se recomienda utilizar un micr6fono del tipo unidireccional para vers MIN. evitar chillidos. Micrbfono unidireccionalopcional de Aiwa: Microphone recommandd DM-H18, DM-H15, etc. L'utilisation d'un microphone de type unidirectionnel est recommand6e pour _viter le hurlement. Microphone unidirectionnel Aiwa optionnel: DM-H18, DM-H15, etc.
-
Page 45: Vocal Fader Function
USEFUL FUNCTIONS FOR KARAOKE VOCAL FADER FUNCTION You can obtain a simulated Karaoke effect by making the singer's ..A,B voice on ordinary discs or tapes softer than the accompaniment. To set the VOCAL FADER function _ See illustration []. Press the KARAOKE button once so that the red line surrounding ,, •... - Page 46 FUNCIONES UTILES PARA KARAOKE FONCTIONS UTILES POUR KARAOKE FUNCION DE ATENUACION VOCAL FONCTION VOCAL FADER Puede usted obtener un efecto parecido al Karaoke atenuando la Avec des disques compactsou des cassettes ordinaires,on peut voz del cantante en los discos o cintas ordinarios. obtenir un effet Karaoke simul_ en rendant la partie vocale plus douce que raccompagnement.
-
Page 47: Care Andmaintenance
..CARE ANDMAINTENANCE Occasional maintenance of the unit and care of the software ® _iii!i needed to optimize the operations of your unit. ilili!i_iii ii_iiii!_i To clean the cabinet Use a soft cloth lightly moistened with mild detergent solution. Do not use strong solvents, such as alcohol, benzine or thinner. - Page 48 CUIDADO Y MANTENIMIENTO SOINSETENTRETIEN Un entretien et des soins reguliers de I'appareil et des disques et De vez en cuando efectue el mantenimiento del aparato y cuidado cassettessont n_cessaires pour assurer un fonctionnement o ptimal. del software para conservarlo siempre en 6ptimas condiciones. Nettoyage du coffret Para Iimplar el gabinete...
-
Page 49: Specifications
SPECIFICATIONS <FM section> <CD player section> Disc 87.5 MHz to 108 MHz Compact disc Frequency range Scanning method Non-contact optical scanner (semi- Usable sensitivity (IHF) 1.3 laY (75 ohms) 13.2 dBf conductor laser application) Alternate channel selectivity 50 dB (+400 kHz) Laser STEREO: 70 dB Semiconductor... - Page 50 ESPECIFICACIONES <Seccion de FM> <Seccion del reproductor de discos compactos> Disco Disco compacto Gama de frecuencia 87,5 MHz a 108 MHz Metodo de exploraci6n Explorador 6ptico sin contacto Sensibilidad utilizable (IHF) 1,3 p.V(75 ohmios) 13,2 dBf Selectividad de canal (aplicacibn laser 50 dB (+400 kHz) semiconductor)
- Page 51 SPECIFICATIONS <Pattie lecteur de disques compacts> <Pattie FM> Disque Disque compact 87,5 MHz & 108 MHz Plage de frdquences M_thode de bslaysge Scanner optique sans contact Senslbllitd utile (IHF) 1,3 pV (75 ohms) 13,2 dBf S61ectlvlt_ des canaux (application du laser & 50 dB (+400 kHz) STEREO: 70 dB semiconducteurs)
- Page 52 TROUBLESHOOTING GUIDE If the unit fails to perform as it is supposed to, by following this operation manual, please check it carefully in accordance with the table below: • Correct the connection. I here is no sound. • The AC cord is not connected properly, •...
- Page 53 GUIAPARA LASOLUCION DEPROBLEMAS Si el aparato no fu nciona correctamente aun cuando siga las instrucciones de este manual, revise cuidadosamente de acuerdo con Io descrito en la tabla siguiente: El cordon CA no esta. conectado correctamente. SUeN_. • Conectelo correctamente. Se ha presionado un incorrecto boton de •...
- Page 54 ENCASDEPROBLEME Si la chafne ne fonctionne pas correctement, m_me apres application scrupuleuse des instructions de ce manuel, priere de la verifier soigneusement conform_ment au tableau suivant: • Le cordon secteur n'est pas brancl_6 corruuement. • Uorriger le branuhelHunt. II n'y a pas de son. •...
-
Page 55: Identification Ofparts
IDENTIFICATION OFPARTS The names of the buttons and controls are indicated in the following illustrations. Instructions about each button are in the pages indicated in the black circles. The illustrations are classified according to their functions. For CD _ [] For TAPE _ [] For TUNER _ [] Other _ []... - Page 56 IDENTIFICACION DELASPARTES NOMENCLATURE Losnombresde los botones y controlesse indicanen lassiguientes Les noms des touches et commandes sont indiques sur les ilustraciones. Las instrucciones sobre cada bot6n se encuentran illustrations suivantes. Les instructions concernant chaque touche en las p_ginas indicadas en los circulos negros. Las ilustraciones se trouvent aux pages dont les num_ros sont indiqu6s dans les se clasifican segt_n sus funciones.
- Page 57 _!_ ,_ !_ii _ ,_ "_!_ _i_i_!_!i_!_ii!_i_i_! _i!_!_ii_i_!!i_ili!_iii_i_iiiiiii_!ii!_ii_l_iii_iiii_i!i_ if!i;iiii i ¸ AIWA CO.,LTD. 83-NEA-906-019 Printed in Malaysia 930908AAY-U...