Table of Contents
Advertisement
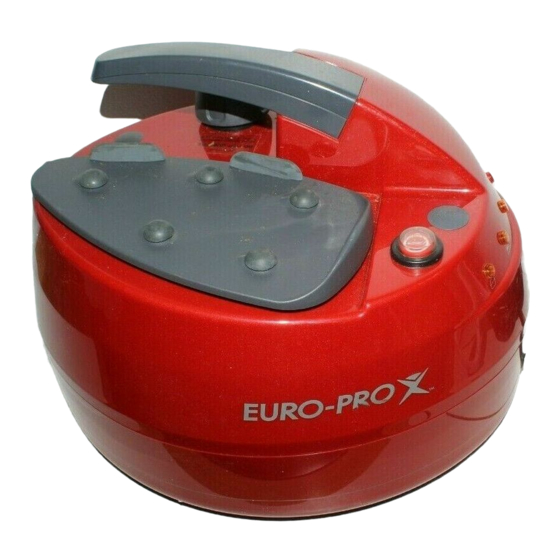
Steam Cleaner with Iron
1500 Watt
Model EP965
USE & CARE INSTRUCTIONS
Used As a Steam Iron
Used As a Steam Cleaner
Congratulations! You are the owner of the ultimate in modern Vapor Steam
Cleaning/Steam Ironing equipment. To fully enjoy the advantages of your
appliance, please take a few minutes to read all the "Use & Care
Instructions" and keep the instructions handy for ready reference. Please
review the product warranty and mail the owner registration form.
EURO-PRO CORPORATION
EURO-PRO CORPORATION
178 WEST SERVICE RD.
4400 BOIS FRANC
CHAMPLAIN, NY 12919
ST. LAURENT, QUEBEC H4S1A7
USA
CANADA
Advertisement
Table of Contents

Related Manuals for Euro-Pro EP965


Summary of Contents for Euro-Pro EP965
- Page 1 Steam Cleaner with Iron 1500 Watt Model EP965 USE & CARE INSTRUCTIONS Used As a Steam Iron Used As a Steam Cleaner Congratulations! You are the owner of the ultimate in modern Vapor Steam Cleaning/Steam Ironing equipment. To fully enjoy the advantages of your appliance, please take a few minutes to read all the “Use &...
-
Page 2: Important Safeguards
To avoid the risk of electric shock, do not disassemble or attempt to repair the Steam Cleaner. Return the system to EURO-PRO Corp. (see warranty for examination and repair. Incorrect re-assembly or repair can cause a risk of electrical shock or injury to persons when the Steam Cleaner is used. -
Page 3: Special Instructions
IMPORTANT SAFEGUARDS SPECIAL INSTRUCTIONS 1. To avoid circuit overload, do not operate another appliance on the same socket (circuit) 2. If an extension cord is absolutely necessary, a 15 ampere 14 gage cord should be used. Cords rated for less amperage may overheat. Care should be taken to arrange cord so that it cannot be pulled or tripped over. - Page 4 7 - On/Off Steam Switch (On the Steam Handle) 8 - Connection Port for Flexible Steam Hose or Iron Steam Hose 9 - Steam Hose Holder & Extension Model EP965 Rated 1500 watts, 110 V / 60HZ A - Steam Button B - Continuous Steam Lock Button...
-
Page 5: List Of Accessories
List Of Accessories 10 - Extension Tubes (2) 11 - Rectangular Brush for Floor / Carpet 12 - Angle Adapter 13 - Glass & Tile Squeegee Technical Specifications Voltage: 110V 60Hz. Power: 1500 Watts Max Steam Pressure: 3.5 Bar (50.75 PSI) Water Capacity: 6.1/4 Cups / 1.5 Liters Max. - Page 6 Operating Instructions - Components On/Off Switch: The unit is “On” when the switch (#2) is in the “Pushed down” position. The unit is “Off” when the switch is in its “Up” position. Safety Cap (#1) In order to open the Safety Cap, first press it down and then turn counterclockwise. Caution: Read the instruction for “Filling the Water Tank”...
- Page 7 Filling Your Steam Generator With Water Step 5: Put the Funnel (16) into the filling pipe, under the Safety Cap (1). (See illustration below.) Step 6: Fill the tank with water (warm if possible), to the top of the filling pipe. Step 7: Remove the Funnel (16) from the filling pipe.
-
Page 8: Using Your Accessories
USING AS A STEAM CLEANER Using Your Accessories Attaching the extension tubes (#10) to the Flexible Grip (with On/Off Steam Control) and to the other accessories. To insert the extension pipes (#10) one in the other, in the flexible grip and in the attachments, press the knob ensuring that it fits into the hole. - Page 9 Attachments Rectangular Brush (#11). 100% white terry cloth towel can be fitted on this brush as to absorb the dirt and protect delicate surfaces. It also used washable surfaces following same procedure as for the floor. How to Fit the Towel Over the Rectangular Brush (#11) Important: Please note that bristles may break through thin towels.
- Page 10 How to fit the Towel Over the Rectangular Brush (#11) Fig. E 6. Stretch the towel around the brush, and repeat folding the towel as shown in Fig. E. Glass & Tile Squeegee This attachment is very useful for cleaning large windows, plastic material, ceramic, tiled surfaces, marble planes, etc.
- Page 11 Tips On How To Use Your System Water • Use tap water for all your cleaning needs. • However, if you live in an area with hard water, use demineralized/distilled water when cleaning light colored fabrics to eliminate the possibility of hard water stains. Temperature •...
-
Page 12: Using Your Steam Cleaner
Using Your Steam Cleaner Wood, Vinyl and Marble Floors Use the rectangular brush with a terry cloth attached. Move the brush across the floor as if you are mopping. When the towel is soiled, you can turn the towel over or replace it with a clean towel. If you are working on a very dirty area, you can move the brush over the area slowly, several times. - Page 13 Walls Use the rectangular brush with a terry cloth towel attached depending on the surface area to be cleaned. For painted surfaces, use the brush with a terry cloth attached to remove stains or spots. WARNING Be sure that the paint is not a water-based paint that you are cleaning. The extreme temperature may damage the finish or even remove the paint.
- Page 14 Garden Furniture Use any of the brushes depending on the surface area. Vertical and Horizontal Blinds Use the rectangular brush with a terry cloth towel. Move the brush over the surface, allowing enough time for the vapor to penetrate. For badly soiled areas, use the brush without the cloth first to loosen dirt. Bathroom Areas To clean the bathtub or shower area, use the small nylon detail brush for grout, shower door tracks, hard to get areas and heavily soiled areas.
- Page 15 Nicotine and Tar Nicotine and tar dissolves at high temperatures and becomes a light yellow oil that has the consistency of sewing machine oil. When the nicotine/tar film is touched by a hot terry cloth towel clipped over the rectangular brush, it immediately dissolves and flows into the towel. You can remove it from flat surfaces as fast as you can move the brush over the surface.
-
Page 16: Ironing With Steam
This steam cleaner can be converted to a high quality steam ironing system. USING AS A STEAM IRON A - Steam Button B - Continuous Steam Lock Button C - Handle D - Steam Hose with Connection Plug E - Temperature Light F - Iron Soleplate G - Temperature Regulator H - Iron Rest... -
Page 17: Temperature Settings
Make sure that the yellow steam light (3) is “ON”, indicating that the steam is ready. Make sure that the iron temperature light (E) went “ON” first indicating that the iron was heating then turned “OFF”, indicating that the iron has reached the set temperature. Press the Continuous Steam button (B) down to let the steam come out of the iron. - Page 18 Wool: Just vaporize, do not pull fabrics Silk: Just vaporize, then steam smoothly Velvet: Iron quickly and lightly on the reverse side,using little steam, or vaporize first, then iron on the right side, hardly touching the fabric. CAUTION: The iron must be hot to obtain maximum steam performance. A cold iron will give water instead of steam.
-
Page 19: Limited Warranty
PRO Corporation, 178 West Service Rd., Champlain, NY 12919. Proof of purchase date and $15.00 for handling and return packing/shipping charges must be included.* The liability of EURO-PRO Corporation is limited solely to the cost of the replacement parts or the complete unit at our option. LABOUR CHARGES ARE NOT INCLUDED.