
Related Manuals for Euro-Pro EP908H


Summary of Contents for Euro-Pro EP908H
- Page 1 STEAM CLEANER OWNER’S MANUAL Model EP908H 120V., 60 Hz, 1550 Watts EURO-PRO Operating LLC 94 Main Mill Street, Door 16 Plattsburgh, NY 12901 Tel.: 1 (800) 798-7398...
-
Page 2: Year Limited Warranty
Should any defect covered by the terms of the limited warranty be discovered within one year, EURO-PRO Operating LLC will repair or replace any defective part provided the unit is returned by the original purchaser, freight prepaid, to: EURO-PRO Operating LLC, 94 Main Mill Street, Door, 16, Plattsburgh, N.Y. -
Page 3: Important Safety Instructions
Fig. 11 shock, do not disassemble or attempt to repair the steam cleaner. Return the system to EURO-PRO Operating LLC (see warranty) for examination and repair. Incorrect re-assembly or repair can cause a risk of electrical shock or injury to persons when the steam cleaner is used. - Page 4 ADDITIONAL IMPORTANT SAFEGUARDS 1. To avoid circuit overload, do not operate another appliance on the same socket (circuit) as the steam cleaner 2. If an extension cord is absolutely necessary, an extension cord rated a minimum of 15 ampere, 14 gage cord should be used. Cords rated for less amperage may overheat.
-
Page 5: Technical Specifications
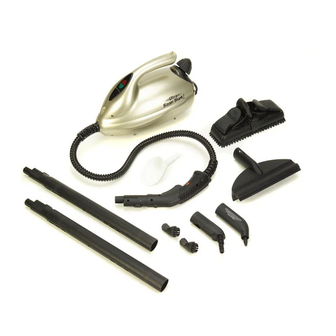
USAGE SUGGESTIONS FOR STEAM CLEANER Window, Glass Surfaces and Mirrors Garden Furniture Use the dual edge glass and tile squeegee. Use any of the brushes depending on the Work with the vapor jet on using the top to surface area. Work quickly when cleaning bottom movements. - Page 6 FEATURES OF STEAM CLEANER 4. Heavy-duty crush-resistant 1. No more detergents or chemicals. Just add water. 2. Lightweight & Portable 5. Versatile, quick-change accessories 6. Multipurpose Steam Cleaner: Bathrooms, kitchens, living 3. Stainless Steel Boiler: areas, pet areas and Non-corroding, stainless appliances.
- Page 7 OPERATING INSTRUCTIONS Tips On How To Use Your System Attaching the Accessories to the Flexible Steam Hose Water • Use tap water for all your cleaning Dual Edge Glass & Tile Squeegee needs. This attachment is very useful for • However, if you live in an area with cleaning large windows, plastic material, hard water, use de-mineralized /...
- Page 8 OPERATING INSTRUCTIONS Refilling Your Steam Cleaner With Water Step 1: Disconnect electrical power cord from wall outlet. Step 2: Depress and hold the hand grip steam trigger to ensure that any remaining pressure in the boiler has been released. Step 3: Carefully loosen the safety/filler cap by turning counter clockwise.