Advertisement
Quick Links
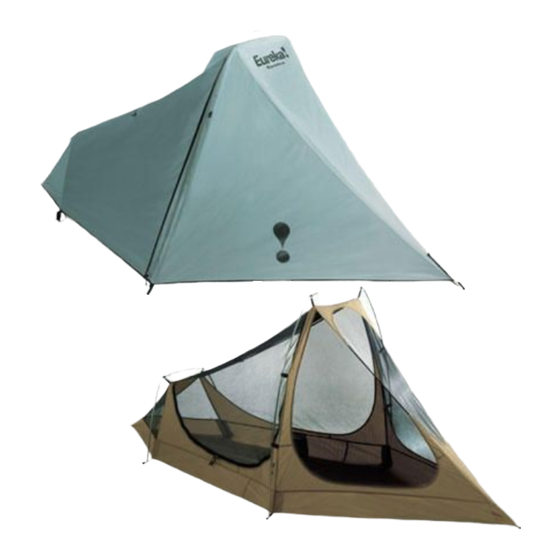
Component List:
1 Tent Body
1 Fly, 1 Short Pole, 1 Long Pole,
1 Carry Bag,
1 Stake Bag w/Stakes,
1 Pole Bag,
2 Cords w/sliders
Do not drop tent bag or pole bag on its end. Do not bounce
tent bag on its end to get the tent out. These actions may cut
the shock-cord and/or damage the pole ends.
ASSEMBLY:
Unpack the carry bag and separate all the parts.
Unroll and unfold the tent and lay it on the ground with
the mesh side up. If windy, place
into the wind and
B
down the web loop.
Assemble the shock-corded poles. Try to prevent pole
sections from snapping together, as this can damage the pole
ends. Make certain each insert end has seated firmly into
each plain end.
C
A
fig.1
D
Insert the end posts of the long
tent pole into the web grommets
from
to
creating an arc.
C
D
Then,
insert the end posts of the short pole
into the web grommets from
E
to
F
.
See fig.1 and 2.
ASSEMBLY
INSTRUCTIONS
SPITFIRE TENT:
Hook clips from the tent body to the tops and
sides of each pole.
See fig. 3 and 4.
stake
Place the tent in the desired location and stake down the web loop at
Lift the long pole and pull the tent fabric taut at
loop.
Stake out the floor web loops at
E
tent, pulling the fabric to remove floor wrinkles and adjusting the tension
as you go. This is a tension tent- not a freestanding tent. Opposing corner
webs must be pulled taut and staked out for sturctural support. See fig.5.
Unfold the fly, turn it right side up and drape it on the tent with the Eureka!
B
logo over the front peak.
F
A
fig.2
fig.3
fig.4
. Stake down the web
A
and
. Work your way around the
C/D
E/F
Front peak
fig.5
D
Reach under the fly and wrap the
hook and loop straps around the
poles. See fig. 6.
Attach the web buckle from the
corners of the fly to its mate on the
corner tent web. Adjust the web to
proper tension.
Be careful, when
finished, the fly must not come in
contact with the tent body.
See fig. 7.
Tension and stake out the web loops on either side of the fly.
Tie a cord to the storm loops on the fly. The cords must be staked
out. Adjust the slider to maintain tension support. See fig.8.
fig.7
.
B
This tent features a poke-up vent in
the fly, with zippered access in the
roof cloth. Pull it open and set the
stay with the hook and loop tab.
See fig. 9.
B
F
YOUR TENT IS READY!
fig.6
fig.8
fig.9
REV. D 4.09
Advertisement

Related Manuals for Eureka Spitfire


Summary of Contents for Eureka Spitfire
- Page 1 This is a tension tent- not a freestanding tent. Opposing corner webs must be pulled taut and staked out for sturctural support. See fig.5. Unfold the fly, turn it right side up and drape it on the tent with the Eureka! logo over the front peak.
- Page 2 Cross ventilation becomes more important in • Once the tent body is erected, stake it out before the fly is put on. This enables you very humid or extremely cold conditions when the permeable roof is less to square the tent up to ensure that the fly goes on properly and that the seams...