Table of Contents
Advertisement
Available languages
Available languages
Owner's Manual
J CRIIFTSMIIN"J
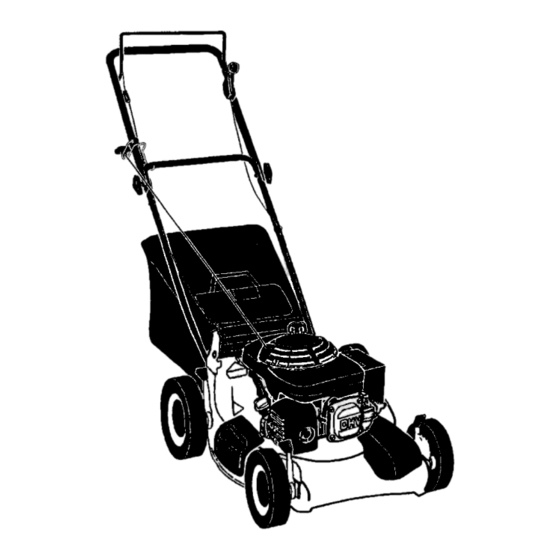
ROTARY LAWN MOWER
5.5 Horsepower
Power-Propelled
21" Multi-Cut
Model No.
917.378550
• EspaSol, p. 18
CAUTION:
Read and follow all
Safety Rules and Instructions
before operating this equipment
Sears, Roebuck and Co., Hoffman Estates, IL 60179 U.S.A.
Visit our Craftsman website:www.sears.com/craftsman
Advertisement
Table of Contents
Troubleshooting

Related Manuals for Craftsman 917.378550


Summary of Contents for Craftsman 917.378550
- Page 1 ROTARY LAWN MOWER 5.5 Horsepower Power-Propelled 21" Multi-Cut Model No. 917.378550 • EspaSol, p. 18 CAUTION: Read and follow all Safety Rules and Instructions before operating this equipment Sears, Roebuck and Co., Hoffman Estates, IL 60179 U.S.A. Visit our Craftsman website:www.sears.com/craftsman...
- Page 2 Warranty service is available by returning the Craftsman power mower to the nearest Sears Parts & Repair Center in the United States. This warranty applies only while this product is used in the United States.
- Page 3 I. GENERAL OPERATION II. SLOPE OPERATION • Read, understand, and follow all Slopes are a major factor related to slip instructions on the machine and in the and fall accidents which can result in manual(s) before starting. Be thoroughly severe injury. All slopes require extra cau- familiar with the controls and the proper tion.
- Page 4 Record both serial number and date of purchase in space provided above. Repair Protection Agreements Congratulations on making a smart pur- Fast help by phone - phone support chase. Your new Craftsman® product is from a Sears technician on products requiring in-home repair, plus conve- designed and manufactured for years of dependable operation.
- Page 5 These accessories were available when this lawn mower was produced. They are not shipped with your mower. They are also available at most Sears retail outlets and service centers. Some of these accessories may not apply to your lawn mower. LAWN MOWER PERFORMANCE CLIPPING DEFLECTORS...
- Page 6 Read these instructions and this manual in Operator presence its entirety before you attempt to assemble control bar or operate your new lawn mower. IMPORTANT: This lawn mower is shipped WITHOUT OIL OR GASOLINE in the engine. Your new lawn mower has been assem- bled at the factory with the exception of those parts left unassembled for shipping...
- Page 7 KNOWYOUR LAWN MOWER READ THIS OWNER'S MANUAL AND ALL SAFETY RULES BEFORE OPERATING YOUR LAWN MOWER, Compare the illustrations with your lawn mower to familiarize yourself with the location of various controls and adjustments. Save this manual for future reference. These symbols may appear on your lawn mower or in literature supplied with the product.
- Page 8 • To change cutting height, squeeze ad- The operation of any lawn juster lever toward wheel. Move wheel mower result in for- up or down to suit your requirements. Be eign objects thrown into sure all wheels are in the same setting. the eyes, which can result NOTE: Adjuster is properly positioned in severe...
- Page 9 mulcher door Grass catcher frame handle handle BEFORE STARTING ENGINE ADD OIL Your lawnmower is shipped without oil in Discharge the engine. For type and grade of oil to use, see "ENGINE" in the Maintenance section of this manual. • i, CAUTION: DO NOT overfill engine with oil, or it will smoke on startup.
- Page 10 • For extremely heavy cutting, reduce the CAUTION: Alcohol blended fuels (called width of cut by overlapping previously gasohol or using ethanol or methanol) cut path and mow slowly. attract moisture which leads to separation • For better grass bagging and most cut- and formation of acids during storage.
- Page 11 MAINTENANCE BEFORE AFTER EVERY EVERY EVERY EACH EACH 25 HOURS BEFORE SCHEDULE HOURS OR SEASON HOURS STORAGE Oheok,or,oose FastonarsW Clean / Inspect Grass Catcher * Check Tires Check Drive Wheels Clean Lawn Mower ..MClean under Drive Cover *** Check Drive Belt / Pulleys *** EN Check / Sharpen / Replace Blade R Lubrication Clean and Recharge Battery **...
- Page 12 LAWN MOWER 3. Be sure the trailing edge of blade (op- posite sharp edge) is up toward the Always observe safety rules when per- engine. forming any maintenance. 4. Install the blade bolt with the lock washer and hardened washer into TIRES blade adapter and crankshaft.
- Page 13 GEAR CASE oil from the container down the oil fill spout into the engine. • To keep your drive system working 6. Wait one minute to allow oil to settle. properly, the gear case and area around the drive should be kept clean and free Use guage on oil fill cap/dipstick of trash buUd-up.
- Page 14 MUFFLER • Clean the underside of your lawn mower Inspect and replace corroded muffler as it by scraping to remove build-up of grass and trash. could create a fire hazard and/or damage. • Clean engine often to keep trash from SPARK PLUG accumulating.
- Page 15 5. Squeeze lower handle in; position holes engine repair establishment or individual. onto mounting pins on handle bracket. Warranty repairs must be performed by an 6. Reassemble upper handle and all authorized engine manufacturer's service outlet. parts removed from lower handle. ENGINE SPEED Your engine speed has been factory set.
- Page 16 Operator presence age container. Always follow the mix ratio control bar found on stabilizer container. Run engine at least 10 minutes after adding stabilizer to allow the stabilizer to reach the car- buretor. Do not empty the gas tank and Lower carburetor if using fuel stabilizer.
- Page 17 TROUBLESHOOTING - See appropriate section in manual unless directed to a Sears Service Center. PROBLEM CAUSE CORRECTION Does not start 5. Spark plug wire disconnected. 5. Connect wire to spark plug. (continued) 6. Bad spark plug. 6. Replace spark plug. 7.
- Page 18 GARANTiA LIMITADA DE DOS AigOS PARA LA SEGADORA A MOTOR CRAFTSMAN Pot dos (2) arlos, a partir de la fecha de compra, cuando esta Segadora Craftsman se mantenga, lubrique y afine seg_n las instrucciones para la operacion y el mantenimiento en el manual del dueho, Sears reparar&...
- Page 19 I. OPERACION HACER" • Antes de empezar, debe familiarizarse comple- • Puede recortar a tray,s de la superficie de tamente con los controles y el uso correcto de la cuesta, nunca hacia arriba y hacia abajo. la maquina. Para esto, debe leer y comprender Pmceda con extrama precauci6n cuando todas las instrucciones que aparecen en la ma- cambie de diracci6n en las cuestas.
- Page 20 • Nunca manipule de forma indebida los • Los componentes del receptor de la hierba dispositivos de seguridad. Controle regular- van sujetos a desgaste, dafios y deterioro, mente su funcionamiento correcto. que pueden exponer las partes en mov- • Mantenga la m_quina libre de hierba, hojas imiento o permitir que objetos sean dispara- u otras acumulaciones de desperdicio.
- Page 21 Estos accesorios estaban disponibles cuando se produjo la segadora. No son facilitados junto al cortacesped. Est_n disponibles en la mayorfa de las tiendas de Sears yen los centros de servicio. Algunos de estos accesorios tal vez no se apliquen a su segadora RENDIMIENTO DE LA SEGADORA DESVlADOR DE RECORTES...
- Page 22 Lea estas instrucciones y el manual comple- Bar. de contmlc operador tamente antes de tratar de montar u operar su segadora nueva. Mango superior IMPORTANTE: Este cortacesped viene SIN ACEITE O GASOLINA en el motor. Su segadora nueva ha sido montada en la LEVANTAR fabrica con la excepciGn de aquellas partes que se dejaron sin montar por razones de envfo.
- Page 23 FAMILIARICESE CON SU SEGADORA LEA ESTE MANUAL DEL DUEI_IO Y LAS REGLAS DE SEGURIDAD ANTES DE OPERAR SU SEGADORA. Compare las ilustraciones con su segadora para familiarizarse con la ubicacibn de los diversos controles y ajustes. Guarde este manual para referencia en el futuro. Estos simbolos pueden apareser sobre su segadora o en la literatura proporcionada con el...
- Page 24 • Para cambiar la altura de corte, empuje palanca del ajustador hacia la rueda. Mueva la segadora puede hacer que salten rueda hacia arriba o hacia abajo de modo que objetos extrafios dentro de sus La operaci6n de cualquier se acomode a sus requisitos. AsegOrese que ojos, Io que puede producir dafios todas las ruedas queden igualmente ajustadas.
- Page 25 Abra la protecci6n contrala descarga recogedor de c_sped Mango de la botsa ANTES DE HACER ARRANCAR MOTOR AGREGUE ACEITE Su segadora fue enviada sin aceite en el motor. Para el tipo y el grado del aceite a utilizar, vea el "MOTOR" en la secci6n del Mantenimiento de Desviador este manual.
- Page 26 ,APRECAUCI6N" Los combustibles mezclados • Para un corte muy pesado, reduzca el ancho del corte pasando parcialments porencimadellugar con alcohol (conocidos como gasohol, o el uso anteriormente cortado y siegue lentaments. de etanol o metanol) pueden atraer la humedad, • Para un mejor ensacado del c_sped y para la la que conduce a la separaci6n y formaci6n mayoria delas condicionesde corte, la velocidad...
- Page 27 PROGRAMA ANTES DESPUES CADA CADA CADA ANTES DEL ECAOADECAOA 10 =S.ORASO 100 A,.ACE- MANTENIMIENTO uso .ORAS T E.PORADA.ORAS NAMIENTO Umpiar/Inspeccionar el Recogedor de C6sped * Controlar los Neumdticos Controlar las Ruedas Motdces *** Umplar la Segadora .." Limpiar debajo la Cubierta de la Transmisi6n *** Revisar las Correas y las Poleas Jmpulsades "°* Revlsar / Afilar / Cambiar la Cuchllla...
- Page 28 SEGADORA Aseg_rese de que el borde de salida de la cochilla (opuesto al borde afilado) esta $iempre observe las reglas de seguridad cu- hacia arriba hacia el motor. ando haga el mantenimiento. Instale el perno de la cuchilla con la aran- LLANTAS dela de seguridad y la arandela endurecida •...
- Page 29 • La caja de engranajes se Ilena con lubricante AsegL_rese de apretar la varilla medidora hasta el nivel adecuado en la f&brica. La del aceite antes de arrancar el motor. _nica vez que el lubricante necesita atenci6n Vuelva a conectar el alambre de la bujfa a _sta.
- Page 30 • Limpie la parte inferior de su segadora para evitar que les entre el agua. El agua en raspdndola para remover la acumulaci6n el motor puede acortar la duraci6n de _ste. c_sped y basura. LIMPIE DEBAJO DE LA CUBIERTA DE LA •...
- Page 31 CARBURADOR MOTOR Su carburador no es ajustable. Si su motor no El mantenimiento, la reparaci6n, o el reemplazo sst_ funcionando en forma adecuada debido de cualquier dispositivos o sistemas del control de la emisi6n, los cuales sean hechos al costo a problemas que se sospecha vienen del carbL rador, Ileve su segadora a contacto con su car del cliente, pueden ser realizados por cualquier...
- Page 32 CILINDRO • Vaciar el dep6sito del carburante poniendo Remueva la bujfa. en marcha el motor y dejdndolo funcionar Vacfe 29 ml (una onza) de aceite a trav_s basta que el carburante termine y el carburador est_ vacfo. del agujero de la bujfa en el cilindro. •...
- Page 33 SOLUCI6N DE PROBLEMAS - Vea la secci6n apropiada en el manual amenos que est6 dirigido a un centro de servico Sears. CAUSA CORRECCI6N PROBLEMA Eleve la altura de corte. Falta de Cuchi!la desgastada, doblada fuerza o suelta. Eleve la altura de corte. Altura de las ruedas dispareja.
- Page 34 CRAFTSMAN ROTARY LAWN MOWER - - MODEL NUMBER 917.378550...
- Page 35 CRAFTSMAN ROTARY LAWN MOWER - - MODEL NUMBER 917.378550 PART PART DESCRIPTION DESCRIPTION 166860X479 Upper Handle 186576X004 Axle Arm Assembly, LR 151721X479 Lower Handle 180626 Hubcap 146771 Control Bar 184193 Bolt 182755 Engine Zone Control Cable 176185 Washer, Step 131959...
- Page 36 CRAFTSMAN ROTARY LAWN MOWER - - MODEL NUMBER 917.378550 o>...
- Page 37 CRAFTSMAN ROTARY LAWN MOWER - - MODEL NUMBER 917.378550 PART PART DESCRIPTION DESCRIPTION 184588 Control Cable _.ssembly 189255 Grassbag Assembly 167387 Bearing, Wheel Adjuster 175739 Driveshaft Cover 751152 Locknut #10-24 188815 Frame, Grassbag 158755 Hex Washer Head Screw 1/4-20 x 2.12...
- Page 38 HONDA 4-CYCLE ENGINE MODEL NUMBER GCV-160-AS3A LABEL CHOKE CAMSHAFT PULLEYJ °7 13----4D CARBURETOR I...
- Page 39 HONDA 4-CYCLE ENGINE MODEL NUMBER GCV-160-AS3_ CARBURETOR LABELS PART PART DESCRIPTION DESCRIPTION 3088416 Packing Set 7400187 Mark, Choke indication 5580162 Float Set 3465879 Chamber Set, Float 1441518 Screw Set CHOKE 7301138 Carburetor Asssembly (BB62G A) 5580212 Valve, Float KEY PART 5580220 Nozzle, Main DESCRIPTION...
- Page 40 HONDA 4-CYCLE ENGINE MODEL NUMBER GCV-160-AS3A COVERJ RECOIL STARTER AIR CLEANER q_---l| FLYWHEEL 20_g...
- Page 41 HONDA 4-CYCLE ENGINE MODEL NUMBER GCV-160-AS3A FAN COVER RECOIL STARTER PART KEY PART DESCRIPTION DESCRIPTION 6092886 3683646 Rubber Supporter (107 mm) Starter Assembly, Recoil 7357379 Cock Assembly, Fuel 5580634 Grip, Starter 5189352 Bracket, Fuel Cock 5580642 Rope, Recoil Starter 6673289 Cap Assembly, Fuel Tank 6478812 Nut, Flange 6 mm...
- Page 42 HONDA 4-CYCLE ENGINE MODEL NUMBER GCV-160-AS3A CYLINDER BARREL I PISTON CONNECTING ROD I CRANKSHAFT I I MUFFLER...
- Page 43 HONDA 4-CYCLE ENGINE MODEL NUMBER GCV-160-AS3_ OIL PAN CYLINDER BARREL PART PART DESCRIPTION DESCRIPTION 6771489 Pan Assembly, Oil 6842413 Barrel Assembly, Cylinder 5716915 Gauge Assembly, Oil Level 2399780 Clip, Valve Guide 1452754 Packing, Oil Filler cap 5579990 Cover, Head 5664503 Extension, Oil Filler 5580006 Cover Comp., Breather...
- Page 44 Your Home For repair - in your home - of all major brand appliances, lawn and garden equipment, or heating and cooling systems, no matter who made it, no matter who sold it! For the replacement parts, accessories owner's manuals that you need to do-it-yourself. For Sears professional installation of home appliances...