Advertisement
Available languages
Available languages
Quick Links
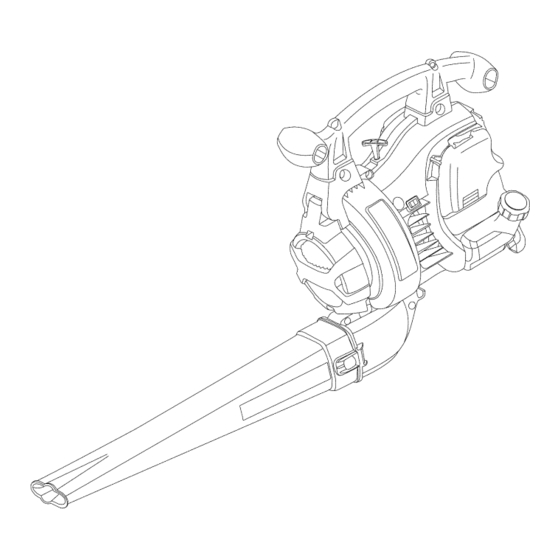
Operator's
Manual
®
4-Cycle
GAS BLOWER VAC
Model No. 316.794980
INCREDI.PULL
TM
UNBELIEVABLE
STARTING
E A S E
with
MAX FIRE_tI[3NITION
M
• SAFETY
• ASSEMBLY
• OPERATION
• MAINTENANCE
• PARTS LIST
• ESPANOL, E 19
CAUTION:
Before
using
this product,
read this
manual
and follow
all
safety
rules and operating
instructions.
Sears, Roebuck
and Co., Hoffman Estates, IL 60179, U.S.A.
Visit our website" www.sears.com/craftsman
769-02360
Advertisement

Related Manuals for Craftsman INCREDI.PULL 316.794980


Summary of Contents for Craftsman INCREDI.PULL 316.794980
- Page 1 • OPERATION • MAINTENANCE • PARTS LIST • ESPANOL, E 19 CAUTION: Before using this product, read this manual and follow safety rules and operating instructions. Sears, Roebuck and Co., Hoffman Estates, IL 60179, U.S.A. Visit our website" www.sears.com/craftsman 769-02360...
- Page 2 SPARK ARRESTOR NOTE CALIFORNIA PROPOSITION 65 WARNING NOTE: For users on U.S. Forest Land and in the states of California, Maine, Oregon and Washington. All U.S. Forest Land and the state of California (Public Resources Codes 4442 and 4443), Oregon and Washington require, by law that certain internal combustion engines operated on forest brush and/or...
- Page 3 notoperate w ithout guards i nplace. • The unit is designed to pickup dry material such as leaves, grass, small twigs, and bits of paper. Do not attempt to • Do not put any object into openings. Do not use with any vacuum wet debris and/or standing water as this may result opening blocked;...
- Page 4 Sears store, Sears Parts & Repair Service Center, or other Craftsman outlet for free repair. This warranty excludes spark plug, air filter, and vacuum bag, which are expendable parts that can wear out from normal use in less than two years.
- Page 5 APPLICATIONS Throttle Control Asablower: • Cleaning yards, garages, driveways, porches, Starter R ope patios, around w alls, fences a ndmore Grip Asavacuum: Rear Handle • Picking u pleaves a ndother l ightdebris Front Handle Spark Plug On/Off Stop _<-_ Fuel Control Assembled as a Blower...
- Page 6 ASSEMBLING UNIT ASABLOWER ASSEMBLING THE GUTTER CLEAN-OUT ADAPTER Blower T ube Assembly In order to use the gutter clean-out attachment kit, you must install the gutter clean-out adapter (Part #753-05231 not included). Push the adapter onto the blower outlet until both stop the engine and allow the impeller to stop tabs snap into place (Fig.
- Page 7 Vacuum Tube Flat INSTALLING THE SHOULDER STRAP WARNING: To avoid serious personal injury, never attempt to start the unit when standing with Groove the unit clipped to the shoulder strap. Always follow the starting procedures as described in the Tabs Starting/Stopping Instructions section.
- Page 8 Using Blended Fuels WARNING: OVERFILLING OIL CRANKCASE MAY CAUSE SERIOUS PERSONAL INJURY. Check and If you choose to use a blended fuel, or its use is unavoidable, follow recommended precautions: maintain the proper oil level in the crank case; it is important and cannot be overemphasized.
- Page 9 Primer Bulb Choke Lever -, WARNING: Operate this unit only in a well- ventilated outdoor area. Carbon monoxide exhaust fumes can be lethal in a confined area. WARNING: Avoid accidental starting. Make sure you are in the starting position when pulling the starter rope (Fig.
- Page 10 HOLDING THE BLOWER/VACUUM OPERATING AS A BLOWER Please note this unit comes with a high pressure concentrator WARNING nozzle. This nozzle should be used when there is a need to blow - Hot Surface: After starting the unit, always stand on the left side of the unit to in a limited or concentrated area.
- Page 11 OPERATING ASAVACUUM shake out dust and debris. Zip close and reinstall the vacuum bag. unit, always stand on the left side of the unit to WARNING operate it as shown in Figure 21. - Hot Surface: After starting the WARNING: To avoid serious personal injury, turn off the unit and allow the impeller to stop before opening vacuum door or installing or removing...
- Page 12 NOTE: Maintenance, replacement, or repair of the emission WARNING: Toprevent serious injury, never control devices and system may be performed by a perform maintenance or repairs with unit running. Sears or other qualified service dealer. Always service and repair a cool unit. Disconnect the In order to assure peak performance of your engine, inspection spark pug w re to ensure that the un t cannot start.
- Page 13 measure thecorrect amount ofoil.The topofthelabel onthebottle measures approximately 3.04 ounces ( 90 ml) (Fig. 2 6). C heck t helevel, See Checking theOil Level. Ifthelevel islow, a ddasmall amount ofoiland recheck. Donotoverfill (Fig. 23). Fig. 29 Fig. 30 Reinstall the air filter Tabs Back Plate cover.
- Page 14 View Of The Rear Engine Cover Adjust Idle Speed Screw If, after checking the fuel and cleaning the air filter, the engine still will not idle, adjust the idle speed screw as follows: Start the engine and let it run at a high idle for a minute to warm up.
- Page 15 Muffler Adjusting Nut Spark Arrestor Screen Rocker Arm Diverter T-25 Screw "\/ .003-.006in. (.076-.152 Slot T-20 Screw Fig. 40 SPARK ARRESTOR MAINTENANCE Remove the rear engine cover. See RockerArm Clearance. Valve Stem With a flat blade screwdriver or Torx T-20 bit and a T-25 Fig.
- Page 16 CAUSE ACTION Fill fuel tank with new fuel Empty fuel tank Primer bulb wasn't pressed enough Press primer bulb fully and slowly 10 times Old fuel Drain gas tank and add fresh fuel Fouled spark plug Replace the spark plug Plugged spark arrestor Clean or replace spark arrestor CAUSE...
- Page 17 Felicidades por haber hecho una compra inteligente. Su nuevo Craftsman® product is designed and manufactured for years of producto Craftsman esta dise_ado y fabricado para que opere de manera confiable durante a_os. Pero como todos los dependable operation. productos, pudiera necesitar una reparaci6n cada cierto But like all products, it may require repair from time to time.
- Page 19 CALIFORNIA PARACH ISPAS PROPOSITION 65 WARNING NOTA: Para los usuarios en tierras forestales de los EE.UU. y en los estados de California, Maine, Oregon y Washington. Todos los terrenos forestales de los EE.UU. y el estado de California (C6digos de Recursos PQblicos 4442 y 4443), Oregon y Washington, requieren por decreto, que ciertos motores de LAS EMISIONES DEL MOTOR DE ESTE PRODUCTO combusti6n interna que se hagan funcionar en zonas boscosas...
- Page 20 • 0se una mascara para la cara o contra el polvo si el trabajo MIENTRAS OPERA COMO ASPIRADORA es polvoriento. Se recomiendan las camisas de manga larga. • Evite situaciones que puedan prenderle fuego a la bolsa de • Use la unidad Qnicamente con la luz del dia o con buena luz recolecci6n.
- Page 21 SIMBOLOS DE SEGURIDAD E INTERNACIONALES Este manual del operador describe los simbolos y figuras de seguridad e internacionales que pueden aparecer en este producto. Lea el manual del operador para obtener informaci6n completa acerca de la seguridad, ensamble, operaci6n y mantenimiento y reparaci6n.
- Page 22 GARANTIA LIMITADA POR DOS AI_IOS EN EL SOPLADOR/ASPIRADORA DE GASOLINA CRAFTSMAN Por dos aSos a partir de la fecha de compra, cuando se use y se de mantenimiento a este Soplador segOn el manual del operador, Sears reparara cualquier defecto en material o mano de obra sin cargo alguno, Esta garantfa excluye la bujia, el filtro de aire y la bolsa de la aspiradora, las cuales son piezas fungibles que se pueden gastar debido al uso normal en menos de dos aSos.
- Page 23 APLICACION Como soplador: Control del regulador • Limpieza de jardines, cocheras, entradas de Mango de la cuerda autom6viles, p6rticos, patios, alrededor de paredes, de arranque oercos, etc. Manija Posterior Como aspirador: Manija anterior • Recoger hojas, escombros livianos, etc. Control de encendido enBUJeiad_o y apagado...
- Page 24 ENSAMBLE DELAUNIDAD C OMO SOPLADOR Remoci6n Ensamble deltubodelsoplador • Retire el tubo del soplador presionando ambas orejetas al mismo tiempo y tirando del tubo del soplador hacia afuera (Fig. 1). personales, apague el motor y espere que el propulsor MONTAJE DEL ADAPTADOR DE LIMPIEZA DE CANAL ADVERTENCIA: Para e vitar graves lesiones se detenga antes de conectar o retirar los tubos.
- Page 25 Ranura delapuerta Asegurese de cerrar completamente la bolsa de deaspiradora Abrazadera recolecci6n. decierre Remoci6n Desenganche la bolsa. Saque la bolsa del aspirador presionando ambas orejetas en el code de la bolsa del aspirador al mismo tiempo y tirando hacia afuera del soplador (Fig. 6). Instale el tubo del soplador para armar la unidad como un soplador.
- Page 26 NOTA: Este es un motor de cuatro ciclos. Pare evitar daSar su unidad, no mezcle el aceite con la gasoline. Befinici6n de los combustibles de mezcla Los combustibles actuales con frecuencia son una mezcla de gasoline y uno o mas oxigenantes como el etano, el metanol o el MTBE (eter).
- Page 27 Bombilla ADVERTENClA: Use esta unidad s61o en un Area Palanca del obturador_ -del cebador exterior bien ventilada. Los gases de escape de mon6xido de carbono pueden ser letales en un Area cerrada. ADVERTENClA: Evite los arranques accidentales. Col6quese en posici6n de inicio cuando tire de la cuerda de arranque (Fig.
- Page 28 SOSTENIMIENTO DE LA SOPLADORA/ASPIRADORA • Limpie despues de usar las sopladoras y otros equipos. Deposite los desechos en recipientes para la basura. ADVERTENCIA - Superficie Caliente: PROCEDIMIENTO DE OPERACION PARA LA SOPLADORA Despues de arrancar la unidad, parese siempre en el Observe que esta unidad viene equipada con una boquilla lado izquierdo de la unidad para operarla, tal come concentradora...
- Page 29 OPERACION COMO ASPIRADOR Proteja sus ojos y use una mascara contra el polvo, abra el cierre relampago de la bolsa del aspirador y vaciar el contenido en una bolsa o recipiente de basura. Despues de arrancar la unidad, parese siempre en el De vuelta la bolsa hacia fuera luego del vaciado inicial y DVERTENCIA- Superficie...
- Page 30 PROGRAMA DE MANTENIMIENTO Para asegurar funcionamiento maximo de su motor, la inspecci6n del puerto del extractor del motor puede set necesaria despues de Estos procedimientos requeridos para el mantenimiento deben ser 50 horas de la operaci6n. Si usted nota la RPM perdida, realizados con la frecuencia indicada en la tabla.
- Page 31 NOTA: Use la botella y la boquilla Aplique suficiente aceite limpio que guard6 del use inicial de motor SAE 30 para recubrir para medir la cantidad ligeramente el filtro (Fig. 29). correcta. El nivel de 90 Apriete el filtro para esparcir y ml (3,04 onzas) esta retirar el exceso de aceite (Fig.
- Page 32 Inspecci6n del Combustible Afloje los tres (3) tornillos situado cerca de la parte superior de la bisagra de la puerta con las mismas herramientas En general, el combustible viejo es el motivo principal para que mencionadas en Fig. 34. la unidad no funcione en forma adecuada. Drene y vuelva a Abra la puerta de la aspiradora, abrala haciendo presi6n Ilenar el tanque con combustible nuevo, limpio y sin plomo...
- Page 33 Limpie alrededor de la bujia de Tuerca de a encendido. Saque la buj[a de encendido de la cabeza del Balancin cilindro girando una Ilave de casquillo de 16 mm (5/8 de 0,655 mm pulgada) en sentido (0,025 pulg.) antihorario. Cambie las buj[as que esten 0,076-0,152 rajadas, sucias o deterioradas.
- Page 34 ALMACENAMIENTO POR LARGOS PERIODOS DE TIEMPO Si debe guardar la unidad durante un largo perfodo de tiempo: Drene toda la gasolina del tanque en un recipiente. No use gasolina que haya estado guardada durante mas de 60 dfas, Elimine la gasolina vieja de acuerdo con las normas federales, estatales y locales.
- Page 35 CAUSA ACCIC)N Eltanque d ecombustible esta vac[o Llene eltanque c oncombustible bien mezclado Labombilla d ecebado n ofueoprimida Iosuficiente Oprima l abombilla decebado t otal y lentamente de10veces Elcombustible esviejo Drene e ltanque d egasolina / Agregue combustible nueva Labujfa deencendido esta arruinada Cambie o limpie la bujia de encendido Parachispas obstruido...
- Page 36 Felicidades por haber hecho una compra inteligente. Su nuevo Craftsman@ product is designed and manufactured for years of producto Craftsman esta dise_ado y fabricado para que opere de manera confiable durante ar3os. Pero como todos los dependable operation. productos, pudiera necesitar una reparaci6n cada cierto But like all products, it may require repair from time to time.
- Page 37 REPLACEMENT PARTS - MODEL 794980 4-CYCLE BLOWER PPN 41AS360G799...
- Page 38 REPLACEMENT PARTS - MODEL 794980 4-CYCLE GAS BLOWER 41AS360G799 Item Part No. Description Item Description 791-181751 753-05363 Engine Cover Assembly (includes 2 & 51) O-Ring 753-04595 Cover Screw 753-05368 Throttle Lever Assembly 791-181003 Screw 753-05302 Air Cleaner Cover Assembly (includes 33) 753-05209 Rocker Cover 753-05254...
- Page 39 REPLACEMENT PARTS - MODEL 794980 4-CYCLE BLOWER PPN 41AS360G799 °% Item Part No. Description 753-05372 Handle Assembly 753-05373 Housing Assembly 791-182405 Switch 753-05011 Handle 753-04596 Impeller 753-04833 Washer 753-04834 Washer 791-182414 Bolt 753-04456 Spring 753-04455 Clip 753-05380 Vacuum Door 753-05016 Blower Tube 791-181345 Screw...
- Page 40 iiiiiiiiiiiiiiiiiiiF www.sears.com iiiiiiiiiiiiiiiiii ........iiiiiiiiiiiiiiii iiiiiiiiiiiiiiiiii Para peclir servicio de reparacion Au Canada pour service en frangais: iiiiiiiiiiiiiiiiii adomicilio yparaordenarpiezas: 1-800-LE-FOYER iiiiiiiiiiiiiiii !!!!!!!!!!!!!!!!!! 1-800-SU-HOGAR ® (1-800-533-6937) ....(1-888-784-6427) www.sears.ca (e Registered Trademark / TM Trademark / SM Service Mark of Sears Brands, (¢...