Table of Contents
Advertisement
Advertisement
Table of Contents

Related Manuals for Ericsson 230


Summary of Contents for Ericsson 230
-
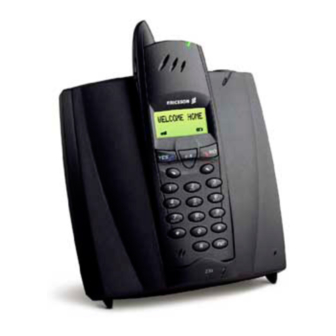
Page 2: Cordless Phone
Cordless Phone 230 DT200 Handset BS230 Base Station DECT/GAP Digital User’s Guide... - Page 3 Improvements and changes to this user’s guide necessitated by typographical errors, inaccuracies of current information, or changes to programs and/or equipment, may be made by Ericsson Mobile Communications AB at any time and without notice. Such changes will, however, be incorporated into new editions of this user’s guide.
- Page 4 HANDSET Antenna Volume up key Volume down key Off hook key Up key Number keys Microphone BASE STATION Handset compartment Charging light Warning light Earpiece Display On Hook/On/Off key Clear/Mute key Down key Battery compartment (back) Internal call key R key Accessory contacts Page button External line...
- Page 5 HANDSET DISPLAY ICONS AND INDICATORS Signal strength Visible when con- nected to a base station Ring off Ring signal muted or microphone off Keys locked Hook Handset off hook Message Call Info New unanswered entry in the who called list Battery Battery status (4 blocks is fully charged)
- Page 6 QUICK START This page helps you to get the cordless phone up and running quickly. For a more detailed instal- lation procedure, see “Preparing for use” on page 9. You should read the “Getting started” section afterwards.
-
Page 7: Table Of Contents
Contents Getting started 9 What is in the box 9 Preparing for use 9 Battery 12 Switching the handset on and off 15 Attaching and removing the clip 15 A brief guide 16 Information on display 18 Using the menus 19 Changing the menu language 20 Telephoning 23 Making a call 23... - Page 8 Blocking keys and extra security 53 Blocking handset keys 53 Setting handset locks 53 Changing the handset PIN code 54 Unblocking the handset 55 Changing the base station PIN code 56 Resetting the base station PIN code 57 Showing the IPEI code 57 Overview PIN and other codes 58 Extra features 59 Emergency call 59...
-
Page 10: Getting Started
Getting started WHAT IS IN THE BOX Make sure that all the parts are in the box. If anything is missing, please con- tact your dealer. The box should contain: Base station Desk stand for the base station Wall mounter for the base station Screws and plugs for the wall mounter Handset Battery... - Page 11 When installing the cordless phone, it is important that you closely follow the procedure below: Attach the clip to the handset. Insert the battery in the handset. Getting started...
- Page 12 Find a suitable location for the base station. To make the best use of its operating range, put your base station in a central position. You can place it on a table using the desk stand or mount it on the wall using the wall mounter.
-
Page 13: Battery
If the handset does not turn on automatically, remove the power adapter plug from the wall socket and repeat from step 9. If that does not help, please refer to “Subscribing handsets” on page 68. When the battery is charged, the handset is ready for use. For more informa- tion about charging the battery, please refer to “Battery”... - Page 14 Placing the battery Place the battery as shown below. Make sure that the battery wires are put through the notches as shown. Reading the battery meter When the battery is fully charged, the battery meter on the handset display Home consists of four blocks.
- Page 15 Charging the battery Place the handset in the base station as shown in the picture below. If the lower green light on the base station is on (and the battery meter on the display flashes), the battery is being charged. As soon as the battery is fully charged, the lower green light is turned off and the battery meter on the hand- set stops flashing.
-
Page 16: Switching The Handset On And Off
SWITCHING THE HANDSET ON AND OFF While the handset is switched on, it is in standby mode. In standby mode, the handset is ready to make or receive calls but consumes less energy. With a fully charged battery, the handset can operate for about 100 hours in standby mode. -
Page 17: A Brief Guide
Attaching the clip Removing the clip A BRIEF GUIDE After installing the cordless phone you can now make and receive calls. For initial use, it is assumed that you are near the base station and that the signal strength indicator is visible. Using the base station The base station covers an area in which the handset can make and receive calls via a radio connection. - Page 18 If the indicator is not visible, then the handset is not connected to a base sta- No Network tion. This may mean: • You are out of range. Check that the base station is on and that you are within range. •...
-
Page 19: Information On Display
Press The duration of the call is displayed. If available, the costs of the call are also displayed. For more information about displaying call costs, see “Call tariff” on page 63. If you dial a number but can still hear the dial tone, you probably have to set the base station to another dialling method. -
Page 20: Using The Menus
base station name yourself. This is described in “Editing base station name” on page 81. Extension number Your internal number is shown on the right-hand side of the display when the Home handset is on standby. The internal number may not be shown when the hand- set is connected to another type of base station. -
Page 21: Changing The Menu Language
know your way around the menus. This guide only tells you where to enter a PIN code and what menu item to select for a specific function. To help you locate the menu items that are not in the main menu, a path through the menus is given at the beginning of each procedure. - Page 22 Base station menus The base station menus form a part of the handset menus. They are normally in the same language as the handset menus. If the handset language is not available, the base station chooses English by default. To select another default language, use the Language note that the menu options stay in English until you confirm your language...
- Page 23 Getting started...
-
Page 24: Telephoning
Telephoning MAKING A CALL When you make a call, you can enter the number and then press called pre-dialling and allows you to check and, if necessary, correct the number. To pre-dial: Enter the number. The number is displayed. 0-0535554505 Correct the number if necessary ( move right). - Page 25 Calling by name The call by name option lets you search for a name and number in the phone book. To call by name: Route: Select Enter Name: the phone book, see “Adding name and number” on page 36. Press the key which has the first letter of the name you are searching for. Press once for the first letter of the key, twice for the second and three times for the third letter of the key.
-
Page 26: Redialling
Example: Suppose you want to call someone whose name is ‘Jones’. Press number key 5 and hold until the first name in the phone book beginning with ‘J’ appears. Press number key 6 three times for the ‘O’. The first name in the phone book beginning with ‘Jo’... -
Page 27: Returning A Call
RETURNING A CALL When you receive an internal call, the number (or name) of the caller is dis- Check Who Called ? played. In that case the number is stored in the who called memory. The call info icon shows you if there are new unanswered calls. By using the call return function, you can easily return a call to these numbers. -
Page 28: Receiving A Call
RECEIVING A CALL When the handset rings: Press ExternalCall To end the call, press The duration of the call is displayed. If available, the costs of the call are also displayed. On an incoming internal call, the caller’s handset number is displayed. If the InternalCall Anna caller’s number is included in your handset phone book, the corresponding... -
Page 29: Paging A Handset From The Base Station
You can also turn off the ringer permanently by adjusting the ring volume to its lowest level. See “Ring volume” on page 42. To turn the ring or the warning sound on again: • Press The ring off icon disappears. PAGING A HANDSET FROM THE BASE STATION The base station has a search function with which you can page the handsets connected to it. -
Page 30: Advanced Telephoning
Advanced telephoning WHEN USING MORE THAN ONE HANDSET If you use more than one handset with the base station, here are a few special hints. Internal or external call? When you receive a call, there is a different ring signal for internal and exter- nal calls: •... -
Page 31: Receiving A Second Call
To make an internal call: Press Dial the internal telephone number and wait for a connection. Have a conversation. Press The duration of the call is displayed. To receive an internal call: Press InternalCall Have a conversation. Press The duration of the call is displayed. Each handset has a unique extension number on the base station by which it can be contacted. -
Page 32: Searching For Handsets Or People
SEARCHING FOR HANDSETS OR PEOPLE The cordless phone has a function which you can use to search for handsets and any handset user on the same base station. You can call all other handsets by using your handset. To use the search function: Press the All handsets connected to the base station ring. -
Page 33: Making A Three-Party Call
MAKING A THREE-PARTY CALL In a three-party call, a caller is connected to two handsets on the base station. The three-party call is sometimes also known as a conference call. You have an external call and you wish to involve a third person with a handset on the base station: Press You hear the dial tone. -
Page 34: Sending A Dial Tone Pause
To switch the handset back to short tones during a call: Route: DialMode » DTMF-Short • Select and press DTMF-Short The handset switches to short tones again. SENDING A DIAL TONE PAUSE If you are dialling while the handset is off hook, you can use menu option SendPause to allow the handset to wait for the dial tone. - Page 35 Advanced telephoning...
-
Page 36: Phone Book
Phone book PHONE BOOK USE Your handset contains a phone book for 100 names and numbers. You can get to the phone book via the PhoneBook The phone book lists all the names and numbers in alphabetical order. You can freely add names and numbers to the phone book. -
Page 37: Adding Name And Number
ADDING NAME AND NUMBER You can use the To add a new phone book entry: Route: Select Enter Name: Enter Name: delete a phone book entry first before you can add a new one. John_ Enter a name ( space; Press EnterNumber: EnterNumber:... -
Page 38: Adding Caller's Number
ADDING CALLER’S NUMBER Your phone keeps a list of numbers of people who have called you internally with another handset. The last ten numbers of your callers remain stored in your handset memory until you turn it off. You can use the to add these numbers to the phone book. -
Page 39: Editing Names And Numbers
EDITING NAMES AND NUMBERS With the book. Editing names You can correct a misspelled name or give a new name to an existing tele- phone number. To edit a name: Route: Select Enter Name: are available for editing. Enter the first letter(s) of the name you are searching for. Press Scroll until you find the name. -
Page 40: Deleting Names And Numbers
DELETING NAMES AND NUMBERS You can also delete names and associated numbers from the phone book. To delete a name and number from the phone book: Route: PhoneBook » Find&Edit » Delete Select Delete and press Enter Name: Phone book is empty entries are available for deletion. - Page 41 Phone book...
-
Page 42: Personalizing The Handset
Personalizing the handset LANGUAGE You can change the language of the menus at any time. The default language is English. To change the handset menu language: Route: Handset » Language Select Language and press The current language is displayed. Scroll through the list of languages until the language you want is selected. Press to confirm your choice. -
Page 43: Ring Volume
RING VOLUME You can adjust the ring volume of the handset. To adjust the ring volume: Route: Select A volume level bar is displayed. VolumeLevel: Press the You can now also use the change the volume. Each time you press D O W N lowest level, the ring off icon appears. -
Page 44: Discreet Ringing
DISCREET RINGING In the discreet ringing mode, your handset starts ringing at the lowest audible volume level. It then gets louder and louder. To set discreet ringing: Route: Handset » Alerts » DiscreetRng Select DiscreetRng and press The current setting is displayed. Use the D OW N Press... -
Page 45: Display Light
DISPLAY LIGHT Your handset has an illuminated display which lights up when a key is pressed during an incoming call or when it is put in or out of the base station. The illu- mination automatically goes off after a while, unless you press a key. To set the display light to automatic or off: Route: Select... -
Page 46: Personalizing The Base Station
Personalizing the base station CHANGING SETTINGS (PIN CODE) If your handset is connected to the base station, you can change its settings by using this handset. You may have to enter the base station PIN code to change these settings. For the default base station PIN code, see page 58. To prevent others changing the settings of the base station, you should change this code. -
Page 47: Ring Volume
RING VOLUME The base station rings when an external call is received. You can adjust the ring volume. To adjust the ring volume with the handset: Route: Select The current ring volume setting is displayed (0 is the quietest level and 6 is the loudest level. -
Page 48: Call Waiting Notification
Setting the number of rings You can also set the number of times a handset rings before the next handset starts to ring. To set the ring count: Route: BaseStation » Basic » RingOrder » Delay Select Basic and press Y E S PIN: is displayed. - Page 49 located again, the same service is called to deactivate the diverted telephone number. Ask your dealer for more information on the call diversion service. Priority phone can only be set for one handset. If a diversion telephone number is activated, no calls may be received by the base station until the priority phone handset is located again.
-
Page 50: Least Cost Routing
Priority phone deactivation To deactivate a handset as priority phone: Route: BaseStation » PriorityNo » AssignNo Select and press PriorityNo PIN: is displayed. Enter the PIN code for the base station (see page 58) and press Select AssignNo and press The number of the priority phone handset is displayed. -
Page 51: Dial Tone Pause
To set least cost routing: Route: Select PIN: Enter the PIN code for the base station (see page 58) and press Either displayed. Press the required and press Enter the prefix digits ( right). Press Substitution digits are displayed if they have been set before. Enter the substitution digits ( move right). -
Page 52: Clearing All Base Station Settings
CLEARING ALL BASE STATION SETTINGS You can clear all settings on the base station simultaneously. The pin code and the subscriptions, however, are not cleared. All settings revert to default. To reset all base station settings: Route: BaseStation » Basic » MasterReset Select and press Basic... - Page 53 Personalizing the base station...
-
Page 54: Security
Blocking keys and extra security BLOCKING HANDSET KEYS If you carry the handset in your pocket, you might accidentally press the keys and make a call. To prevent this, you can have them automatically blocked if you do not press a key for one minute. The keys no longer work and a key Home symbol is displayed, but you can still receive calls. -
Page 55: Changing The Handset Pin Code
Securing against unauthorized use You can set the handset so that the PIN code must be entered after switching on. This option is off by default. To enable or disable protection against unauthorized use: Route: Select Enter PIN Enter the PIN code for the handset (see page 58) and press The current setting is displayed. -
Page 56: Unblocking The Handset
Enter the new PIN code again and press Either New PIN accepted new PIN and the code you have just entered do not match. You can write down the new PIN code in the space provided in “Personal handset PIN code” on page 58. If you enter an incorrect new handset PIN code three times in a row, the hand- set leaves this menu option. -
Page 57: Changing The Base Station Pin Code
CHANGING THE BASE STATION PIN CODE To prevent unauthorized people from accessing vital settings on the base sta- tion, they are secured by a PIN code. Each time you want to change these base station settings, you must enter the PIN code. You cannot switch off this secu- rity feature but you can change the base station PIN code. -
Page 58: Resetting The Base Station Pin Code
RESETTING THE BASE STATION PIN CODE If you enter an incorrect base station PIN code three times in a row, the PIN code is invalidated. Although you can still make and receive calls, you cannot alter the base station settings. Whenever you make an attempt to change a set- ting, you are asked to enter the PARI code. -
Page 59: Overview Pin And Other Codes
OVERVIEW PIN AND OTHER CODES The handset and base station use several identification codes for security rea- sons. In the table below, an overview of these codes and their values is given. Code Handset PIN Base station PIN Authentication Code (AC) Same as base station PIN. International Portable part Equipment Identity (IPEI) Primary Access Rights... -
Page 60: Extra Features
Extra features EMERGENCY CALL Your handset is provided with an emergency call feature. This allows you to call the emergency services even when the handset is PIN-code protected or blocked or when the keys are blocked or direct call is on. You can access this feature by calling 112. -
Page 61: Direct Call
To activate the baby phone: Route: Select BabyPhone phone number of the other end is incorrect or the other end is out of range. Wait for a connection and place the handset somewhere in the baby’s room. You can end a baby phone call by pressing Baby phone call number You can change the baby phone call number which is the internal telephone number of a handset you want to select as the other end. -
Page 62: Call Barring
To switch the direct call on: Route: Select Enable Direct Call? Press DirectC.No: shown in the display. Enter the direct call number with the number keys ( move left; Press The direct call function is now on. If direct call is on, Direct Call 0201300571 key on the handset. -
Page 63: Exempt Numbers
Switching call barring on and off Each handset (if you have more than one) should have call barring set on or off separately. Call barring is off by default. To enable or disable call barring for a handset: Route: Select PIN: Enter the PIN code for the base station (see page 58) and press Select... -
Page 64: Call Tariff
To exempt a number from call barring and call budgeting: Route: Select PIN: Enter the PIN code for the base station (see page 58) and press Select Either Press the number if required and press Exempted No: not edit the exempt number and you have to select another entry. Enter the exempt number ( right). -
Page 65: Call Budget
Example: Suppose you have set the call tariff to 0.25. During a call when the first meter- ing pulse is received, the call costs are 0.25. With the second pulse, they are 0.50 and so on. CALL BUDGET The base station is provided with a call budgeting feature, which you can use to set the amount of money or time a particular handset can spend on external calls. - Page 66 Setting call budgets You can set a budget for a particular handset or, if the budget is exceeded, grant a new budget. Whether time or costs are budgeted depends on the budget type setting, see above. The maximum budget that can be set is 99 hours and 59 minutes or 99999 in local currency units.
-
Page 67: Call Statistics Handset
Remaining budget You can easily check the remaining budget of your handset. The amount depends on the budget type and, if a cost budget is selected, whether metering pulses have been received during an external call. The amount can show a negative value which means that the budget has been exceeded and no more external calls can be made with your handset. -
Page 68: Voice Mail
Total duration To see the time spent on outgoing external calls: Route: Select The total time of all external calls made is displayed. Press Reset TotCallTime? Press PIN: Enter the PIN code for the base station (see page 58) and press Total Time is Reset Total cost This menu option may not be available. -
Page 69: Subscribing Handsets
Press The length of the call is displayed. If available, the costs of the call are also displayed. Voice mail notification Voice mail services normally answer calls after a few rings. To check for voice mail messages, you have to call a service number, which lets you listen to your recorded messages. - Page 70 PIN code, is secret and prevents other handsets subscribing to the base station without your approval. If the handset does not have a subscription, it automatically enters the sub- scription mode when it is switched on. In this case, the handset displays <Page>...
-
Page 71: Using Multiple Base Stations
P A G E remains in the subscription mode for about 5 minutes. Cancelling the subscription of a handset Up to eight handsets can be subscribed to a base station. If you want to sub- scribe a ninth handset, you must cancel the subscription of another. To cancel a subscription of a handset: Route: Select... -
Page 72: Single Or Multi-Cell Mode
Connecting to a base station To be able to use a certain base station, the handset must be subscribed and connected to that base station. A handset can be subscribed to multiple base stations, but can only be connected to one base station at a time. To connect to a base station please refer to “Selecting another base station”... -
Page 73: Pulse Or Tone Dialling
If there is a dash in a number, the handset waits a while for the dial tone. If you hear the dial tone, the handset continues dialling without waiting for the full dial tone pause period. PULSE OR TONE DIALLING Some telephone networks use pulses when dialling a number. -
Page 74: Signalling Methods
Tone dialling To set the base station to tone dialling: Route: BaseStation » Basic » PhoneLine Select and press Basic Y E S PIN: is displayed. Enter the PIN code for the base station (see page 58) and press Select PhoneLine and press The opposite of the current setting is displayed. - Page 75 Hook flash Hook flash is a signalling method in a telephone network or on a switchboard and is initiated by pressing the call transfer. Hook flash actually simulates an on-hook-off-hook sequence during a call. The length of such a sequence can be adjusted. In most cases the factory setting (default) is correct.
-
Page 76: Transferring Calls
TRANSFERRING CALLS In general, you can transfer calls on a switchboard as described below. How- ever, transferring calls may work differently on your switchboard. To put a call on hold and dial another number, use the menu option. If you do not know the number by heart, use the With the R key You are on the phone and want to transfer a call. - Page 77 Extra features...
-
Page 78: Using Base Stations
Using base stations CONNECTING TO BASE STATIONS You can connect your handset to seven other base stations, as well as to the one that comes with your set. Before you can connect to a base station, your handset must have access rights to that base station. -
Page 79: Subscribing To A Base Station
Subscriptions Up to eight base stations may be subscribed. The names of these base stations are stored in a prioritized list. In case of automatic base station selection, the handset tries to connect to the base station with the highest priority; first base station entry 1, followed by base station entry 2 etc. -
Page 80: Re-Subscribing To A Base Station
Enter the authentication code or the PIN code of the base station. Each digit of the AC number that you enter is shown only as purposes. Press The handset now looks for base stations in subscription mode using the AC number to test if it is allowed to subscribe. Wait until The handset is connected to the base station. -
Page 81: Selecting Another Base Station
SELECTING ANOTHER BASE STATION The handset can connect to several base stations. It can select a base station automatically when it has been out of range or switched on. You can also specify a base station to connect to. Automatic selection This menu option is only available if the subscription list contains base station names. -
Page 82: Editing Base Station Name
To change the order of the subscription list: Route: Select The first base station name on the list is displayed. Press Pos. 1 station. Press The base station is moved to the position you have chosen. The selected base station is put into the required position on the list. The other base stations on the list are re-arranged accordingly, maintaining their relevant priorities. -
Page 83: Deleting Subscription
Press The handset can display several special characters. Please refer to “Phone book use” on page 35 for more details. DELETING SUBSCRIPTION If a subscription is no longer required, you can remove it from the handset’s subscription list. This menu option is only available if the subscription list contains base station names. -
Page 84: Tips And Tricks
Tips and tricks You can find a few useful tips and tricks in this section. Putting a call on hold You can put a call on hold in three ways: • During an external call press handset, return to the call or start a three-party call. See “Consulting with another handset or transferring a call”... - Page 85 Editing a name and number If you edit a name or a number on your handset you can “jump” to the most left or the most right character by respectively pressing for one D O W N second. You can clear the whole name or number by pressing for one CL R second.
-
Page 86: Reference
Reference SAFETY INSTRUCTIONS Do not place the base station near audio or video equipment. It may cause interference. The handset is not suitable for lifeline applications. Intrinsic safety Do not use the handset in conditions where there is a danger of electrically ignited explosions. - Page 87 Do I get a warning before the batteries run out? An alarm sounds when approximately fifteen minutes’ calling time is left. How can I subscribe a handset to a base station? To subscribe a handset you need the authentication (PIN) code of the base sta- tion.
- Page 88 I have entered an incorrect PIN code three times in a row. How can I set a new PIN code? If you have entered an incorrect PIN code three times in a row, the current code is invalidated. If the handset PIN code is invalidated, the handset cannot be used any more.
-
Page 89: Buttons And Keys
one which you are close to has been selected. See “Subscribing handsets” on page 68 and “Connecting to base stations” on page 77. I hear a warning tone and the battery icon is flashing. What is wrong? The battery is almost flat. Put the handset in the base station to charge the battery. -
Page 90: Display Icons And Terminology
D O W N I N T Base station Button P A G E DISPLAY ICONS AND TERMINOLOGY A number of icons may appear on the handset display. They are shown inside the front cover of this user’s guide. The lists below explains what the icons mean and the terminology which may appear on the display. -
Page 91: Signals
Terminology used on display Term DTMF IPEI PARI SIGNALS The handset and the base station signal certain events audibly and visually as described below. Handset Signal Red warning light The handset also generates audible ring signals, alarm signals and warning tones, and key clicks. -
Page 92: Menu Structure
MENU STRUCTURE Several functions of the handset and the base station can be accessed via the handset menus. The charts below give an overview of the top level menu items to help you locate those functions. Standby menu The standby menu is accessible when the handset is in standby mode by press- (see below). - Page 93 “In call” menu The “in call” menu is accessible by pressing Base station menu The base station menu can be accessed via the handset’s standby menu. RingV olume Basic Reference NewCall Find&Call W hoCalled* LastDialled* Routing PriorityNo AssignNo Language ScanP eriod RingOrder CellMode MasterReset...
-
Page 94: Maintenance
MAINTENANCE The base station and handset do not contain user serviceable parts. If your base station or handset require service you should return them to the dealer or retailer from whom they were bought. See also “Warranty” on page 96. Cleaning Clean the cordless phone with a soft cloth moistened with water only. -
Page 95: Standards And Regulations
Performance Battery Standby time Call time Charge time Volume Ring signal Earpiece Phone book Maximum name length Maximum number length Entries External interfaces Radio connection User interface Accessory connector Features Menu controlled, predial, difference between internal and external calls, phone book, redial (10 numbers), who called memory (10 numbers), baby monitor, illu- minated display, temporarily transmit long DTMF tones, security with PIN code, keys can be locked automatically, access to up to 8 DECT/GAP telephone sys-... -
Page 96: Dimensions And Weight
Dimensions and weight L x W x H Weight Performance Handset subscriptions Number of calls Volume Ring signal External interfaces Fixed telephone line Radio connection Power supply Charge connection This function may not be supported by your telephone network operator. Installation Mounting Features... -
Page 97: Spare Parts And Accessories
In the event of difficulty, details of our authorized service network are available from your local Ericsson subsidiary. Our warranty Ericsson warrants this product as being free of defects in material, design and workmanship at the time of its original purchase and for a period of twelve (12) months immediately thereafter. - Page 98 Repairs performed by non-authorized service workshops or open- ing of the unit by a non-authorized person. • Accidents, acts of God or any cause beyond the control of Ericsson, including but not limited to lightning, water, fire, public distur- bances and improper ventilation.
- Page 99 Reference...
-
Page 100: Index
Index AC 58, 90 Accessories 85, 96 Audio accessory 43 Automatic answering 43 Automatic selection 80 Baby monitor 59 Baby phone 59 Backdoor code 58 Barring calls 61 Base station changing PIN 56 language 21 master reset 51 name 18 PIN 58 ring volume 46 selection 80... - Page 101 Costs 63 DECT/GAP 93 Deleting subscription 82 Dial tone pause 50 Direct call 60 Discreet ringing 43 Display contrast 44 information 18 light 44 Diversion 47 DTMF 90 Earpiece volume 41 Earth signalling 73 Editing name/number 38 Emergency call 59 Exempt numbers 62 Extension number 19 External call 29...
- Page 102 Page base station 28 call 28, 31 handset 31 PARI 58, 90 PARK 58 Path through the menus 19 Phone book 35 adding caller’s numbers 37 adding last dialled numbers 36 adding name and number 36 adding who called 37 deleting names and numbers 39 editing name 38 editing number 38...
- Page 103 Volume earpiece 41 ringer base station 46 ringer handset 42 Wall mounter 11 Warning sound off 27 Warranty 96 Who called 26 Index...
- Page 106 Handset quick reference Telephoning Switching handset on and Making an external call Making an internal call Pre-dial Answering a call Put on hold and then ..transferring a call ... back to external caller ... three-party call Call by name Quick call by name Switching microphone off Tone dialling (temporarily) Select...
- Page 107 Web site Please visit us at our web site: http:\\mobile.ericsson.com EN/LZTNB 101 75/1 R1 ©Ericsson Mobile Communications AB 1998 0344...