Nikon COOLPIX S4000 User Manual
Hide thumbs
Also See for COOLPIX S4000:
- User manual (196 pages) ,
- Manual del usuario (196 pages) ,
- Errata sheet (2 pages)
Table of Contents
Advertisement
Advertisement
Table of Contents

Related Manuals for Nikon COOLPIX S4000


Summary of Contents for Nikon COOLPIX S4000
- Page 1 Nikon DIGITAL CAMERA $4000 COOLPX User's Manual...
- Page 2 • Adobe and Acrobat are registered trademarks of Adobe Systems inc. • SDand SDHCLogos are trademarks of SD-3C,LLC. • PictBridge is a trademark. • All other trade names mentioned in this manual or the other documentation provided with your Nikon product are trademarks or registered trademarks of their respective holders.
- Page 3 More on Playback...
- Page 4 To prevent damage to your Nikon product or injury to yourself or to others, read the following safety precautions in their entirety before using this equipment. Keep these safety instructions where all those who use the product will read them.
- Page 5 • Do not expose the battery to flame be damaged and the wires become or to excessive heat. exposed, take it to a Nikon- authorized service representative for • Do not immerse in or expose to inspection. Failure to observe these water.
- Page 6 When connecting cables to the input Should the monitor break, care should and output jacks, use only the cables provided or sold by Nikon for the be taken to avoid injury caused by purpose, to maintain compliance with broken glass and to prevent liquid product regulations.
- Page 7 This equipment generates, uses,and are not expressly approved by Nikon can radiate radio frequency energy Corporation may void the user's and, if not installed and used in authority to operate the equipment.
- Page 8 Notice for customers in Canada CAUTION This Class Bdigital apparatus complies with Canadian iCES-O03. ATTENTION Cet appareil nurn#rique de la classe B est conforme _ la norme NMB-O03 Canada. Notice for customers in Europe This symbol indicates that this product is to be collected separately.
-
Page 9: Table Of Contents
For Your Safety ................WARNINGS ................Notices ................. Introduction ................About This Manual ............... Information and P recautions .............. Parts ofthe Camera ..............The C amera Body ..............Basic Operations ................. The I _1 ( Shooting Mode) Button ............The [ ] (Playback) Button .............. - Page 10 Playing Back Pictures (Playback Mode) ....................Deleting Pictures ............................Tapping the Monitor to Release the Shutter (Touch Shutter) ..........34 Tapping the Monitor to Focus (Touch AF/AE) ................Focusing on a Moving Subject (Subject Tracking) ..............Using the Flash ............................Setting the Flash Mode ..........................
- Page 11 Viewing Pictures inAuto Sort Mode ............. Using Auto S ort Mode ..............Auto S ort Menu ..............Viewing Pictures by Date (List by Date Mode) ..........Selecting aDate inList by Date Mode ........... Using List by Date Mode ............... List by Date Menu ..............Playback Options: The P layback...
- Page 12 Connecting to a Computer ......................Before Connecting the Camera ....................... Transferring Pictures from a Camera to a Computer ..............] 27 Charging While Connecting to a Computer ................... Connecting to a Printer ........................Connecting the Camera to a Printer ..................... Printing Pictures One at a Time .......................
- Page 13 Thank you for your purchase ofa Nikon COOLPIX $4000 digital camera. This manual was written to help you enjoy taking pictures with your Nikon digital camera. Read this manual thoroughly before use, and keep it where all those who use tile product will read it.
- Page 14 • Nikon will not be held liable for any damages resulting from the use of this product, • While every effort was made to ensure that the information...
- Page 15 Notice Concerning Prohibition of Copying or Reproduction Note that simply being in possession of material that was digitally copied or reproduced by means of a scanner, digital camera or other device may be punishable by law. • Items prohibited by law from being copied or reproduced Do not copy or reproduce...
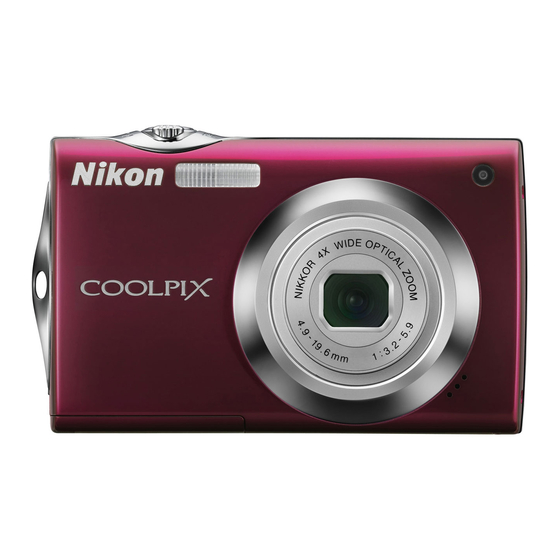
- Page 16 The Camera Body Lens cover closed Zoom control ..........Lens ............159, 174 W:wide ............Self-timer lamp ..........T: tale .............. AF-assist illuminator ......... thumbnail playback ...... C(: playback zoom ........Buiitdn microphone ...... 103, 119 Lens cover ............Shutter-rdease button BuiJtdn flash Eyelet for camera strap ........
- Page 17 Opening connector cover ... Charge lamp ......... ]g, 131 Flash lamp ............! Battery-chamber/ I_I (shooting mode) button ..... 6, 46 memory card slot cover ....16, 24 Speaker ..........104, 123 Tripod socket Battery latch ........ld 17 USB/audio/video output connector ............
-
Page 18: The I
I_1 (Shooting Mode) Button shooting mode. • Pressthe I_1 button in shooting mode to display • Pressthe I_1 button in playback mode to enter the shooting-mode selection menu and switch shooting modes (_ 46). The [] (Playback) Button • Pressthe [] button in shooting mode to enter playback mode. -
Page 19: Shutter-Release Button
Shutter-release Button Tile camera features a two-stage shutter-release button. To set focus and exposure, press tile shutter-release button halfway, stopping when you feel resistance. Focus and exposure lock while tile shutter-release button is held in this position. To release tile shutter and take a picture, press tile shutter-release... -
Page 20: Operating The Touch Panel
The monitor on the COOLPIX $4000 is a touch panel display. Use a finger or the supplied stylus to operate the touch panel. Tapping Tap the touch panel. Use this operation to: Select icons or other controls Select pictures in thumbnail playback mode (_ Perform touch shutter (_ 34), touch AF/AE (_... -
Page 21: Using The Stylus
Using Stylus Use tile stylus for operations, such as when using tile paint option (_ 107) or the draw option (_ 69), that require more precision than using a finger is possible. Attaching the Stylus Attach the stylus to the strap as shown. Notes on the Touch... -
Page 22: Main Display Of The Monitor/Touch Panel And Basic Operations
Shooting (Operation Controls) Tap tile following controls to change settings. • The controls available and indicators displayed vary with information display on/off, shooting mode and the current camera settings. Hue adjustment (in Food scene mode) ..............Flash mode ..........Touch shooting f_F&&... -
Page 23: Shooting (Other Indicators)
Shooting (Other Indicators) The following monitor display shows the current settings applied from the shooting menu (_ 47) as well as the active focus area. • The indicators displayed vary with current camera settings and shooting mode. lll_ 20 19 18 17 Shooting mode% .... -
Page 24: Playback (Operation Controls)
Playback (Operation Controls) Tap tile following controls to switch between monitor displays, or delete or edit pictures. • The controls available and indicators displayed vary with information display on/off, the picture played back and the current camera settings. Editing (still pictures) Information display setting .......... -
Page 25: Playback (Information Display)
Playback (Information Display) The folk_wing monitor display shows information for the picture currently displayed. • The controls and indicators displayed vary depending upon the picture played back and the current camera settings. £ mode 1 a Current frame number/ Playback ..... -
Page 26: The Menu Screen
The Menu Screen Tap _ to display the rT/enu for the selected mode. • Tap a tab at tile top of the menu screen to switch to tile menu for that tab. • Tap I_ to exit the menu. Displayed when the menu contains two or more pages Display the setup menu Display the available... -
Page 27: Help Display
Help Display Tapthe control when El is displayedin the monitor to displaythe help selection screen.Tap a menu item or option to view a description of that feature or setting. Tap _ to return to the previousscreen. -
Page 28: First Steps
Insert a Rechargeable Liqon Battery EN-EL10 (supplied) into the camera. • Charge the battery before the first use or when the battery is running (_ 18). Open battery-chamber/memory card slot " "° cover. :":_/1_ Insert the battery. Confirm that the positive (+) and negative ( ) terminals are oriented correctly as shown on the label at the battery chamber opening, and insert the battery. -
Page 29: Removing The Battery
Removing the Battery Turn tile camera off (_ 21 ) and make sure that tile power-on lamp and tile monitor have turned off before opening tile battery-chamber/memory card slot cover. To eject tile battery, open tile battery<hamberi memory card slot cover and slide tile orange battery latch... -
Page 30: Charging The Battery
Charge the supplied Rechargeable Lidon Battery EN-EL10 inserted into the camera,by connecting the supplied Ct_arging AC Adapter EH-68P to the camera via the supplied USB Cable UOE6, and then plugging the Charging AC Adapter into an electrical outlet. Prepare the Charging ACAdapter EH-68P, Ira plug adapter _ is included, attach the plug adapter to the plug on the Charging AC Adapter. - Page 31 Plug the Charging AC Adapter into an electrical outlet. The charge lamp slowly blinks green to indicate that the battery is charging. About two hours and ten minutes are required to charge a fully exhausted battery. The following chart explains charge lamp status when the camera is plugged into the electrical outlet.
- Page 32 Notes on Charging AC Adapter • The Charging AC Adapter EH 68P is _r use only with compatible devices. Do not use with another make or model of device, • Be sure to read and follow the warnings for the Charging AC Adapter on page iii and the section, "The Battery"...
-
Page 33: Turning On And Off The Camera
Turning On and Off the Camera To turn on the camera, press the power switch. The power-on lamp (green) will light for a moment and the monitor will turn on. To turn offthe camera, press the power switch again. When the camera is turned off, both the power-on lamp and monitor will turn off. -
Page 34: Setting Display Language, Date And Time
Alanguage-selection dialog is displayed the first time t he camera is turned on. Press the power switch to turn on the camera. power-on lamp (green)will light for a moment %_,_ the monitor will turn _C::_ Tap the desired language. If the desired language is not displayed, tap 0... - Page 35 day, month and year are displayed. • Edit the date and time. Tap the desired item and IMI or _ to edit the highlighted item. Tap !_. settings are applied and monitor display exits to shooting mode. Changing Imprinting Date Time •...
-
Page 36: Inserting Memory Cards
Image, sound, and movie files a re stored inthe camera's internal memory (approximately 45 MB) oronremovable Secure Digital (SD) memory cards (available commercially; _ 1.61). If a memory card is inserted in the camera, data are automatically stored on the memory card and data recorded to the memory card can be played back, deleted or transferred. - Page 37 Formatting Memory Cards If the message at right is displayed when the camera is turned the memory card must be _rmatted he.re use (_ 1SO) Note that formatting permanently deletes all pictures and other data the memory card. Be sure to make copies of any pictures you wish to keep before formatting...
-
Page 38: Basic Photography And Playback: I_1 (Auto) Mode
This section describes how to take pictures in I_1 (auto) mode, an automatic:, "point-and-shoot" mode recommended for first-time users of digital cameras. Press the power switch to turn on the camera..The power-on lamp (green) will light for a moment and the monitor will turn on. -
Page 39: Indicators Displayed In I_1 (Auto) Mode
Indicators Displayed in I_1 (Auto) Mode mode detection icon The effects of subject I_1 displayed in I_1 mode. movement and camera shake are reduced. Image mode Internal memory indicator F," The combination of image Indicates that images will be stored in the quality (compression) camera's... -
Page 40: Step 2 Frame A Picture
Readythe camera. Hold the camera steadily in both hands, keeping your fingers and other objects away from the lens, flash, AF- assist illuminator, microphone, and speaker. When taking pictures in portrait ("tall") orientation, turn the camera so that the buiINn flash is above the lens. -<... -
Page 41: Using The Zoom
Using the Zoom Use tile zoom control to activate optical zoom. Rotate Zoom Zoom subject zoom control to zoom in so that larger frame, or W fills area of the to zoom out, thus increasing area visible in the frame. A zoom indicator is displayed at the top of the monitor when the zoom control is rotated. -
Page 42: Step 3 Focus And Shoot
Pressthe shutter-release button halfway. Focus is locked when the shutter-release button is pressed halfway. When a face is recognized, it is framed by the double border indicating the active focus area. When the subject is in focus, the double border turns green. F,"... - Page 43 During Recording While pictures are being recorded, the number of exposures remaining will blink, Do not open the battery-chamber/memory card slot cover while pictures are being recorded. Cutting power removing the memory card in these circumstances could result in loss of data or in damage to the camera or card,...
-
Page 44: Step 4 Playing Back And Deleting Pictures
Playing Back Pictures (Playback Mode) Press the [] (playback) button I_1 (shooting mode) (playback) Internal y indicator F," button button The last picture taken will be displayed in full-frame playback mode. Drag the current picture left or right to display the previous or subsequent picture. Previous or ,<... - Page 45 Deleting Pictures Tap I_1 to delete the picture currently displayed in the monitor. Tap Yes. F," Deleted pictures cannot be recovered. To exit without ddedng the picture, tap No. Operations Available in Playback Mode See "More on Playback" ([._ 75) or "Editing Pictures"...
- Page 46 Pictures can be taken by simply tapping the monitor. • When _ (default setting) is displayed for t he touch shooting indicator, proceed tostep 3 . Tap the touch shooting icon. The touch shooting menu is displayed in the monitor. ,<...
- Page 47 Notes on Touch Shutter • When taking pictures with Continuous or BSS in Continuous setting 53) enabled, or in Sports or Museum scene mode Sg), use the shutter release button to take pictures. Only one picture can be taken at a time using the touch shutter function, •...
- Page 48 Touch Shutter Function When Recording Movies Touch shutter is also available movie recording. Movie recording can be initiated or stopped tapping the monitor 119), Touch Shooting Setting The touch shooting setting applied in I_1 (auto) mode is stored in the camera's memory even after the camera...
- Page 49 The touch shooting setting can be changed from Touch shutter (default setting) to Touch AF/AE Tap a subject in tile monitor to select tile area at which tile camera focuses. Press the shutter-release button halfway to lock focus and exposure for the area tapped, and press the shutter-release button...
- Page 50 Note on Touch AF/AE In some rare cases, shooting subjects with which autofocus may not perform as expected, subject may not be in focus (Q] 31). Shooting Modes That Enable Touch AF/AE Function Touch AF/AE can be enabled in shooting modes other than I_1 (auto) mode as well.
- Page 51 Taking Pictures of Subjects with Which Autofocus Perform Expected When taking pictures of su_ects with which auto_cus may not per_rm as expected 31), try pressing the shutter release button halfway to refocus several times, or try the following techniques. 1 Switch to I_1 (auto) mode and select Touch AF/AE for the •...
- Page 52 In a (auto) mode (_ 26), the touch shooting setting can be changed from Touch shutter (default setting) to Subject tracking. Use this option to take pictures of moving subjects. Tap the subject on which the camera will focus. The focus area will automatically move to track the subject.
- Page 53 Press the shutter-release button to take a picture. The camera focuses on the focus area when the shutter- release button is pressed halfway. The focus area will glow green and focus will be locked. When the camera is unable to focus, the focus area will blink.
- Page 54 When ISO sensitivity is set to Auto, the flash has a range of 0.5-4.5 m (1 ft. 8 in.- 14 ft.) at the maximum wide-angle zoom position and a range of 0.5-2.4 m (1 ft. 8 in.-7 ft. 10 in.) at the maximum telephoto zoom position.
- Page 55 Shooting When Flash Is Disabled (_)) or Lighting Is Dim • Use of a tripod is recommended to stabilize the camera during shooting and avoid the effects camera shake. • The []_ indicator is displayed when the camera automatically increases sensitivity, Pictures taken when...
- Page 56 The camera is equipped with a ten-second and two-second timer for self-portraits. This feature is useful for reducing the effects of camera shake that occurs when pressing the shutter-release button. When using the self-timer, use of a tripod is recommended. Tap the self-timer control.
- Page 57 Macro mode is used for taking pictures of objects as close as 8 cm (3.2 in.). Note that the flash may be unable to light the entire subject at distances of less than S0 cm (1 ft. 8 in.). Tap the macro mode control,...
- Page 58 Select a shooting mode from I_1 (auto), _ (scene), [] (smart portrait), and (movie) modes. Press thea button in shooting The shooting mode-selection menu is displayed, i_:' mode. h___J tlitIt Tap the desired shooting mode control. The camera enters the selected shooting mode. if the scene mode control (second control from the top) was tapped, tap the desired scene mode icon s9).
- Page 59 The following options can be set when shooting in a (auto) mode 26). Image mode [_[_J48 Choose the image mode (combination of image size and compression rate) at which pictures are recorded.The image mode setting can also be modified from other shooting modes (except movie recording).
- Page 60 Image Mode (Image Quality/Image Size) (auto) _ _ (Shootingmenu) _ Image mode Image mode refers to the combination of image size and image quality (compression) at which pictures are recorded. Choose the image mode best suited to the manner in which pictures will be used and the capacity of the internal memory or memory card.
- Page 61 Number of Exposures Remaining The _llowing table lists the approximate number of pictures that can be stored in internal memory and on a 4 GB memory card, Note that the number of pictures that can be stored will differ depending on the composition of the picture (due to JPEG compression),...
- Page 62 White Balance (Adjusting Hue) I_1 (auto) -) _ (Shooting menu) _ White balance The color of light reflected from an object varies with the color of the light source. The human brain is able to adapt to changes in the color of the light source, with the result that white objects...
- Page 63 Preset Manual Preset manual is effective with mixed lighting or to compensate for light sources with a strong color cast (for example, to make pictures taken under a lamp with a red shade look asthough they had been taken under white light). Place a white or gray reference object under the lighting...
- Page 64 Exposure Comp. (Adjusting Brightness) comp, I_1 (auto) (Shooting menu) Exposure Exposure compensation is used to alter exposure from the value suggested by the camera to make pictures brighter or darker. • To make the picture brighter, tap 0 to apply positive (€) exposure compensation, and tap _.
- Page 65 Continuous I_1 (auto) -) _ (Shooting menu) -) Continuous Enable continuous shooting or BSS (best shot selec:tor). The flash is disabled when Continuous, BSS or Multi-shot 16 is selected, and focus, exposure and white balance are fixed at the values determined with the first picture in each series.
- Page 66 ISO Sensitivity I_1(auto) -_ _ (Shooting menu) -_ ISOsensitivity Sensitivity is a measure of the camera's response to light. The higher the sensitivity, the less light is needed to expose an image. Although high ISO sensitivity settings are suited to pictures of moving subjects or those taken...
- Page 67 AF Area Mode 1_1(auto) -)' _ (Shooting menu) -)' AF area mode Use this option to determine flow tile camera selects tile focus area for autofocus. • When digital zoom is in effect, tile camera always focuses at tile center of tile frame regardless...
- Page 68 Face Priority When the camera is pointed at a human face, face recognition, which the camera automatically recognizes that face and focus on it, starts. The face priority function is activated in the following situations. • AF area mode 55) is set to Face priority •...
- Page 69 Notes on Face Priority • If the camera is unable to recognize any faces when the shutter release button is pressed halfway with AF area mode set to Face priority, the AF area mode setting automatically switches Auto. • If no faces are recognized when the shutter release button is pressed halfway...
- Page 70 Camera Settings that Cannot Be Applied Simultaneously Some shooting settingscannot be usedwith other functions. _-_" Restricted '_'_! 7_'i_!_'_=_ Description function Setting _,,_!_ ..When Continuous, BSS, or Multi-shot 16 is Flash mode Continuous selected, flash is disabled. When Multi-shot 16 is selected, the Image Continuous mode setting is fixed at [] (image size: 2560 ×...
- Page 71 Camera settings are automatic:ally optimized for the selected subject type. The following scene modes are available. Portrait Sunset [)uslVdawn Night landscape Beach/snow Museum Fireworksshow Copy Food iLandscape __Sports Night portrait Panoramaassist Draw Backlight Setting a Scene Mode Press thea button in shooting mode to displaythe...
- Page 72 Shooting in the Scene Mode Selected by the Camera (Scene Auto Selector) By simply frarrfing a picture, tile camera automatically selects tile optimum scene mode for simpler shooting. When a picture is framed in _ (Scene auto selector) scene mode, the camera automatically selects one of the following scene modes: •...
-
Page 73: Macro Mode
Notes on Scene Auto Selector Scene Mode • Digital zoom is not available • Depending upon shooting conditions, the camera may not select the desired scene mode Should this occur, switch to I_1 (auto) mode ([.7._ 26) or select the desired scene mode manually Focusing... - Page 74 Selecting a Scene Mode to Take Pictures (Features) Tile following icons are used for descriptions in this section: _, flash mode 42); _t_),self-timer 44); _1_, macro mode 45). See "Shooting in tile Scene Mode Selected by tile Camera (Scene Auto Selector)"...
-
Page 75: Continuous
"_ Sports Use this mode for dynamic action shots that freeze the action in a single shot and record motion in a series of pictures. • The camera focuses on the subject at the center of the frame and focuses continuously until focus is locked by pressing the shutter-release button halfway. - Page 76 _._ Party/indoor Captures the effects of candlelight and other indoor background lighting. • Camera focuses on subject at the center of the frame. The area focused can be changed by the touch shutter ([_ 34) or touch AF/AE ([_ 37). •...
- Page 77 Dusk!dawn Preserves the colors seen in the weak natural light before sunrise or after sunset, • Camera focuses at infinity. The focus area or focus indicator 30) always glows green when the shutter-release button is pressed halfway. Note, however, that objects in the foreground may not always be in focus.
- Page 78 _l Food Use when taking pictures of food. • The camera focused on the subject at the center of the frame. The area focused can be changed by the touch shutter ([_) 34) or touch AF/AE ([_) 37). • Macro mode (_ 45) is enabled and the camera automatically zooms to the closest position at which it can focus.
-
Page 79: Using The Draw Option
_:_._ F ireworksshow Slow shutter speeds are used to capture the expanding burst of light from a firework. • Camera focuses at infinity. The focus indicator (1_] 30) always glows green when the shutter-release button is pressed halfway. Note, however, that objects in the foreground may not always be in focus. -
Page 80: Shooting For A Panorama
I:_ Panorama assist Use when taking a series of pictures that will later bejoined to form a single panorama using the supplied Panorama Maker software. See "Shooting for a Panorama" ([Z_]] 70) for details. Default setting can be modified. - Page 81 Using the Draw Option Write a memo, or draw a picture, on the touch panel display and save it as an image. The image is saved at an image size setting of _ 640x480 Press thea button in shooting mode to display the shooting-mode selection...
- Page 82 Shooting for a Panorama The camera focuses o11 the subject at the c:enter of the frame. Use a tripod for the best results. Press thea button in shooting mode to display the shooting-mode selection menu and choose 1:_ (Panorama assist) scene mode (C_359).
- Page 83 Tap I_1 when shooting is complete. The camera returns to step Notes on Panorama Assist • Flash mode, sel_timer, and macro mode settings cannot be adjusted after the first picture is taken. Pictures cannot be deleted, nor can zoom, Image mode setting ([._...
- Page 84 At the default settings, the camera uses face priority to recognize human faces, and then automatically releases the shutter when a smile is detected (smile timer). The skin softening option can be used to smooth skin tones of human fac:es. Press thea button in shooting...
- Page 85 Notes on Smart Portrait Mode • Digital zoom is not available. • Under some shooting conditions, the camera may be unable to recognize faces or detect smiles. • See "Notes on Face Priority" ([,]_ 57) for more information, Notes on Skin Softening •...
-
Page 86: Smart Portrait Menu
Smart Portrait Menu The following options can be applied in the smart portrait menu. Tap _ 14) in smart portrait mode (_ 72) to display the smart portrait menu and tap menu items to adjust settings. Image mode Adjust Image mode (_ 48). - Page 87 Press the l-_](playback) button to enter playback mode and d)splay p)ctures that have been taken (_ 32). The following operations are available in full-frame playback mode. Option Description View thumbnails W (_1_) Rotate the zoom control to W (_) display 4, 9 or l d picture thumbnails. Rotate the zoom control to T (% to enlarge the picture up to lOx.
- Page 88 Viewing Pictures When pictures in which a face was recognized during shooting ([._ 56) are displayed in full frame playback mode, depending upon the orientation of the recognized face, the pictures may be automatically rotated for playback display except pictures taken with Continuous, BSS, and Multi- shot...
- Page 89 Rotate the zoom control to W ([]) in full-frame playback mode (_ 75) to display pictures in "contact sheets" of thumbnail images. The following operations are available while thumbnails are displayed. t33 ¸ Description Rotate the zoom control to W (_;_) to Increasethe number W (_;_)
- Page 90 Thumbnail Display in Favorite Pictures and Auto Sort Mode • When thumbnails are displayed in favorite pictures mode (_ 81), the favorite pictures icon is displayed at right above the thumbnails, • When thumbnails are displayed in auto sort mode (_ 88), the pictures' category icon is displayed at right above the thumbnails,...
- Page 91 Rotating the zoom control to T (c() in full-frame playback mode 75) enlarges display of the center portion of the current picture. • The guide displayed at bottom right shows the portion of the image currently displayed. The following operations can be performed while picture...
- Page 92 Select a pByback mode from [] (pByback), I_ (favorite pictures), _ (auto sort), and _1 (list by date) modes. Press the[] button in playback mode. The playbackmode menu is displayed. Tap the desired playback mode control The _amera enters _ne smec_eo olavoacK mooe. To return to the current DlavDacK mooe wlrnour swl_cnln9 pla PaCKmoaes _ress the [] Du_on.
-
Page 93: Adding Pictures To Albums
Pictures can be sorted to albums. Once pictures have been sorted to albums, favorite picture mode can be used to play back only the pictures in a specific album. Adding pictures to albums makes finding a particular picture faster and easier. - Page 94 Notes on Adding Favorite Pictures • An album can contain up to 200 pictures, • Movies cannot be added to albums, • If the selected picture has already been added to an album, the checkbox for the album to which it has been added will be checked (V).
-
Page 95: Viewing Pictures In An Album
Viewing Pictures in an Album Pictures carl be displayed by selecting tile album to which they were added "f_l favorite pictures mode". • In full-frame playback mode, just as with normal playback mode, pictures can be displayed as thumbnails and picture display can be enlarged. -
Page 96: Removing Pictures From Albums
Removing Pictures from Albums To remove a picture frorn an album without perrnanentiy deleting it, follow tile procedures described below. • Select tile desired picture in full-frame display in step 2 in favorite pictures mode (_ 83), tap I1, and tap in retouch screen. -
Page 97: Favorite Pictures Menu
Using Favorite Pictures Mode Thefollowing operationsare availableinthe album list screen. Description Change album icon Change the icon assigned to an album. Delete pictures Tap _ to display the album selection screen. added tothe Select the desired album and tap IT]_to specified album delete all pictures added to that album. - Page 98 Changing Icons Assigned to Albums The icon assigned to an album can be changed to reflect the theme of pic:tures included in the album. Press the[] button in playback mode to display the playback-mode F----JIIL----q selection menu and tap I_. A list of albums is displayed.
- Page 99 Adding/Viewing Favorite Pictures When pictures are added to albums, they are not physically copied to albums or moved from the folder to which they were originally recorded 162), Only the file names of pictures are added to albums, in favorite pictures mode, pictures with...
- Page 100 Pictures and movies are automatically sorted to any of the following categories with shooting. When "_ (auto sort) mode" is selected, pictures and movies can be viewed by selecting the category to which they were sorted. Smile • Portraits Landscape Dusk to dawn Movie -F_ Retouched copies...
- Page 101 Auto Sort Mode Categories Category Description [] Smile Pictures taken in smart portrait mode ([_] 72) with the smile rimer se_ung set to On are displayed. Pictures taken in I_1 (auto) mode ([_] 26) with the face priority. Pictures taker in Portrait _, Night Portrait*, Party/indoor, Portraits Backlight _ scene mode ([_) 59).
- Page 102 Using Auto Sort Mode following Tile operations are available in tile category list screen. Description Sorted to the Delete pictures Tap _ to display the category selection screen. Specified Select the desired category and tap I_ to delete Category all pictures sorted to that category. View auto Sort menu Tap _...
- Page 103 No reproduction in any form of this manual, in whole or in part (except for brief quotation in critical articles or reviews), may be made without written authorization from NIKON CORPORATION. NIKON CORPORATION YPOB01(11) © 2010 Nikon Corporation 6MM7781 1-01...