Panasonic Lumix DMC-G3K Basic Owner's Manual
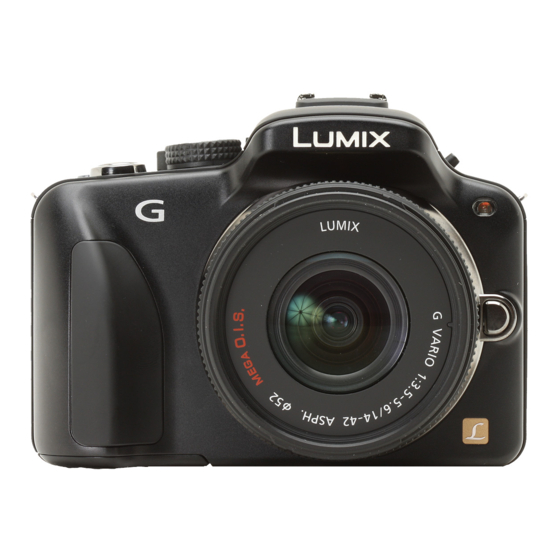
Lens kit/body
Hide thumbs
Also See for Lumix DMC-G3K:
- Basic owner's manual (56 pages) ,
- Basic operating instructions manual (52 pages) ,
- Basic operating instructions manual (48 pages)
Advertisement
Quick Links
Panasonic
Basic Owner's Manual
Digital Camera/
Lens Kit/Body
Model
No.
DMC-G3K/DMC-G3
Before connecting, operating or adjusting this product, please read
the instructions completely.
LUM|X
TM
MICRO
FouRTHiRDS
_c
More detailed instructions
on the operation of this
camera are contained in
"Owner's
Manual for advanced features
(PDF format)"
in the supplied CD-ROM.
Install it on your PC to read it.
|
VQT3N42
Advertisement

Related Manuals for Panasonic Lumix DMC-G3K


Summary of Contents for Panasonic Lumix DMC-G3K
- Page 1 Panasonic Basic Owner's Manual Digital Camera/ Lens Kit/Body DMC-G3K/DMC-G3 Model Before connecting, operating or adjusting this product, please read the instructions completely. LUM|X More detailed instructions on the operation of this camera are contained in MICRO FouRTHiRDS "Owner's Manual for advanced features (PDF format)"...
- Page 2 Dear Customer, Thank you for choosing Panasonic! You have purchased one of the most sophisticated and reliable products on the market today. Used properly, we're sure it will bring you and your family years of enjoyment. Please take time to fill in the information on the below.
- Page 3 • Product identification marking Product Location Bottom Digital Camera Bottom Battery charger This Class B digital apparatus complies with Canadian ICES-003. • About the battery pack CAUTION Battery pack (Lithium ion battery pack) • Use the specified unit to recharge the battery pack. •...
- Page 4 • Do not use any other USB connection cables except the supplied one. • Always use a genuine Panasonic HDMI mini cable (RP-CDHM15, RP-CDHM30; optional). Part numbers: RP-CDHM15 (1.5 m) (5 feet), RP-CDHM30 (3.0 m) (10 feet) • Always...
- Page 5 Information for Your Safety ....................Standard Accessories ...................... Names and Functions of Components ................About the Lens ....................... Attaching/Detaching the Lens ..................Attaching the Shoulder Strap ..................Charging the Battery ...................... • Charging ........................• Approximate operating time and number of recordable pictures ......Inserting and Removing the Card (optional)/the Battery ..........
-
Page 6: Standard Accessories
,_Standard Accessories Check that all the accessories are supplied before using the camera. Product numbers correct as of June 2011. These may be subject to change. Digital Camera Body (This is referred to as camera body in this Owner's Manual.) Interchangeable Lens "LUMIX G VARIO 14-42 mm/F3.5-5.6... - Page 7 VYC1009 VFC4315 H-FS014042 VYF3201 DE-A93B K1HY08YY0016 DMW-BLD10PP K1HY08YY0015 VKF4385 VFF0805 VFC4634 VGQOC14 (ENG) VQT3N42...
- Page 8 • Camera body Sensor Flash Self-timer indicator/ AF Assist Lamp Lens fitting mark Mount Lens lock pin Lens release button [LVF/LCD] button 9 10 1112 13 14 15 Diopter adjustment dial 10 Viewfinder Playback button Motion picture button Camera ON/OFF switch Rear dial [DISR/Fnl] button...
- Page 9 Intelligent Auto button 28 29 30 31 32 33 Tripod receptacle DC coupler cover • When using an AC adaptor, ensure that the Panasonic DC coupler (DMW-DCC9; optional) and AC adaptor (DMW-AC8PP; optional) are used. • Always use a genuine Panasonic adaptor (DMW-AC8PP;...
- Page 10 • Lens H-FS014042 (LUMIX G VARIO 14-42 mm/F3.5-5.6 ASPH./MEGA O.I.S.) 39 40 41 42 Tele Lens surface Focus ring Wide Zoom ring Contact point Lens fitting mark 10 VQT3N42 (ENG)
- Page 11 This touch panel is a type that detects pressure. Drag Touch the screen A movement without releasing the touch To touch and release the touch panel, panel. Use this to perform tasks such as selecting This is used to move the AF area, operate _cons or images displayed...
- Page 12 CAbout the Len • Micro Four Thirds mount specification lens This unit can use the dedicated lenses compatible with the Micro Four Thirds System lens mount specification (Micro Four Thirds mount). MICRO MICRO FOURTHIRDS • Four Thirds mount specification lens Lens with the Four Thirds mount specification can be used by using the mount adaptor (DMW-MA1 ;...
- Page 13 • Check that the camera is turned off. • Change lenses where there is not a lot of dirt or dust. ® ® rear cap body _Turn the lens and the in the direction of the arrow to detach them. •...
-
Page 14: Attach The Lens Cap
Attach the lens cap. pressing While the lens release button rotate the lens toward the arrow until it stops and then remove. • Always attach the body cap to the camera body so that dirt or dust does not get inside. •... - Page 15 hounder Strap • We recommend attaching the shoulder strap when using the camera to prevent it from dropping. strap through _Pass the shoulder the shoulder strap eyelet on the camera body. @: Shoulder strap eyelet the end of the shoulder strap through _Pass the ring in the direction of the arrow and then pass it through the stopper.
- Page 16 To ensure that safe products are used we would recommend that a genuine Panasonic battery pack is used. • Use the dedicated charger and battery. • The battery is not charged when the camera is shipped. Charge the battery before use.
- Page 17 [Camera & Imaging Products Association]. • Temperature: 23 °C (73.4 '_F)/Humidity: 50%RH when LCD monitor is on. • Using a Panasonic SD Memory Card (2 GB). • Using the supplied battery. • Starting recording 30 seconds after the camera is turned •...
- Page 18 • Recording motion pictures (when using the LCD monitor) - [AVCHD] (Recording with picture quality set to [FSH]) the interchangeable lens (H-FS014042) is used Approx. 110 min -[MOTION JPEG] (Recording with picture quality set to [HD]) the interchangeable lens (H-FS014042) is used Approx.
- Page 19 • Check that this unit is turned off. • We recommend using a Panasonic card. lide the release lever in the direction of the arrow and open the card/battery door. • Always use genuine Panasonic batteries (DMW-BLDIOPP). • If you use other batteries,...
- Page 20 The following cards which conform to the SD video standard can be used with this unit. These cards are indicated as card in the text.) iiiiillliiii ,Yii il,i iiiiii i ,iiiiiiiiiiiiiiiiiiiiiii! Liiiiiii iiii ill,l, iiiiiiii i !i!i ..• Use a card with SD Speed ClassX with "Class 4"...
- Page 21 The clock can be setup with the following procedure at the time of purchase. Change the clock setting in [CLOCK SET] of the [SETUP] menu. For deta s, read the PDF. • The clock is not set when the camera is shipped. Turn the camera •...
- Page 22 • To select a Recording Mode with the mode dial Switching the mode by rotating the mode dial. Align a desired mode with part _. • Rotate the mode dial slowly and surely to adjust to each mode. • To select Intelligent Auto Mode Press [1_].
- Page 23 • Basic Intelligent Auto Mode The subjects are recorded using settings automatically selected by the camera. Program AE Mode The subjects are recorded using your own settings. • Advanced Aperture-Priority AE Mode The shutter speed is automatically determined by the aperture value you set. Shutter-Priority AE Mode The aperture value is automatically...
- Page 24 Recording Mode: __[_[j__ "_ king a Still picture • Set the drive mode to [_] by pressing 1'(__j ¢:)). Selecting the Recording Mode. halfway Press the shutter button to focus. (Z) Aperture value Shutter speed • Aperture value and shutter speed are displayed.
-
Page 25: Af Assist Lamp
The camera will set the most appropriate settings to match the subject and the recording conditions so we recommend this mode for beginners or those who want to leave settings to the camera and take pictures easily. • The following functions are activated automatically. - Page 26 When the camera identifies the optimum scene, the icon of the scene concerned is displayed in blue for 2 seconds, after which its color changes to the usual red. When taking pictures [i-PORTRAIT] [i-SCENERY] [i-MACRO] • Only when [I,I_A ] is selected [i-NIGHT PORTRAIT] [i-NIGHT SCENERY] [i-BABY] _...
- Page 27 The brightness and color optimally set by the camera can be easily matched to your preferences. This mode is useful for those who would like the settings made by the camera to match their preferences but do not like dealing with detailed settings. when in Press [MENU/SET] Intelligent...
- Page 28 Recording Mode: ictures with Defocus Control You can easily set the blurriness of the background while checking the screen. Touch [_] to display the setting screen. • When using the viewfinder, press the rear dial several times to display the Defocus Control setting screen.
- Page 29 The camera automatically sets the shutter speed and the aperture value according to the brightness of the subject. You can take pictures with greater freedom by changing various settings in [REC] menu. Set the mode dial to [{_]. Note • The shutter speed is automatically set between...
- Page 30 ReCording Mode: __[_[_[_}_ cording Notion Pictures This can record full high definition motion pictures compatible with the AVCHD format motion pictures recorded in Motion JPEG. Audio will be recorded in stereo. The functions available when recording motion pictures differ according to the lens you are using, and the operational...
- Page 31 Press [_]. orward or rewind the image by dragging the screen horizontally. Forward: drag from right to left Rewind: drag from left to right • It is also possible to forward or rewind the image by pressing _1/1_ of the cursor button.
- Page 32 [AVCHD] motion pictures that were recorded with this unit, AVCHD format (including [AVCHD Lite]) motion pictures recorded with Panasonic digital cameras (LUMIX) only. Press [_]. with Motion Picture icon Select a picture ([_], [1_]) and then touch [_] to play back.
- Page 33 • Operations performed during Motion Picture Playback Display control panel by touching screen. • If no operation is performed for 2 seconds, it will return to original status. Operate control panel by touching. Play/Pause Stop Fast rewind Fast forward Frame-by-frame rewind Frame-by-frame forward...
- Page 34 Once d eleted, pictures cannot be recovered. Press [(_]. Select the picture to be deleted, and then touch [[]]. Touch [DELETE SINGLE]. • Confirmation screen is displayed. Picture is deleted by selecting [YES]. VQT3N42 (ENG)
-
Page 35: Setting The Menu
_Setting the Menu This camera offers menu selections that allow you to customize its operation to maximize your picture taking experience. In particular, the [SETUP] menu contains some important settings relating to the camera's clock and power. Check the settings of this menu before proceeding to use the camera. - Page 36 Press [MENU/SET] to display the menu. ,& © Select the menu item by pressing A/I' by rotating the rear dial. • Select the item at the very bottom, and press • rotate the rear dial right to move to the next screen. dial.
- Page 37 • Switching to other menus e.g.: Switching to the [SETUP] menu from [REC] menu Press "4. (_ Menu toggle icon © Press • or rotate the rear dial to select the [SETUP] menu icon [_ ]. ©, Press I_ or the rear dial. •...
- Page 38 C_omRecording Mode: pensating the Exposure Use this function when you cannot achieve appropriate exposure due to the difference brightness between the subject and the background. Look at the following examples. Properly U nderexposed exposed Overexposed Compensate the exposure Compensate the exposure towards positive.
- Page 39 Recording Mode: []B_] Set the aperture value to a higher number when you want a sharp focus background. the aperture value to a lower number when you want a soft focus background. [_]. Set the mode dial to Rotate the rear dial to set the aperture value.
- Page 40 Determine the exposure by manually setting the aperture value and the shutter speed. The Manual Exposure Assistance appears on the lower portion of the screen to indicate the exposure. Set the mode dial to [l_]. otate the rear dial to set the aperture and shutter speed.
- Page 41 Web Site. http:llget.adobe.comlreaderlotherversions • To uninstall the Owner's Manual (PDF format) Delete the PDF file from the "Program Files\Panasonic\LumixV' folder. • For Mac Turn the PC on and insert the CD-ROM containing the Owner's Manual (supplied). Open the "Manual"...
- Page 42 Digital Camera Body (DMC-G3): Information for your safety Power Consumption: 3.1 W (When recording with LCD Monitor) [When the Interchangeable lens (H-FS014042)is used] 1.9 W (When playing back with LCD Monitor) [When the Interchangeable lens (H-FS014042)is used] Camera effective pixels 16,000,000 pixels Image sensor 4/3"...
- Page 43 Shutter speed B (Bulb) (Max. approx. 120 seconds), 60 seconds to 1/4000th of a second Taking still pictures during motion picture recording Motion picture priorities: 1/30th of a second to 1/16000th of a second Still picture priorities: B (Bulb) (Max. approx. 120 seconds), 60 seconds to 1/4000th of a second EV 0 to EV 18 Metering range...
- Page 44 Recording quality Motion pictures [AVCHD] (With audio) When set to [FSH]: 1920x1080 pixels (60i recording/ Approx. 17 Mbps)! When set to [SH]: 1280x720 pixels (60p recording/ Approx. 17 Mbps) ( _Sensor output is 30 frames/sec.) [MOTION JPEG] (With audio) When set to [HD]: 1280x720 pixels (30 frames/sec.)! When set to [VGA]: 640x480 pixels (30 frames/sec.)!
- Page 45 Battery Charger (Panasonic DE-A93B): Information for your safety _110 V to 240 V, 50/60 Hz, 0.2 A Output: _ 8.4 V, 0.65 A Battery Pack (lithium-ion) (Panasonic DMW-BLD10PP): Information for your safety Interchangeable Lens (H-FS014042) "LUMIX G VARIO 14-42 ram/F3.5-5.6 ASPH./MEGA...
- Page 46 Description Accessory# DMW-BLD10 Lithum Ion Battery DMW-AC8 AC Adaptor DMW-DCC9 DC Coupler Flash DMW-FL220, DMW-FL360, DMW-FL500 Remote Shutter DMW-RSL1 Zoom Lever DMW-ZL1 MC Protector DMW-LMC52 ND Filter DMW-LND5212 DMW-LPL5212 PL Filter (Circular Type) DMW-LFC52 Lens Cap DMW-LRC1 Lens Rear Cap DMW-BDC1 Body Cap DMW-TA1...
- Page 47 June 2011. These be subject to change. 1 The AC Adaptor (optional) can only be used with the designated Panasonic DC Coupler (optional). The AC adaptor (optional) cannot be used by itself. If you are using other than the interchangeable...
- Page 48 HDMI Licensing LLC in the United States and other countries. • VlERA Link is a trademark of Panasonic Corporation. • EZ Sync ® is a trademark of Panasonic Corporation. • HDAVl Control is a trademark of Panasonic Corporation.
- Page 49 Panasonic Basic Owner's Manual Digital Camera/ Lens Kit/Body DMC-G3K/DMC-G3 Model Before connecting, operating or adjusting this product, please read the instructions completely. LUM|X More detailed instructions on the operation of this camera are contained in MICRO FouRTHiRDS "Owner's Manual for advanced features (PDF format)"...
- Page 50 Dear Customer, Thank you for choosing Panasonic! You have purchased one of the most sophisticated and reliable products on the market today. Used properly, we're sure it will bring you and your family years of enjoyment. Please take time to fill in the information on the below.
- Page 51 • Product identification marking Product Location Bottom Digital Camera Bottom Battery charger This Class B digital apparatus complies with Canadian ICES-003. • About the battery pack CAUTION Battery pack (Lithium ion battery pack) • Use the specified unit to recharge the battery pack. •...
- Page 52 • Do not use any other USB connection cables except the supplied one. • Always use a genuine Panasonic HDMI mini cable (RP-CDHM15, RP-CDHM30; optional). Part numbers: RP-CDHM15 (1.5 m) (5 feet), RP-CDHM30 (3.0 m) (10 feet) • Always...
- Page 53 Information for Your Safety ....................Standard Accessories ...................... Names and Functions of Components ................About the Lens ....................... Attaching/Detaching the Lens ..................Attaching the Shoulder Strap ..................Charging the Battery ...................... • Charging ........................• Approximate operating time and number of recordable pictures ......Inserting and Removing the Card (optional)/the Battery ..........
- Page 54 ,_Standard Accessories Check that all the accessories are supplied before using the camera. Product numbers correct as of June 2011. These may be subject to change. Digital Camera Body (This is referred to as camera body in this Owner's Manual.) Interchangeable Lens "LUMIX G VARIO 14-42 mm/F3.5-5.6...
- Page 55 VYC1009 VFC4315 H-FS014042 VYF3201 DE-A93B K1HY08YY0016 DMW-BLD10PP K1HY08YY0015 VKF4385 VFF0805 VFC4634 VGQOC14 (ENG) VQT3N42...
- Page 56 • Camera body Sensor Flash Self-timer indicator/ AF Assist Lamp Lens fitting mark Mount Lens lock pin Lens release button [LVF/LCD] button 9 10 1112 13 14 15 Diopter adjustment dial 10 Viewfinder Playback button Motion picture button Camera ON/OFF switch Rear dial [DISR/Fnl] button...
- Page 57 Intelligent Auto button 28 29 30 31 32 33 Tripod receptacle DC coupler cover • When using an AC adaptor, ensure that the Panasonic DC coupler (DMW-DCC9; optional) and AC adaptor (DMW-AC8PP; optional) are used. • Always use a genuine Panasonic adaptor (DMW-AC8PP;...
- Page 58 • Lens H-FS014042 (LUMIX G VARIO 14-42 mm/F3.5-5.6 ASPH./MEGA O.I.S.) 39 40 41 42 Tele Lens surface Focus ring Wide Zoom ring Contact point Lens fitting mark 10 VQT3N42 (ENG)
- Page 59 This touch panel is a type that detects pressure. Drag Touch the screen A movement without releasing the touch To touch and release the touch panel, panel. Use this to perform tasks such as selecting This is used to move the AF area, operate _cons or images displayed...
- Page 60 CAbout the Len • Micro Four Thirds mount specification lens This unit can use the dedicated lenses compatible with the Micro Four Thirds System lens mount specification (Micro Four Thirds mount). MICRO MICRO FOURTHIRDS • Four Thirds mount specification lens Lens with the Four Thirds mount specification can be used by using the mount adaptor (DMW-MA1 ;...
- Page 61 • Check that the camera is turned off. • Change lenses where there is not a lot of dirt or dust. ® ® rear cap body _Turn the lens and the in the direction of the arrow to detach them. •...
- Page 62 Attach the lens cap. pressing While the lens release button rotate the lens toward the arrow until it stops and then remove. • Always attach the body cap to the camera body so that dirt or dust does not get inside. •...
- Page 63 hounder Strap • We recommend attaching the shoulder strap when using the camera to prevent it from dropping. strap through _Pass the shoulder the shoulder strap eyelet on the camera body. @: Shoulder strap eyelet the end of the shoulder strap through _Pass the ring in the direction of the arrow and then pass it through the stopper.
- Page 64 To ensure that safe products are used we would recommend that a genuine Panasonic battery pack is used. • Use the dedicated charger and battery. • The battery is not charged when the camera is shipped. Charge the battery before use.
- Page 65 [Camera & Imaging Products Association]. • Temperature: 23 °C (73.4 '_F)/Humidity: 50%RH when LCD monitor is on. • Using a Panasonic SD Memory Card (2 GB). • Using the supplied battery. • Starting recording 30 seconds after the camera is turned •...
- Page 66 • Recording motion pictures (when using the LCD monitor) - [AVCHD] (Recording with picture quality set to [FSH]) the interchangeable lens (H-FS014042) is used Approx. 110 min -[MOTION JPEG] (Recording with picture quality set to [HD]) the interchangeable lens (H-FS014042) is used Approx.
- Page 67 • Check that this unit is turned off. • We recommend using a Panasonic card. lide the release lever in the direction of the arrow and open the card/battery door. • Always use genuine Panasonic batteries (DMW-BLDIOPP). • If you use other batteries,...
- Page 68 The following cards which conform to the SD video standard can be used with this unit. These cards are indicated as card in the text.) iiiiillliiii ,Yii il,i iiiiii i ,iiiiiiiiiiiiiiiiiiiiiii! Liiiiiii iiii ill,l, iiiiiiii i !i!i ..• Use a card with SD Speed ClassX with "Class 4"...
- Page 69 The clock can be setup with the following procedure at the time of purchase. Change the clock setting in [CLOCK SET] of the [SETUP] menu. For deta s, read the PDF. • The clock is not set when the camera is shipped. Turn the camera •...
- Page 70 • To select a Recording Mode with the mode dial Switching the mode by rotating the mode dial. Align a desired mode with part _. • Rotate the mode dial slowly and surely to adjust to each mode. • To select Intelligent Auto Mode Press [1_].
- Page 71 • Basic Intelligent Auto Mode The subjects are recorded using settings automatically selected by the camera. Program AE Mode The subjects are recorded using your own settings. • Advanced Aperture-Priority AE Mode The shutter speed is automatically determined by the aperture value you set. Shutter-Priority AE Mode The aperture value is automatically...
- Page 72 Recording Mode: __[_[j__ "_ king a Still picture • Set the drive mode to [_] by pressing 1'(__j ¢:)). Selecting the Recording Mode. halfway Press the shutter button to focus. (Z) Aperture value Shutter speed • Aperture value and shutter speed are displayed.
- Page 73 The camera will set the most appropriate settings to match the subject and the recording conditions so we recommend this mode for beginners or those who want to leave settings to the camera and take pictures easily. • The following functions are activated automatically.
- Page 74 When the camera identifies the optimum scene, the icon of the scene concerned is displayed in blue for 2 seconds, after which its color changes to the usual red. When taking pictures [i-PORTRAIT] [i-SCENERY] [i-MACRO] • Only when [I,I_A ] is selected [i-NIGHT PORTRAIT] [i-NIGHT SCENERY] [i-BABY] _...
- Page 75 The brightness and color optimally set by the camera can be easily matched to your preferences. This mode is useful for those who would like the settings made by the camera to match their preferences but do not like dealing with detailed settings. when in Press [MENU/SET] Intelligent...
- Page 76 Recording Mode: ictures with Defocus Control You can easily set the blurriness of the background while checking the screen. Touch [_] to display the setting screen. • When using the viewfinder, press the rear dial several times to display the Defocus Control setting screen.
- Page 77 The camera automatically sets the shutter speed and the aperture value according to the brightness of the subject. You can take pictures with greater freedom by changing various settings in [REC] menu. Set the mode dial to [{_]. Note • The shutter speed is automatically set between...
- Page 78 ReCording Mode: __[_[_[_}_ cording Notion Pictures This can record full high definition motion pictures compatible with the AVCHD format motion pictures recorded in Motion JPEG. Audio will be recorded in stereo. The functions available when recording motion pictures differ according to the lens you are using, and the operational...
- Page 79 Press [_]. orward or rewind the image by dragging the screen horizontally. Forward: drag from right to left Rewind: drag from left to right • It is also possible to forward or rewind the image by pressing _1/1_ of the cursor button.
- Page 80 [AVCHD] motion pictures that were recorded with this unit, AVCHD format (including [AVCHD Lite]) motion pictures recorded with Panasonic digital cameras (LUMIX) only. Press [_]. with Motion Picture icon Select a picture ([_], [1_]) and then touch [_] to play back.
- Page 81 • Operations performed during Motion Picture Playback Display control panel by touching screen. • If no operation is performed for 2 seconds, it will return to original status. Operate control panel by touching. Play/Pause Stop Fast rewind Fast forward Frame-by-frame rewind Frame-by-frame forward...
- Page 82 Once d eleted, pictures cannot be recovered. Press [(_]. Select the picture to be deleted, and then touch [[]]. Touch [DELETE SINGLE]. • Confirmation screen is displayed. Picture is deleted by selecting [YES]. VQT3N42 (ENG)
- Page 83 _Setting the Menu This camera offers menu selections that allow you to customize its operation to maximize your picture taking experience. In particular, the [SETUP] menu contains some important settings relating to the camera's clock and power. Check the settings of this menu before proceeding to use the camera.
- Page 84 Press [MENU/SET] to display the menu. ,& © Select the menu item by pressing A/I' by rotating the rear dial. • Select the item at the very bottom, and press • rotate the rear dial right to move to the next screen. dial.
- Page 85 • Switching to other menus e.g.: Switching to the [SETUP] menu from [REC] menu Press "4. (_ Menu toggle icon © Press • or rotate the rear dial to select the [SETUP] menu icon [_ ]. ©, Press I_ or the rear dial. •...
- Page 86 C_omRecording Mode: pensating the Exposure Use this function when you cannot achieve appropriate exposure due to the difference brightness between the subject and the background. Look at the following examples. Properly U nderexposed exposed Overexposed Compensate the exposure Compensate the exposure towards positive.
- Page 87 Recording Mode: []B_] Set the aperture value to a higher number when you want a sharp focus background. the aperture value to a lower number when you want a soft focus background. [_]. Set the mode dial to Rotate the rear dial to set the aperture value.
- Page 88 Determine the exposure by manually setting the aperture value and the shutter speed. The Manual Exposure Assistance appears on the lower portion of the screen to indicate the exposure. Set the mode dial to [l_]. otate the rear dial to set the aperture and shutter speed.
- Page 89 Web Site. http:llget.adobe.comlreaderlotherversions • To uninstall the Owner's Manual (PDF format) Delete the PDF file from the "Program Files\Panasonic\LumixV' folder. • For Mac Turn the PC on and insert the CD-ROM containing the Owner's Manual (supplied). Open the "Manual"...
- Page 90 Digital Camera Body (DMC-G3): Information for your safety Power Consumption: 3.1 W (When recording with LCD Monitor) [When the Interchangeable lens (H-FS014042)is used] 1.9 W (When playing back with LCD Monitor) [When the Interchangeable lens (H-FS014042)is used] Camera effective pixels 16,000,000 pixels Image sensor 4/3"...
- Page 91 Shutter speed B (Bulb) (Max. approx. 120 seconds), 60 seconds to 1/4000th of a second Taking still pictures during motion picture recording Motion picture priorities: 1/30th of a second to 1/16000th of a second Still picture priorities: B (Bulb) (Max. approx. 120 seconds), 60 seconds to 1/4000th of a second EV 0 to EV 18 Metering range...
- Page 92 Recording quality Motion pictures [AVCHD] (With audio) When set to [FSH]: 1920x1080 pixels (60i recording/ Approx. 17 Mbps)! When set to [SH]: 1280x720 pixels (60p recording/ Approx. 17 Mbps) ( _Sensor output is 30 frames/sec.) [MOTION JPEG] (With audio) When set to [HD]: 1280x720 pixels (30 frames/sec.)! When set to [VGA]: 640x480 pixels (30 frames/sec.)!
- Page 93 Battery Charger (Panasonic DE-A93B): Information for your safety _110 V to 240 V, 50/60 Hz, 0.2 A Output: _ 8.4 V, 0.65 A Battery Pack (lithium-ion) (Panasonic DMW-BLD10PP): Information for your safety Interchangeable Lens (H-FS014042) "LUMIX G VARIO 14-42 ram/F3.5-5.6 ASPH./MEGA...
- Page 94 Description Accessory# DMW-BLD10 Lithum Ion Battery DMW-AC8 AC Adaptor DMW-DCC9 DC Coupler Flash DMW-FL220, DMW-FL360, DMW-FL500 Remote Shutter DMW-RSL1 Zoom Lever DMW-ZL1 MC Protector DMW-LMC52 ND Filter DMW-LND5212 DMW-LPL5212 PL Filter (Circular Type) DMW-LFC52 Lens Cap DMW-LRC1 Lens Rear Cap DMW-BDC1 Body Cap DMW-TA1...
- Page 95 June 2011. These be subject to change. 1 The AC Adaptor (optional) can only be used with the designated Panasonic DC Coupler (optional). The AC adaptor (optional) cannot be used by itself. If you are using other than the interchangeable...
- Page 96 HDMI Licensing LLC in the United States and other countries. • VlERA Link is a trademark of Panasonic Corporation. • EZ Sync ® is a trademark of Panasonic Corporation. • HDAVl Control is a trademark of Panasonic Corporation.