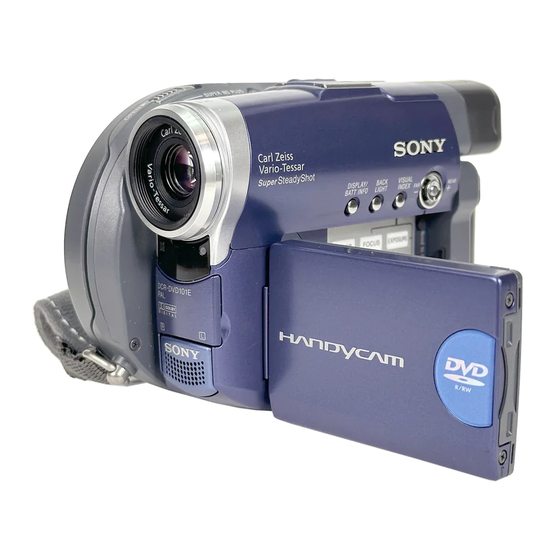
Sony Handycam DCR-DVD101E Operating Instructions Manual
Digital video camera recorder
Hide thumbs
Also See for Handycam DCR-DVD101E:
- Operating instructions manual (148 pages) ,
- Brochure & specs (28 pages) ,
- Service manual (128 pages)

Related Manuals for Sony Handycam DCR-DVD101E


Summary of Contents for Sony Handycam DCR-DVD101E
- Page 1 3-089-914-13 Digital Video Camera Recorder gTVD R/_W Operating Instructions Before operating the unit, please read this manual thoroughly, retain it for future reference. InfoLITHIUM DCR-D VD91E/D VD 101E/ DVD2OIE @2004 Sony Corporation...
- Page 3 Never use the plug without tire fuse co_ er. If you should lose the fuse cover, please contact your nearest Sony service station. For the customers in Europe ATTENTION The electromagnetic fields at the specific frequencies...
-
Page 4: Read This First
Read this first Your DVD Handycam uses DVD-R and DVD-RW as a recording media. can enjoy your DVD Handycam in ways that are new and different from those of a _ape media-based camcorder. Read the next pages to find how. You can find a scene quickly using a Visual... -
Page 5: Handycam
DVD Handycam to your computer. can edit and copy a disc easily on your computer using the supplied ImageMixer Vet.1.5 Sony DVD i_il iiii Handycam software. It also enables to produce your original DVD disc. ii I ii_... - Page 6 i_iii!iii_iiiiii/iiiiiiiiiiiiiiiFiii 2 types of discs a re available and they are different in the following ways, ow can I can l use? choose between these Which disc 2 discs? 8cm DVD-Rs and 8cm DVD-RWs The number of recordable times is available.
- Page 7 VR mode: A disc can be edited On DVD Handycam but the players are limited. DVD R/RWdiscs recorded by Sony DVD Handycam camcorders are designed to be compatible with and may be played back on home DVD players, computer DVD drives and PlayStation 2 video game consoles.*2...
- Page 8 Prepare a new disc. • You can start recording prompti) with a DVD-R • You neea _o format a DVD RW before recording. =ormatting is also required when using a once recordea 9VDA_W again Select a recording format (either VIDEO mode or VR mode) when using DVD-RW.
- Page 9 You can make a copy of a disc you have recorded by connecting your Handycam to your computer with the supplied software. For the recommended computer system environment, page 91. _ You can produce an original DVD by editing your movies/still images on your computer.
-
Page 10: Table Of Contents
Table of contents Using Super NightShot plus ..45 Read this first Using the NightShot Light .... 46 What you can do with your Using Color Slow Shutter ....DVD Handycam ....... 4 Self-timer recording ......What is tire difference between On shooting movies ....... - Page 11 Using a disc in VR mode Connecting your camcorder a TV and a VCR (DVD-RWs only) Selecting the playing order on your Dubbing a dis(" to a tape ..... camcorder - Playlist ....... Connecting your camcorder to a VCR .......... Registering movies or still images...
- Page 12 -- Getting Started Using this manual instructions in this manual are for the 3 models listed in the table below. Before start reading this manual operating your canrcorder, check the model number looking at the bottom of your carncorder. DCR-DVD201E is the model used illustration...
-
Page 13: Using This Manual
Using this manual display/viewfinder The LCD display and the viewfinder are manufactured using extremely high- precision technology, so over 99.99 % of the pixels are operational for effective use. However, there may be some tiny black points and/or bright points (white, red, blue or green in color) that appear constantly on the LCD display and the viewfinder. -
Page 14: Accessories
Checking the supplied accessories Make sure that the following accessories are supplied with your camcorder. Wireless Remote Commander Shoulder strap (page 142) Lens cap (1) (page AC-L15A/L15B AC adaptor (i), USB cable (Hi-SPEED USB compatible) Mains lead (1) (page (1) (page c_2) NP-FIVI50 rechargeable battery... -
Page 15: Step 1 Preparing The Power Source
Step 1 Preparing the power source To install the battery pack, slide it in and up in the direction of the arrow until it clicks. To remove battery pack 1 Slide the batterypa_kin the direction of arrow while pressingthe battery release button. -
Page 16: The Power Source
Step 1 Preparing the power source Your camcorder operates only with the "InfoLITHIUM" battery pack (M series). See page 130 for more information on the "InfoLITHlUM" battery pack. Open the DC IN jack cover. With the • mark on POWER/CHG the DC plug facing up lamp Mains lead... -
Page 17: Battery Pack
Step 1 Preparing the power source Charging time (full charge)*1 Battery pack NP-FM50 (supplied) NP-QM71/QM71D NP-QM91/QM91D Recording time with viewfinder*2 Continuous Typical*3 Battery pack DVD91E DVD101E DVD201E DVD91E DVD101E DVD201E NP-FM50 (supplied) NP-QM71/OM71D NP-QM91/()M91D Recording time with display*2 LCD BACKLIGHT is set to ON Continuous Typical*3 Battery pack... -
Page 18: Info
Step 1 Preparing the power source Open the LCD screen. Press DISPLAY/BATT INFO. The remaining battery time appears for a while on the LCD display. BATTERY CHARGE LEVEL BATTERY CHARGE LEa/EL 50% , [00% /00% liiiiiiliiiiiiliiiiiiiliiiiiiiliiiiiiliiiiiiiliiiiiilii! i!1 I I liiiiiiliiiiiiiliiiiiiliiiiiiiliiiiiiliiiiiiiliiiiiiiliiiiiiliiiiiiiliiiiiil BATTER_ AVAILABLE ,N_O... -
Page 19: On The Power
Step 2 Turning on the power Press the POWER button for a few seconds. Your carncorder turns on and the POWER/ CHG lamp lights up in green. When you turn on your camcorder for the first time, the CLOCK SET display appears. -
Page 20: Of The Lcd Screen
Step 3 Adjusting the LCD screen and the viewfinder Adjust the brightness and the angle of the LCD screen properly in your sight. SETUP button Open the LCD screen. Adjust the direction of the LCD screen to the desired position. When you adjust the angle... - Page 21 Step 3 Adjusting the LCD screen the viewfinder Use the nmlti-selector to select LCD BRIGHT]. Use the inulti-selector to adjust the brightness of the LCD display. - : Get Darker + : Get Brighter The LCD screen brighh_ess is adjusted. Press SETUP.
-
Page 22: The Viewfinder
Step 3 Adjusting the LCD screen and the viewfinder When recording pictures with the LCD screen closed, check the picture with the viewfinder. Adjust the viewfinder lens to accommodate your eyesight so that the image in the viewfinder comes into sharp focus. Viewfinder lens adjustment... -
Page 23: The Date And Time
Step 4 Setting the date and time Set the date and time when you use your camcorder for the first time. Set the geographical area, then daylight sax ings time ([DST]), the year, the month, the day the hour and the minute, in that order. - Page 24 Step 4 Setting the date and time C_OCKSET AREA_ L_sbonLondon DATE [ ENTER / NEXT ITEM Use the multi-selector to set daylight savings time ([DST]) to [ON], necessary. AREA C,MT +0 0 isbon London [ ENTER NEXT ITEq Use the multi-selector to set the year.
- Page 25 Step 4 Setting the date and time You can easily set the clock to the local time by setting the area. In the SETUP display use the multi-selector to select @ (OTHERS) then [AREA SET]. World time difference Area Time-zone Area Time-zone Area setting...
- Page 26 Step 5 Preparing a disc for recording A new DVD-R or DVD-RW is required for recording. You cannot overwrite or delete data recorded on a DVD-R, but you can delete data and record again with a DVD-RW. The preparation procedure is different depending on the type of disc you use.
-
Page 27: A Disc For Recording
Step 5 Preparing a disc for recording Close the disc cover. Your camcorder starts recognizing the inserted disc. With a DVD-R, you can start recording immediately after [DISC ACCESS] disappears on the LCD display. The FORMAT display appears when you insert a DVD-RW. -
Page 28: Before Shooting
-- Shooting movies/still images Before shooting Note To shoot movies/still images correctly, note the following: -Hold your camcorder correctly. Do not shock or vibrate your camcorder during shooting. -Do not scratch, put the fingerprint on, or get the disc dirty. To hold your camcorder... - Page 29 Shooting movies " Perform " Jettin o _ tarted from step 1 to 5 beforehand (page 15 to 27). The following operation is common with VIDEO mode and VR mode. < Recording lamp Remove the lens cap by pressing both knobs on the sides of the cap.
- Page 30 Shooting movies Press START/STOP (Q). Your camcorder starts recording. [REC] appears on the LCD display. camera recording lamp located on the front of your camcorder lights up. To stop recording, press START/STOP again. You can operate start/stop with the REC START/STOP button on the LCD screen.
-
Page 31: Mode
Shooting movies Indicators displayed in the recording mode These indicators are not recorded on discs..... Remaining battery time (page 18) j,----------- Recording mode (page 32) ,..... STBY/REC ¢....Counter DIsc type (page 6) _:_-------- ......... _" _ 0;_i1;7¢_ /;,39_ £ J'_yy, <... - Page 32 Shooting movies Your camcorder records in the HQ (high quality) mode, SP (standard play) mode, and the LP (long play) mode. Your camcorder is set to SP mode as the default setting. Set the mode dial to _ (Movie). Press SETUP. Use the multi-selector to select _ (DISC SET).
- Page 33 Shooting movies Move the power zoom lever a little for a slower zoom. Move it further for a faster zoom. Using the zoom sparingly results in better-looking recordings. W: For wide-angle (subject appears farther away) T : For telephoto (subject appears closer) Ocm * * The minimum...
- Page 34 Shooting movies The picture on the LCD display is a mirror-image. However, the picture will be normal when recorded. 180 ° 90 ° Open and rotate the LCD screen 180 degrees as shown above. The _ indicator appears in the viewfinder and on the LCD display.
- Page 35 Shooting still images Perform "Getting Started" from step 1 to 5 beforehand (page 15 to 27). The following operation is common with VIDEO mode and VR mode. You can record still images and rno_ ies on the same disc. < Remove the lens cap by pressing both knobs...
- Page 36 Shooting still images Press and hold PHOTO down lightl D then check out the image. When the AE/AF lock indicator (0) stops flashing and remains on, your camcorder is ready for shooting. The brightness of the image and focus are adjusted, are targeted for the middle...
-
Page 37: Only)
Shooting still images Notes • When the mode dial is set to _ (Still), the following functions do not work. - 16:9 Wide mode Digital zoom - SteadyShot Super NightShot plus -Color Slow Shutter Fader - Picture effect Digital effect -The Sports lesson feature of [PROGRAM... - Page 38 Shooting still images To select still image quality You can select the image quality from [FINE] or [STANDARD] for still image recording. The default setting is [FINE]. Set the mode dial to _ [Still). Press SETUP. Use the multi-selector to select {_ [CAMERA SET).
- Page 39 Shooting still images To select still image size (DCR-DVD2OIE only) You can select either of 2 image sizes, 1152 × 864 or 640 x 480. The default setting is 1152 x 864. Set the mode dial to _ (Still). Press SETUP. Use the multi-selector to select _ (CAMERA...
- Page 40 Shooting still images Number of still images recordable a disc Your camcorder compresses image clata in JPEG format (extension .jpg). Default image data file name is as following: • 100-0001: This file name appears on the LCD display of your camcorder. •...
- Page 41 Shooting still images You can record still images continuously by setting [BURST]. NORMAL _1 Your camcorder shoots up to 4 still images in 1152 × 864 size or 12 still images in 640 x 480 size at about 0.7 sec intervals. <...
- Page 42 Shooting still images Us_,the multi-selector to select [BURSTI. Use the multi-selector to select NORMAL] or [EXP BRKTG]. SELFT MER NORMAL QUALITY MAGESlZE N 8 UGHT _RETURN CAMERA SET / SETUP EN FI Press SETUP. The SETUP display disappears from the LCD display. Press PHOTO all the way down.
- Page 43 Adjusting the exposure When you shoot a subject with the light source Adjust the exposure manually in the following behind the subject or a subject with a light cases; background, use the backlight. when you need a fine adjustment subjects against the light.
-
Page 44: Back Light
Adjusting the exposure Use the multi-selector to adjust the brightness shown as below. - : Get Darker + : Get Brighter To return to the automatic exposure Press EXPOSURE again. Notes • When you adjust the exposure manually, following functions do not work: Color Slow Shutter BACK LIGHT... -
Page 45: Manually
Shooting in the dark- NightShot plus, etc. The functions using infrared rays, such as Notes NightShot plus and Super NightShot plus, or • Do not use the NightShot plus mode in bright Color Slow Shutter are useful when you shoot places (e.g. -
Page 46: Using Color Slow Shutter
Shooting in the dark - NightShot plus, etc. The picture will be clearer with the NightShot Light on. NightShot Light rays are infrared and so are invisible. The maximum shooting distance using the NightShot Light is about 3 m. To enable the NightShot Light, set (CAMERA SET) -
Page 47: Self-Timer Recording
Self-timer recording button Set the mode dial to _ (Still), then perform Steps 2 to 6. Press PHOTO all the way down. START/ STOP Self-timer starts counting down with a beep. In the last 2 seconds of the button countdown, the beep gets faster, then recording starts automatically... - Page 48 Shooting for the wide-screen - 16:9 Wide mode You can record a 16:9 Wide picture to watch Set the mode dial to H (Mox ie). on a 16:9 wide-screen TV (16:gWIDE). Press SETUP. Black bands appear on the LCD display during recording in 16:9 Wide mode [a].
-
Page 49: Shooting For The Wide-Screen Tv
Shooting for the wide-screen TV - 16:9 Wide mode Notes • You cannot select [OLD MOVIE] (page 54) during recording in the 16:9 Wide mode. • When you select VIDEO mode, setting the recording mode to [LP] cancels the 16:9 Wide n_tode. -
Page 50: Adjusting The White Balance Manually
Adjusting the white balance manually To return to the automatic white Normally white balance is adjusted balance mode automatically. Adjust manually in the following cases: Set _ (MANUAL SET) [WHT BAL] to • When shooting in a place that the light [AUTO] in the SETUP display. -
Page 51: Shooting Techniques To Match Your
Shooting techniques to match your circumstances - PROGRAM SPOTLIGHT*I Set the mode dial to H (Movie) or This effect prevents people's faces, for (Still). example, from appearing excessively white Press SETUP. when shooting subjects lit by strong light. Use the multi-selector to select PORTRAIT (soft portrait) (MANUAL... -
Page 52: Focusing Manually
Focusing manually You can adjust the focus manually according Set tire mode dial to H (Mox ie) or to the recording conditions. (Still). Use this function in the following cases. Press FOCUS. To record a subject behind a window covered with raindrops. -
Page 53: Shooting With Special Effects
Shooting with special effects Set the mode dial to H (Movie). When fading You can fade in or out to give your movie a In the standby mode, press the FADER more professional appearance. button until the desired fader indicator appears. -
Page 54: Picture Effect/Digital
Shooting with special effects Use the multi-selector to select (MANUAL SET). []_]t_ AUTO You can digitally process movies to obtain p EFFECT D EFFECT special effects like those in films or on TV. WriT BAL AUTO SHTR _RETURN Picture effect MANUAL SET [ SETUP SEPIA:... -
Page 55: Review
Checking/Demeting the mast scene If the checked scene is unnecessary, you can delete it on the spot. button Press EDIT during the review. A deletion confirmation display appears. © & REVIEW button Select [EXEC.] with the multi-selector. TILe latest scene is deleted. You can check the last recorded scene quickly. -
Page 56: Visual Index
-- Viewing the recordings Playing a disc on your camcorder The recorded scenes are displayed as a list in the Visual Index display. You can find the desired scene quickly using this convenient index. If you close the LCD screen, you can monitor the playback picture... -
Page 57: Playing A Disc On Your Camcorder
Playing a disc on your camcorder Select the H (Movie) tab or the _ (Still) tab with the multi-selector according to the kind of scene you want to play back. The thumbnail list screen appears. < Use the multi-selector to select the desired scenes. - Page 58 Playing a disc on your camcorder Movies The sound is muted in the various playback mocles. To pause playback (view a still image) Press n during playback. To resume normal playback, press n again. To advance the scene Press I_1_1during playback.
- Page 59 Playing a disc on your camcorder Press D1SPLAY/BATT INFO on your camcorder or press D1SPLAY on your Remote Commander. The indicators switch on or off as you press the button. DISPLAY button < $" DISPLAY/BATT INFO button To display date/time various settings Your camcorder...
- Page 60 Playing a disc on your camcorder Various settings (movie) Various settings (still image) [g] Exposure value [a] SteadyShot [h] Shutter speed [b] Exposure [c] White balance [i] Aperture value [d] Gain [e] Shutter speed [f] Aperture value Tips • When you use data code during playback, bars (..
- Page 61 Playing a disc on your camcorder Zoom lever < In the playback, playback pause or review, move the power zoom lever. You can choose the magnification from approx. 1.1x to 5x. W : Decreases the zoom ratio. T : Increases the zoom ratio.
-
Page 62: Slide Sho
Playing a disc on your camcorder You can see the automatic playback of all the still images recorded on the disc. Set the mode dial to[] (Play/Edit). Press SETUP. SLIDE SH©W APPLi / SETUP } ENF_ Use the multi-selector to select _ (APPLI.). -
Page 63: Viewing Recordings On Tv
Viewing recordings on TV Connect your carncorder to your TV with the A/V connecting cable supplied with your carncorder to watch playback pictures on the TV screen. You can operate the video control buttons in the same way as when you monitor playback pictures on the LCD... - Page 64 Viewing recordings on TV Tips • Connecting via an S video jack reproduces pictures more faithfully. When there is an S video jack on the device to be connected, connect the S video plug to that jack instead of using the yellow video plug. The audio will not be output when you connect via the S video plug alone.
-
Page 65: Finalizing A Disc
-- Finalizing a disc for other players Finalizing a disc You have to finalize the disc before vou can play a recorded disc on other players. Finalizing makes the recorded disc DVD-Videocompatible, and you can play the disc on equipments such as DVD players. - Page 66 Finalizing a disc When still images are included on a disc recorded in VIDEO mode, use the multi-selector to select [PHOTOMOVIE], then select [CREATE]. Proceed step 5 in VR mode. To play back still images on players such as DVD players, still images must converted...
- Page 67 Finalizing a disc Notes • A Photomovie created in this section is used to view still images on other players. cannot view the Photomovie on your camcorder in VIDEO mode. the slide show feature to play back still images in sequence on your camcorder (page...
- Page 68 Finalizing a disc By pressing the SETUP button, you can make a title on each disc. As the default, date when the disc was first used is added as a disc title. To change a disc title on the finalize display, select [DISC TITLE] with the multi-selector and start from step 4 on this page.
- Page 69 Finalizing a disc Use the multi-selector to select [SET]. The disc title is set and the display returns to the SETUP display. REO ,IOr_E FOR_4AT FINALIZE UNFINAUZE BE_CH _RETURN ISC S£T r SETUP ] END Press SETUP. The SETUP display disappears from the LCD display.
- Page 70 Finalizing a disc To play back a disc recorded in VIDEO mode You can play back a finalized disc recorded in VIDEO mode on players that can play back DVD-Rs or DVD-RWs. When the disc is finalized in VIDEO mode, a menu display is provided similar...
- Page 71 Finalizing a disc Tire display and the operation may xary depending on the oF, erating, _vstem of _v°ur computer. To play back movies Turnon your computer. Insert the finalized disc to the DVD drive of your computer. A DVD playback application starts and the movie is played...
- Page 72 Finalizing a disc Structures file names movies still images Movies and still images are stored in the following folders on the disc. Movies: VIDEO TS folder (on VIDEO mode) RTAV folder (on VR mode) Still images: DCIM\ 100MSDCF folder Windows XP display /_;;_ Desk_op Ply Documents...
-
Page 73: Recording On A Finalized Disc
Recording on a finalized disc- Unfinalizing (VIDEO mode DVD-RWs only) You can record on finalized DVD-RWs by unfinalizing them. This operation is xalid in VIDEO mode only. You do not have to unfinalize a VR mode disc. Insert a finalized DVD-RW into your camcorder beforehand. - Page 74 Recording again on a used disc - Formatting (DVD-RWs only) You can format recorded DVD-RWs and make them new discs. Note that formatting erases all the data recorded on the disc. Insert a recorded DVD-RW into your camcorder beforehand. Press SETUP. Use the multi-selector to select _ (DISC SET).
-
Page 75: Recording Again On A Used Disc - Formatting (Dvd-Rws Only)
Recording again on a used disc - Formatting (DVD-RWs only) Press SETUP when [COMPLETED] appears on the LCD display. The FORMAT display disappears from the LCD display. The disc is forrnatted and you can record on the disc again. To cancel formatting Press SETUP in any step from 2 to 6. - Page 76 -- Using a disc in VR mode (DVD-RWs only) -- Selecting playing order on your camcorder - Playlist You can edit the Playlist on your DVD-RWs recorded in VR mode. The Playlist is a list used to change the playback order of scenes to suit your own preference.
- Page 77 Selecting the playing order on your camcorder - Playlist Use the multi-selector to select [SEL.ITEM]. SEL _TEM SELECT SELECTA_L MOVE 91V_DE _RETURb_ EDIT_ Use the multi-selector to select [ADD]. SEL _TEM ERASE _,IOVE SELECT D4VDE SELECT #RETURN ED4T_ Use the multi-selector to select SELECT] (movies)
-
Page 78: Converting All The Still Images On A
Selecting the playing order on your camcorder - Playlist Use the multi-selector to select [EXEC.]. The selected movies or still images are registered in the Playlist. When a still image is added to a Playlist, it is converted and registered as a new movie the movie folder. - Page 79 Selecting the playing order on your camcorder - Playlist All the still images in a disc are saved as a single movie when you make a Photomovie. Sa_ ing still images as a single movie allows you to register more scenes in the Playlist. Insert a DVD-RW with still images recorded into your camcorder.
- Page 80 Selecting the playing order on your camcorder - Playlist Erasing unnecessary scenes from the Playlist does not affect the actual recorded data on the disc. Insert a Playlist-registered DVD-RW into your camcorder. Set the mode dial to [] (Play/Edit). Press EDIT. The display to select editing object appears.
- Page 81 Selecting the playing order on your camcorder - Playlist 7 Us_,the, m _lti-selector to selectme sc_,_e t o be erased. The selected scene is marked with Repeat this step to erase multiple scenes. Pressing IP _ starts playback of the selected scene.
- Page 82 Selecting the playing order on your camcorder - Playlist Insert a Playlist-registered DVD-RW into your camcorder. Set the mode dial to [] (Play/Edit). Press EDIT. The display to select editing object appears. EDIT STILL EDIT PLAYL EDIT [EDIT] Use tire multi-selector to select EDIT PLAYLIST].
- Page 83 Selecting the playing order on your camcorder - Playlist Use, tire, multi-selector to select tile scene to be moved. The selected scene is marked with _/. Repeat this step if you want to move multiple scenes. Pressing IP _ starts playback of the selected scene.
- Page 84 Selecting the playing order on your camcorder - Playlist You can divide a movie into 2 scenes. Dividing movies into scenes within the Playlist does not affect the actual recorded data on the disc. Insert a Playlist-registered DVD-RW into your camcorder. Note You cannot divide a movie converted from still images.
- Page 85 Selecting the playing order on your camcorder - Playlist Use the multi-selector to select tile scene to be divided. The playback of the selected scene starts. Time in progress Total time of the selected scenes Press the button in the center of the multi-selector at the point at which...
- Page 86 Selecting the playing order on your camcorder - Playlist Insert a Playlist-registered DVD-RW into your camcorder. Set the mode dial to [] (Play/Edit). The Visual h_dex display appears. Use the multi-selector to select _ (Playlist) tab. A thumbnail list of the scenes registered to the Playlist appears.
-
Page 87: Data
Editing the original data Original data stand for the actual recorded movies and still images data on the disc. You can edit the original data of DVD-RW recorded in VR mode. Editing the original data affects the actual recorded data. Note that this operation actually di_ ides the original recorded... - Page 88 Editing the original data Use the multi-selector to select the scene to be divided. The playback of the selected movie starts. in progress time of the selected scenes Press the center of the multi-selector at the point at which you want to divide the movie into scenes.
- Page 89 Editing the original data Note that this operation actually deletes recorded data from the disc. Insert a recorded DVD-RW into your camcorder. Notes • When you delete movies, the movies registered to the Playlist are also deleted. • Deleting scenes may not provide enough space to record movies or still images additionally.
- Page 90 Editing the original data Use the multi-selector to select [SELECT]. A thumbnail list of the movies or still images recorded on the disc appears. Use the multi-selector to select a scene. The selected scene is marked with _d. Repeat this step to select nmltiple movies or still inlages.
-
Page 91: Editing The Recordings On Your
-- Viewing/duplicating discs/editing the recordings on your computer (DCR-DVD101E/DVD201Eonly) -- Connecting your camcorder to your computer- Introduction A USB driver and application software installation is required to connect your camcorder to your computer. The USB driver along with the application Microsoft Windows software... - Page 92 Connecting your camcorder to your computer - Introduction Move the cursor to [USB Driver] and click. InstallShield Wizard program starts up. Start the following operation before connecting the USB cable to your computer. Install the USB driver to control your camcorder from your computer.
- Page 93 - Introduction Follow the instructions given in the on- screen messages. When the [Setup Type] Install the ImageMixer Ver.l.5 for Sony DVD window appears, make sure that [PAL] Handycam (hereinafter referred to as is selected and continue the procedure.
- Page 94 USB cable supplied Make sure that [Sony DVD Handycam] with your calncorder. is selected as the best match and click [Next]. Click [Sony DVD Handycaln] if it is not selected. [Completing the Found New Hardware USB port Wizard] dialog box appears.
- Page 95 USB cable supplied Click [Device Manager]. with your camcorder. [Device Manager] window appears. < Make sure that [SONY DDX-A1010 Device] appears in [DVD/CD-ROM drives], [Generic volume] in [Storage USB port volumes], and [USB Mass Storage Device]...
- Page 96 Manager]. pressing the POWER button for a few [Device Manager] window appears. seconds. Make sure that [SONY DDX-A1010 Connect the '_ (USB) jack of the Device] appears in [DVD/CD-ROM camcorder and the _ (USB) port of the drives], [Generic volmne]...
- Page 97 ---* [Control Panel]. Click [System]. [System Properties] window appears. Click [Device Manager]. [Device Manager] window appears. Make sure that [SONY DDX-A1010] appears in [CDROM], [Sony DVD Handycam] in [Storage device], [USB Mass Storage Device] in [Universal Serial Bus controllers] respectively. When...
- Page 98 Connecting your camcorder to your computer - Introduction If you cannot install driver The USB driver has been registered incorrectly An ImageMixer on-line help is available where as yoLlr earncorder was connected to vour you can find detailed operating instructions computer before the installation of the USB...
-
Page 99: Viewing Scenes Recorded On Your Computer
You must install the USB driver and the Double-click [ImageMixer Ver.l.5 lrnageMixer software to view scenes recorded Sony DVD Handycam] icon on the on a disc with your computer (page 92, 93). Windows desktop. Or, click [Start] ---* [Programs] (JAil... - Page 100 Viewing scenes recorded on your computer Notes Double-click the scene to view from the • If you connect the USB cable before USB thumbnails. driver installation is complete, the USB The selected scene is temporarily copied driver will not be properly registered.
-
Page 101: Additional
Making a disc copy - Disc Duplicating 10 Click[OK]. 1 1 When the copy completion message You can make a copy of a finalized disc. appears, remove the disc and insert Turn on your computer and allow new disc into your calncorder. Windows to load. -
Page 102: Scenes
Editing and saving scenes You can combine multiple scenes into a single scene. When the editing of the movie is completed, you can save the data on your computer. Click ;_i on the title window. following procedure shows an example The window switches to the [Movie... -
Page 103: Disc
Creating an original disc Album menu: You can edit the scenes registered to the album Click to change the and make an original DVD. displayed album. Disc title A menu is required to play a disc recorded Title }Tour camcorder on a DVD player. - Page 104 Creating an original disc When you want to change the disc title shown on the menu, click the _ tab. You can edit the contents by adding/deleting Change the settings such as the name scenes, changing the order of scenes, and and the font.
-
Page 105: Recording On A Disc
Creating an original disc When you have checked that all the contents are right, connect your Check the menu and view the contents on a camcorder to the computer with the prex iew window, then record the contents on a USB cable, then insert a blank... -
Page 106: Vcr
-- Connecting your camcorder to a TV and a VCR -- Dubbing a disc to a tape You can dub movies recorded in a disc using a Tips VCR connected to your camcorder, using your • You can edit on VCRs that support camcorder as a player. - Page 107 Dubbing a disc to a tape Before operation • Set [DISPLAY] in @ (OTHERS) to [LCD] in the SETUP display (the default setting is [LCD]). • Press the following buttons to make the indicators disappear so that they will not be superimposed on the edited tape: - DISPLAY/BATT...
-
Page 108: Only)
Dubbing a TV program or video tape onto a disc (DCR-DVD101E/DVD201E only) You can record a disc from another VCR or a TV program. Use your camcorder as a recorder. The supplied A/V connecting cable is equipped with an S video plug and a video plug. - Page 109 Dubbing a TV program or video tape onto a disc (DCR-DVD101E/DVD201E only) When have finished dubbing Press • on your camcorder to stop recording and stop the playback on the VCR. Prepare the TV/VCR. If you are recording a tape from the Note VCR, insert a recorded...
-
Page 110: The Setup Display
Customizing your camcorder Changing the SETUP display You can change the default settings selecting the options in the SETUP display Use the multi-selector to select the with the multi-selector. desired icon. Select the item in the following order: C;AM EIRA *ET SETUP display --,, icon --,, menu item... -
Page 111: Changing The Setup Display
Changing the SETUP display Menu items differ depending on the position of the mode dial. The display shows only the items that are currently in effect or that you can operate at tire moment. • is tire default setting. Icon/Item Option Meaning Mode... - Page 112 Changing the SETUP display Icon/Item Option Meaning Mode dial CAMERA SELFTIMER • To disable self-timer. H Movie To use self-timer (page 47). Still D ZOOM • To deactivate the digital zoom. Only tip to Movie 10X optical zoom is performed. 2O×...
- Page 113 Changing the SETUP display Icon/item Option Meaning Mode dial LCD/VF SET LCD BRIGHT To adjust the brightness on the LCD screen H Movie with -/+. Still [] Play/Edit Darker ....Brighter LCD B.L • BRT NORMAL To set the brightness on tile LCD screen H Movie normal.
- Page 114 Changing the SETUP display Icon/Item Option Meaning Mode dial VIDEO SET (DCR-DVD101E/DVD201E) PLAYER SET (DCR-DVDg1E) HiFi SOUND • STERE() To play back a stereo dis{" or dual sound track [] Play/Edit disc with main sub sound. To play back a stereo disc with the left sound or a dual...
- Page 115 Changing the SETUP display Icon/Item Option Meaning Mode dial SETUPMENU CLOCK SET To set the date or time (page 23). H Movie Still Play/Edit A. SHUT OFF • 5 rain To turn the power off automatically if no H Movie opecation have taken place foe 5 minutes when l_ Still powered by the battery pack.
- Page 116 Changing the SETUP display Icon/Item Option Meaning Mode dial OTHERS DATA CODE • DATE/CAM To change the display in the order of the date [] Play/Edit (operation and time --* the camera data --* tile display each the Remote time presshlg DATA CODE (page...
- Page 117 Changing the SETUP display Mode dial Icon/Item Option Meaning OTHERS H Movie @ REMAIN • AUTO To display the remaining capacity of the disc in Still the following cases for example: Play/Edit • For 8 seconds after setting the power on and tile mode dial to ga{ (Movie)
- Page 118 If the problem persists, disconnect the power source and contact your Sony dealer or local authorized Sony service facility. If "C:C]C]:C]C]" appears on the LCD display, the self-diagnosis display function is working. See page 125. Symptom...
- Page 119 • Something is wrong with the battery pack. • 9 If the symptom persists, disconnect the plug from the wall socket as soon as possible to cut off the power, contact your Sony dealer or local authorized Sony service facilitv.
- Page 120 Types of trouble and corrective action Cause and/or Corrective Actions Symptom • The [ @ REMAIN] item is set to [AUTO] in @ (OTHERS) Remaining disc space indicator in the SETUP display. not displayed. ÷ Set it to [ON] to always display the remaining disc space...
- Page 121 Types of trouble and corrective action Cause and/or Corrective Actions Symptom • The mode dial is set to [] (Play/Edit). Pressing START/STOP or PHOTO does not record movies/still • ") Set it to _:_ (Movie) or _ (Still). (page 29, 35) images.
- Page 122 Types of trouble and corrective action Symptom Cause and/or Corrective Actions The picture flickers and the color • PROGRAM AE is set to [PORTRAIT] or [SPORTS] lesson changes incorrecthc under the fluorescent lamp, the sodium lamp and the mercury lamp. •...
- Page 123 Types of trouble and corrective action Cause and/or Corrective Actions Symptom Can not be played back or the disc • The disc may be dirty. can not be recognized. • ") Clean it with the supplied cleaning cloth. • The disc is not finalized. •...
- Page 124 Types of trouble and corrective action Symptom Cause and/or Corrective Actions The disc title cannot be changed. • The disc has been finalized. • ") Unfinalize the disc (DVD-RW only). You cannot record a disc title on a finalized DVD-R. •...
-
Page 125: Display
[3[3) differ depending on the state of your camcorder. Self-diagnosisdisplay • C:K]K]:K]E3 You can service your camcorder yourself. • E:E3E3:E3K] Contact your Sony dealer or local authorized Sony service facility. Cause and/or Corrective Actions 5-digit display C:04:C]C] • You are using a battery pack that is not an "InfoLITHIUM"... -
Page 126: Indicators
Warning indicators If indicators appear on the LCD display or in _\_ The battery pack is dead or nearly dead the viewfinder, check the following: Slow flashing: See the page in parentheses "( )" for more • The battery pack is exhausted. -
Page 127: Messages
Warning messages Message Cause and/or Corrective Actions FOR "InfoLITH1UM" BATTERY • Use an "lnfoL1THIUM" battery pack. ONLY _\" • Install a charged battery pack. • The battery pack is completely dead, and cannot be recharged. ÷ Replace it with a new battery pack. - Page 128 Warning messages Message Cause and/or Corrective Actions DISC PROTECTED • A disc protected on another device cannot be edited. ÷ Cancel the protection of the disc on the device used to protect the disc. COPY INHIBIT*I • Copyright protected movies and sounds cannot be recorded on your camcorder.
-
Page 129: Information
Wipe the disc from the center out. For dirt, clean the disc with a soft cloth slightly Note moistened in water, then remove We reconrmend you to use the Sony discs nroisture with a soft, dry cloth. Do not use which is confirmed compatibility with your... -
Page 130: The "Infolithium
About the "InfoLITHIUM" battery pack This unit is compatible with the • Be sure to press the POWER button for a few "InfoLITHIUM" battery pack (M series). Your seconds and turn off the power when not camcorder operates only with the shooting or playing back on your camcorder. -
Page 131: Using Your Camcorder Abroad
Using your camcorder abroad You can use your camcorder with the AC adaptor supplied with it in any area with 100 V to 240 V AC, 50/60 Hz power standards. Your camcorder is a PAL system-based camcorder. If you want to view the playback picture on a TV, it must be a PAL system- based TV with the AUDIO/VIDEO... -
Page 132: Information And
5 seconds. • If any solid object or lkluid gets inside the casing, unplug your camcorder and have it checked by a Sony dealer before operating any further. flicker for 5 seconds • Avoid rough handling or mechanical shock. - Page 133 Maintenance information and precautions • Near a AM receivers and video equipment. On the pickup lens Noise mav occur. • Do not touch the lens inside the disc cover. • In sandy or dusty places Keep the disc cover closed except when inserting and ejecting the disc, to keep dust...
- Page 134 Maintenance information and precautions AC adaptor Charging built-in rechargeable battery in your • Unplug the unit from the wall socket when camcorder you are not using it for a long time. To disconnect the mains lead, pull it out by the A built-in rechargeable battery is installed...
-
Page 135: Specifications
Specifications Lens USB jack (DCR-DVD101E/ Carl Zeiss Vario-Tessar DVD201E oMy) Filter diameter: mini-B 25 mm REMOTE jack 10x (Optical), 120× (Digital) Stereo mini-minijack (_ 2.5 ram) DCR-DVD9] E/DVD101 MIC jack Video recording format F = 1.7-2.3 Stereo minijack (o 3.5 ram) DVD-Video DCR-DVD201E: DVD-VR... - Page 136 Specifications Power requirements 100 - 240 V AC, 50/60 Current consumption 0.35 - 0.18 A Power consumption Output voltage DC OUT: 8.4 V, 1.5 A in the operating mode Operating temperature O°C to 40°C Storage temperature -20'C to + 60°C Dimensions (approx.) 56 ×...
-
Page 137: Parts And Controls/Index
Carl Zeiss lens which can reproduce fine images. The lens for your camcorder was developed jointly by Carl Zeiss, in Germany, Sony Corporation. It adopts the MTF* measurement system for video cameras offers the same quality as a Carl Zeiss lens. -
Page 138: Parts And Controls
Identifying parts and controls Mode dial (page DC IN jack (page 16) POWER/CHG lamp (page Lens cap (page 28) REMOTE jack Tripod receptacle Use to connect to optional accessories. Make sure that the length of the tripod screw is less than 5.5 ram. Viewfinder lens adjustment dial... - Page 139 Identifying parts and controls Intelligent accessory shoe AUDIO/VIDEO jack (page 63) Shoe cover Microphone Lens DISPLAY/BATT INFO button (page i8) Remote sensor/Infrared ray emitter BACK LIGHT button (page MIC (PLUG IN POWER) jack VISUAL INDEX button (page 56) Connect an external microphone Multi-selector (page 23)
- Page 140 Identifying parts and controls Power zoom lever (page NIGHTSHOT PLUS switch (page 45) PHOTO button (page 35) Disc cover OPEN switch (page 26) SUPER NS PLUS/COLOR SLOW S Recording lamp (page 20) button (page Grip belt (page 28) ACCESS lamp (page Attaching the shoulder strap Attach the shoulder strap supplied...
- Page 141 Identifying parts and controls ......VOL buttons FADER button (page (page 53) • REC buttons (page 109, DCR- FOCUS button (page _iiii DVD101E/DVD201E only) EXPOSURE button (page 43) Speaker SETUP button (page 110) NEXT (next) button (page 58) FINALIZE button (page PREV (previous) button...
- Page 142 Identifying parts and controls buttons that have the same name on the Remote Commander as on your camcorder function identically to the buttons on your camcorder. Transmitter DATA CODE button (page 59) START/STOP button (page PHOTO button (page 35) Power zoom buttons (page _1_/@_ SCAN/SLOW buttons...
- Page 143 • Your camcorder works in the DVD 2 Commander mode. Commander modes 1, 2 and 3 are used to distinguish your camcorder from other Sony DVD players avoid erroneous remote control operation. If you use another Sony DVD player in the...
- Page 144 Identifying parts and controls LCD display and viewfinder On playback On shooting 0:12:34_ ..... ] ....LCD BACK LIGHT OFF (page 21) Recording mode (page 32, i14), Image size {page 39, I12) Remaining time {page 117), Recordable number of still images (page 40) Remaining battery...
-
Page 145: Index
Index ..........RESET ......114, 141 Review ........AC adaptor ......I, J, K, L Adjusting viewfinder ..... connecting cable ..14, 63 ImageMixer ....... 93, 99 BACK LIGHT ......Image quality ....38, 112 Self-diagnosis display ..BATTERY INFO ...... hnage size ...... - Page 146 On trademarks • DVD-VIDEO, DVD-RW, and tire DVD-R logo are trademarks. • InfoLITHIUM is a trademark of Sony Corporation. • PlayStation is a registered trademark of Sony Computer Entertainment Inc. • Microsoft and Windows are trademarks or registered trademarks of Microsoft...
- Page 147 Printed on 100% recycled paper using VOC (Volatile Organic Compound)-free vegetable oil based ink. 3089914130 Printed in Japan...